How to start tracking tasks. A simple guide in 5 steps
Friends, hello!
Today we want to share a small guide to starting task tracking in the tracker.
Starting to keep track of your tasks is easy. This will require no more than 30 minutes of setup time. We have prepared a simple 5-step guide for getting started quickly.
We will consider this task using the METEOR task tracker as an example.
So let's get started.
Registration
Create your METEOR account on the landing page – https://u-meteor.ru.
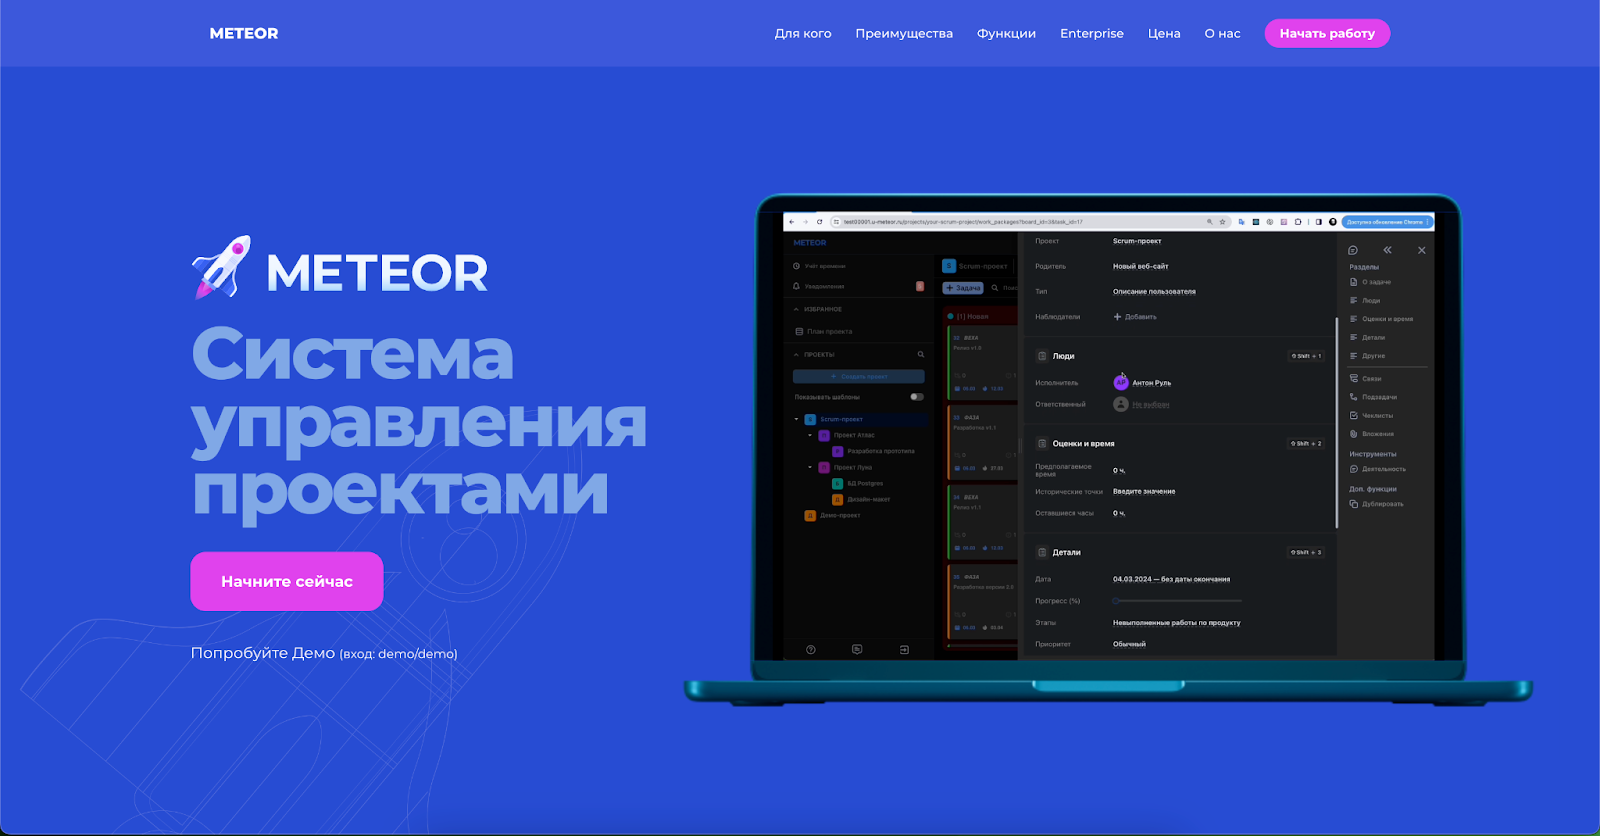
After registering and logging in, you will be taken to your workspace.
The first thing you will see are two demo projects. They will help you understand the interface and evaluate some of the functions. These demo projects can be deleted later.
Demonstration projects play another important role. They pre-set global directories that are necessary for launch.
Creating and customizing a workspace
In this step you will need:
create your first Project
create Representation (task board, task list and/or Gantt chart)
Create a project you can click on the corresponding button in the left menu:

In the form that opens, enter the name of the project – this will be enough:

Projects in METEOR can be used for different purposes: departments, teams, projects with deadlines, blocks of work within a large project.
Here is an example of a project structure:

After creating the project, you will need to create a task board. We wrote about what kind of boards there can be in one of the previous articles. You can read Here.
In the simplest case, create a task board “By status”:

Columns for statuses should be added to the created board:
New
In progress
Closed
Pending
Rejected


We are considering these particular statuses because a work flow is defined for them—the rules for transitions between statuses.
If you need to change the demo workflow (workflow), select your work statuses and allowed transitions between them, you can do this through the Administration – Tasks – Workflows menu:


Inviting project participants
Inviting participants to your project occurs in the project settings. In the context menu of each project there are items to go to the “Project Participants” section or directly to the invitation form:

Let's look at how to invite a participant. Click on the “Add participant” button:

In the form that opens, in the first step you can study what types of participants can be in the project. For our example, you need to select “User” and click “Next”.

In the second step, in the “Name or email” field, enter the email address of the invited user. After the email address is entered, the “Invite” button will appear. Click it. Then select the role of the invited user (Project Administrator, Reader or Contributor), then click “Next” and “Invite”.

The invited user will appear in the list of all project users. An email will be sent to the user's specified email address with a link to the registration completion form.

After the user completes registration, you will see the status change to “Active” in the table.
Creating tasks
In the previous step we completed the setup. Now you can start creating tasks.
Return to the task board (click on the project in the left menu).
You can create a task immediately in the column you need, since this is allowed in the configured workflow. To do this, there is a “+” button in the column headers:

You can also create a task using the “+ Task” button located above, next to the search. In this case, a slightly different task form will open, where you will need to select a status from the list on which the task will be created:

Enter a Subject (Task Title) and click “Create”:

Done, you are already in orbit! Your first task is created:

Project status assessment
In the last step we created the first task. In the same way, you will create many, many more tasks. Very soon you will need to assess the status of your tasks: who is doing them, how many tasks have been completed, and how many are pending.
Let's take a closer look at the example of the demo project “Scrum-project”.

Using the filter at the top right of the page, you can filter tasks by various criteria. By analyzing problems on the board, you can easily draw the conclusions needed to make decisions.
Now you have a tool that gives clear insight:
what you need to do right now;
how much remains to be done;
how much has already been done;
what deadlines can you promise to your customers?
Thank you for your attention!
Feel free to ask questions and make your comments. We are always happy to receive feedback.
We wish you productive work!