Running MacOS 13+ in VMware on AMD processors (OpenCore)
Hi all! I’m sharing my research on running MacOS virtual machines on AMD processors. Perhaps this will help someone and save time.
Background: I have several guest virtual machines with MacOS, on one physical host, with which there have been no problems for a long time. Versions – from Mojave to Monterey, they were even updated regularly via Software Update. Next, when updating to Ventura/Sonoma, we get a kernel panic and loop boot, and it’s not entirely clear what to do about it.
A quick Google on the problem said that there is no solution to this problem. We'll have to find a workaround. My eye fell on Hackintosh, but how to properly configure it for VMware images also turned out to be not entirely clear (at least to me), which is why I am writing this article. My introductory ones are Ryzen 5950X, Windows 10, VMware Workstation 16.2 (it was version 16.0, until we encountered a problem, the first thing we tried was to update and reroll the unlocker – as expected, it didn’t help).
What you will need (what I personally used):
OCAT – graphical editor of plist-configs.
ProperTree – another plist editor, it was convenient for me to copy-paste through it block with patch for AMD (it’s convenient to open patches.plist from the turnip and pull out the entire patch block from there to insert it into our config)
Recommendation for setting up the config for AMD – in general, there is comprehensive information on what options need to be noted in the config.
Ready-made SSDTs for noobs like me (as far as I understand, these are tables with hardware IDs that are initialized when the OS starts. You can create something similar yourself on a specific piece of hardware. The article also describes how to generate your own tables, but I don’t quite understand how what will affect virtual machines, and whether this is necessary for them.
Guide to EFI drivers and kexts – here, in general, there is a fairly complete and understandable document for the necessary files. I left all the drivers because… they do not directly affect the boot process and operation of the guest OS. But I’ll write about kexts later.
Custom .vmdk disk from which we will boot. (we create it ourselves)
I'm posting my EFI version – it’s not a fact that everything will take off with it, but it may be useful as an example.
Now about OpenCore and what it is
We are interested in the X64 version, there is an EFI folder inside, which in the future will need to be placed on our boot partition of the disk from which we will boot. When we turn on our virtual machine, the first thing that loads is /EFI/BOOT/BOOTx64.efi, which then launches /EFI/OpenCore.efi (if you specify a bootloader file in the firmware, specify the path to BOOTx64.efi)
What else is inside the EFI folder:
EFI/OC/ACPI – here are the SSDT/DSDT equipment tables. If you delete an unnecessary one, you definitely need to check that there are no references to it in config.plist, otherwise there will be a crash.
EFI/OC/Drivers – here are the .efi drivers. OpenRuntime.efi and HfsPlus.efi are required, I did not remove unnecessary drivers, but just for fun I played around and found out that without OpenCanopy.efi, OpenLinuxBoot.efi, OpenLegacyBoot.efi, the bootloader would not take off. As far as I understand, these drivers do not affect the further operation of MacOS, but are strictly responsible for the performance of the bootloader and its capabilities.
EFI/OC/Kexts – there are kernel extensions lying around here (kext – kernel extension), they are needed for the successful launch of MacOS itself, as well as for the correct initialization and operation of devices. Every hackintosh starts with Lilu.kextthen the fake SMC should go (I started the car with VirtualSMC.kext), then everything else. Their sequence is determined by the config.plist config, in what order they are specified, this is how they will be injected when the OS boots.
It was found experimentally that the system will not boot without:
AppleMCEReporterDisabler.kext – Required on macOS 12.3 and later on AMD systems, and on macOS 10.15 and later on dual-socket Intel systems. *from the OpenCore docs
CryptexFixup.kext – As I understand it, this is a mandatory kext not only for AMD, but also for Intel up to Haswell
NoAVXFSCompressionTypeZlib-AVXpel.kext – perhaps redundantly, without it it also struggles.
Just in case I left:
VoodooHDA.kext – initializing sound in MacOS
HibernationFixup.kext – on a virtual machine it’s easier to disable sleep altogether, but if you forgot or want to leave it, perhaps this will be fixed. The fact is that under hackintoshes, Makosi have problems with sleep, or rather with getting out of it)
Whatevergreen.kext – Fix for graphics initialization, in theory it is not needed, because there are VMWARE tools.
Create your own .vmdk
To create it, I created a new virtual machine -> “I’ll install it later” -> system type other, created a 0.2GB disk, but with this size VMware created a disk with the IDE type, so I deleted it and recreated it as SATA (you can just create a new one disk for an existing virtual machine). From additional settings need to be selected store virtual disk as a single file.
Next, mount this disk using Daemon Tools. Now open the Disk Management snap-in, to do this, press WIN + R, enter diskmgmt.msc and enter, the system will offer to initialize a new disk. Select GPT and click OK. Next, we create a volume and format it in FAT32, in the Label field we enter any one that is understandable to you, I called it OpenCore. The same procedures can be performed through DISKPART, or third-party tools – whichever is more convenient for you. That’s it, now all that’s left is to drop the EFI folder on our mounted disk, unmount it and we can try to boot.
Incompatibility between the guest and the vmdk disk (if we add it to a ready-made machine)
If you try to insert a boot vmdk that was created in another version of VMware, a compatibility error will appear:

Option 2: either recreate a new vmdk for this virtual machine, format it and put EFI in there, or convert the virtual machine:
Right-click on it → manage → Change Hardware Compatibility.
My first EFI was created in version 16.2.x, so I choose it so that the version matches the one in which it was created. Next, the wizard will ask if you want to clone or convert the current build car. This is up to your discretion; I didn’t have any problems with the conversion. After conversion, the disk will be picked up without errors)
What's next?
From now on, any Mac, be it an installer or an already installed version, should be launched only through our custom EFI. Otherwise, they will have a kernel panic in the future.
With a clean installation everything is simple: (I won’t dwell on how to create a new VM, how to patch it with an unlocker, how to create a disk, allocate resources, etc.)
We add our EFI to the virtual machine, in the settings we look at which sat port it was added (in the articles it is recommended to make SATA 0:0, but you can forget it, it does not affect anything (except for the order of the first boot) – so here it is at your discretion.
We add the .iso image of the MacOS installer to the virtual CD (you can take it from a torrent, or download it yourself, but this requires a separate guide).
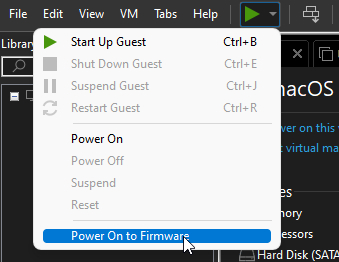
Next in VMware select Power on firmware
After this we will have the opportunity to boot from the desired disk, here we will need the SATA port number

Select the drive and press Enter.
Next we get to the OpenCore menu:

If you press Spacebar, more download options will appear

We select the installer and then go through the installation as usual (don’t forget to run the disk utility before running the installer and format our target vmdk in APFS format).
For those who want to update their old Monterey
You have two options, either update regularly, via Software Update, or update from iso (just like a clean installation in the paragraph above, but without formatting the target disk)
The rule is the same in both cases – before the update, you must boot from a custom bootloader. If Makos catches Kernel Panic during the update process (it will restart several times while the update process is in progress), then it will be corrupted so that even with EFI inserted, it will not boot.
Before the update, you can take a snapshot; a rollback will help if something goes wrong.
What problems might there be?
If Makos, during the installer restarts, boots not through OpenCore, but directly, and panics, it will no longer be restored. (I already wrote about this above, but I’d better duplicate it – it’s important!)
If, after successfully loading MacOS, the mouse/keyboard does not work, or the mouse has very high sensitivity that it is impossible to use it, you need to check the version of the emulated USB controller in the guest settings. Should be 3.1.
add. may be needed VoodooPS2Controller.kextIt is better to remove Bluetooth forwarding (in the same place as the USB settings)
Before changing the number of cores allocated to the guest, it is better to edit the patches in config.plist on the EFI partition. Otherwise there may be problems: Patches for AMD
It crashed for me if I allocated more than 4 cores without a patch.MUST DISABLE TSO https://communities.vmware.com/t5/VMware-Fusion-Discussions/VMware-Fusion-Only-Upload-Internet-Speed-is-Super-Slow-compared/td-p/2955386
sysctl net.inet.tcp.tso=0 and in order for it to work after a restart, create the file /etc/sysctl.conf and insert “net.inet.tcp.tso=0”
If this is not done, then VNC/SCP/uploading files to Samba will not work, maybe something else (very low UPLOAD speed for TCP connections)AND DON'T FORGET THAT THE config needs to be written in VMX
this was a mandatory rule for earlier versions of MacOS as well
cpuid.0.eax = "0000:0000:0000:0000:0000:0000:0000:1011"
cpuid.0.ebx = "0111:0101:0110:1110:0110:0101:0100:0111"
cpuid.0.ecx = "0110:1100:0110:0101:0111:0100:0110:1110"
cpuid.0.edx = "0100:1001:0110:0101:0110:1110:0110:1001"
cpuid.1.eax = "0000:0000:0000:0001:0000:0110:0111:0001"
cpuid.1.ebx = "0000:0010:0000:0001:0000:1000:0000:0000"
cpuid.1.ecx = "1000:0010:1001:1000:0010:0010:0000:0011"
cpuid.1.edx = "0000:0111:1000:1011:1111:1011:1111:1111"
ethernet0.virtualDev = "vmxnet3"
I’ll take it separately: one of the things that hasn’t been fixed is a problem with virtual machine restarts. It successfully stops the system and hangs

You can add it from the command line:"ваш путь установки вмвари\VMware Workstation\vmrun.exe" -T ws stop "путь к виртуалке.vmx"
Thank you for attention. This is my first article on Habré, I hope it will save someone time and nerves. I assume that it will be relevant at least until Apple finally cuts out x86 support in its systems. This article is not a step-by-step guide to installing the system. In it, I rather tried to tell what problems those who need to update their virtual machines to get the latest versions of Xcode will encounter. This is especially true because As far as I understand, support for Xcode versions from Monterey ends in a month.
PS: I also forgot to mention: After you install makos, you can configure OpenCore directly on the main VMDK from makos itself (mount its built-in EFI and write OpenCore there) – I personally did not do this, because then you most likely will not have access to OpenCore from outside the guest. Because MacOS formatted vmdk Daemon Tools is not able to mount. Perhaps a utility for reading APFS volumes can help here, but I did not check it.