How to Set Up Push Notifications in Safari on iOS
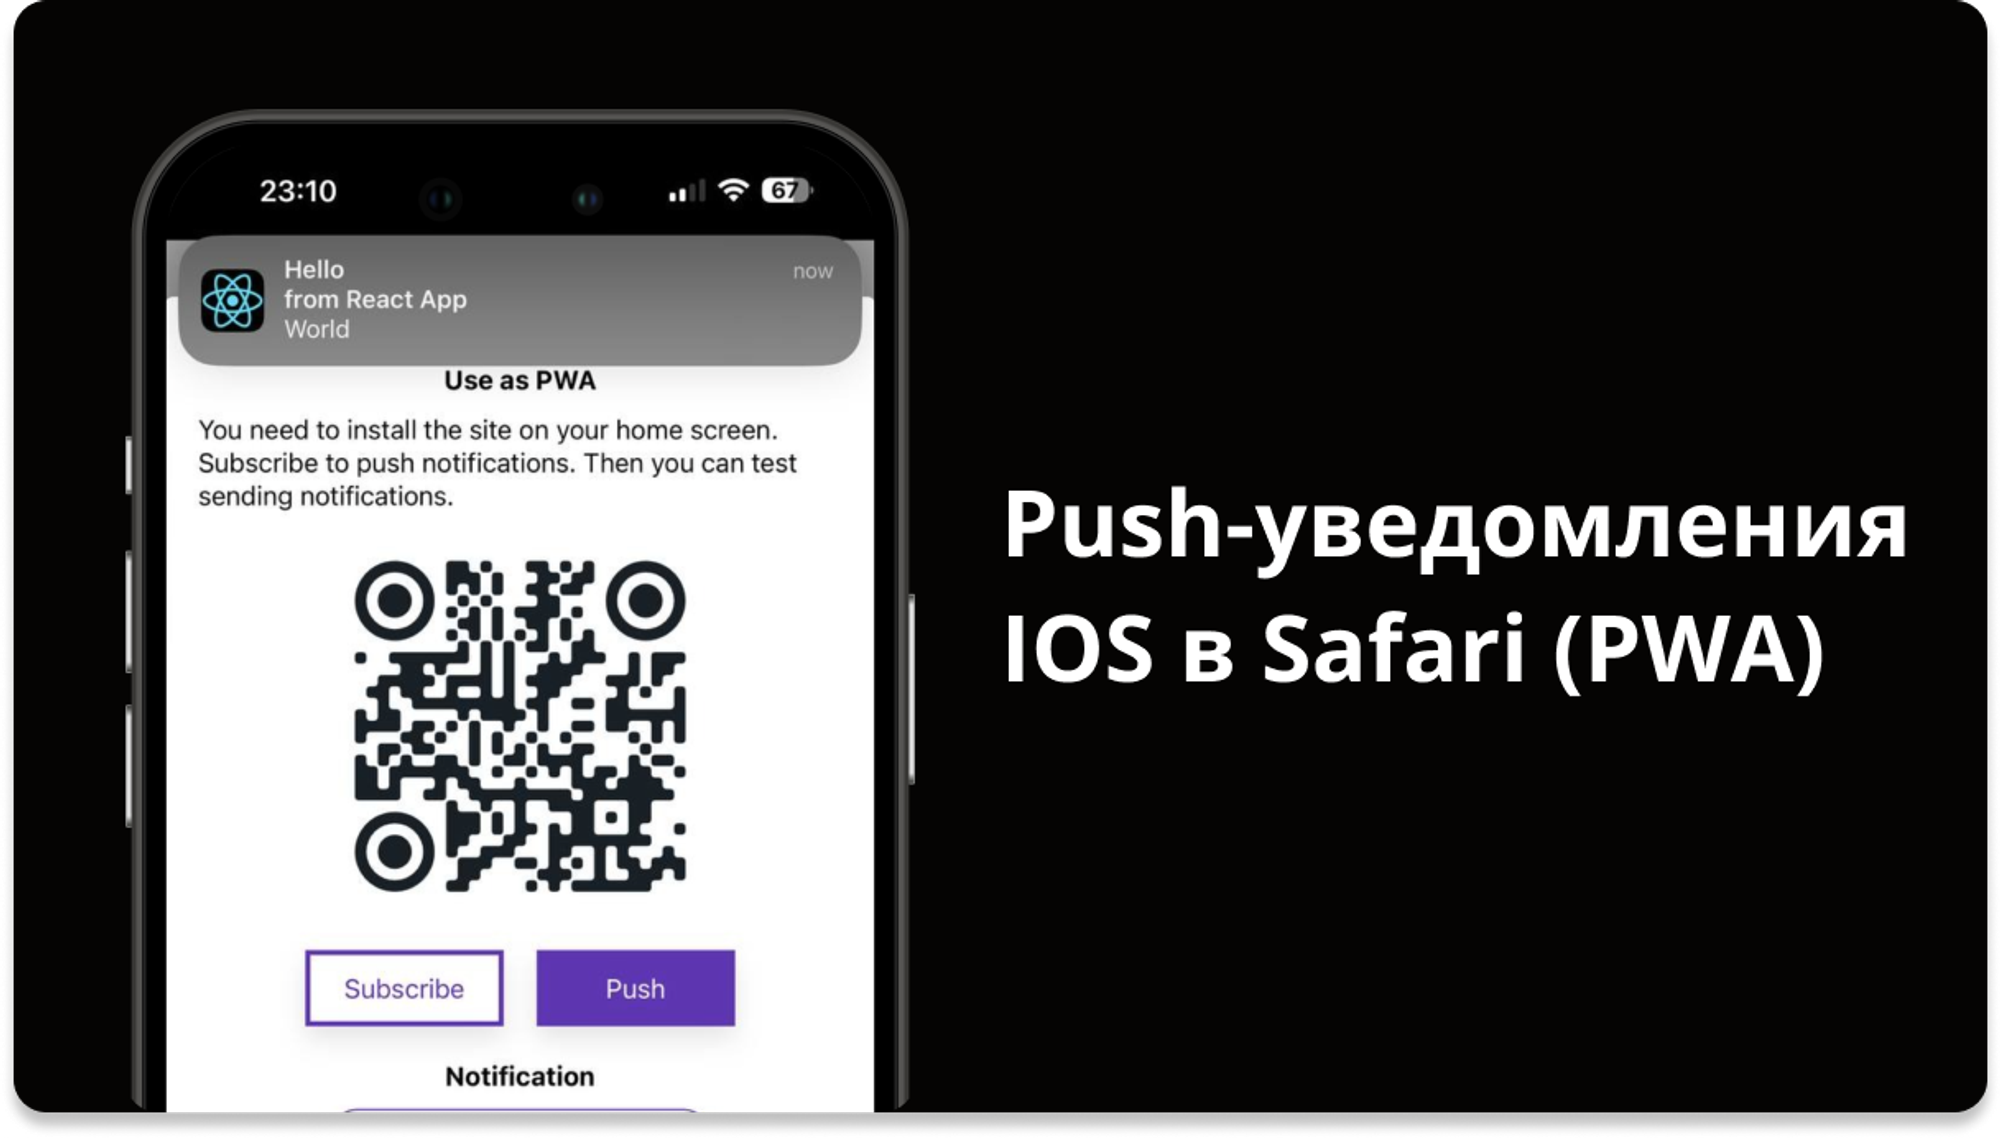
Hello! In this article, we’ll figure out how to send push notifications to iOS users even if your app is temporarily unavailable in the App Store. With the release of Safari 16.4, it became possible to receive notifications in Progressive Web Apps (PWA)
Let’s look at this task from the perspective of a front-end developer
What do we need
Server part: for server logic we will choose Node.js.
Client part: We will use React.js to create the user interface.
Push service: We use Google Cloud Messaging as a service for sending push notifications.

Creating a server using Express.js
Let’s start by creating VAPID keys. To understand why they are needed, let’s briefly go through the theory. VAPID is essentially a unique ID for your app in the world of web push notifications. These keys will help the browser understand where the notification is coming from and provide an additional layer of security. So, we will have a pair of keys public and private
Now practice! We will use a library for Node.js called web-push. This library works well with Google Cloud Messaging, Google’s system for sending notifications
Installing the library using npm
npm install web-push -gGenerating keys
web-push generate-vapid-keysWe generated two keys: public and private. We will use the public key on the client side when users subscribe to notifications. This key will allow the browser to identify the source of the notifications to ensure they are coming from a trusted server.
The private key will be stored on our server. We need it to sign the data we send and to authenticate our application to notification systems like Google Cloud Messaging.
Let’s create two URLs: one for storing notification subscriptions, and the other for sending them.
// Подключаем библиотеку web-push для работы с push-уведомлениями
const webPush = require('web-push');

webPush.setVapidDetails(
    publicKey,
    privateKey
);

// Инициализация объекта для хранения подписок
let subscriptions = {}

// Роут для подписки на push-уведомления
app.post('/subscribe', (req, res) => {
    // Извлекаем подписку и ID из запроса
    const {subscription, id} = req.body;
    // Сохраняем подписку в объекте под ключом ID
    subscriptions[id] = subscription;
    // Возвращаем успешный статус
    return res.status(201).json({data: {success: true}});
});

// Роут для отправки push-уведомлений
app.post('/send', (req, res) => {
    // Извлекаем сообщение, заголовок и ID из запроса
    const {message, title, id} = req.body;
    // Находим подписку по ID
    const subscription = subscriptions[id];
    // Формируем payload для push-уведомления
    const payload = JSON.stringify({ title, message });

    // Отправляем push-уведомление
    webPush.sendNotification(subscription, payload)
    .catch(error => {
        // В случае ошибки возвращаем статус 400
        return res.status(400).json({data: {success: false}});
    })
    .then((value) => {
        // В случае успешной отправки возвращаем статус 201
        return res.status(201).json({data: {success: true}});
    });
});
Setting up the client side
Here we will be working with a basic React application. To make everything as simple as possible, we will create our own hook that will help us simplify the work with push notifications. I will leave comments so that it is clear how everything works.
// Функция для преобразования Base64URL в Uint8Array
const urlBase64ToUint8Array = (base64String) => {
    const padding = '='.repeat((4 - base64String.length % 4) % 4);
    const base64 = (base64String + padding)
        .replace(/-/g, '+')
        .replace(/_/g, '/');

    const rawData = window.atob(base64);
    const outputArray = new Uint8Array(rawData.length);

    for (let i = 0; i < rawData.length; ++i) {
        outputArray[i] = rawData.charCodeAt(i);
    }

    return outputArray;
};

// Хук для подписки на push-уведомления
const useSubscribe = ({ publicKey }) => {
    const getSubscription = async () => {
        // Проверка поддержки ServiceWorker и PushManager
        if (!('serviceWorker' in navigator) || !('PushManager' in window)) {
            throw { errorCode: "ServiceWorkerAndPushManagerNotSupported" };
        }

        // Ожидание готовности Service Worker
        const registration = await navigator.serviceWorker.ready;

        // Проверка наличия pushManager в регистрации
        if (!registration.pushManager) {
            throw { errorCode: "PushManagerUnavailable" };
        }

        // Проверка на наличие существующей подписки
        const existingSubscription = await registration.pushManager.getSubscription();

        if (existingSubscription) {
            throw { errorCode: "ExistingSubscription" };
        }

        // Преобразование VAPID-ключа для использования в подписке
        const convertedVapidKey = urlBase64ToUint8Array(publicKey);
        return await registration.pushManager.subscribe({
            applicationServerKey: convertedVapidKey,
            userVisibleOnly: true,
        });
    };

    return {getSubscription};
};
An example of using a React hook to get a subscription object and send it to the server
// Импорт функции useSubscribe и задание публичного ключа (PUBLIC_KEY)
const { getSubscription } = useSubscribe({publicKey: PUBLIC_KEY});

// Обработчик для подписки на push-уведомления
const onSubmitSubscribe = async (e) => {
    try {
        // Получение объекта подписки с использованием функции getSubscription
        const subscription = await getSubscription();

        // Отправка объекта подписки и ID на сервер для регистрации подписки
        await axios.post('/api/subscribe', {
            subscription: subscription,
            id: subscribeId
        });

        // Вывод сообщения в случае успешной подписки
        console.log('Subscribe success');
    } catch (e) {
        // Вывод предупреждения в случае возникновения ошибки
        console.warn(e);
    }
};
So we have already done most of it successfully, now we need to display the notification that will arrive from Google Cloud Messaging.
Push notifications
To implement background tracking of new notifications in our application, we will use two key technologies: service worker and Push API.
A service worker is a background script that runs independently of the main thread of a web application. This script provides the ability to process network requests, cache data, and in our case, listen to incoming push notifications
Push API is a web API that allows servers to send information directly to the user’s browser.
Example service-worker.js
// Добавляем слушателя события 'push' к сервис-воркеру.
self.addEventListener('push', function(event) {
    // Извлекаем данные из push-события
    const data = event.data.json();

    // Опции для уведомления
    const options = {
        // Текст сообщения в уведомлении
        body: data.message,
        // Иконка, отображаемая в уведомлении
        icon: 'icons/icon-72x72.png'
    };

    // Используем waitUntil для того, чтобы удерживать сервис-воркер активным
    // пока не будет показано уведомление
    event.waitUntil(
        self.registration.showNotification(data.title, options)
    );
});
Demo
To be able to check on your own device, here is a link to test stand. For a more detailed study of the code, I leave a link to GitHub repository.
Thank you for attention 🙂


![How to find out how much traffic is coming from hidden requests in Google Ads [скрипт]](https://prog.world/wp-content/uploads/2020/09/phztuumleskuuyfdg2sbxu7ck5a-768x403.png)