Microservice testing with mock data
In the article I will talk about how I tested the microservice using mock data or mock data. I will explain what it is, why I used them, how I created them, and what conclusions I came to.
What is the feature?
Mock data is fictitious or simulated data that mimics the real data that a microservice would receive or send in a user environment. This data helps you test the functionality, performance, reliability, and security of microservices without relying on external services or systems that may be unavailable, unreliable, or expensive to access.
Why were mocks used?
Mock data was used to test the microservice for several reasons. One of them is the need to test independently from other microservices or external systems. Thus, it became possible to find and fix any errors without affecting other components.
The second reason is control. I wanted to have full control over the data that the microservice received or sent. It was possible to create mocks and manipulate them according to test scenarios and expectations, as well as vary the volume, frequency, format and their quality in order to test how the microservice copes with different situations and conditions.
The next reason is consistency. You need to make sure that microservice tests are consistent and reusable. This way one could use the same mock data for different tests or environments without worrying about data changes or inconsistencies. They could also be stored and reused for future tests or as a reference.
The last reason is efficiency. Creating and using mock data “on demand” without waiting for real data from other sources or systems, as well as reducing the cost and complexity of setting up and maintaining real data sources or systems for testing purposes, has made it possible to increase the efficiency and speed of tests for microservices.
How was mock data created and used?
To create mocks, a mockserver was used in a Docker container. Mockserver is a tool that allows you to mimic almost any system or service you depend on over HTTP or HTTPS. It can be used to test microservices by modeling their downstream dependencies and recording the requests and responses that flow through them. And also to check that the microservice meets certain expectations, such as sending the right requests or getting the expected responses.
Mockserver, based on a Docker container, provides a REST API for getting and managing expected data, as well as a web-based dashboard for viewing and editing it. You can use a client library or a command line tool to interact with the Mockserver API.
To set up and run a container with mockserver, install Docker on the machine and make sure it is running. Download the mockserver image from Docker Hub by running the following command:
docker pull mockserver/mockserver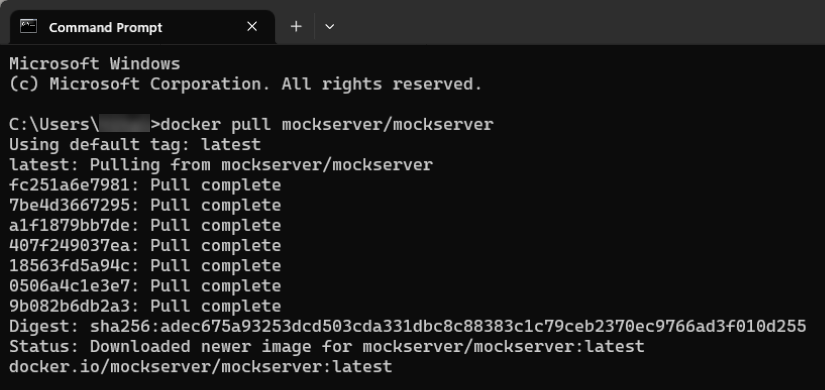
Create a file docker-compose.yml in the project directory with the following content:
version: "3"
services:
  mockserver:
    image: mockserver/mockserver
    ports:
      - "1080:1080"
    environment:
      MOCKSERVER_INITIALIZATION_JSON_PATH: /config/initializerJson.json
      MOCKSERVER_LOG_LEVEL: INFO
    volumes:
      - ./config:/config
This file installs a service called mockserver that uses the image downloaded from Docker Hub, sets the host port (for the dashboard) and container port to 1080, and sets the log level to INFO. Creates and binds a volume from the current directory (./config) To /config inside the container, sets up a JSON expect initializer.
The wait has two parts: the request match and the response generator. The first part defines the criteria for incoming requests, such as method, path, headers, or body, and the second defines how to generate a response for the corresponding requests, such as status code, headers, body, or delay.
So, our microservice depends on another service that provides information about the user. To emulate data from a third-party service, create a file initializerJson.json with the following content:
[
  {
    "httpRequest": {
      "method": "GET",
      "path": "/controller/777"
    },
    "httpResponse": {
      "statusCode": 200,
      "headers": [
        {
          "name": "Content-Type",
          "values": [
            "application/json"
          ]
        }
      ],
      "body": {
        "id": 777,
        "name": "Test Controller",
        "description": "Description for Test Controller"
      }
    }
  }
]
Where httpRequest it’s an expectation with the following matching query:
"httpRequest": {
  "method": "GET",
  "path": "/controller/777"
}
It is suitable for a GET request with a path /controller/777.
A httpResponse – response generator:
"httpResponse": {
    "statusCode": 200,
    "headers": [
        {
            "name": "Content-Type",
            "values": [
                "application/json"
            ]
        }
    ],
    "body": {
        "id": 777,
        "name": "Test Controller",
        "description": "Description for Test Controller"
    }
}
This response generator returns a 200 status code, a JSON content type header, and a JSON body with some information, in our case controller information. Similarly, this process is repeated for each simulated dependency for the microservice.
With the following command, we start the mockserver service from the project directory, where we put the file before docker-compose.yml:
docker-compose up -d
This command creates and runs a mockserver container in the background. We make sure that the container is running and can be accessed from the mockserver dashboard by opening http://localhost:1080/mockserver/dashboard in the browser. When creating mock data for microservice dependencies, you can use this dashboard to see the expectations for each dependency.
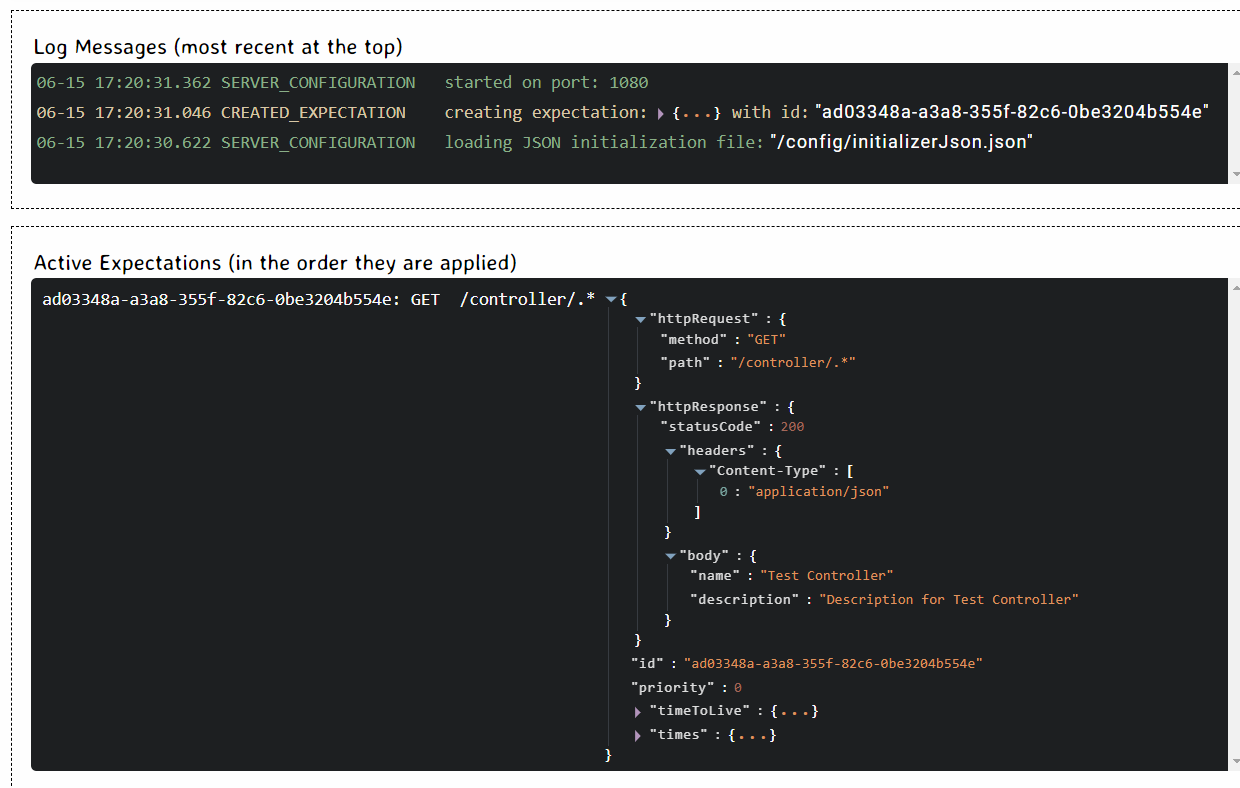
How was the expected behavior of the microservice tested?
To test the expected behavior of the microservice, two approaches were used:
Postman to send API requests to the microservice and check if the expected responses are returned or not.
Mockserver control panel to view the requests and responses that have passed through Mockserver and check if they are as expected.
For example, a microservice has an endpoint /controller/{идентификатор контроллера}, which returns some information about the controller from the mocked service. To test this endpoint, send the following GET request to Postman:
http://127.0.0.1:1090/controller/777And we get the following response:
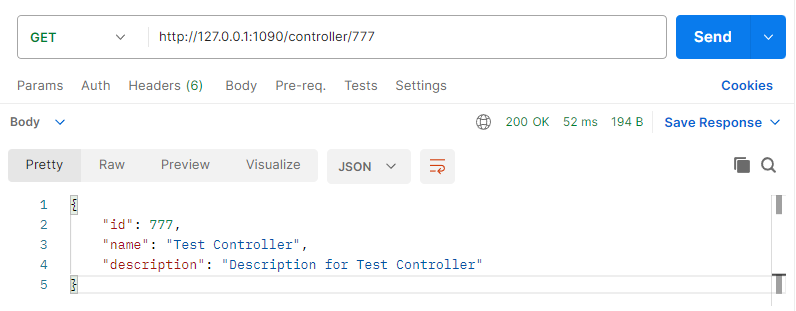
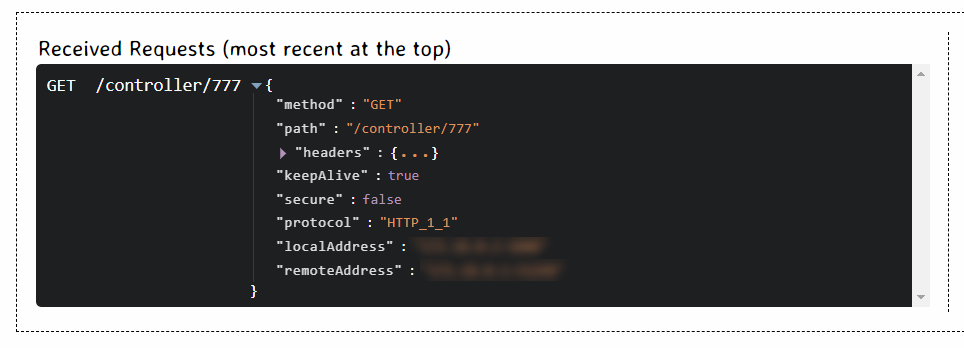
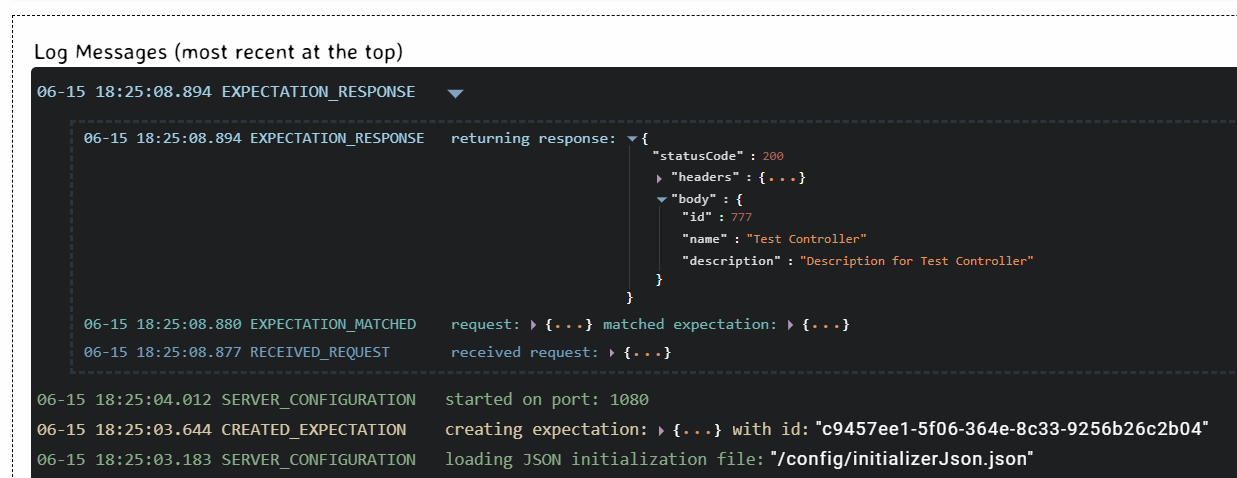
Then we open the Mockserver dashboard and check if the request and response for the mocked service has been recorded:
What are the conclusions?
Mock data is a useful tool for testing microservices in an isolated and controlled environment. Thanks to him, the project was able to test the functionality, performance, reliability and security of the microservice, without depending on external systems, access to which was unavailable, unreliable or expensive. The use of mock data made it possible to detect errors that could be missed when using responses from real services. The quality of the code and the design of the microservice have been improved based on feedback and suggestions received during testing.
However, despite all the advantages of mocks, their use requires careful planning, creation and management in order to ensure the quality, accuracy and reliability of testing.
