Creating your own Android application key
A little background on why all this might be necessary. Recently I came across a situation where a customer needed to revive a blocked old project, add features and place it on PlayMarket again. The key generated by Google cannot be retrieved; the generated builds had a different signature and were not accepted. As a result, it was decided to register a new project, but in order not to depend on such a situation in the future, make your own key.
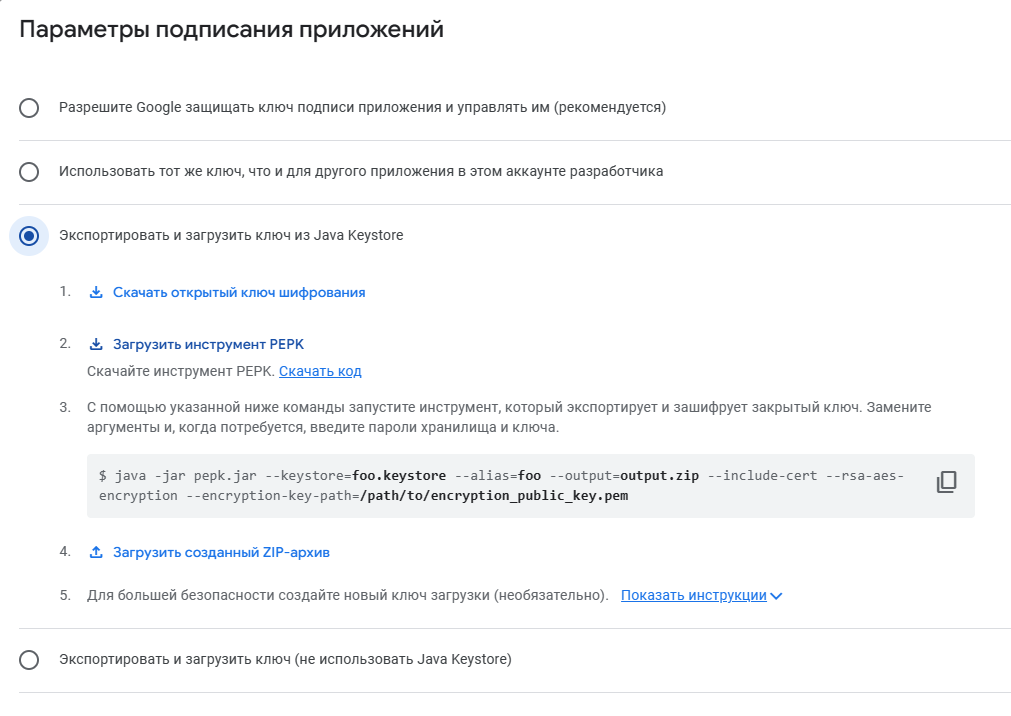
So, let's go through the whole process. Before adding an application build version, at the very beginning of this process, the console will prompt you to select a signing key.

We are strongly recommended to use a key generated by Google, but we are going the other way. Select the “Use a different key” option. Then let’s look at step 3 “Export and upload the key to the Java Keystore”. If you already have a key for another application of yours and you plan to support the application eco-environment, then you can select point 2. But this will happen later, when you add the second, third, etc. application. Now we are adding the conditional first one.

We will need the suggested “Public encryption key” (encryption_public_key.pem), “PEPK tool” (pepk.jar). For convenience, we put all this in one folder.
If you have not done this already, in Android Studio we create a Build/Generate signed bundle/apk release, select the Bundle option (in this case, when installing, Google will generate a special version of the application adapted to the specific device on which the installation is taking place – the size of the application installed from the PlayStore will be smaller ). Create a key-store file: specify the directory where this file will be stored, key_store password (Key store password), alias (alias) and key password (Key password). In the information, just indicate the user name (or you can fill in all the fields). We also add the generated file to the folder with previously downloaded files. Naturally, we write down and save the passwords and nickname.
The next step is, if not already done, to install the Java package. Download the archive and expand it to any folder (for example, Program Files/Java). However, most likely java.exe will not work and some additional steps are required.
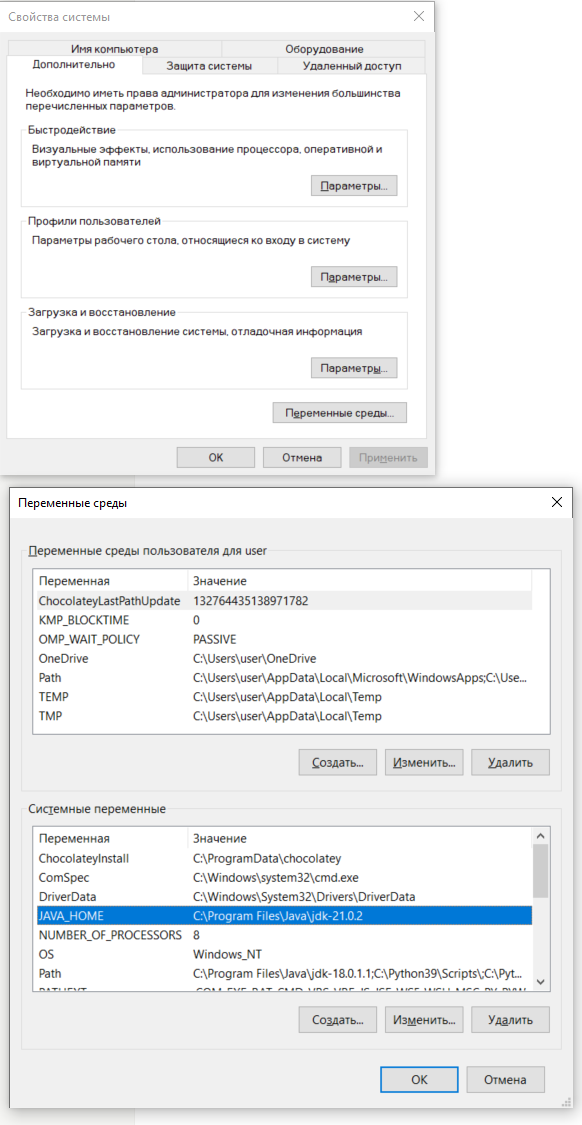
Let's configure the system (in my case it's Windows). Press “win + R”, enter in the window: control /name microsoft.system. In the system settings that open, select “Advanced system settings” and click “Environment variables…”. We create the JAVA_HOME system variable, specifying the path to the folder where the java.exe file is located as the value. In our case, the Java version is 21.0.2, you can have any other version that you have installed.

We also open the Path variable and create an additional value %JAVA_HOME%\bin in it.

Save all this (click OK). After that, open the terminal (win+R → cmd) and check if Java is connected. Set the path:
C:\\Users\\user>set path=c:\\Program Files\\Java\\jdk-21.0.2\\We check the connection by checking the version:
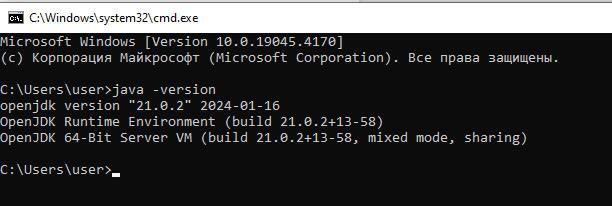
C:\\Users\\user>java -versionWe should see something like this:

Now go to the folder where we saved the files necessary to create the key (in our case this is C:\Users\user\Desktop\MyKeyFile\)

There's one last step left. Fill in the following command in the terminal with data:
c:\\Users\\user\\Desktop\\MyKeyFile>java -jar pepk.jar --keystore=store_key.jks --alias=myApp --output=output.zip --include-cert --rsa-aes-encryption --encryption-key-path=C:\\Users\\user\\Desktop\\MyKeyFile\\encryption_public_key.pemWhere store_key.jks – this is the file with the key that we created earlier in Android Studio
myApp – the name of the alias that we specified when generating the key file in Android Studio
C:\Users\user\Desktop\MyKeyFile\encryption_public_key.pem – respectively, the path to the file encryption_public_key.pem
After running this command, you will first be asked to enter the password for key_store, then you will be asked to enter the key password. Enter (it’s good that we saved them for ourselves :))
If the passwords are entered correctly, a new file will appear in the folder with our files – output.zipwhich we paste into the corresponding field in the console (see point 4 in the second picture).
If you got to this line, congratulations, you did it. Perhaps there are other ways to achieve what you want. But I wanted to share my experience.


