Animation processing after budget mockup for UE4
We are a small studio of enthusiasts, our main activity is creating projects for a local museum using VR headsets (Oculus Quest 2). We try to add some feature to each of our new projects. In this project, it was decided to abandon Mixamo and create our own animation kit, especially since we got our hands on two Azure Kinect cameras.
Armed with an old LeapMoution and an IPhone 12 Pro Max, we filmed more than a hundred movements, finally our characters will no longer be the same type of blanks, we thought)
If this topic is interesting, I can describe how we built a mini mocap studio.
At the first stages, everything worked out and one big problem flew past our eyes, namely, the legs floated in almost all animations. If you look at various solutions with a budget mockup, this problem is visible in almost all videos.
While we were creating the project, we decided to leave this problem for the final stage, since it was necessary to solve a number of other problems and tasks.
And now this stage has arrived. It’s very difficult to describe my level of proficiency in animation: I know a lot and at the same time I don’t know anything… I know about the Disney rules, I can imagine how to create a rig, how to animate an object in a Houdini or a T-shirt, I can make my own from Mixam’s ones, but at the same time There is no practical experience at the moment, especially in correcting such a problem. I understand that moving every key is not an option. Simply copying the keys at the feet on the first frame and copying them to the rest is not a very good option.
Next I will describe our approach, I will immediately say that in some places it is too sophisticated, but perhaps after looking at this solution you will be able to apply a similar approach to solving other problems. The choice of software is also determined by what you are used to working with.
To obtain the desired result, the following tools were taken: Maya, Cascadeur and (suddenly) WinAutomation.
Taking animation from UE4
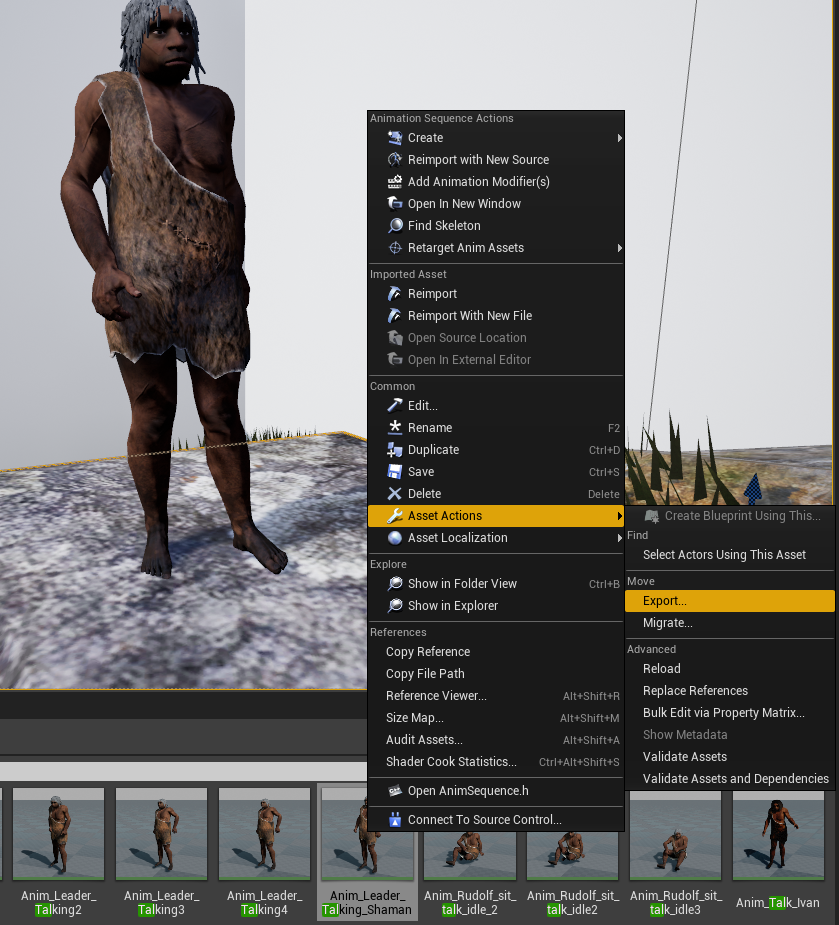
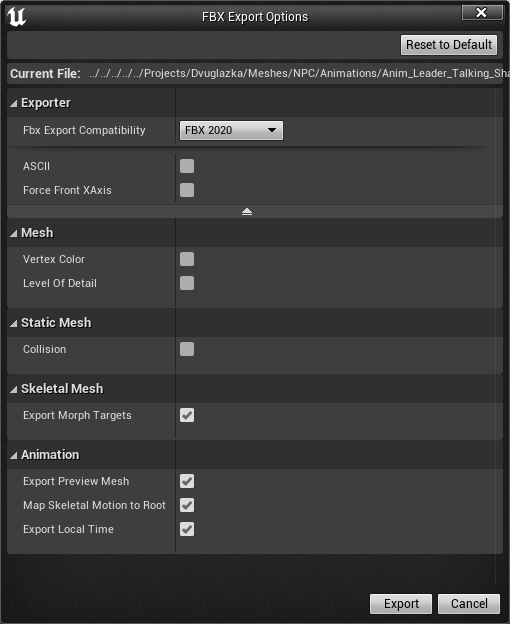
We drop the uploaded file into Maya into a new scene.
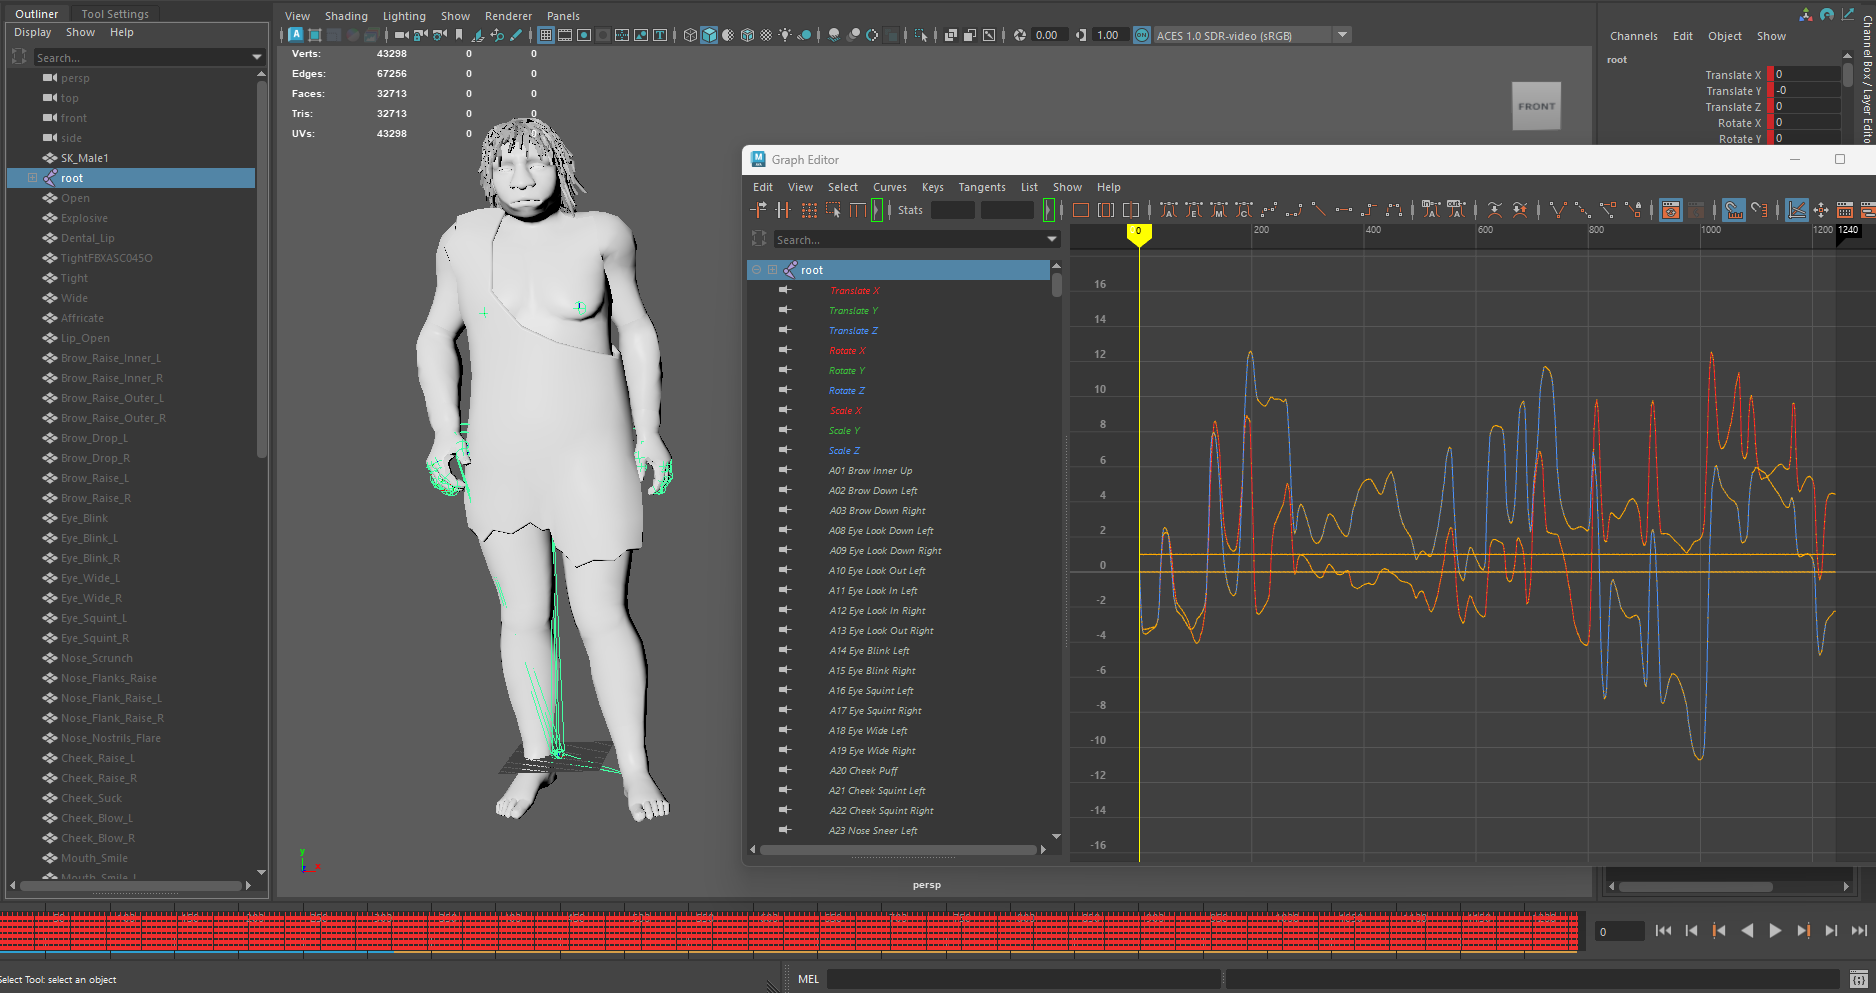
Be sure to display all keys on the timeline

As you can see from the screenshot, the animation has a key baked into each frame. In addition, blendshapes for facial animation are built into the model (keep this in mind for now). For the first stage we need animation from the skeleton. Select all bones for processing
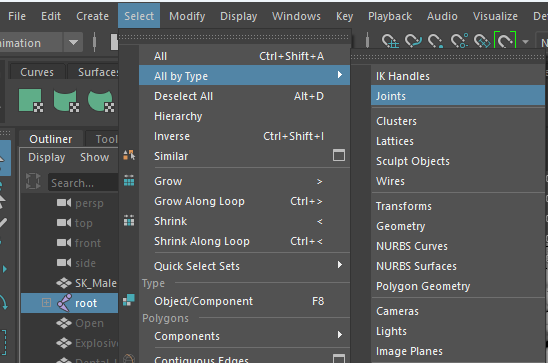
In the Graph Editor, open the Curves→Smooth Filter settings
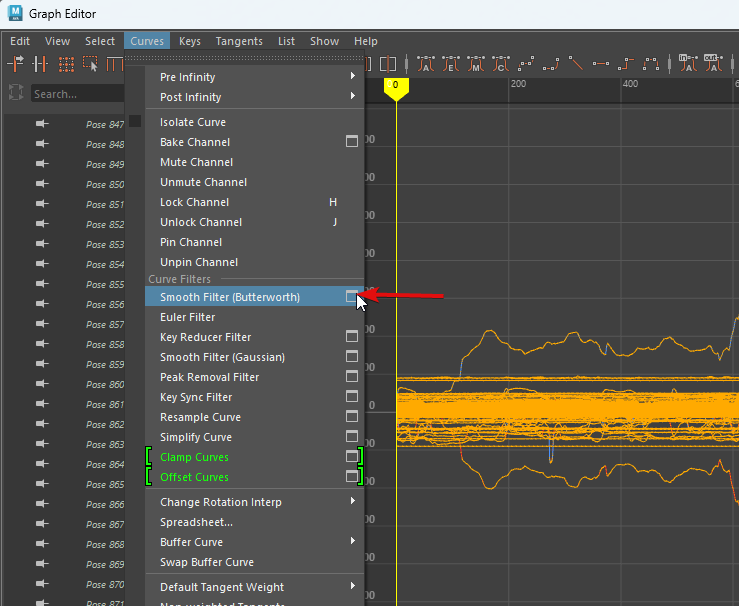
Next, depending on the nature of the animation, we need to indicate how detailed we want the animation to be. The Sampling Rate setting will help us with this. For Idle animation, you can set it to 1, then the interpolation will be every 25 frames. For dialogue animation, where we need to convey emotions, set the value to 5.
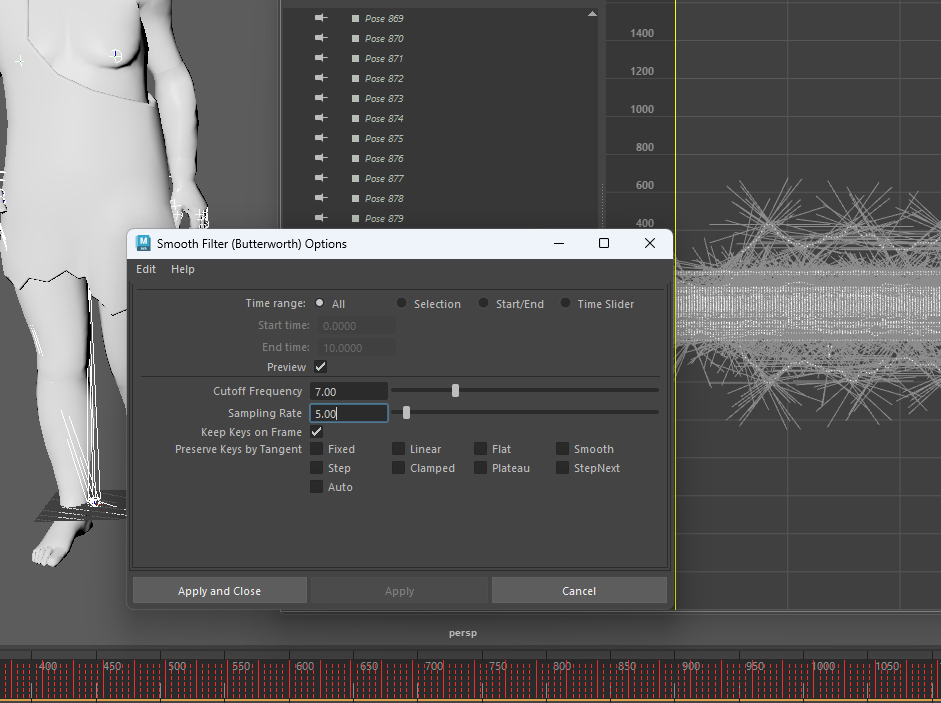
When changing a value, the computer will think for a long time, so specify the value precisely from the keyboard, and not with the slider.
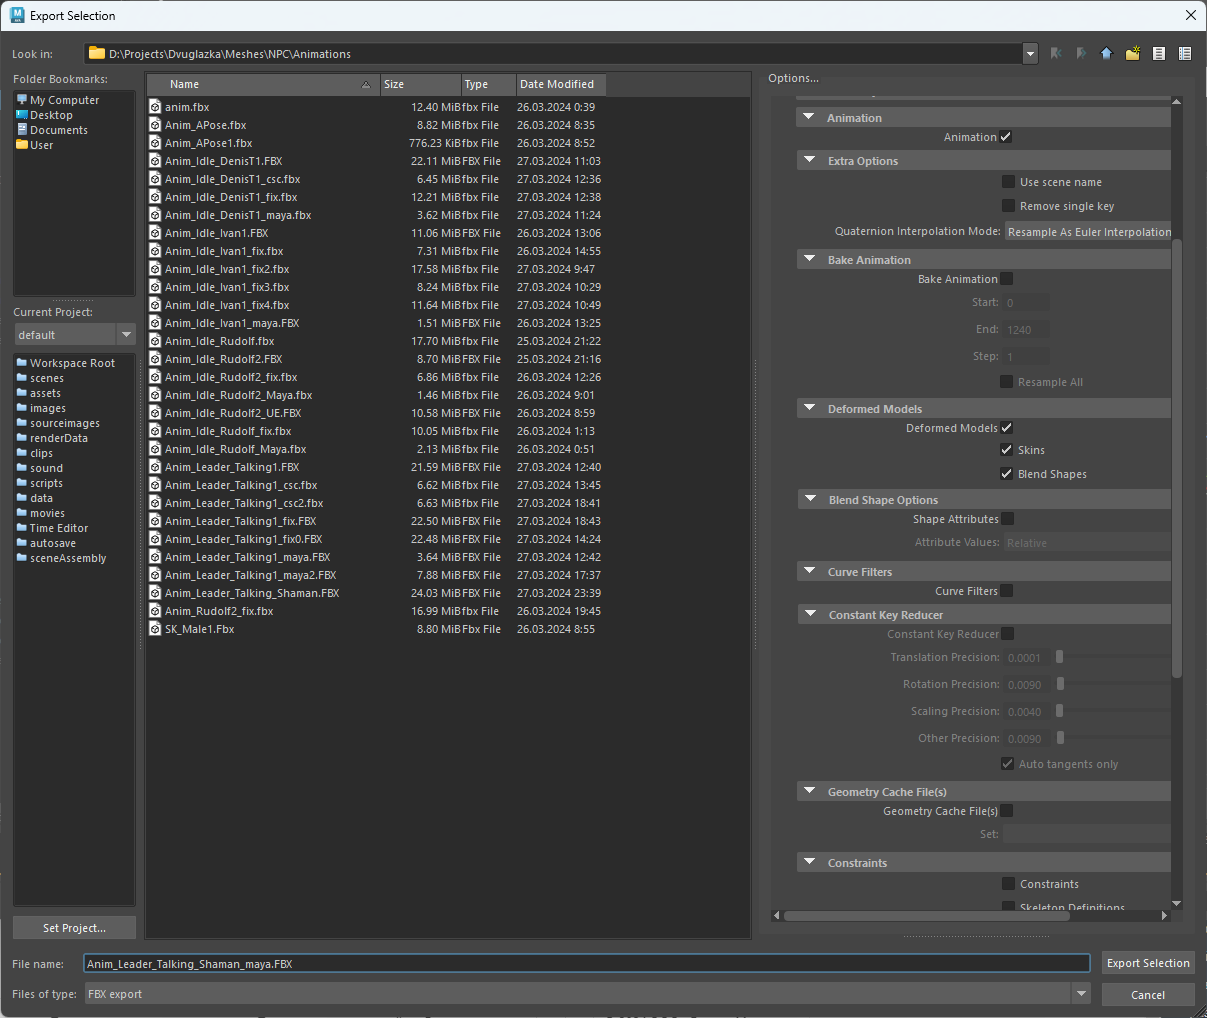
At this point, we no longer need the T-shirt functionality, select the top root bone and export the selection (File→Export Selection)
Let's launch Cascadeur. First of all, we need to load the character's bag in A – pose and auto-rig.
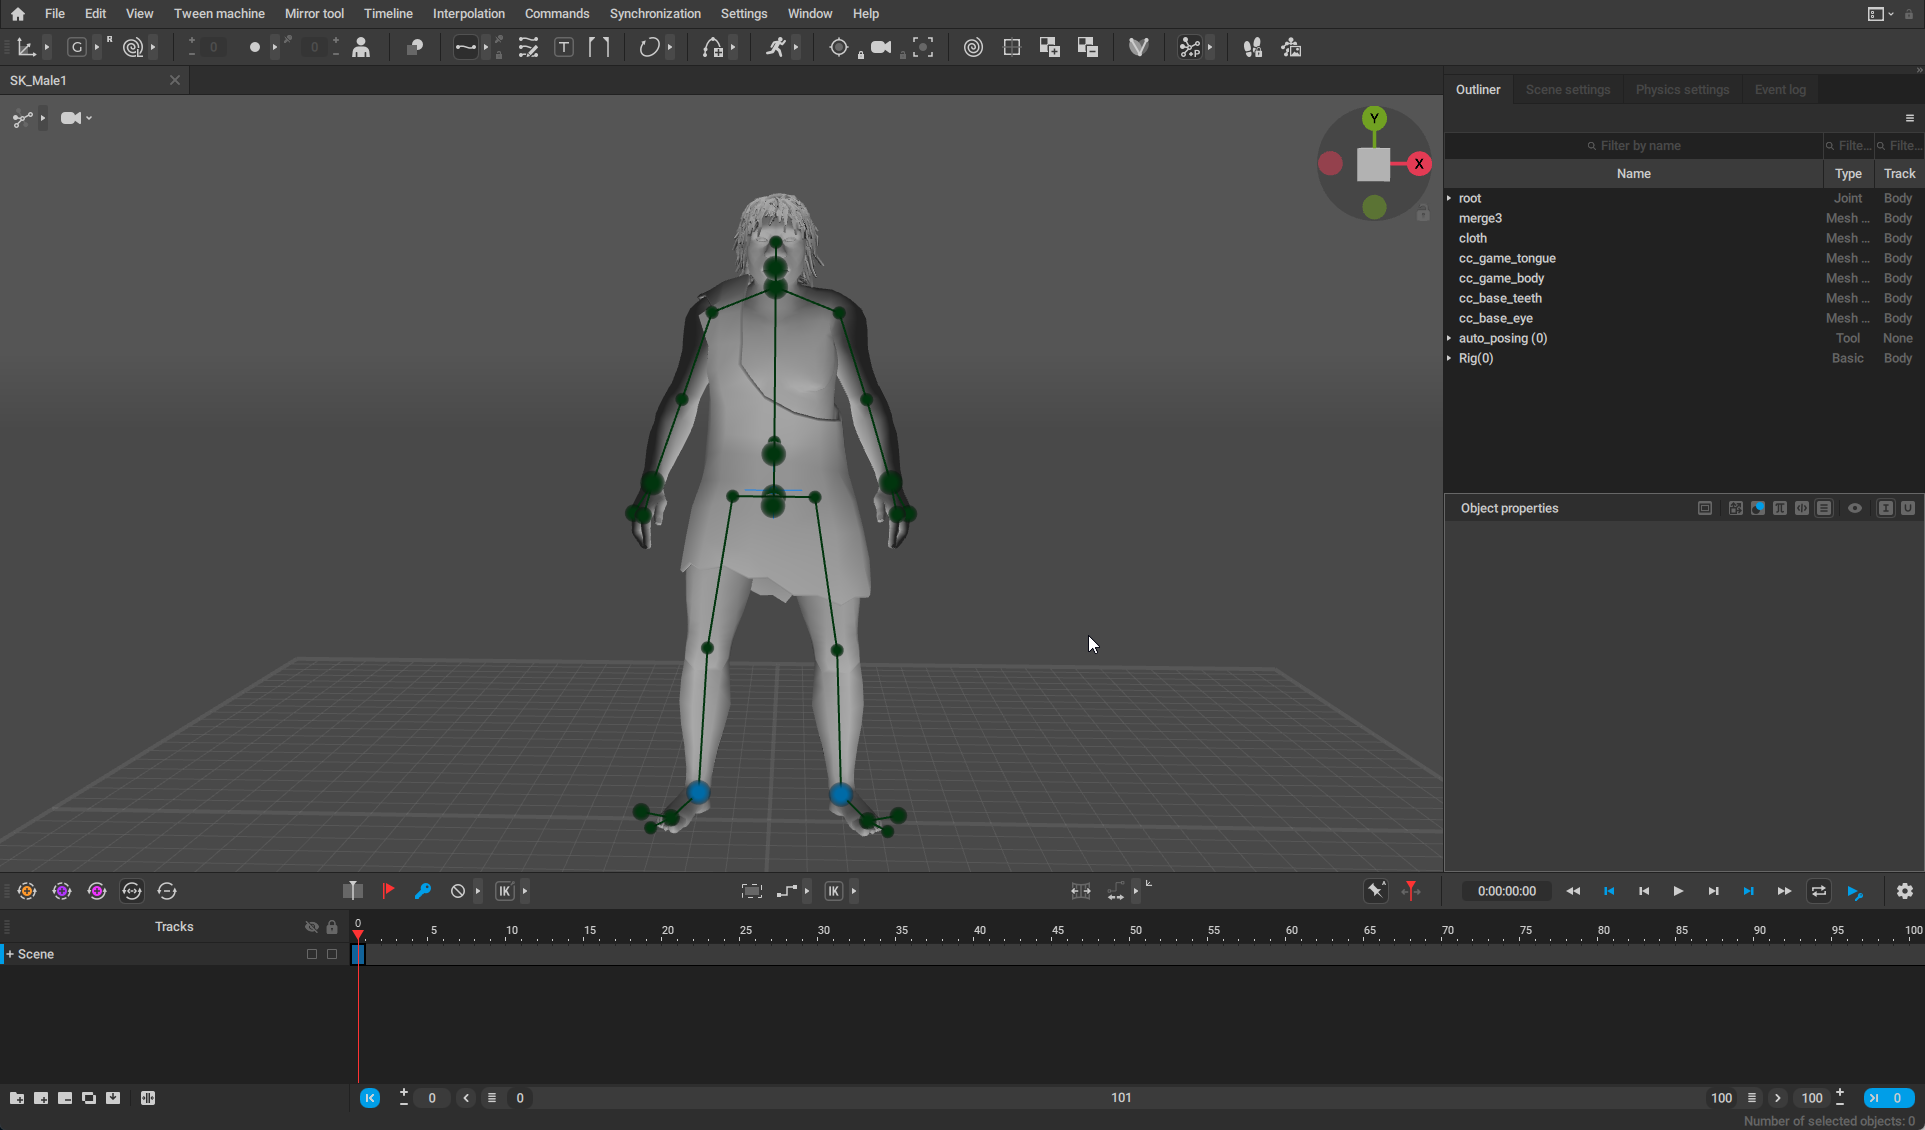
After this, you need to load the animation that we processed in Maya
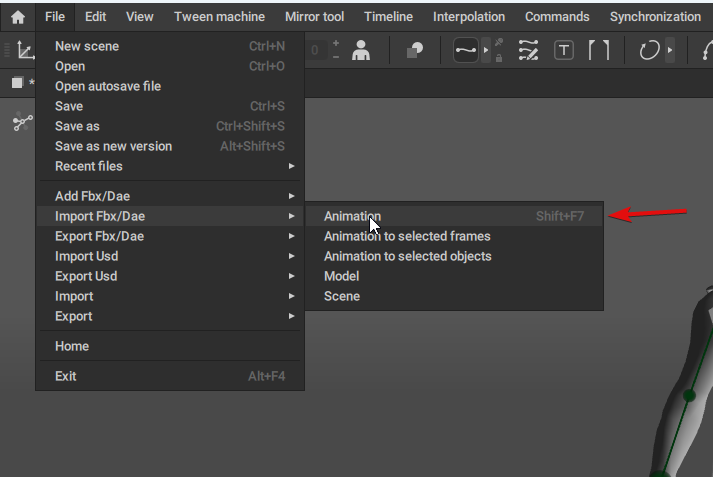
An animation will be applied to the loaded bag
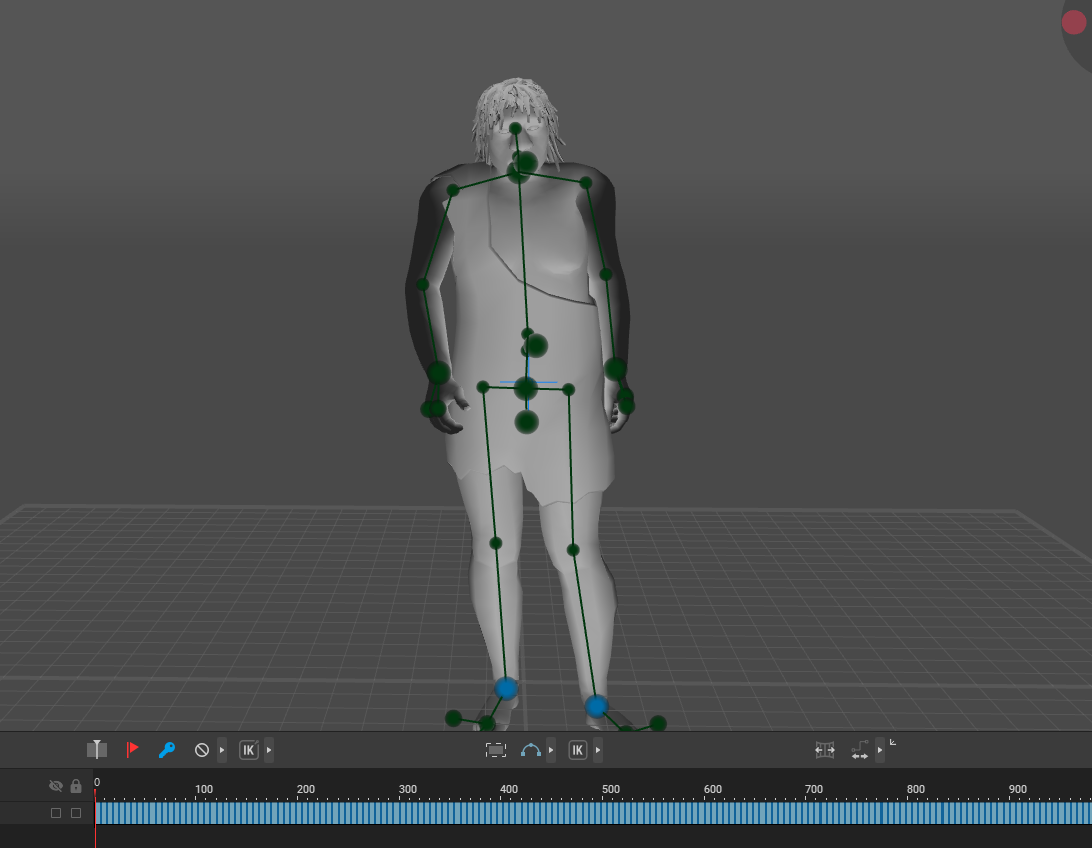
The peculiarity of the Cascadeur program is that it is possible to calculate the naturalness of the pose, which means we can place the legs and recalculate the body for each frame. If we chose the option of interpolation for 25 frames, then this can be done manually and get an acceptable result. At the end of the article I will attach a video with this result. But when breaking down with interpolation of 6 frames, you will have to work with your hands for a very long time.
Before automating, you need to understand the Cascadeur feature. It has several modes of operation, we will need two: Automatic pose and editing through the rig. To switch, use the Enable AutoPosing tool button

To work we need some application hotkeys, to move from a key frame to the next key frame we use Shift+A And Shift+D (previous and next frame) Editing can only be done on key frames; editing on intermediate frames will be ignored.
Before copying the position of the legs to all frames, we need to position the character in the desired starting pose; to do this, switch to the AutoPosing mode and change the position of the blue spheres on the feet.
When the starting pose is ready, it must be transferred to the final one; to do this, switch to rig mode (turn off AutoPosing), select all points, copy (Ctrl+C) we stand on the last frame and, without removing the selection, press Ctrl+V. Now our animation can be considered looping.
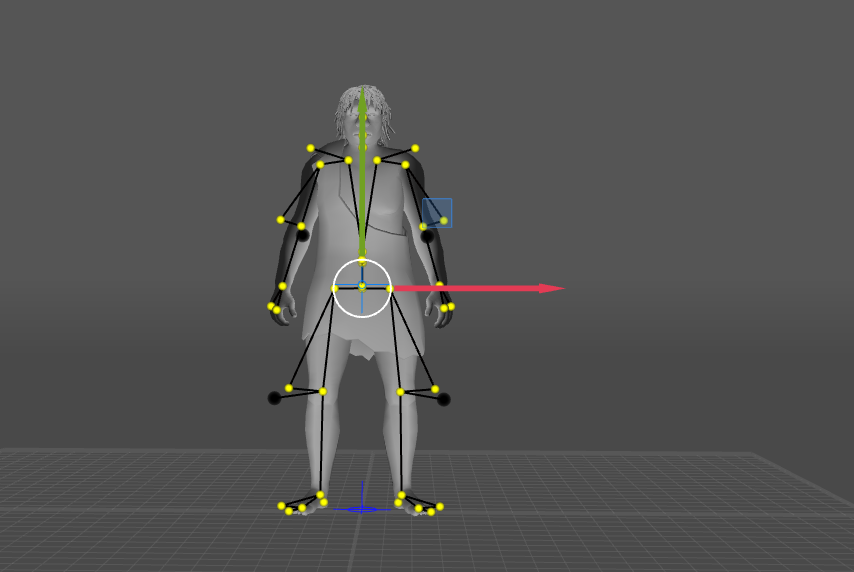
Now everything is ready to glue the legs to the floor. To do this, select the points on the legs, copy them, move to the next key and paste. This can be done by pressing combinations Shift+D, Ctrl+V this needs to be repeated 230 times (the number of keys in this animation)
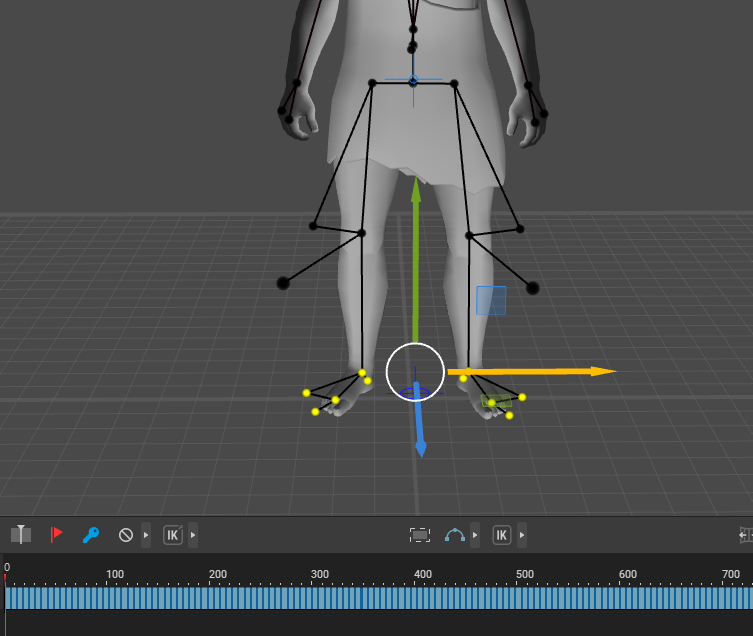
This is where WinAutomation comes to the rescue.

Line 1: Move the mouse to the position of the window title (you could make it active through the window handle, but why)
Line 2: Click the left mouse button
Line 3: Loop 100 times (you can specify 230 at once)
Line 4: Poison combinations Shift+D, Ctrl+V
We copy the position of the points in frame 0, run the script and go pour some tea… after a minute all the frames of the legs are in the same place, but the body is a little distorted in some frames
This is what the animation looks like now, but this result cannot yet be called satisfactory.
To make it beautiful, we now need to use auto pose, but if we just turn it on, then the entire body position will turn into the same as now on frame 0, in order to save the initial positions we need to determine important points that should not change, and we will calculate the rest. To do this, freeze the points of the legs (without deselecting them, and if deselected, select them again), press R and the points will be circled with red squares
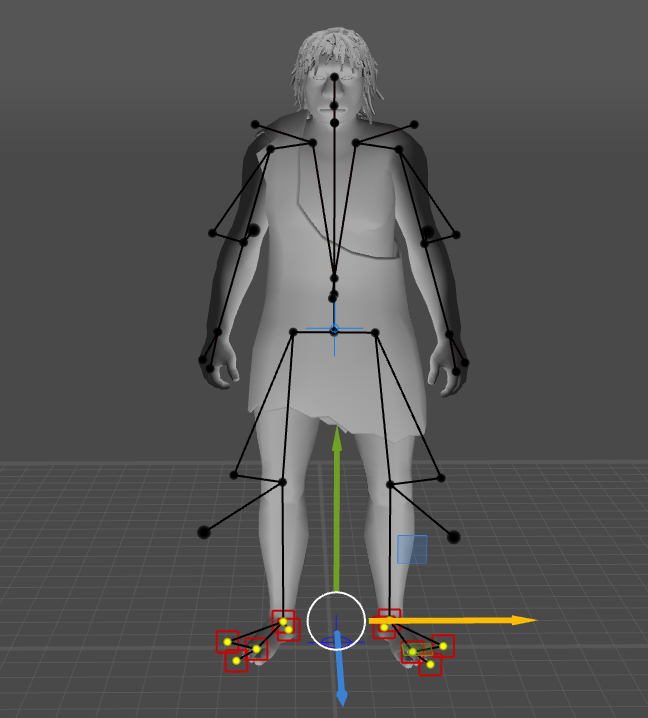
Now, during autopose, the legs will not change their position.
Let's switch to auto pose and select points that affect the individuality of the pose
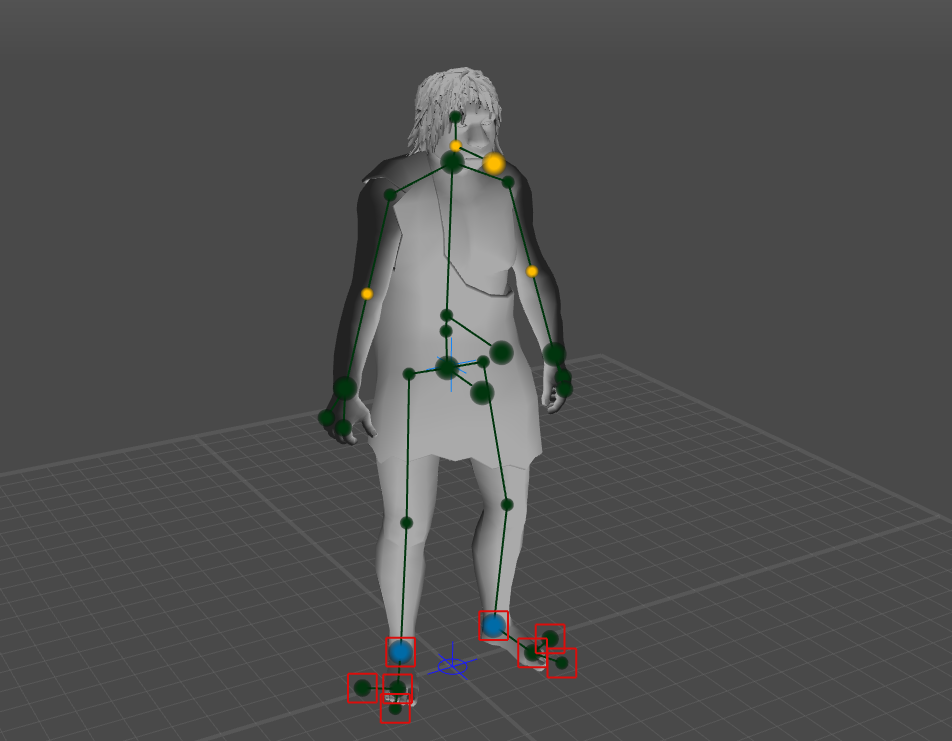
Now if you press Shift+Z, then the pose will be corrected so that the frozen points of the legs and the selected points look natural in this pose. This operation must be repeated again for each frame.
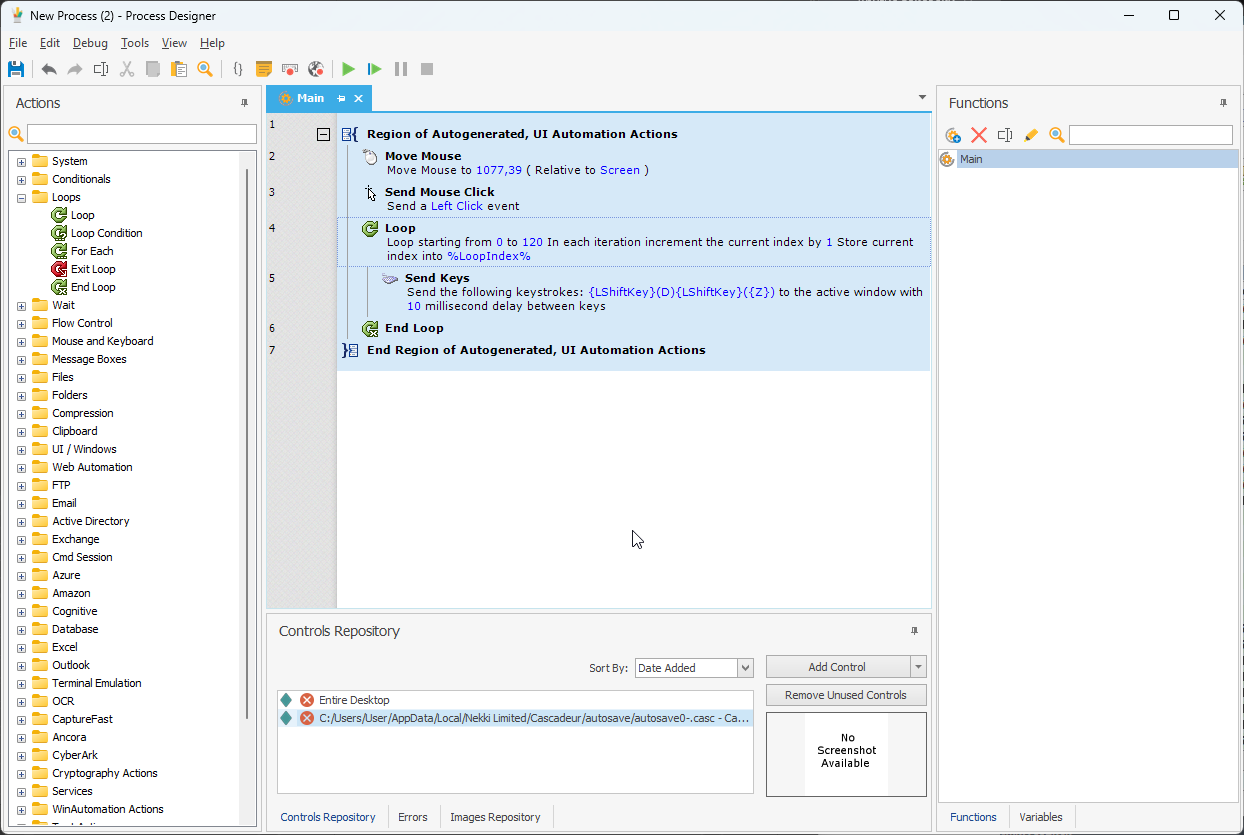
We stand at frame 0 and run the script. During execution, most likely, you will not see anything, but after the script finishes working, you should be pleased with the result.
We carefully review the entire animation and, if necessary, manually correct problem areas. When everything is ready, export the animation without the bag.
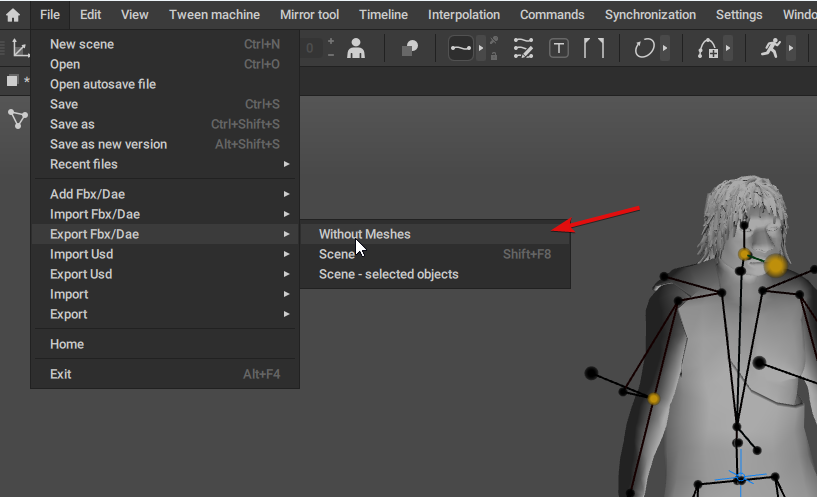
Open Maya, create a new scene, and transfer the old file with the bag, animation and blendshapes into it, and then transfer the file with the new animation on top.
Now you can open the new file in UE and enjoy the result
For comparison, you can see how it was and how it became
Conclusions:
This method allows you to quickly correct animation without a fulcrum. You can, of course, complicate the task, and tie not both legs, but one at a time, then this will give liveliness to the animations. In our project, we decided that where the character says to freeze the legs, and correct the idle animations manually.
In conclusion, the promised animation, in which interpolations are done every 25 frames and the legs are frozen one by one
Thank you for reading the text.
Denis Berezhenko
