Using the DCMTK library to create DICOM files in C++
Link to originaltried to supplement and explain some unclear details.
Introduction
This article focuses on an example of using the library DCMTK when creating DICOM files. As Wikipedia says, DICOM – Digital Imaging and Communications in Medicine, is a standard for creating, storing, transmitting and visualizing medical images. The standard includes a part that describes the structure of a DICOM file, and another that describes the transmission of DICOM data over a network.
DCMTK provides strict DICOM compliance, providing a wide range of functionality for processing images, text information and metadata. The library supports multiple image formats, unifies data, and enables efficient information sharing within the medical community.
Modern MRI and CT devices by default create medical images and transfer them to a PACS server for storage using the DICOM standard. But digital medical images do not have to be topographical, but can be regular color or black-and-white photographs, such as a retinal image. Such images are often stored in the form: patient description + jpg image. To store such images on PACS servers, they need to be converted to DICOM.
In this article we will delve into the practical side of the issue, looking at a specific example of creating a DICOM file from an image in *.dcm format in C++ for its subsequent sending to a PACS server.
Preparation
I think it's worth mentioning what I use for development:
Windows 10, x64
Visual Studio 2022
MSVC v. 14
CMake v. 3.28.2
DCMTK v. 3.6.6
First you need download And install DCMTK library. After building the library and connecting it to your project, it is worth clarifying that you must always open Visual Studio 2022 with administrator rights – this will help avoid most errors.
Writing a program
(https://brandres.medium.com/building-a-simple-dicom-application-with-c-and-dcmtk-in-visual-studio-2019-5aacc1e0854e)
#include <iostream>
#include "dcmtk/config/osconfig.h"
#include "dcmtk/dcmdata/dcfilefo.h"
#include "dcmtk/dcmdata/libi2d/i2d.h"
#include "dcmtk/dcmdata/libi2d/i2djpgs.h"
#include "dcmtk/dcmdata/libi2d/i2dplsc.h"
#include "dcmtk/dcmdata/dctk.h"
using namespace std;
A little about libraries:
dcmtk/config/osconfig.h– contains configuration settings for the operating system;dcfilefo.h– defines the “DcmFileFormat” class, which represents a DICOM file in File Format (including metadata and images). Contains functions and methods for reading, writing, and manipulating DICOM data within a File Format file. Example uses of “DcmFileFormat” could include creating a new DICOM file, adding metadata and images, and saving or reading a DICOM file.i2d.h– Provides tools for encoding images into the DICOM format so that they can be integrated into the DICOM format;i2djpgs.h– Provides tools for converting images to JPEG format and integrating them into a DICOM dataset for subsequent saving to a DICOM file using JPEG compression;dctk.h– Main header file for components related to data processing.
We declare variables:
char uid[100];
I2DImgSource* inputPlug = new I2DJpegSource();
I2DOutputPlug* outPlug = new I2DOutputPlugSC();
Image2Dcm i2d;
E_TransferSyntax writeXfer;
DcmDataset* resultDset = NULL;
An array of characters 100 elements long. Why we need it, we’ll talk in more detail later.
An “I2DImgSource” object with the name “inputPlug” is created, which is initialized by the “I2DJpegSource” constructor. This object represents the JPEG image source.
Everything is exactly the same as in the variable above, only this object represents the output plugin for DICOM.
A class that implements the image2dcm engine. Conversion occurs by combining an input plugin that reads a general purpose image format and output plugins to convert to specific DICOM SOP classes
An enumeration representing various data transfer syntaxes. This enumerator defines various standard syntaxes. repository of patient metadata and images. (we’ll look at this variable in a little more detail later)
Class that works with DICOM dataset format (files without meta header)
After declaring all the variables, you need to load the image to which the metadata will be attached. In our case – test.jpg.

inputPlug->setImageFile("test.jpg");More about E_TransferSyntax
E_TransferSyntax – is an enum in the DCMTK library that defines various transfer syntaxes in the DICOM standard. The data transfer format determines how data is encoded and transferred between devices or programs. This tag is required to transfer a DICOM file over the network, for example, for storage on a PACS server. Without it, it is in principle possible to create a DICOM file, but it is impossible to transmit it over the network; the PACS server will not accept the transmission.
The default syntax for DICOM images is VR Little Endian, which is specified by the following line: “1.2.840.10008.1.2”. In our case, for JPEG transmission there is a separate set of encoding rules – JPEG Baseline (Process 1)which means using a basic JPEG profile for image compression, which is specified by the following string: “1.2.840.10008.1.2.4.50”.
Now you are ready to convert the image to DICOM format:
i2d.convert(inputPlug, outPlug, resultDset, writeXfer)The i2d.convert function is designed to convert data to DICOM format. Let's look at the arguments:
inputPlug: Passed to the function, the input plugin is a fully configured component capable of reading pixel data from a native (.jpg) format.outPlug: The output plugin passed to the function is a fully configured component that defines the final DICOM format.resultDset: This parameter represents the output dataset produced by the conversion.writeXfer: This parameter provides a suggested data transfer format required, for example, when using a JPEG input plugin. It returns from the function.
So the function i2d.convert Converts an image from one format to another.
Adding patient data
In this part of the code we add the name and gender of the patient. The first argument is the name of the DICOM tag, the second is the value that is written to this tag.
resultDset->putAndInsertString(DCM_PatientName, "Marina Shimth");
resultDset->putAndInsertString(DCM_PatientSex, "female");
Moreover, the data can be of any type, for example, “string”, as shown in my example. Numbers (integer and floating point), date, time, and so on can also be transmitted. As a rule, the patient's date of birth and/or ID is also added to simplify subsequent identification of the image.
resultDset ->putAndInsertString(DCM_PatientsBirthDate, PatientBirthDate);
resultDset ->putAndInsertString(DCM_PatientID, PatientID);
Next, you will need to add a number of tags, without which it will not be possible to send our DICOM file to the server:
SOPClassUID = '1.2.840.10008.5.1.4.1.1.77.1.4'
StudyID – set (patient’s study number)
StudyInstanceUID – generate (unique study number)
SeriesInstanceUID – generate (unique series number)
SOPInstanceUID – generate (unique file number)
The DICOM logic is as follows: there is a patient with a unique ID (PatientID), the patient is undergoing a study with a unique ID (StudyInstanceUID) under the StudyID number, in this study there was a series of images with a unique ID (SeriesInstanceUID), which contains a file with a unique ID (SOPInstanceUID) .
Let's look at how to generate a UID using the example of SOPInstanceUID, which sets a globally unique value (it should not be repeated anywhere else in the world) for our DICOM file. Let's write a value into it using a unique identifier (uid) generator:
resultDset->putAndInsertString(DCM_SOPInstanceUID,
                               dcmGenerateUniqueIdentifier(uid, SITE_INSTANCE_UID_ROOT));
More about UID
UID are unique strings that are used in the DICOM standard to uniquely identify various resources, such as images or series. The dcmGenerateUniqueIdentifier function is part of the DCMTK library and is designed to generate unique DICOM object identifiers (UIDs).
const char* dcmGenerateUniqueIdentifier(char* uid, const char* root);uid: This is the output parameter where the generated unique identifier will be written.
root: This is the root part of the UID. This could be a unique string of your own, such as your organization ID. The root part is usually a UID prefix.
In DCMTK, the DICOM Transfer Syntax UID string “1.2.840.10008.1.2.4.50” for JPEG Baseline (Process 1) is also a unique, but not globally, identifier. This means that other DICOM files may also contain this string if they use the same transfer syntax.
So, we added everything, entered everything. We are almost done, there is only one thing left – save the file with the *.dcm extension. How to do it?! The following two lines will help us with this.
DcmFileFormat dcmff(resultDset);
dcmff.saveFile("test.dcm",
                writeXfer,
                EET_ExplicitLength,
                EGL_recalcGL,
                EPD_noChange,
                OFstatic_cast(Uint32, 0),
                OFstatic_cast(Uint32, 0),
                EWM_fileformat);
The first line creates an object of type “DcmFileFormat” With name “dcmff” and transmits to him all our data recorded in “resultDset” The second line calls the method “SAVEFILE“object”dcmff” to save the DICOM image to a file called “test.dcm” using the specified parameters.
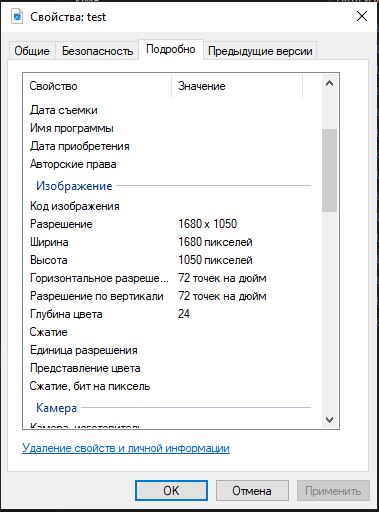
The resulting .dcm file can be opened with one of many free viewers, for example MicroDicom. The end result should be something like this:

To check the possibility of transferring the file over the network, we used the local PACS server Orthanc 23.2, which, after adding all the specified tags, successfully saved the DICOM file. Although adding the *UID and Transfer Syantax tags does not guarantee that the server will accept the file. Ultimately, the server configuration may prohibit saving some SOPClassUID types, or some Transfer Syntaxes.
Full code
#include <iostream>
#include "dcmtk/config/osconfig.h"
#include "dcmtk/dcmdata/dcfilefo.h"
#include "dcmtk/dcmdata/libi2d/i2d.h"
#include "dcmtk/dcmdata/libi2d/i2djpgs.h"
#include "dcmtk/dcmdata/libi2d/i2dplsc.h"
#include "dcmtk/dcmdata/dctk.h"

using namespace std;

void createDicomImage() {
char uid[100];
I2DImgSource* inputPlug = new I2DJpegSource();
I2DOutputPlug* outPlug = new I2DOutputPlugSC();
Image2Dcm i2d;
E_TransferSyntax writeXfer;
DcmDataset* resultDset = NULL;

inputPlug->setImageFile("result.jpg");
i2d.convert(inputPlug, outPlug, resultDset, writeXfer);

//данные из базы данных пациентов

resultDset->putAndInsertString(DCM_PatientName, "Marina Shimth");
resultDset->putAndInsertString(DCM_PatientSex, "female");
resultDset->putAndInsertString(DCM_PatientBirthDate, "PatientBirthDate");
resultDset->putAndInsertString(DCM_PatientID, "PatientID");
resultDset->putAndInsertString(DCM_SOPClassUID, '1.2.840.10008.5.1.4.1.1.77.1.4');
resultDset->putAndInsertString(DCM_SOPInstanceUID, dcmGenerateUniqueIdentifier(uid, SITE_INSTANCE_UID_ROOT));
resultDset->putAndInsertString(DCM_StudyID, "StudyID");
//общие настройки DICOM
resultDset->putAndInsertString(DCM_TransferSyntaxUID, "'1.2.840.10008.5.1.4.1.1.77.1.4 UID_JPEGBaseline");
//сохранения файла

DcmFileFormat dcmff(resultDset);
 dcmff.saveFile("test_result_2.dcm", writeXfer, EET_ExplicitLength, EGL_recalcGL, EPD_noChange, OFstatic_cast(Uint32, 0), OFstatic_cast(Uint32, 0), EWM_fileformat);
}
Conclusion
To get acquainted with and write this program, I used source. Unlike the original article, I wanted to provide additional information about uid generation, take a closer look at the functions and capabilities of DCMTK, and also focus on some important tags when creating your DICOM file. The result is a program that creates a .dcm file from a .jpg image, which can be sent for storage to a PACS server.
In general, the use of the DICOM standard in combination with the DCMTK library allowed us to turn an ordinary photo into a medical image, which beneficially contributes to the standardization of processes in medical programming
Link to originaltried to supplement and explain some unclear details.