MS word. Change fonts in document styles in the spirit of “Brute force”
background
Today we had an epic task to replace the style in our document from public (Tahoma/ Arial/ Times New Roman) to some GOST-like font sent by the Customers.
The boss began to do it for beauty: using traditional tools MS Word to work with styles. Spent 1.5 hours on this.
I decided to try the “brute force” method, probably not the best solution!
But I think in a situation where you don’t have time to do “everything is beautiful and stylish” and / or you don’t know how to do it using MS Word, this method has the right to life …
Step-by-step instruction
In Windows Explorer, select the document of interest to us with the mouse.
We right-click and select the archiver in the drop-down context menu 7-Zipand in it the menu item Open archive.

Rice. 1 – Open docx file with archiver In the archiver window in the archive explorer, open the folder \word.

Rice. 2 – Contents of the archive In this folder we find the file styles.xml.

Rice. 3 – The styles.xml file inside the archive After selecting the file, right-click and select the top item in the context menu Open.

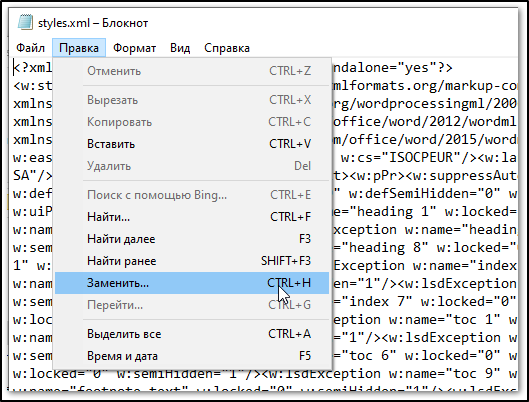
Rice. 4 – Open styles.xml The document opens in Notepad (notepad.exe), you need to call the text replacement window by selecting the appropriate command in the context menu or by pressing the keys ctrl+H.

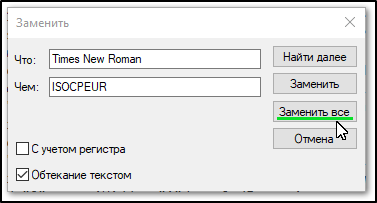
Rice. 5 – Calling the “Text Replacement” command In the top line, write which font you want to replace, in the bottom line, which one and click Replace All.

Rice. 6 – Replacement window Close the document by clicking the button Save.

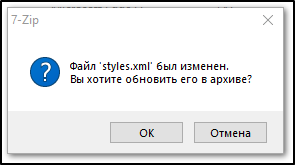
Rice. 7 – Window for saving the xml file in Notepad In the window that appears, the archiver prompts you to update the file. styles.xmlpress the button OK.

Rice. 8 – Updating the xml file in the archive PROFIT!
Took 10 minutes for everything…
Evaluation of the results of manipulations
After opening the edited document MS Word It turned out that in general everything went well. The only problematic place – there are such artifacts in the captions under the figures and above the tables. Note that the font before the long separator bar is different from the font after it.

Despite the fact that the text on both sides is shown in the same typed style (**Start_fig) and font (GOST type B).
After cutting the separator and then pasting, the font of the entire line becomes the same! In principle, the way out, but according to the text of the document, such artifacts occur many times.
Later, I discovered that the problem was cured by replacing the character with itself.
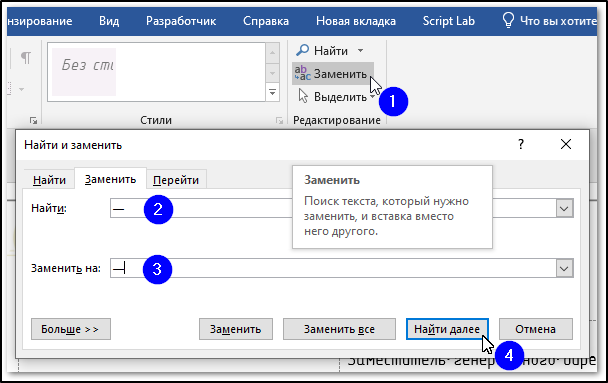
Press the Replace command or the keyboard shortcut ctrl+H.
In field Find insert the symbol “-“.
In field Replaced by also insert the symbol “-“.
Finally, click the button Find next.

After that, the font in the inscription on the left and right began to look the same.


