Today, perhaps every Android developer has heard about Jetpack Compose. Some have already managed to “drag it into production”, some have tried it in their pet projects, and others still doubt its feasibility. After all, at first glance, we have everything the same: was replaced with Text(), Box() is very similar to , etc. The only thing that immediately made an impression is the new Lazy lists, which are a replacement for the usual RecyclerView and allow write less code. But, again, copying and adjusting the adapter for the next screen is already a familiar action and it does not take much time, and the action itself is practiced to the point of automaticity. I could also be counted among the doubters and, perhaps, a little lazy. But a few tasks other than the routine repainting of buttons made me reconsider my approach to Compose.
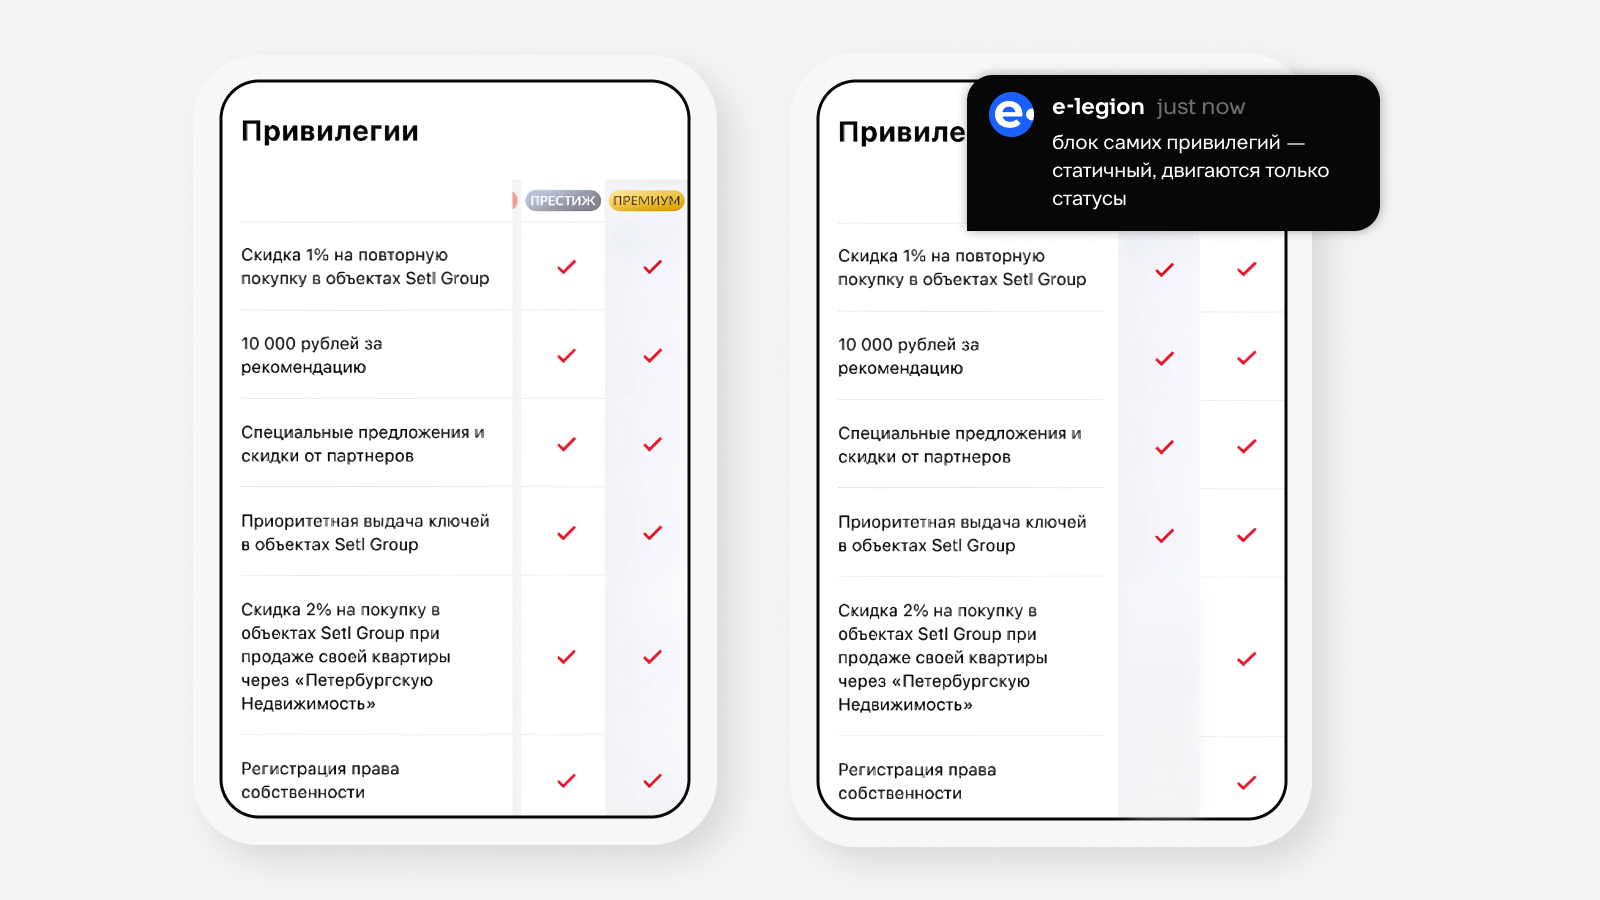
Case one. Given: a layout in a figma of the following form
If you, like me at one time, had doubts about what you saw, then most likely you understood everything correctly. It is necessary to implement a table with horizontal scrolling, and the first cell must be rigidly fixed. For what? “We saw it, we liked it, we want it for ourselves.”
I didn’t know how to do this. Stackoverflow came up with several solutions that made me nervous. One of them had an implementation via
. When was the last time you remembered him? Other solutions were based on RecyclerView (even better) – custom LayoutManager or decorators. But the main reason I rejected these solutions was that the cells had static dimensions, and in my case the height depends on the text in the first column. I had no desire to change the dimensions and recalculate the heights of the cells in the list, so I returned to Google again.
At this point, I decided not to ignore the links that led to articles with Jetpack Compose. It turns out that in LazyColumn/LazyRow, in addition to item elements, (still Experimental) stickyHeaders (https://developer.android.com/jetpack/compose/lists#sticky-headers) were added.
Actually, this is the thing that “sticks” to the top of the screen when scrolling. This find gave me a second wind. I thought that to implement the plan, it would be convenient to present the server response in the form of several lists, one list for each column.
Then the beginning of our Compose function (let’s call it simply DataTable) will look like this:
Now let's describe the elements of the table, there are only three of them: a text header, an image with a status display, and a cell with/without a checkmark.
Time to build the table:
(I'm Lazy and also Sticky!)
LazyRow is used, since horizontal scrolling is needed. In stickyHeader we set a fixed column. In itemsIndexed we will draw the remaining columns with “checkmarks”. If we run our code at this stage, then the screen will look like this:
Ugly.
As you can see, the original problem with cell heights with this approach still remains, so let’s look for a way to solve it. Modifier has an onGloballyPositioned callback in its available functions. It returns the coordinates of the element on the screen after it has been rendered and through them we will find the height. To “throw” heights into other cells, I used mutableState:
The key is the index of the element (can be allowed, since the number of cells in all columns is the same), the value is the height.
The final code of the LazyRow element will look like:
StickyHeader is created first. After filling the cells with content, the heights are calculated and stored in mutableState.
Then columns with “checkmarks” are drawn. The heights are taken from mutableState. A picture is placed at the top of the column (for index == 0).
We launch it, get a screen like this, and rejoice at the result:
This is how a lazy list saved a lot of time for a lazy developer and gave a powerful kicka boost of motivation to learn Jetpack Compose.
Case two. Just a couple of weeks later I was tasked with a “small” screen redesign. It is clear from the layout that a block is planned with a list of services by category. When you scroll, it is fixed at the top, the categories are scrolled through, and when you click on a category, we scroll to the desired position in the list of services:
You can put any @Composable function in stickyHeader, which means the approach from the first case will work here too. The list will look like:
First we place the elements that will be hidden under the toolbar, then the stickyHeader, then everything else.
Case three. Button. In this case, it was necessary to develop an ad screen. When creating the layout, the designers were inspired by Avito, in particular the behavior of the “write to the author of the ad” button:
Long screen with scrolling. The Write button has its own place on this screen. But if the user has not reached this point, then the button should be visible on top of the content.
My first thought was to look in the documentation for stickyFooter, since it's like stickyHeader, but at the bottom. But, unfortunately, Google developers did not consider such an element necessary. And then I had a crazy idea.
What happens if you set the LazyColumn parameter reverseLayout = true? Will stickyHeader stick to the bottom of the screen? As it turned out, it will. It's just a matter of little things: we turn the order in the list backwards and get the desired screen view:
If you're not already using Compose in your projects, it's definitely worth considering getting started, as it makes complex things simple and, most importantly, saves time (and stress).
I want to hope that my experience will be useful and will help other developers in creating custom screens. And don't be afraid to learn something new. Perhaps someday this new thing will make your life a little easier.
The article was prepared by Ilya Kubyshkin, Android developer at e-legion


")