Install Kali Linux with a graphical interface on a virtual server
TL; DR This article describes how to install Kali Linux with a graphical environment on a virtual server with an ISO image via VNC. Such a system can be used as a full desktop.
Most hosters provide only console access to virtual servers and a limited selection of operating system images. But what if you want to install your own OS from your disk, for example, something exotic like Kali Linux? Here you can connect your own ISO-image and install from it any operating system that is supported by the hypervisor.
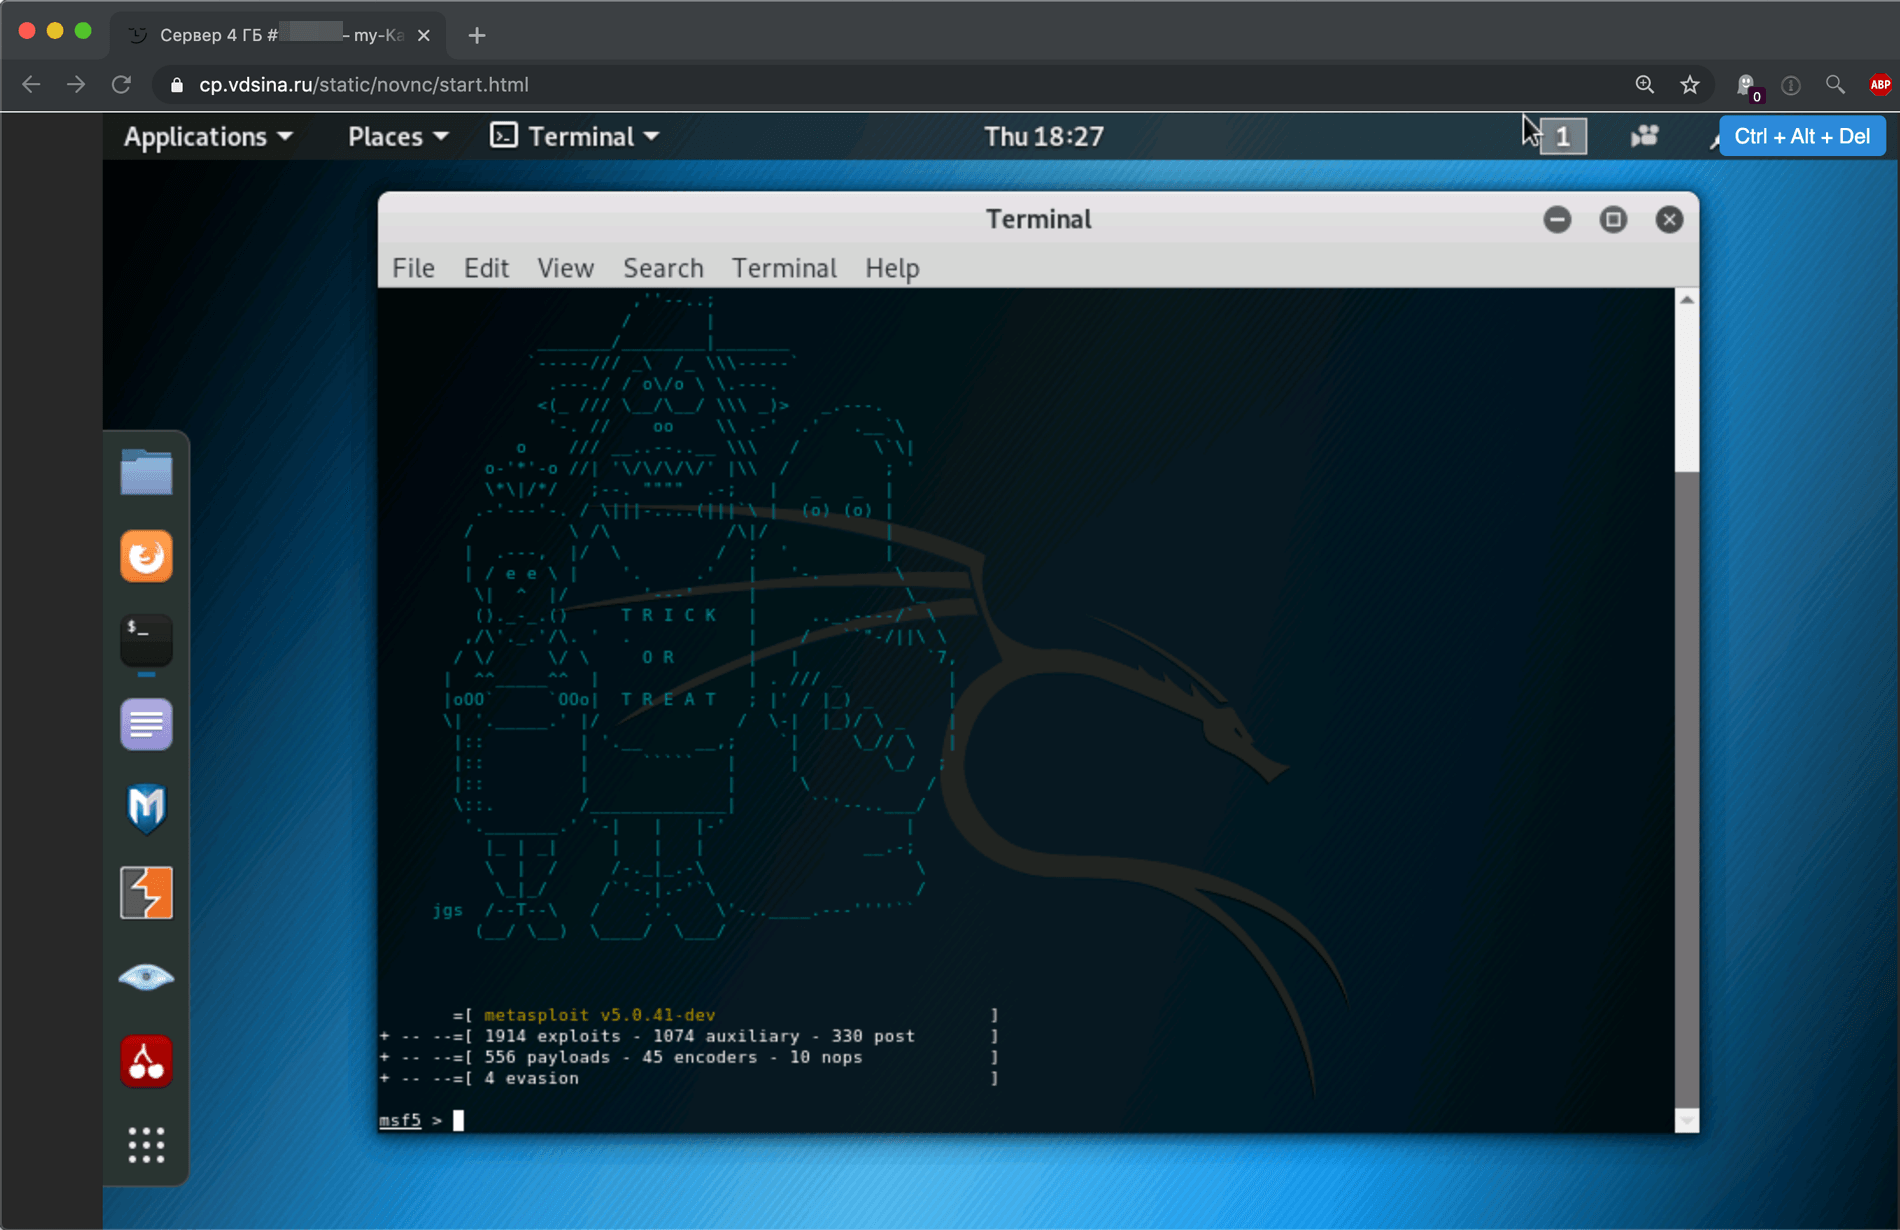
From the moment of installation, the server is managed via VNC in a graphical environment, just like on a desktop virtual machine like VirtualBox or Vmwar. You can use such a server directly in the browser without installing additional programs.
Server creation
The first step is to create a virtual server. Installing the operating system from the ISO image is already on the created server, but you cannot create an empty server. Therefore, when creating the server, we select any OS image, for example, CentOS. This choice does not matter, since we will still format the hard drive.

The graphical environment requires significantly more system resources, so we choose a configuration with 4GB of RAM for comfortable work. I can say that with 2GB it also works tolerably, but heavy programs like Burp Suite in Java eat up all the memory. To ensure that there are enough resources, we have prepared a bonus for you – 1000 rubles with a balance replenishment of 3000 rubles. To activate it, follow this link to register and replenish.

You do not need to add SSH keys, since we will still format the disk and all settings of the pre-installed system will be deleted.
We are waiting for the installation of the server to complete, it usually takes less than a minute. If you leave the tab open at the time of creating the server, you will hear a sound notification that the server has been created. You will also receive an e-mail with the details for SSH access to the server. We will not need these details, since we will set a password at the stage of installing a new system.

Upon completion of the server, its status will change to Active
Connect an ISO image
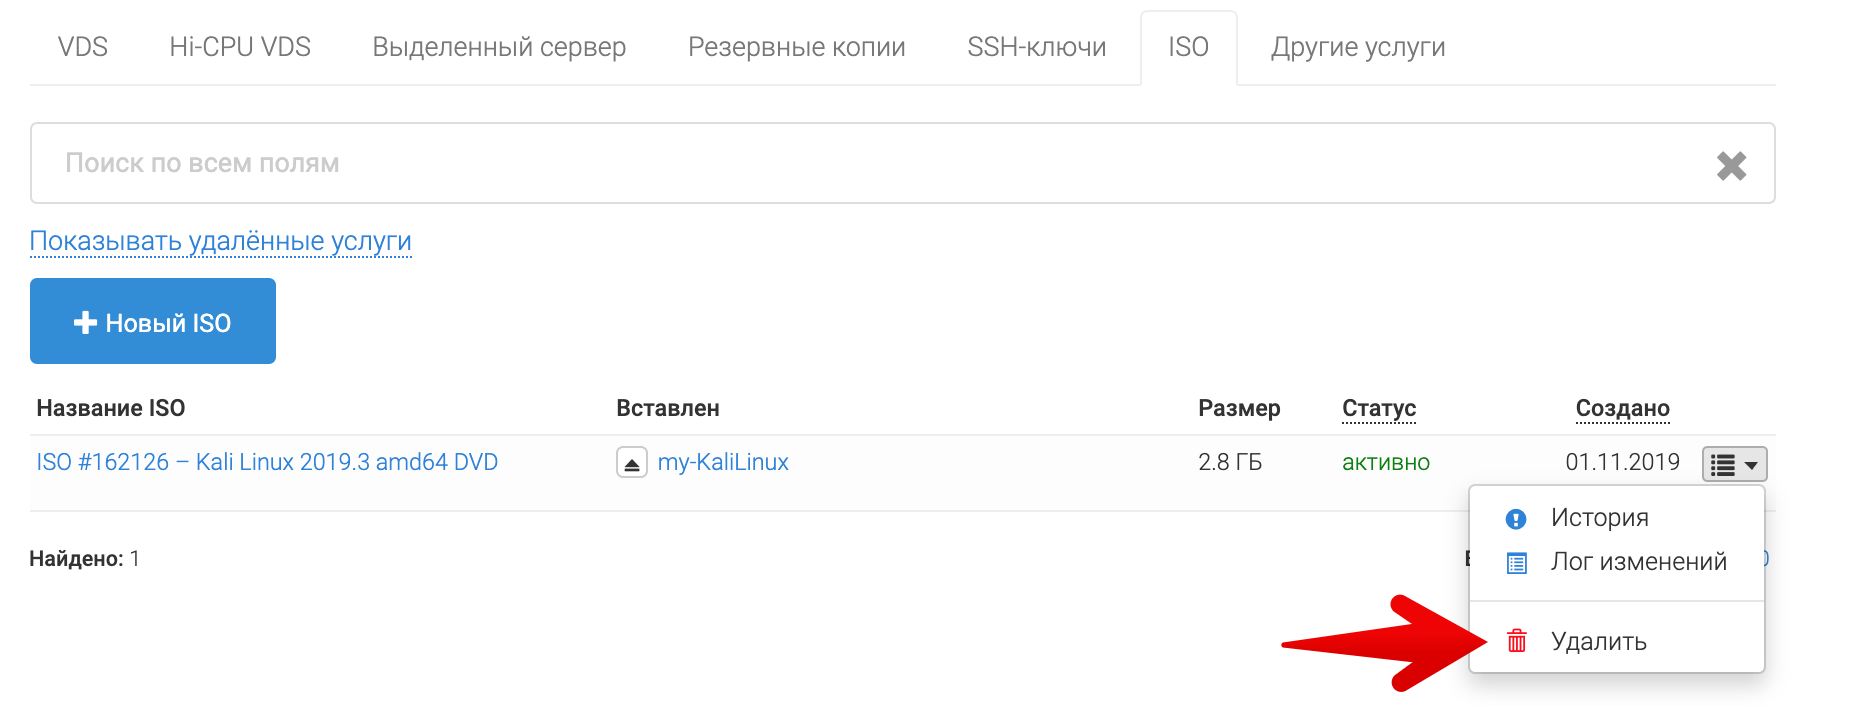
Now that the server is created, we can connect the ISO image with Kali Linux. To do this, you first need to mount it in the control panel, so the connected ISO-image will be available for connection to all created servers. The service for connecting an ISO image costs 1 ruble per day. We will need it only during the installation, after which it can be removed.
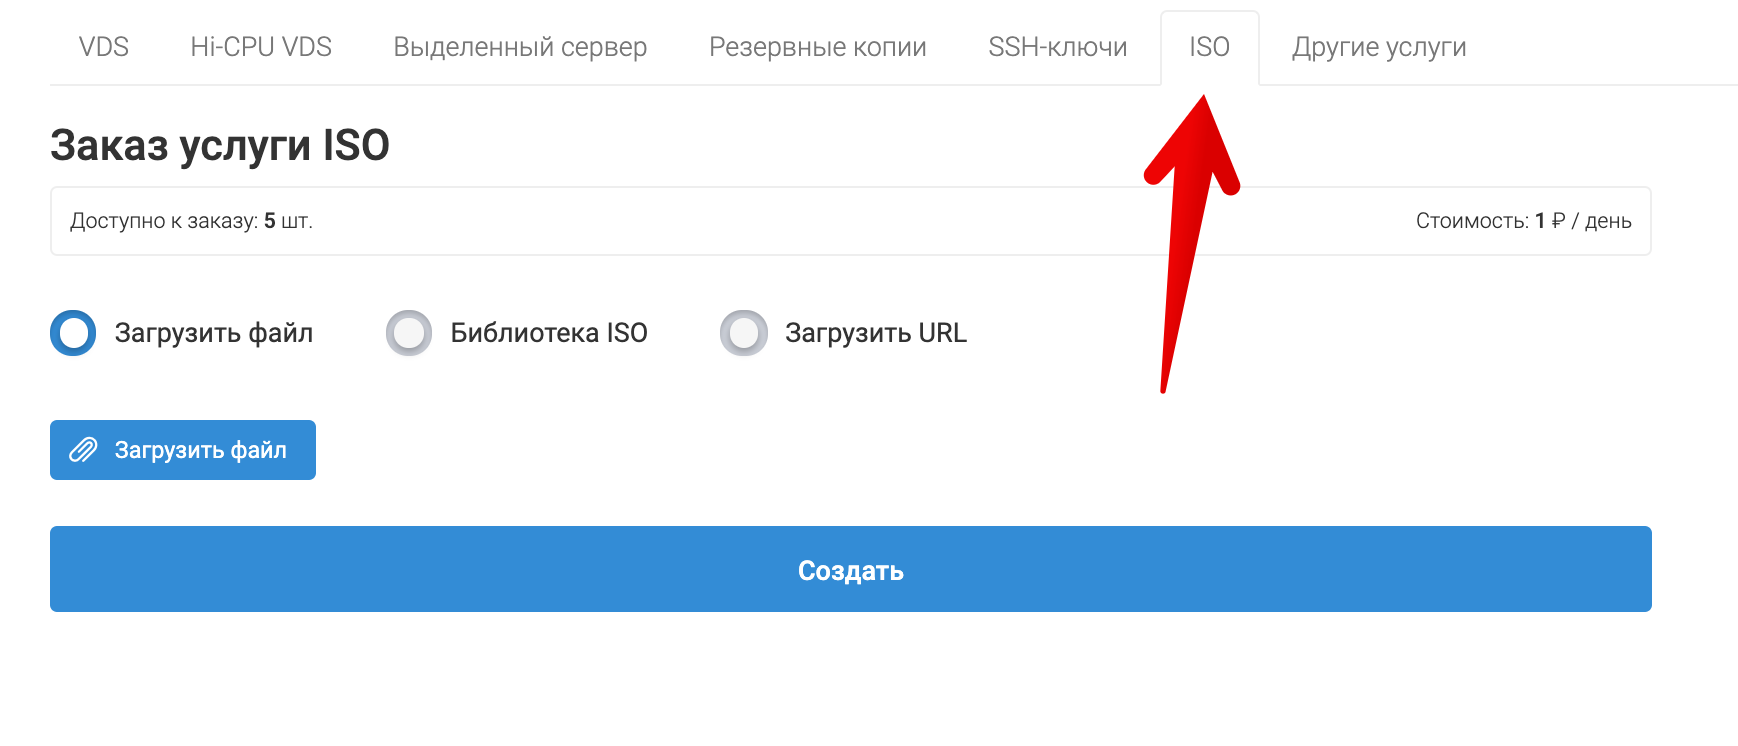
Here you can download ISO from a computer, select from our library or specify a link to a file with an image that will be automatically downloaded. We do not need to download anything, since the library already has an image with Kali Linux. We do not pay attention to the version, since Kali Linux is released according to the “Rolling release” model, it does not have certain major versions, and can always be updated to the current state by simply launching apt ugprade.

Mounting the image will take no more than a minute, after which its status will change to “active”. Now it can be connected to existing servers. To do this, go to the server properties and click the "Connect ISO" button. After connecting the ISO, the system will reboot and the system will boot from the image.
VNC Access
At this stage, the system is loaded from an ISO image and does not have Internet access. The only way to manage the server is to connect to the virtual screen via VNC. Our control panel has a built-in browser VNC client, which is launched at the click of a button. No passwords are required.

If you wish, you can use your VNC client, for example Realvnc. Details for connection can be viewed by clicking on the password disclosure icon. It is important to remember that the address of the VNC server is different from the IP address of your server.

Kali Linux boot disk menu available via VNC
We will not describe all the stages of installing Kali Linux, since they come down to simply clicking Next -> Next -> Next -> Finish. Let us dwell only on non-obvious points.
Manual network setup
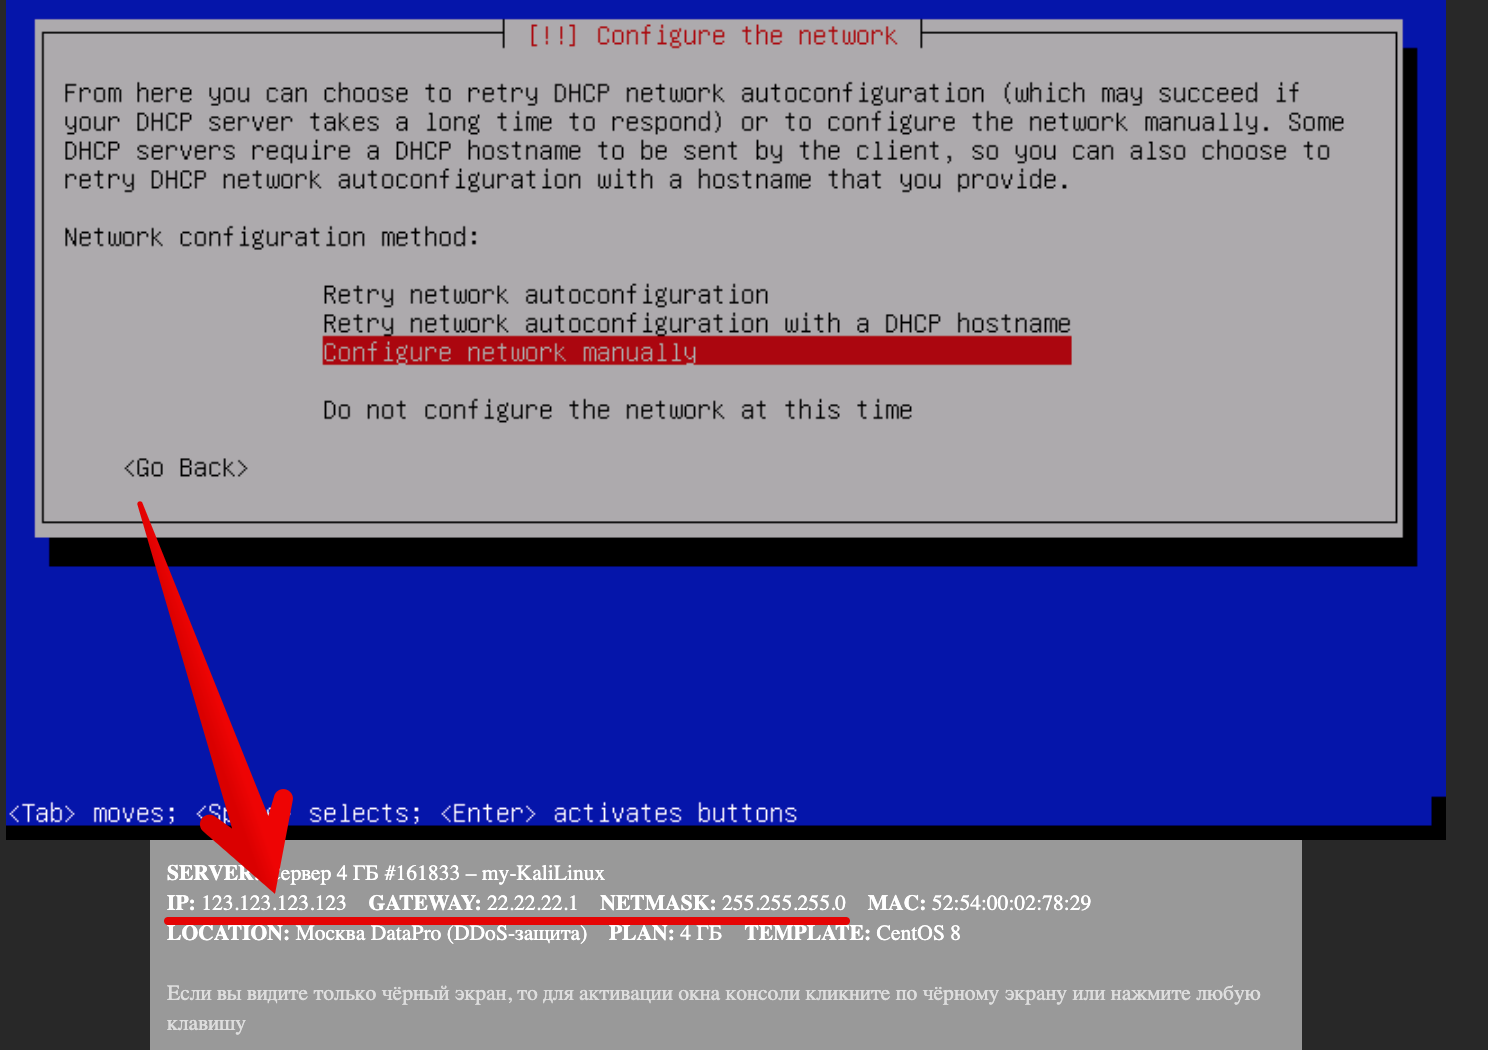
The virtual server will not receive the IP address automatically, since there is no DHCP server on the network, so you will need to enter it manually. At the DHCP discovery stage, you can click Cancel to save time.

Skip automatic network configuration
Select the manual configuration and enter the IP address, gateway and network mask. All necessary settings for a specific server are immediately indicated at the bottom of the VNC client page.
Partitioning the bootloader
At the disk partitioning stage, just select the default item. Thus, the installation wizard will take the entire disk, format it and create partitions automatically. In our case, there is no need to use complex disk layout and create separate partitions.
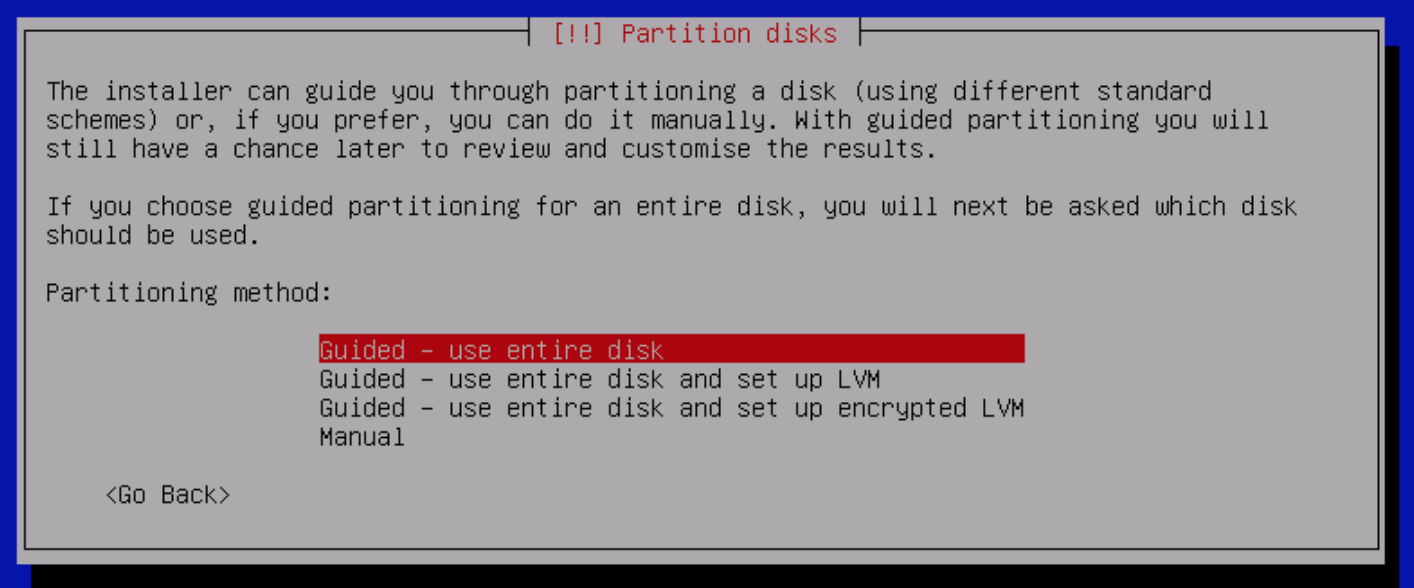
We use the entire disk in automatic mode
We proceed similarly with the question about the GRUB bootloader – select the default item.
Installation complete
After the installation is complete, the system will automatically reboot and we will again be taken to the boot menu of the ISO image. To download the installed system from the hard drive, you need to extract the ISO from the server. After which the server will automatically reboot and we will get into the installed Kali Linux.

In order not to pay for the mounted ISO-image, you can remove it from the control panel. We don't need him anymore.
Conclusion
Done! Now we have the Kali Linux distribution, which is always on and available. No need to load the main computer with virtual machines and suffer if you need to reboot.
This is especially convenient when you need to run some resource-intensive program like a scanner, and leave it to run for several days.
Recall that VNC is not the only way to manage the server. On it, you can also activate SSH, which is turned off by default, or use other remote desktop programs, such as TeamViewer.

Subscribe to our Instagram developer