How a Disk Autopsy Reveals Hidden Artifacts

This room provides a quick overview of the key features of Autopsy, a digital forensics tool. The virtual machine on which Autopsy is installed already contains pre-scanned files and running input modules, which allows us to start analyzing and answering some questions.
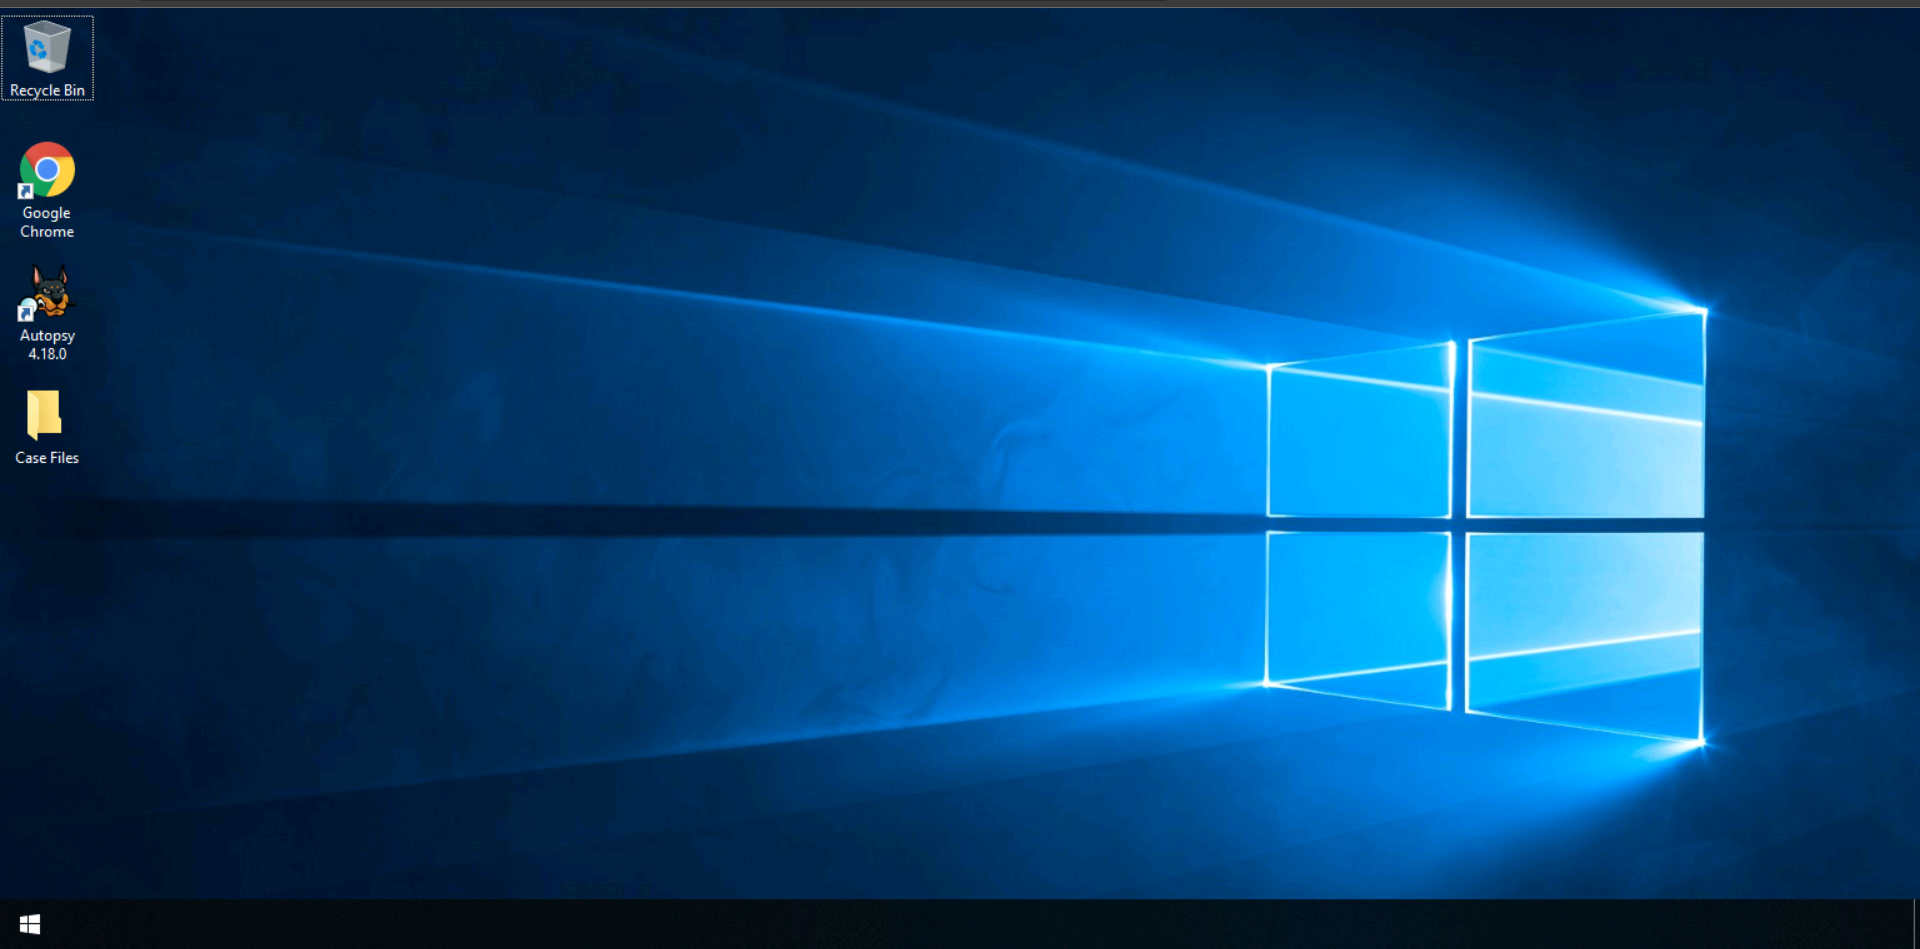
The first step is to start the virtual machine. After launch, we see the Windows desktop with the Autopsy tool installed and the “Case Files” folder. Having opened Autopsy, we wait for it to load before starting work.
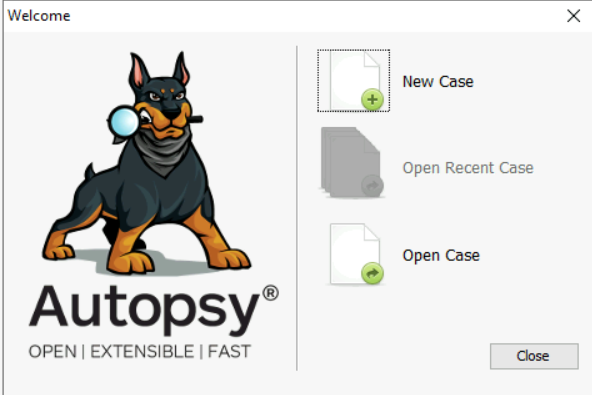
Now we have a window open with various action options: “Create a new case”, “Open a recent case” and “Open a case”. For this situation, where we already have a folder with recently scanned disks, we choose the third option.
We are looking for files with the extension “.aut”, which are database files for analysis. In this case, we find the file “Tryhackme.aut”, which is located in the “Case Files” folder on the desktop.

Next, we will be asked to specify the path to the file “HASAN2.EO1”, as indicated in the room description. We simply confirm this by clicking “Yes” in the pop-up window and select the disk image from the same folder as before.


After selecting the Autopsy drive, its interface opens.
In this section I will describe how I answered all the questions in this room.
#1) What is the MD5 hash of the E01 image?
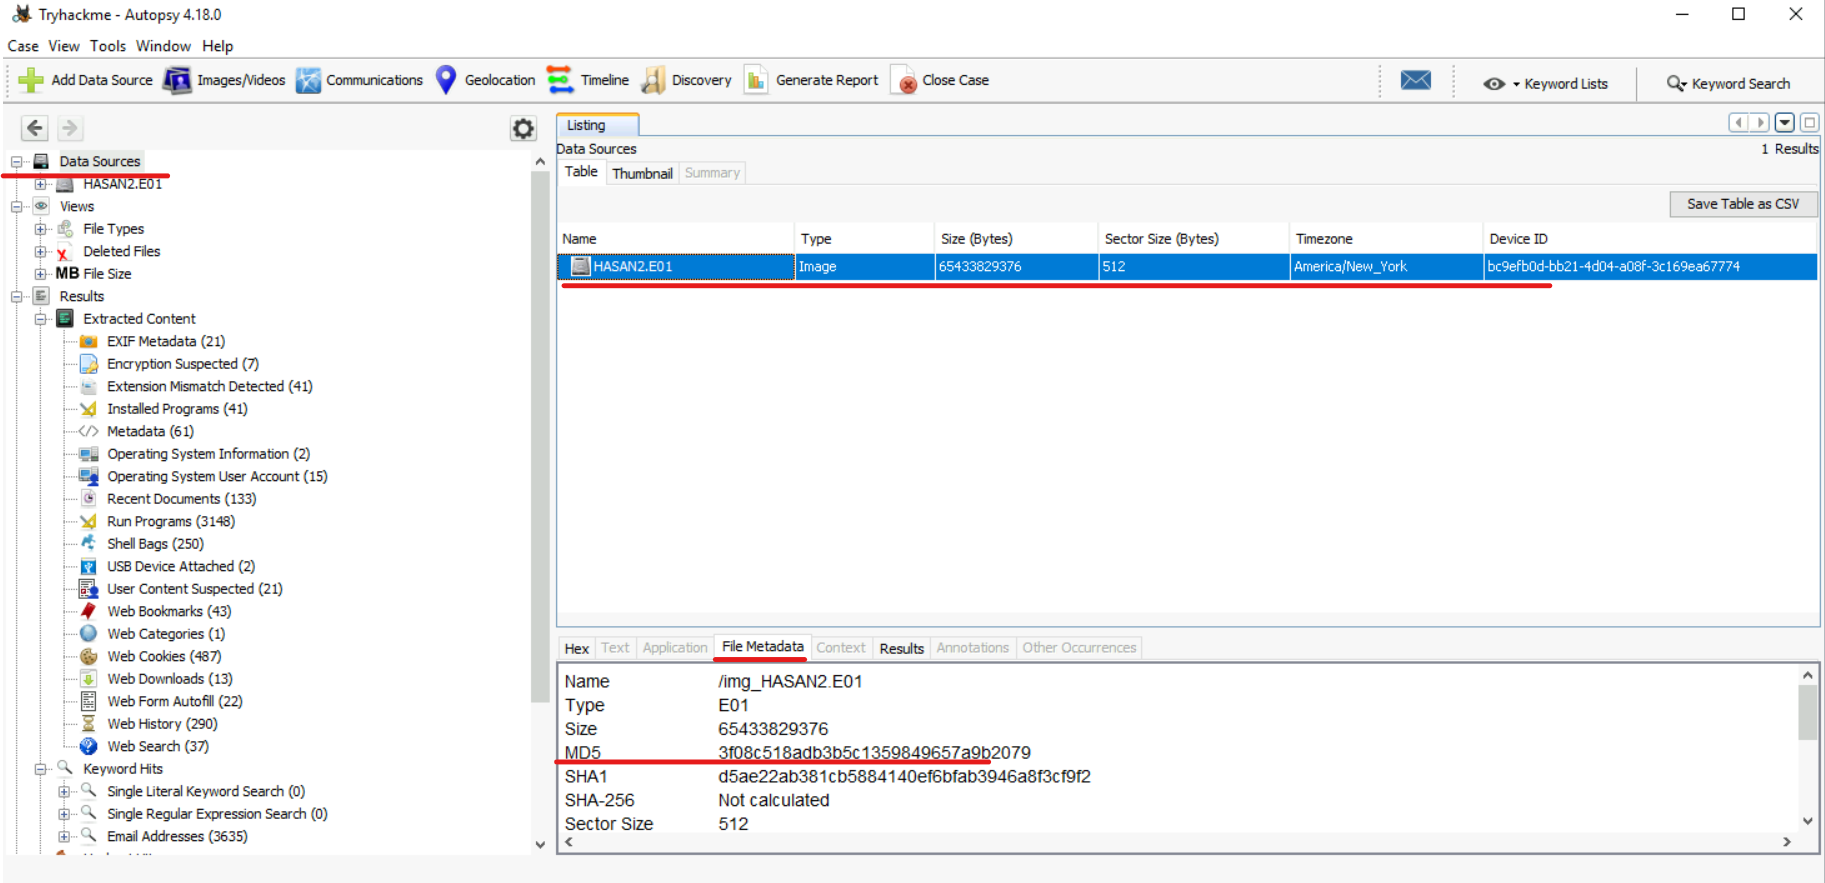
We can get it by selecting the image in the “Data Sources” section, then selecting our “HASAN2.E01” image and going to the “File Metadata” section. Here we can see some information about the image, including the MD5 hash:
#2) What is the computer account name?
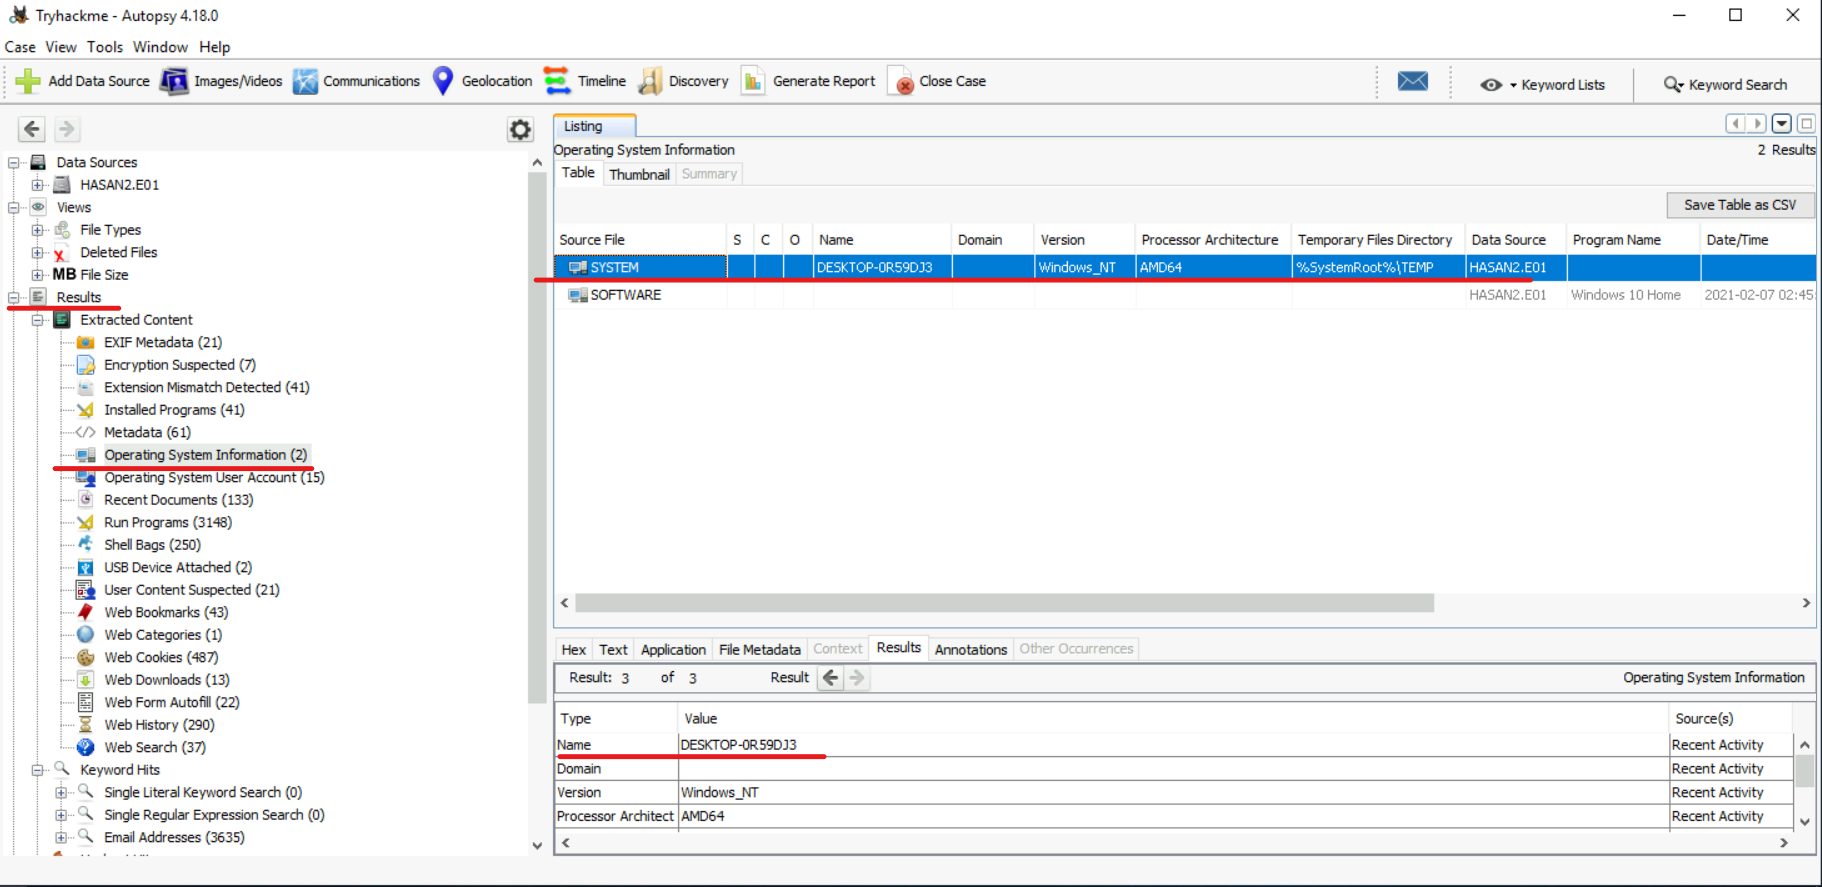
The “Results” section contains “Operating System Information”, where we find two files. In the “SYSTEM” file we can find the name we are looking for: “DESKTOP-0R59DJ3”
#3) List all user accounts. (In alphabet order).
Since we are interested in the user account, it is worth referring to the section “Operating System User Accounts / Operating System User Accounts“. Here we can access all system accounts. We then need to select only those accounts that are associated with the source “SAM” file corresponding to the user accounts and exclude the default system accounts. Additionally, we can sort the user names in in alphabetical order. (H4S4N,joshwa,keshav,sandhya,shreya,sivapriya,srini,suba)

#4) Who was the last user to log into the computer?
In the same section, you can determine the last user logged in by sorting users by the Date Accessed field. (sivapriya)

#5) What IP address did the computer have?
#6) What MAC address did the computer have? (XX-XX-XX-XX-XX-XX-XX-XX)
Both questions can be considered in one file. While searching for IP and MAC addresses, I discovered that the “irunin.ini” file may contain this information, but only if a monitoring tool called “Look@LAN” is installed on the computer. I checked for this tool among the program files and found that it can be found in the following path: Vol3 (NTFS/ exFAT (0x07): 104448-126759028) > Program Files (x86) > Look@LAN > irunin.ini
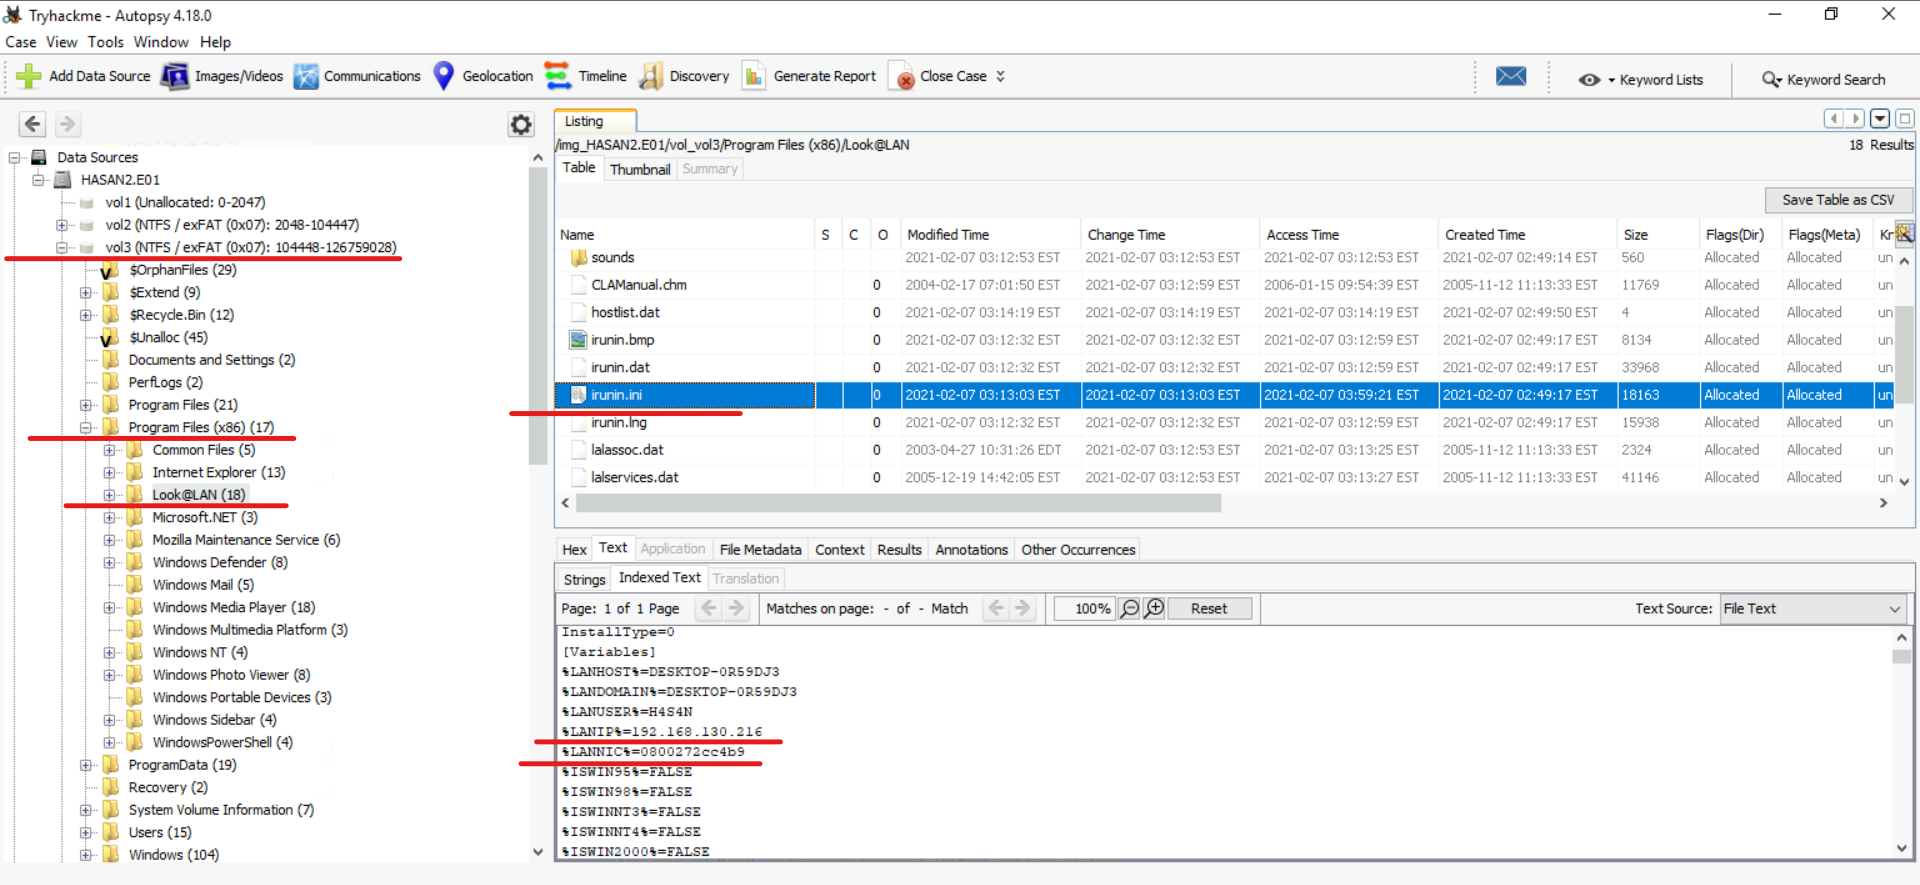
The following data was found in the “irunin.ini” file:
IP address: 192.168.130.216
MAC address: 08-00-27-2c-c4-b9
No. 7) What is the name of the network card on this computer?
Registry hives – Win32 applications | Microsoft Learn
Every time a new user logs in, a new hive is created for him with a separate file for the user profile. This is called a user profile hive. The user hive contains specific registry information related to the user's application, desktop, environment, network connections, and printer settings. User profile hives are located in the HKEY_USERS section.
This means that we can find information about network adapters there, namely in the “SOFTWARE” branch for Windows settings and its hardware. It can be found in the following path: Vol3 (NTFS/ exFAT (0x07): 104448-126759028) > Windows > System32 > config

Next, follow the path: SOFTWARE > Microsoft > Windows NT > CurrentVersion > NetworkCards

Network card: Intel(R) PRO/1000 MT Desktop Adapter.
#8) What is the name of the network monitoring tool?
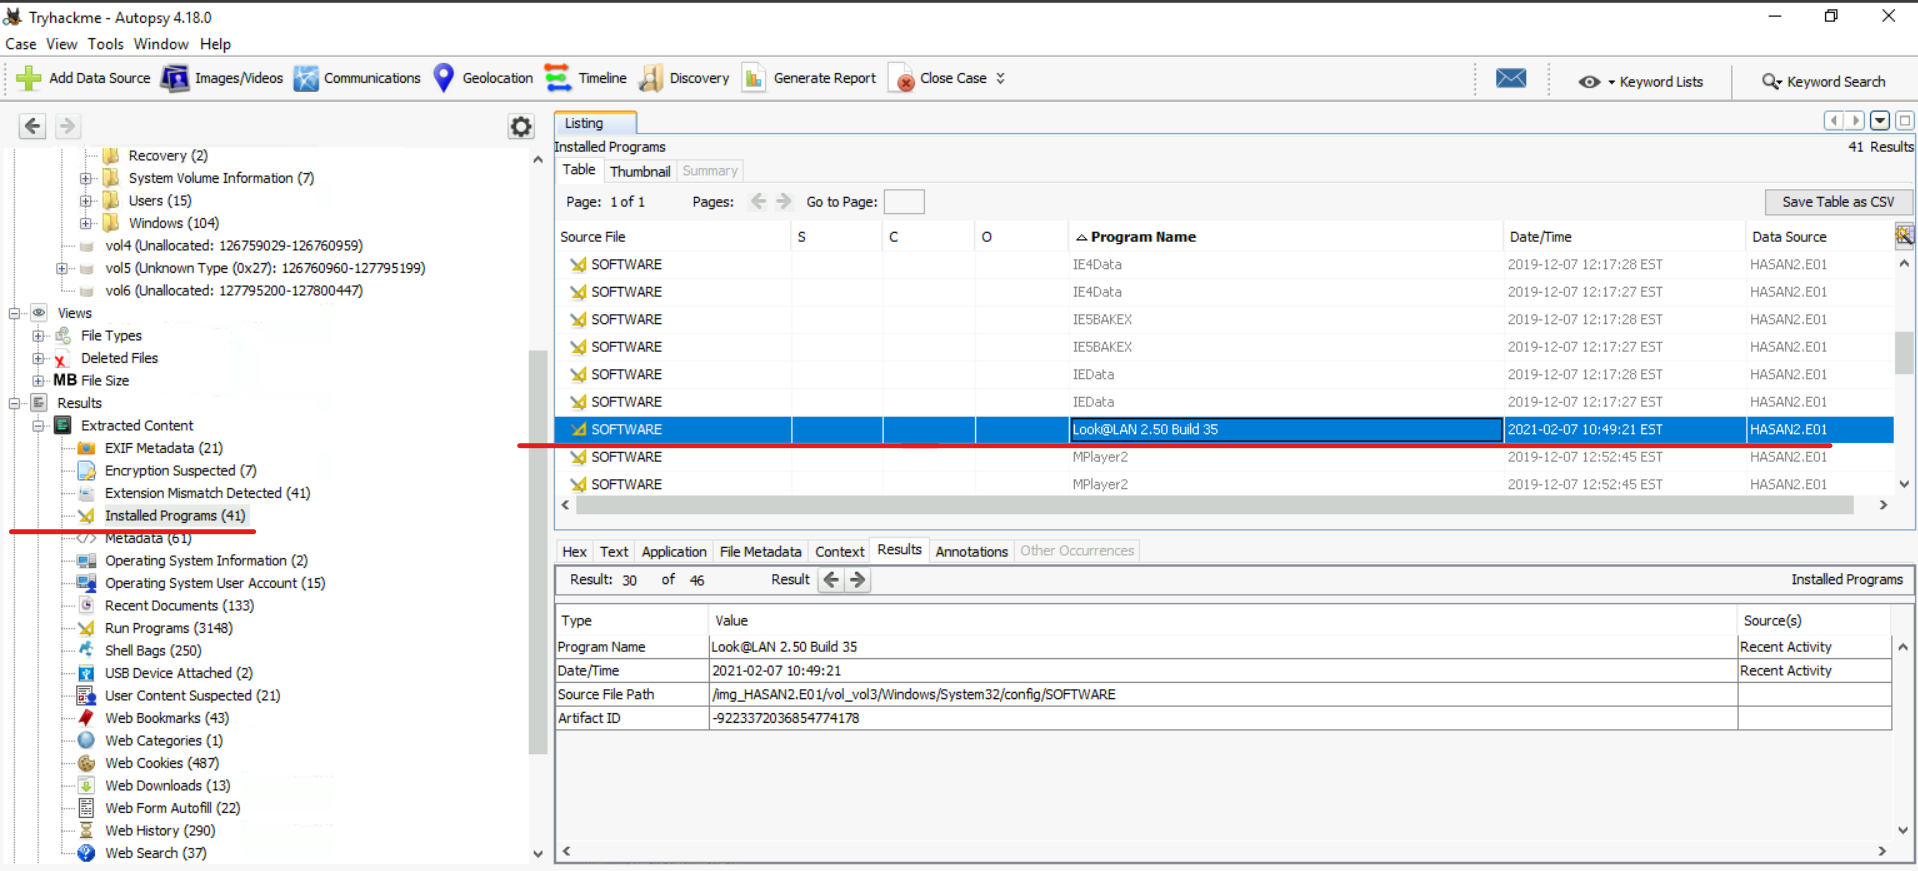
This question is quite simple. If we consider the issue of IP and MAC addresses, then the tool that will help us find them is a monitoring tool. We can check its presence in the “Installed Programs” section: Monitoring tool: Look@LAN
#9) The user bookmarked a location in Google Maps. What are the coordinates of this place?
This question is a little simpler. We just need to open the “Web Bookmarks” section and find the Google URL.

No. 10) The user has his full name printed on his desktop wallpaper. What is the user's full name?
Then we open the “Images/Videos” section and look for the “User” directory to view all the photos.

We find there such a photograph on which it is written (Anto Joshwa).


Full username: Anto Joshwa
#11) The user had a file on his desktop. It had a flag, but she changed it using PowerShell. What was the first flag?
Similar to the previous question, we need to check the PowerShell command history for all users.
(Username) > AppData > Roaming > Microsoft > Windows > PowerShell > PSReadLine > ConsoleHost_History.txt

#12) The same user found an exploit to escalate privileges on a computer. What message was sent to the device owner?
We may notice that there is a file on the desktop called “exploit.ps1” which is suspicious.

The script in file “exploit.ps1” checks whether the current user belongs to the Administrators group in Windows using the Security Identifier (SID) “S-1-5-32-544”. If the current user is an administrator, the script will create a file called “hacked.txt” on user H4S4N's desktop and add the string 'Flag{I-hacked-you}' to it.
So the message is: Flag{I-hacked-you}.
No. 13) 2 hacking tools aimed at cracking passwords were found in the system. What are these instruments called? (In alphabet order)
This task turned out to be more difficult than I expected. It took me a while to figure out that one of the ways the system detects hacking tools is through the antivirus/Windows Defender response.
In this case, the solution was found in the Windows Defender history located at /ProgramData/Microsoft/Windows Defender/Scans/History/Service/DetectionHistory/
Two instruments – Lazagne and Mimikatz.


LaZagne is an open source software designed to extract passwords from various applications on your local computer.
Mimikatz is a more advanced tool that is used to identify vulnerabilities in Windows security systems.
No. 14) There is a YARA file on the computer. Inspect the file. What is the author's name?
We also know that YARA files have a “.yar” extension, so we can search for them in the “Find files by attributes” function:


#15) One of the users wanted to exploit a domain controller using an MS-NRPC based exploit. What is the name of the archive file you found? (include spaces in your answer)
After searching for “MS-NRPC exploit”, information about “zerologon” was found. Additionally, “Search files by attributes” was used, which resulted in the discovery of two files, one of which contained the following line: “C:\Users\sandhya\Downloads\2.2.0 20200918 Zerologon encrypted.zip”. So the answer to the question is: “2.2.0 20200918 Zerologon encrypted.zip”.

Link to assignment: TryHackMe | Disk Analysis & Autopsy

