Filamento-perfectionism or how to make a stand with plastic samples for 3D printing
When developing prototypes, I often use extrusion 3D printing, whether it is a circuit board case, doll furniture or a miniature traffic light. At first I printed all PLA in black, white or gray. But gradually more interesting tasks began to come across, where it was necessary to highlight something with color or use, for example, transparent plastic. And sometimes one part of the prototype was required to be solid, and the second elastic.
Gradually acquired a whole collection of various coils. But the more they became, the more difficult it was to navigate them. Then the idea came to make a visual catalog out of them.

plastic samples
Anyone who prints a lot knows that the settings for working with plastic from one manufacturer may differ from those for the same plastic from another manufacturer. And even plastic of the same manufacturer, but of a different color, can also vary slightly.
For a catalog, just biting off a piece from each reel is not enough, because then it will not be possible to evaluate either the transparency of the plastic or its physical properties after printing. I decided to print the same parts from each sample.

I assigned a serial number to each plastic, put it on the sample itself and entered it in the table. And on each box of plastic put the same numbers.

Sample stand
For convenience, I printed a box with seats for each sample and got such a stand. Purely out of personal love for circles and the presence of a round table, the printer chose this form.

As a result, now the process looks like this:
I choose a suitable plastic from the catalog and look at its number on the inside of the sample.
I find a coil with the same number and load it into the printer
I load the settings for plastic with the same number.
All. The result becomes more predictable and, most importantly, it saves time.
Visual comparison of plastic samples
Transparency score
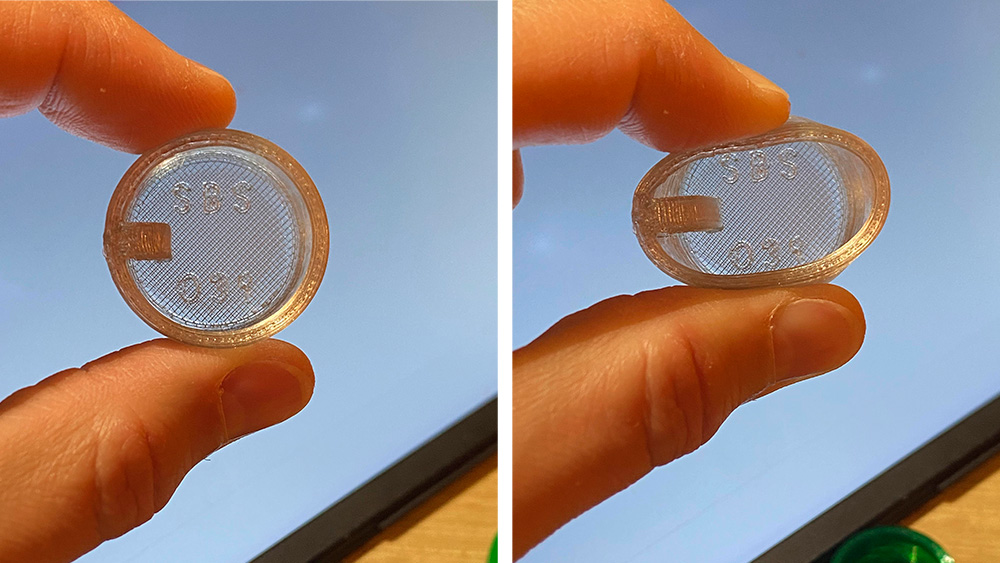
If you shine a light on the sample from the back side or lay them all out on a luminous panel, you can quickly assess how much color the plastic lets through and how transparent it is.

Now I have two such stands, since all the samples no longer fit on one. I want to make a wall mount with LEDs and hang a stand on it for a quick assessment of the plastic in the light. To do this, I already made holes for the LEDs in the existing stand. And in the center there is a large hole for fixing.

Elasticity
To evaluate the elasticity of each sample, it would be best to print plates from them and then bend them. In my case, only a large difference in elasticity between the samples can be assessed. For example, you will not see the difference between PLA and ABS here.
Texture
It is quite clearly possible to evaluate the smoothness, gloss and appearance after printing. And compare samples with each other. For example, a case printed in white hides many irregularities, while a bright color, on the contrary, will emphasize them.

When a new plastic arrives that I didn’t have yet, I immediately print a sample from it and add it to the catalog. Yes, it took some time at first, but if 3D printing is a daily routine for you, then this seems like a very reasonable move.

Models for printing
Models for 3D printing download in STL format I have on the site.

If you have any ideas how and what to improve, please in the comments.