Computer vision lessons in Python + OpenCV from the very beginning. Part 9. My pet project
· Intermediate filtration.
Identification of special features (features)
· High-level analysis.
Of course, this is not a definitive list of processing steps. In the future, something may be added here, as well as some stages may have sub-stages.
Naturally, making a conveyor for the sake of the conveyor itself is somehow pointless. It is necessary that my program does at least something conditionally useful. At first I wanted to write a pet project that would analyze photos from satellites and UAVs and turn them into a graph (this is in line with the topic of my master’s thesis). True, this is too ambitious an idea for a pet project. We need something easier. In the comments to one of the lessons, I was advised to add a couple of chapters in the final about selecting individual characters and recognizing them using publicly available neurons. And so I thought, maybe start a pet project with this particular task? Text recognition? It’s much easier.
So, for starters, I created an empty project and added two folders there: Exec and Libraries. In the first one, I will have a executable file / files, in the second, all sorts of library files. I created Core.py as the first library file:
class Engine:
    """"Движок"""
    pass

class ImageProcessingStep:
    """Шаг обработки изображений"""
    pass

class ImageInfo:
    """Содержимое картинки, включая результаты обработки"""
    pass
It may not be a good idea to put these in Core.py, but it’s not clear yet what the final structure will be, and then I’ll just do the refactoring.
So let’s start programming:
class Engine:
    """"Движок"""

    def __init__(self):
        """Конструктор"""

        self.steps=[]

    def process(self, image):
        """Выполнить обработку.
        image - изображение"""

        current_info=ImageInfo(image)
        for step in self.steps:
            current_info=step.process(current_info)
        return current_info
From this code snippet, you can see that you need to create a constructor for the ImageInfo class, and the ImageProcessingStep class needs to provide a process method. And, of course, ImageProcessingStep must be an abstract class, and each concrete class will implement the methods. It is worth noting that in Python there are no abstract classes as such (unlike C #), they are emulated using decorators. But I will not do this, since the use of decorators leads to excessive consumption of processor time. I’ll just pretend that if “no” means “no”.
I will make an abstract class by adding pseudo-abstract methods marked with pass:
class ImageProcessingStep:
    """Шаг обработки изображений"""

    def process(self,info):
        """Выполнить обработку"""
        pass
Now let’s take a look at the ImageInfo class. In theory, this should also be a pseudo-abstract class, depending on the step, it should contain, in addition to the picture, some additional data. In the meantime, I’m implementing the constructor:
class ImageInfo:
    """Содержимое картинки, включая результаты обработки"""

    def __init__(self,image):
        """Конструктор"""

        self.image=image
Well, now I’ll try to “pull” some simple action onto this scheme, well, for example, filtering. But first, a little refactoring, in particular, we will transfer the ImageProcessingStep class to the file transferred to ImageProcessingSteps.
Let’s create a class responsible for median filtering:
class MedianBlurProcessingStep(ImageProcessingStep):
    """Шаг, отвечающий за предобработку типа Медианная фильтрация"""

    def __init__(self,ksize):
        """Конструктор
        ksize - размер ядра фильтра"""

        self.ksize=ksize

    def process(self,info):
        """Выполнить обработку"""

        median_image = cv2.medianBlur(info.image, self.ksize)
        info.filtered_image=median_image
        return info
Next, create the Exec folder, and in it the run.py file. This is what the folder structure will look like now:

Well, the contents of the run.py file itself:
import cv2

from Libraries.Core import Engine
from Libraries.ImageProcessingSteps import MedianBlurProcessingStep

my_photo = cv2.imread('../Photos/MyPhoto1.jpg')
core=Engine()
core.steps.append(MedianBlurProcessingStep(5))
info=core.process(my_photo)

cv2.imshow('origin', info.image) # выводим исходное изображение в окно
cv2.imshow('res', info.filtered_image) # выводим итоговое изображение в окно

cv2.waitKey()
cv2.destroyAllWindows()
We run the program and see two pictures, one with scratches, the other after median filtering. Yes, this was already in lesson 3, only this time everything is done in accordance with the OOP paradigm. Now it’s time to go further and implement the idea of text recognition. First, let’s try the standard way, through tesseract. First of all, I will tell you how to work with tesseract in general. And so, we put the library:
pip install pytesseract
Let’s go to this link: Home UB-Mannheim/tesseract Wiki (github.com) and download tesseract itself from there. If it suddenly turns out that the link is not relevant (you never know, everything flows, everything changes), then just google it.
After downloading tesseract just install it. In a Python program, you will need to specify the path to the program, something like this it will look like:
import cv2
import pytesseract

pytesseract.pytesseract.tesseract_cmd = "D:\\Program Files\\Tesseract-OCR\\tesseract.exe"

img = cv2.imread('image.jpg')
print(pytesseract.image_to_string(img, lang = 'rus'))
And here is a demonstration of the results of the program along with the original image:
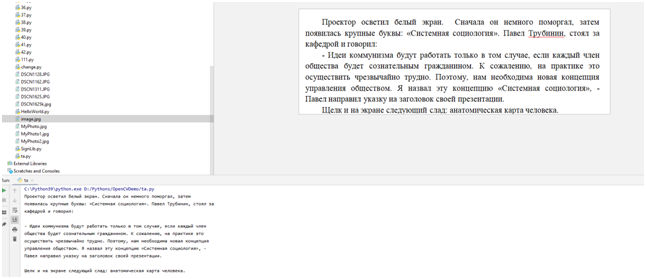
As you can see, the ideal text (Word screenshot) was recognized perfectly. Now it will be necessary to investigate how the library will work on real texts (maybe you don’t need to invent any character recognizer of your own).
Let’s try to recognize the photographed book page:

Here is what we get as output:
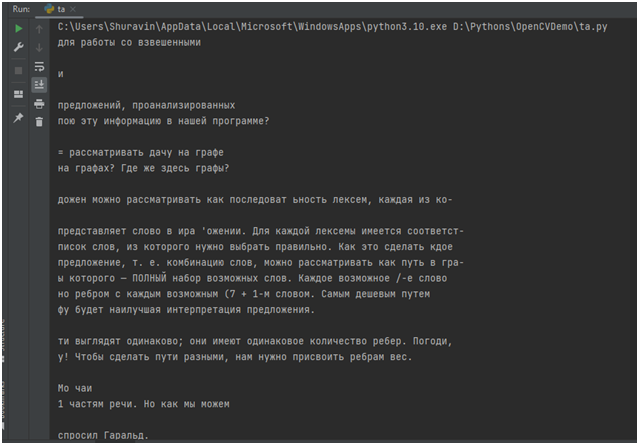
As you can see, somewhere the words were recognized well, somewhere rather crookedly.
And one more, important nuance. The output is solid text. But in reality, it may be necessary to divide the text into some blocks. For example, I once wrote a program that allows you to recognize text in drawings, so that later this drawing can be digitized and entered into a database. In this case, it was necessary to separately find and recognize the stamp of the drawing, separately the inscriptions on the callouts, so that all these inscriptions were entered into the required fields of the database. How was this problem solved in practice? With the help of computer vision algorithms, the image was divided into zones, and these zones were already separately fed to tesseract.
But in my pet project, I will try to recognize license plates. I know, this is generally a button accordion, but, nevertheless, students still write laboratory work on this topic. And even entire term papers. And yes, you have to start somewhere. And the task is quite simple in order to create some kind of basis for a more complex project.
I will probably proceed as follows. I’ll google a ready-made example of license plate recognition, or even several, choose the most successful one, and transfer the code to my OOP template. Go. Found an interesting video:
Since everything flows, everything changes, it may happen that someday you will not find this video. But don’t worry, below are the code snippets from this video.
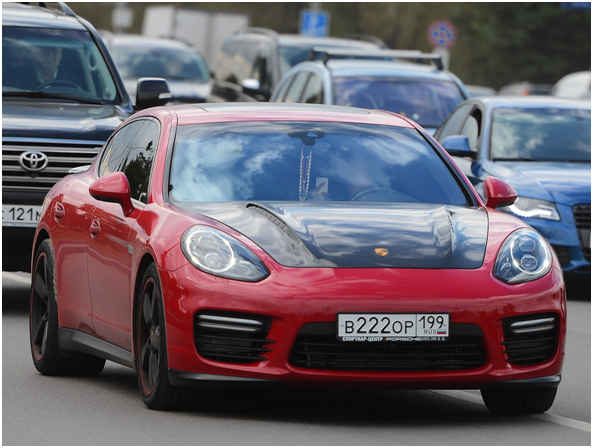
The author tells everything step by step. I’ll give you these steps. First, he suggests converting the text to grayscale and binarizing it:
import cv2

img = cv2.imread('cars/6108249.jpg')
height,width,_=img.shape
gray = cv2.cvtColor(img,cv2.COLOR_BGR2GRAY)
thresh = cv2.threshold(gray,0,255,cv2.THRESH_OTSU)[1]
cv2.imshow('MyPhoto', thresh)
cv2.waitKey(0)

cv2.destroyAllWindows()
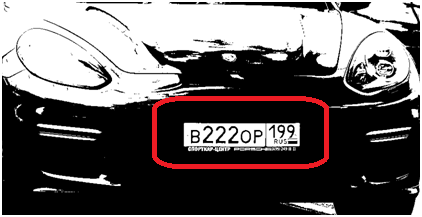
Original Image:
Binarization result:

It is not difficult to predict the next step. I suppose the author will offer to find this white rectangle here:
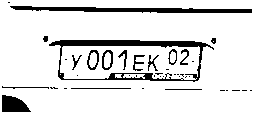
But, before watching the video further, I decided to check if the license plate would also be clearly displayed in other pictures:
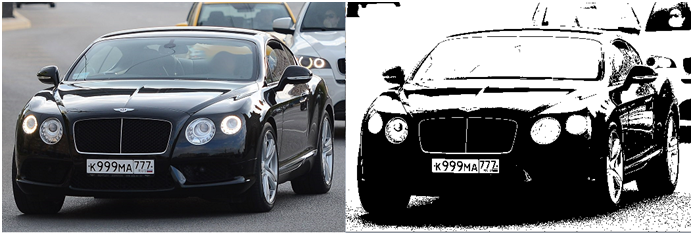

In principle, not bad, although in some places there are interference:
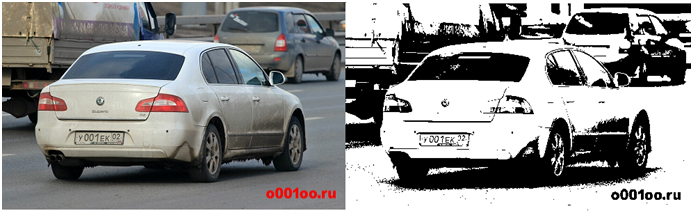
And in the latter case, the license plate is lost on a white background. Although, if you look closely, there is a black outline around it:
So, perhaps the algorithm will find the rectangle, let’s see what the author proposes next, whether my guess is confirmed.
It turned out that the guy suggested simply highlighting the contours, and examining each rectangle of the contour with a sufficiently large area. In general, something like this:
import cv2
from imutils import contours
import pytesseract

pytesseract.pytesseract.tesseract_cmd = "D:\\Program Files\\Tesseract-OCR\\tesseract.exe"

img = cv2.imread('cars/6108249.jpg')
height,width,_=img.shape
gray = cv2.cvtColor(img,cv2.COLOR_BGR2GRAY)
thresh = cv2.threshold(gray,0,255,cv2.THRESH_OTSU)[1]
cnts=cv2.findContours(thresh,cv2.RETR_TREE,cv2.CHAIN_APPROX_SIMPLE)
cnts,_=contours.sort_contours(cnts[0])

for c in cnts:
    area=cv2.contourArea(c)
    x,y,w,h=cv2.boundingRect(c)
    if area>20:
        img_area=img[y:y+h,x:x+h]
        result=pytesseract.image_to_string(img_area,lang="rus+eng")
        if len(result)>3:
            print(result)
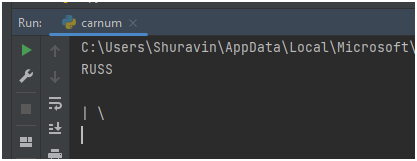
He, however, had slightly different thresholds. And everything worked, he directly showed in the video, everything works. It didn’t work on my photos, so I replaced the thresholds. And got a strange output:
You can add an image viewer to see where tesseract finds these labels:
…
print(result)
cv2.imshow('MyPhoto', img_area)
cv2.waitKey(0)
…
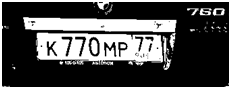
We look at fragments of the picture:


In general, for some reason, tesseract does not want to identify numbers. Does he even understand numbers? Let’s check. Let’s create a picture from numbers in paint:

Feeding tesseract. And we see that the output is empty. Googled this topic. As it turned out, tesseract works with numbers through one place. You can look for some other version, but this is not an option. It is better to write some kind of your own recognizer, for example, using neural networks.
But, even in this case, the question arises, but how to find the location of the license plate? Maybe look for a white rectangle on a binary map, as I suggested at the beginning? In any case, you must first insert developments into an already written OOP container in order to analyze and explore later.
And then I realized that this is the code:
def process(self, image):
    """Выполнить обработку.
    image - изображение"""

    current_info=ImageInfo(image)
    for step in self.steps:
        current_info=step.process(current_info)
    return current_info

...
...

def process(self,info):
    """Выполнить обработку"""

    median_image = cv2.medianBlur(info.image, self.ksize)
    info.filtered_image=median_image
    return info
It is a bad idea. Why? Let’s say I decided to binarize an image. I can binarize the original image, or after filtering. But after filtering, it is not called image, but filtered_image. And the question is, how can you know at the binarization step whether you need to process image or filtered_image? Therefore, they must be named the same. But the processing history must be saved somewhere in order to then restore the processing chain and analyze how the entire system works.
First, let’s fix the process method of the Engine class:
def process(self, image):
    """Выполнить обработку.
    image - изображение"""

    current_info=ImageInfo(image)
    history=[]
    for step in self.steps:
        history.append(current_info)
        current_info=step.process(current_info)
    return current_info, history
Then file: ImageProcessingSteps.py
import cv2
from Libraries.Core import ImageInfo


class ImageProcessingStep:
    """Шаг обработки изображений"""

    def process(self,info):
        """Выполнить обработку"""
        pass

class MedianBlurProcessingStep(ImageProcessingStep):
    """Шаг, отвечающий за предобработку типа Медианная фильтрация"""

    def __init__(self,ksize):
        """Конструктор
        ksize - размер ядра фильтра"""

        self.ksize=ksize

    def process(self,info):
        """Выполнить обработку"""

        median_image = cv2.medianBlur(info.image, self.ksize)
        return ImageInfo(median_image)
Well, finally run.py:
import cv2

from Libraries.Core import Engine
from Libraries.ImageProcessingSteps import MedianBlurProcessingStep

my_photo = cv2.imread('../Photos/MyPhoto1.jpg')
core=Engine()
core.steps.append(MedianBlurProcessingStep(5))
res,history=core.process(my_photo)

i=1
for info in history:
    cv2.imshow('image'+str(i), info.image) # выводим изображение в окно
    i=i+1
cv2.imshow('res', res.image)


cv2.waitKey()
cv2.destroyAllWindows()
Now it is possible to show the entire chain of images, and now we will test this on the example of processing an image of a car. First, a class for computing a binary map:
class ThresholdProcessingStep(ImageProcessingStep):
    """Шаг, отвечающий за бинаризацию"""

    def process(self,info):
        """Выполнить обработку"""

        gray = cv2.cvtColor(info.image, cv2.COLOR_BGR2GRAY)
        image = cv2.threshold(gray, 0, 255, cv2.THRESH_OTSU)[1]
        return ImageInfo(image)
And the new executable file run1.py:
import cv2

from Libraries.Core import Engine
from Libraries.ImageProcessingSteps import MedianBlurProcessingStep, ThresholdProcessingStep

my_photo = cv2.imread('../Photos/car.jpg')
core=Engine()
core.steps.append(MedianBlurProcessingStep(5))
core.steps.append(ThresholdProcessingStep())
res,history=core.process(my_photo)

i=1
for info in history:
    cv2.imshow('image'+str(i), info.image) # выводим изображение в окно
    i=i+1
cv2.imshow('res', res.image)

cv2.waitKey()
cv2.destroyAllWindows()
At startup, we will see this picture:
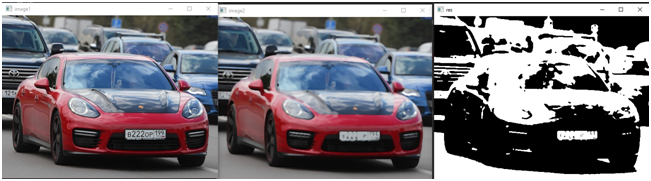
The code for this example can be taken from here: https://github.com/megabax/CVContainer
And now let’s summarize: We have created an OOP container for image processing, in future lessons we will attach a number finder and a digit recognizer on neural networks to it.