What is a Quad Bayer filter in cameras and does it really work?
Summer 2018 Sony presented the IMX586 sensor is 48 megapixels, while the norm for smartphones back then was 12 or 16. In this post, we’ll figure out whether the Quad Bayer filter technology used in it really works, or is it just a marketing ploy.
How cameras see color
Most image sensors do not receive color information directly – they record information about the intensity of the light that caught the pixel on the sensor. Since the pixels have color filters in front of them, we can tell that that pixel caught light of a certain color.
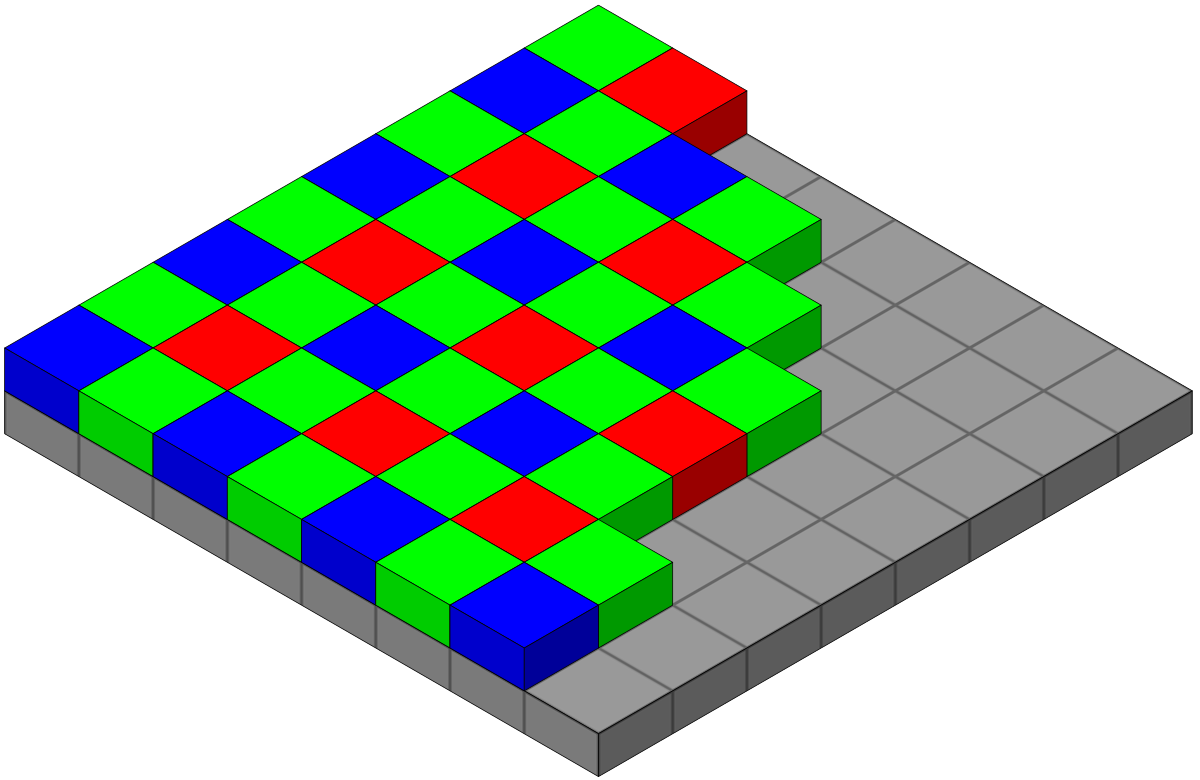
But the pixels on the camera sensor do not have subpixels, like on a monitor – each pixel catches only light of one color – either red, green, or blue, and the values of the other two colors are restored at the expense of neighboring pixels (this process is called demosaicing). This structure helps, firstly, to avoid parallax, which would be present when using subpixels, and, secondly, to obtain a sufficiently high light sensitivity with an acceptable level of detail. The most popular filter arrangement is the Bayer filter, proposed back in 1974. If you take a group of 4 pixels (2×2) in this arrangement, then two of them diagonally will be green, one red and one blue. Copying such a group many times throughout the image sensor allows the camera to see color.
What is Quad Bayer
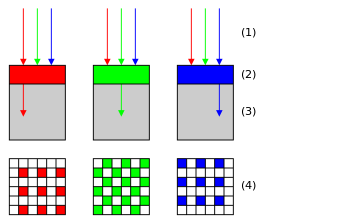
Quad Bayer filter is a modification of the conventional Bayer filter, patented in 2014where in place of one pixel of each color there are 4 (2×2) of the same color, that is, like this:

This makes it easy to turn the signals from those 4 pixels and combine them into one (this is called pixel binning), thereby creating a regular Bayer filter, which can then be processed in the usual way.
At the same time, there is also a full resolution mode, where the sensor uses all the pixels individually to produce a high-resolution image – you can even turn the image into a regular high-resolution Bayer filter using remosaicing:

However, this type of filter implies some compromise – in binning mode the photosensitivity is slightly lower than that of an equivalent conventional low-resolution Bayer filter – instead of one large pixel and one large microlens there are now 4 small ones, and in all-pixel mode the detail of color details is lower than that of the equivalent a conventional high-resolution Bayer filter. But a regular low-resolution Bayer filter will never be able to capture the same level of detail, and if you make it initially high-resolution, you will have to deal with the corresponding level of noise. I note that binning can be carried out with a regular Bayer filter, however, due to the relatively distant location of pixels of the same color, obvious artifacts may occur, which does not happen with Quad Bayer sensors in binning mode.
Testing and results
When Sony first showed off the first mainstream Quad Bayer sensor (first link in this post), they used this image to compare the level of detail:

The reader may wonder if there really is such a difference. To get the answer, I had to “hack” my phone with the Quad Bayer IMX582 sensor and conduct a series of tests, as well as take several comparative shots for a visual assessment. All photos and data below are obtained from single images in raw format, without the influence of processing and algorithms from smartphone manufacturers.
How I “hacked” my phone
The binary file with the sensor resolution setting in my case is located along the path /system/vendor/lib64/camera/com.qti.sensormodule.alioth_sunny_imx582_wide.bin
The default resolution is 4000×3000, that is 0xFA0 on 0xBB8. Since this is a little-endian file, we will need to search A0 0F And B8 0B in a hex editor. I found two cases where both of these values were close to each other, and replacing either pair with 8000 – 0x1F40 (40 1F) and 6000 – 0x1770 (70 17) switched the sensor to 48MP mode. I also added this to/system/vendor/etc/camera/camxoverridesettings.txtsimilar to this module:
overrideForceSensorMode=0
logInfoMask=0x10080
overrideLogLevels=0x1F
maxRAWSizes=2
(Probably logging can be removed)
Making changes into the Magisk module allows you to switch between modes relatively quickly. However, RAW can only be obtained in the FreeDCam application with the option Use FreeDcam DngConverter, and on the preview (but not on the resulting RAW photos) a blue stripe appears at the edge of the frame – after all, this is a hack, and not a full-fledged switching of the sensor to the correct mode. I will also note that in my case, at ISO3200, bright stripes appear throughout the frame, and the light sensitivity at high ISOs is noticeably lower than stated – at least up to 3 stops (!). The graphs below are plotted with adjusted brightness, but reducing this parameter could have a negative impact on SNR. Also, phase autofocus did not work (only slow contrast autofocus remained), and the manual values were not enough to aim at infinity. In reality, all these problems can be solved by updating the software if the manufacturer wishes to enable such a mode in their smartphones.
First, a visual assessment, on the left is 12 MP, on the right is 48 (the settings and physical position of the phone are the same):

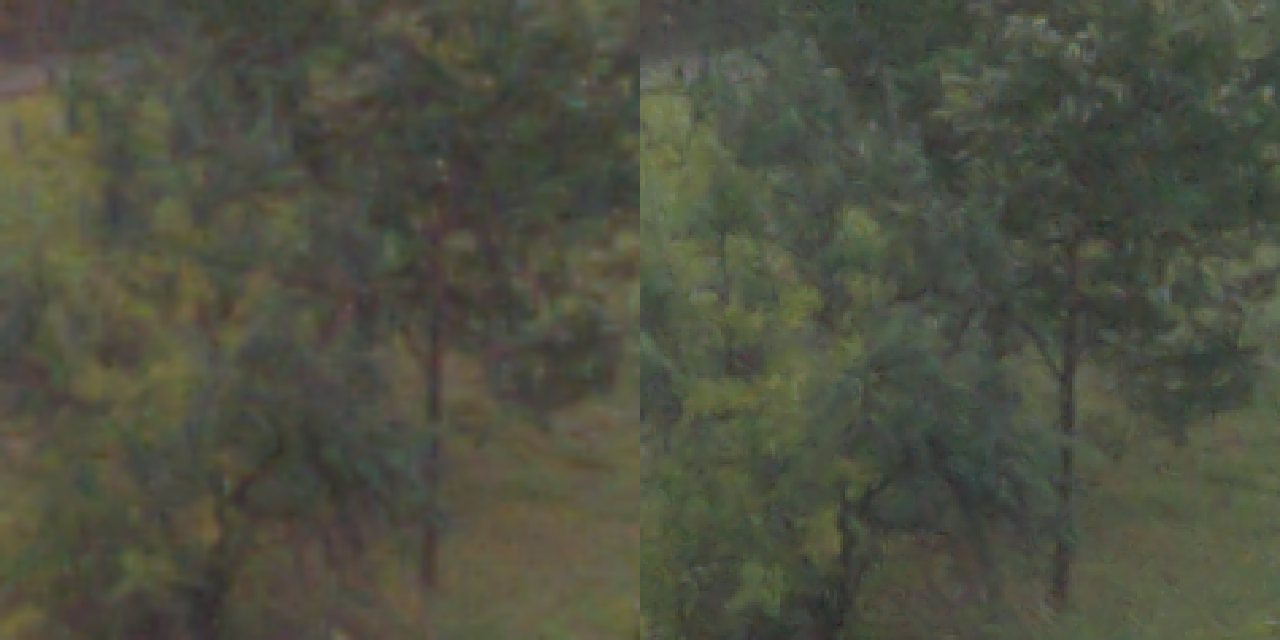
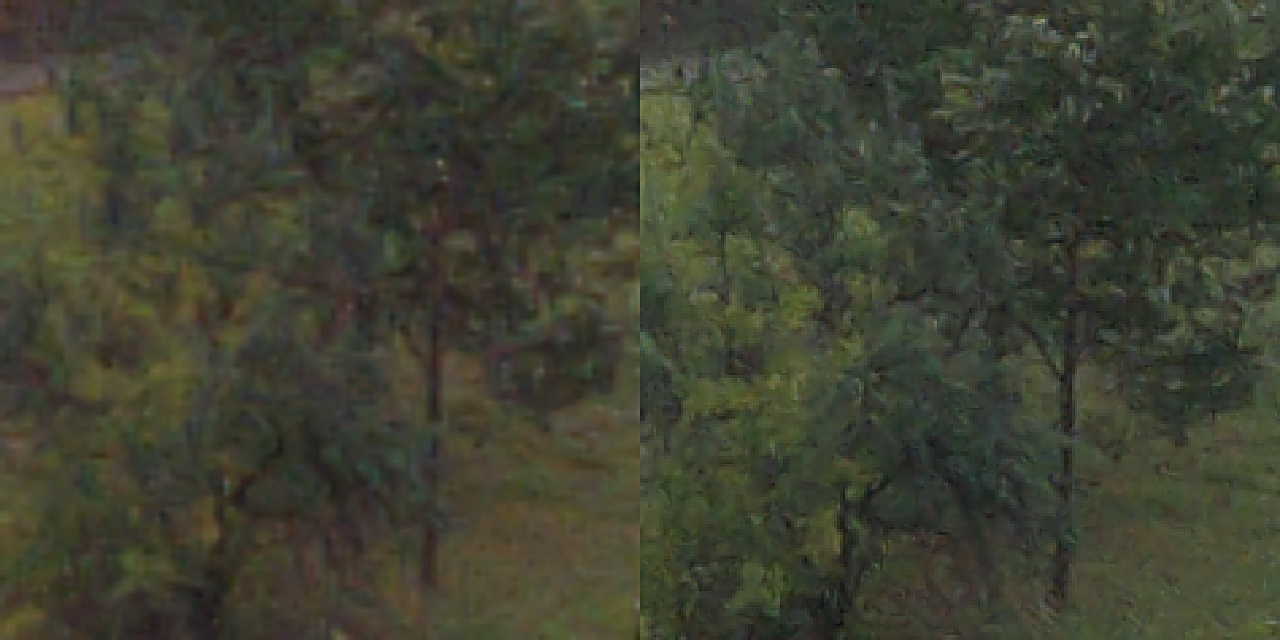
And here are the graphs. Here I use the same algorithm as in my first post, only I use a uniform and homogeneous surface as a target – a piece of paper on top of the lens. I abandoned pink noise in this case, since processing from ISP (remosaic and noise reduction) will still be of great importance, and objective indicators will receive a greatly underestimated result compared to the visual assessment, as limited testing has shown. In this case, using a simple piece of paper to estimate the noise level seems to me the best choice.
Here are the measurements themselves:
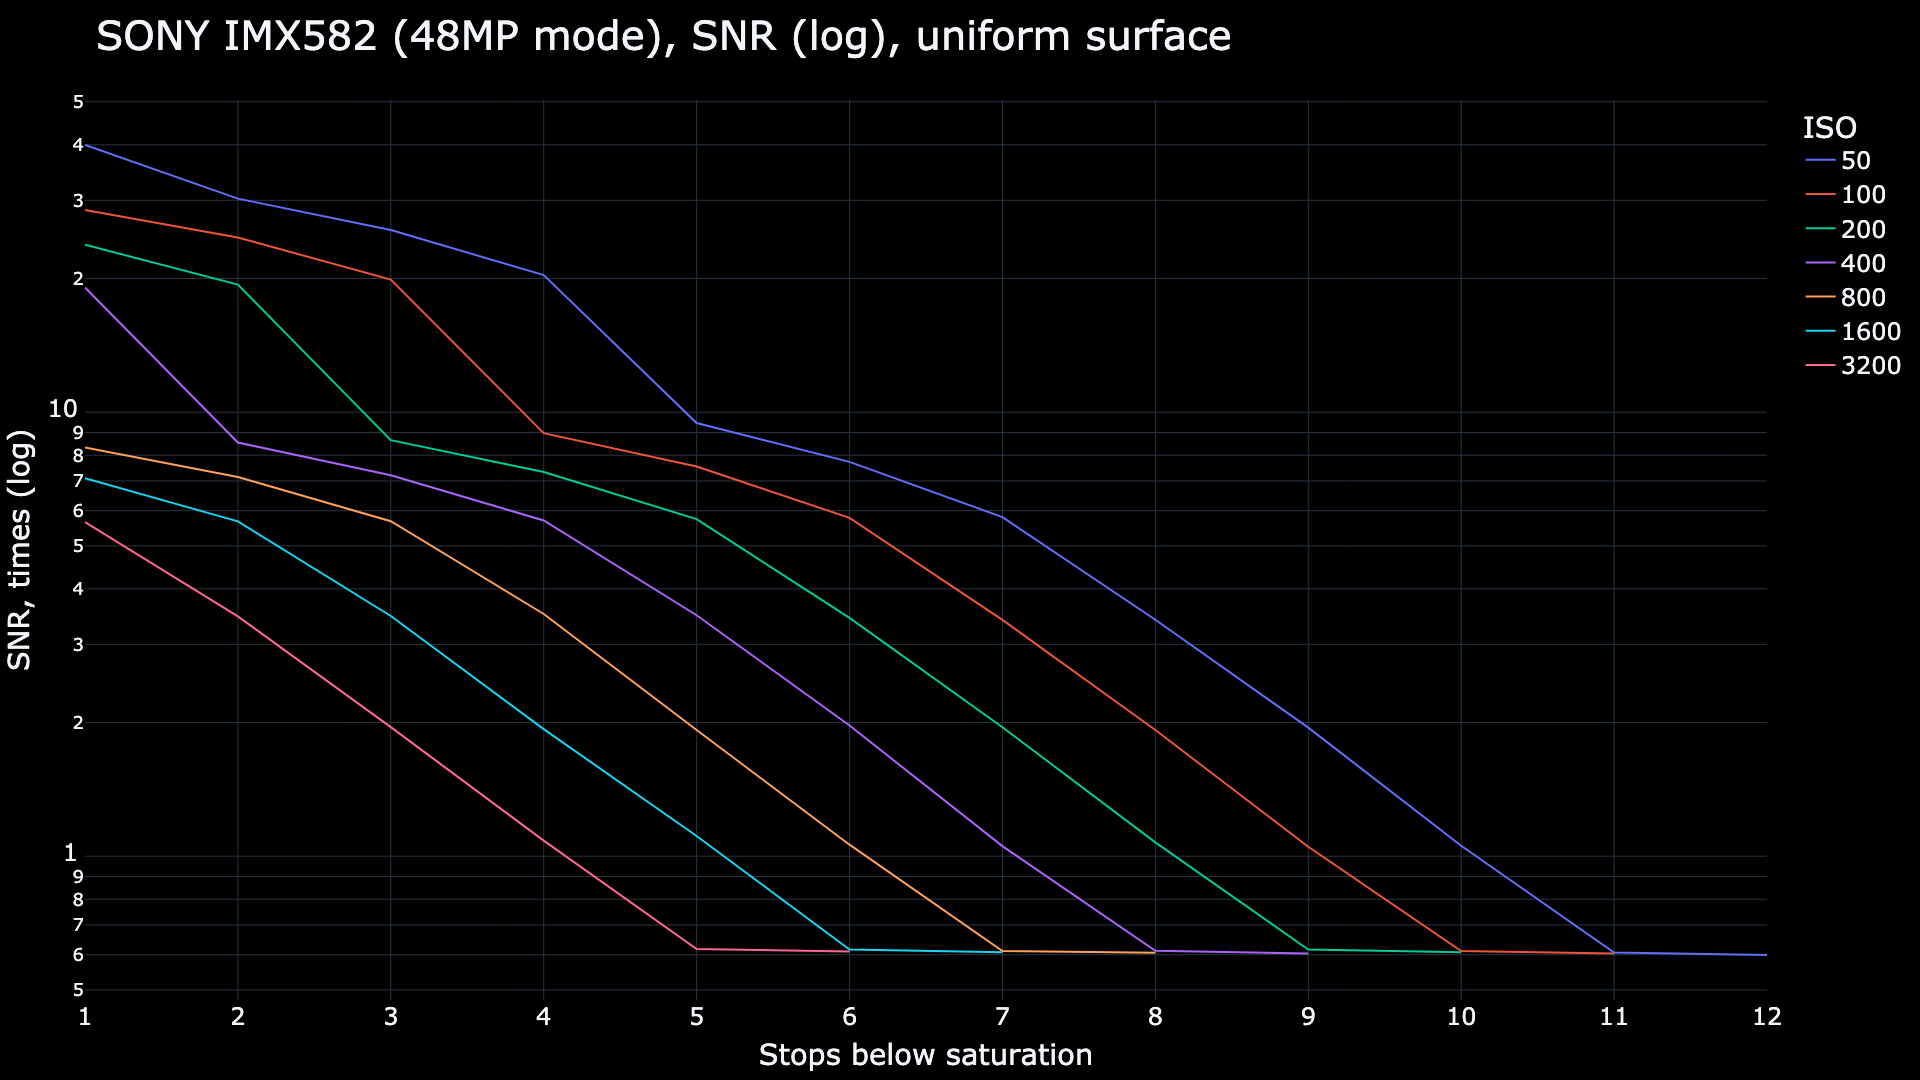
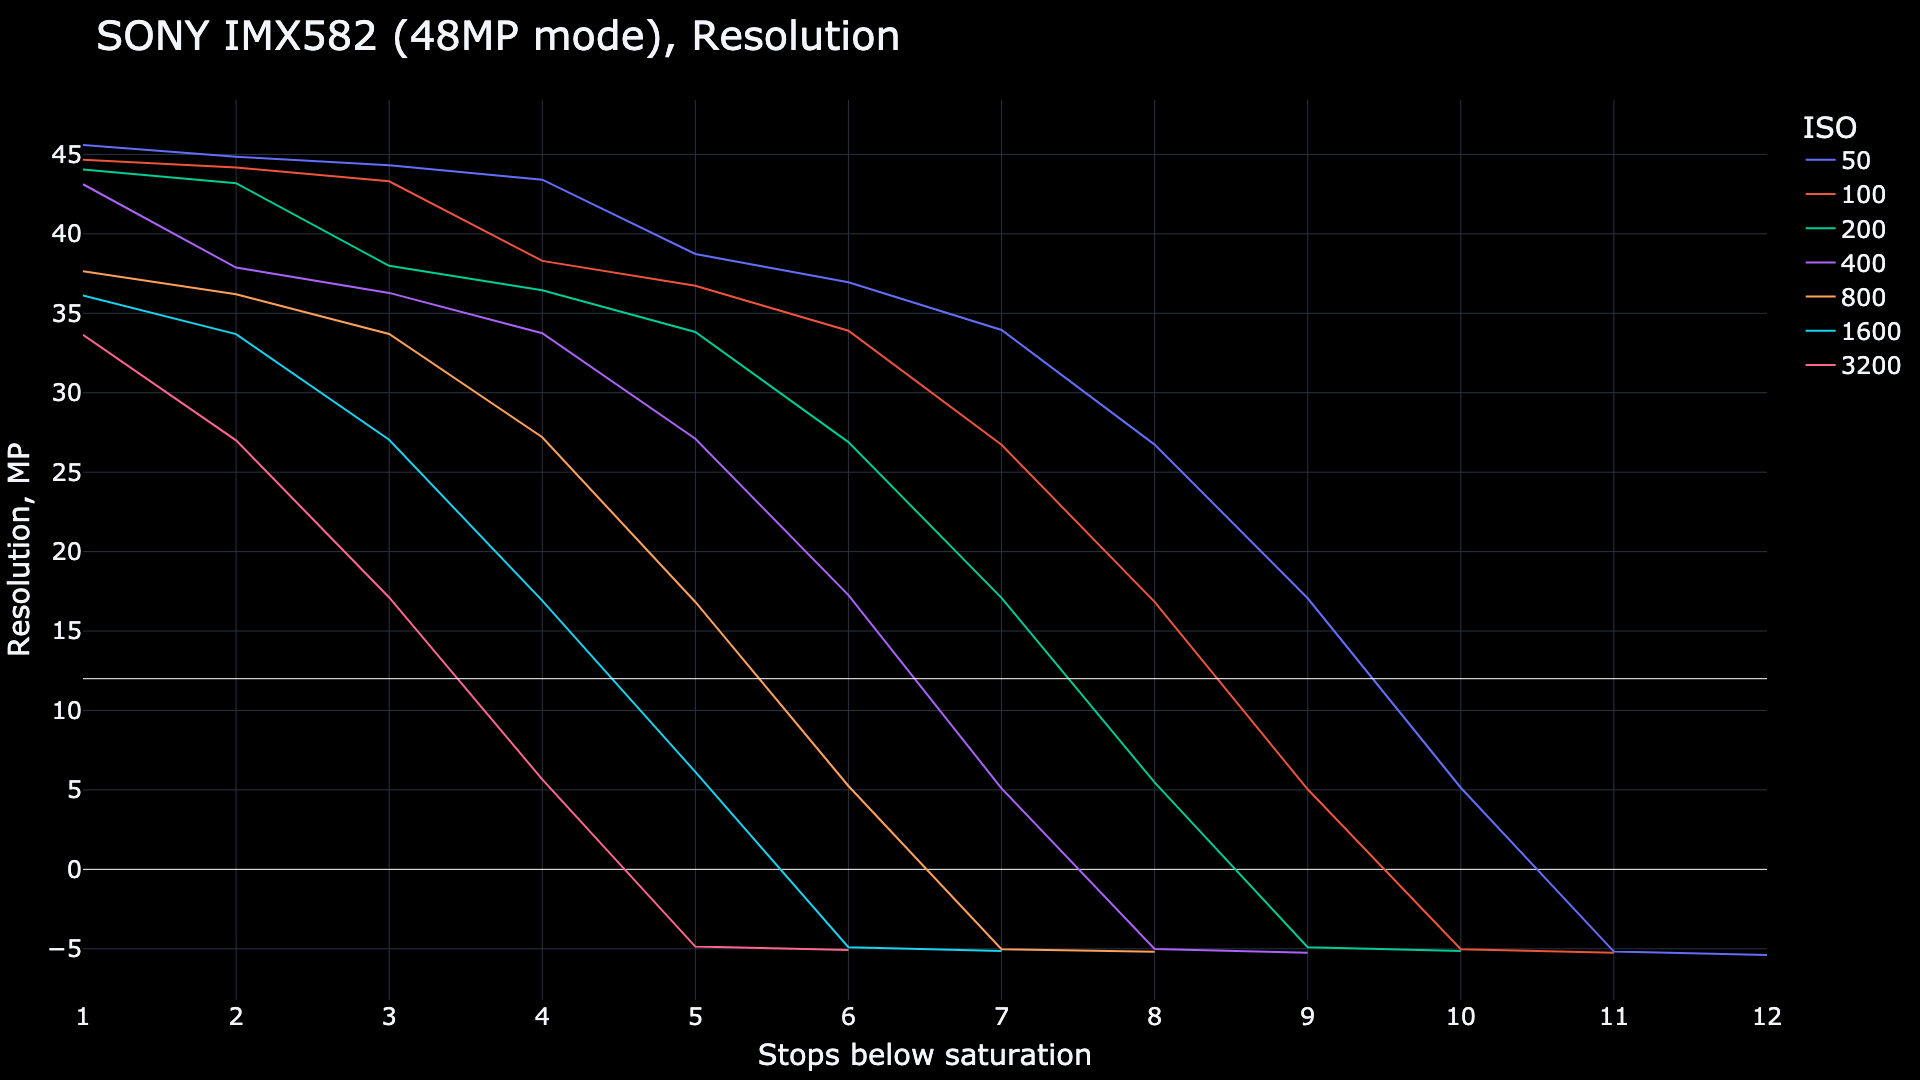
I can say that high resolution is achieved in a really wide range of lighting conditions. The sensor shows results of more than 12 megapixels even in highlights at ISO3200, which means a wide range of applications for the high-resolution mode. At the same time, let me remind you that these results include processing of the ISP sensor signal, and real performance may be slightly worse. If you have ideas for a more accurate method of taking measurements without underestimating the results relative to the visual assessment, please write about it in the comments.
To obtain optimal noise levels when very high resolution is not required (for example, only 4K (not 8K) videos or photos for social networks), you can always use binning mode. It also offers higher readout speeds, suitable for slow motion (up to 90 fps in 4K mode in the case of the IMX586).
conclusions
After measurements and tests, I can say that Quad Bayer filters are not a marketing gimmick. They perform really well even in full resolution mode, and the simple binning principle helps improve light sensitivity almost to the level of a larger pixel sensor and allows for fast readouts useful for video, making the sensor truly versatile. I think manufacturers should consider installing sensors with such filters on “large” cameras that are required to work in a wide range of lighting conditions.
That’s all, thanks for reading!


