We continue to create our first game on Godot 3.5 (part 2)
Link to the first part(https://habr.com/en/articles/745716/).
In the previous part, we created scene blanks: Character, Weapon, Projectile and Enemy, today we will modify these blanks a little, add different guns, the game scene and the main menu. Let’s start by refining the weapon scene.
Weapon
We open our DefaultWeapons scene, this is the one that is a weapon blank.
First, let’s work a little with the shooting animation, now we have that when the shot button is held down, the shot animation is played, when it is released, it stops, that is, for weapons with a long reload, the shot animation will be played even when the weapon is on reload. Or if you quickly press the fire button, the bullet will fly, and the animation will not play. Therefore, we will play the shot animation according to the condition, if the shot button is pressed and the weapon is not on reload.
func get_input():

	if ((global_position - get_global_mouse_position()).x < 0):
		_animated_sprite.flip_v = false
	else:
		_animated_sprite.flip_v = true
	look_at(get_global_mouse_position())# направляем взгляд оружия на курсор мыши

	if (Input.is_action_pressed('fire') && _fire_couldown_timer.is_stopped()):#нажат выстрел и нет перезарядки
		_animated_sprite.play("Fire")#анимация выстрела
		fire()#вызываем функцию выстрела
Add a signal from AnimatedSprite that the animation has played to the end (animation_finished())
func _on_AnimatedSprite_animation_finished():
	if (_animated_sprite.animation == "Fire"):#если анимация выстрела, то меняем на обычную
		_animated_sprite.play("Default")
Next, let’s deal with the function of the shot. Our standard weapon does not have to be taught to shoot, so you can simply write pass in the shot function and write the mechanics of the shot for each individual weapon for this particular weapon.
Full list of weapons
extends KinematicBody2D
#Добавляем элементы дерева объектов в код
onready var _animated_sprite = $AnimatedSprite
onready var _fire_couldown_timer = $FireCouldownTimer
#Объявляем переменные, которые можно менять извне
export (PackedScene) var bullet_scene # это будет сцена нашей пули
export var fire_rate = 0.2 # скорость атаки
export var damage = 1 # урон

#функция обработки нажатий
func get_input():

	if ((global_position - get_global_mouse_position()).x < 0):
		_animated_sprite.flip_v = false
	else:
		_animated_sprite.flip_v = true
	look_at(get_global_mouse_position())# направляем взгляд оружия на курсор мыши

	if (Input.is_action_pressed('fire') && _fire_couldown_timer.is_stopped()):#нажат выстрел и нет перезарядки
		_animated_sprite.play("Fire")#анимация выстрела
		fire()#вызываем функцию выстрела


func _ready():
	_fire_couldown_timer.wait_time = fire_rate # выставляем скорость атаки


func spawn_bullet(rot):# передаём параметр дополнительного поворота пули, позже пригодится
	var b = bullet_scene.instance()

	var new_position = position
	var direction = rotation - rot

	get_parent().add_child(b)# добавляем пулю, как потомка оружия

	b.start(new_position,direction)
	b.damage = damage# задаём пуле урон


func _on_AnimatedSprite_animation_finished():
	if (_animated_sprite.animation == "Fire"):#если анимация выстрела, то меняем на обычную
		_animated_sprite.play("Default")

# функция выстрела
func fire():
	pass #Это дефолтный класс, ему нет нужны стрелять, для каждого другого оружия
		 #будем определять класс стрельбы заного.

func _physics_process(delta):
	get_input()
Bullet
Here, in principle, you don’t need to change anything much, just add a function for handling collision behavior, because, for example, a rocket should explode and it will need different processing, unlike a regular shot. It is worth calling the function on any collision detection. For the bullet blank, we also leave the function empty.
#Функция обработки поведения при столкновении
func collision_action(_collision_object):#_collision_object - объект столкновения
	pass
Full listing of bullets
onready var _animated_sprite = $AnimatedSprite

var velocity = Vector2()

export var damage = 1
export var speed = 750

#функция для задания стартового положения
func start(pos, dir):
	rotation = dir
	position = pos
	velocity = Vector2(speed, 0).rotated(rotation)

func _physics_process(delta):
	var collision = move_and_collide(velocity * delta)
	if collision:
		collision_action(collision.colider)


#Функция обработки сигнала от VisibilityNotifier, Сигнал screen_exited
func _on_VisibilityNotifier2D_screen_exited():
	queue_free()

#Функция обработки поведения при столкновении
func collision_action(_collision_object):#_collision_object - объект столкновения
	pass
We figured out the weapon settings, let’s move on to creating a new one and finalizing the old one.
Blaster

Weapon scenes and blaster bullets remain unchanged. Let’s set up the bullet first. We need to add a collision handler for the bullet. Right click on scene root -> Expand script
In the generated script, you need to override the collision_action() function.
func collision_action(_collision_object):
	if _collision_object.has_method("hit"): #Вызвали метод, если он есть
			_collision_object.hit(damage)
	queue_free()#Удалили пулю
Let’s move on to setting up the weapon, set its characteristics, I have (damage = 1, reload = 0.2) and do not forget to attach the scene of our bullet.
Next, we expand the blaster script and redefine the fire () function
func fire():
	if (_fire_couldown_timer.is_stopped()): # не на перезарядке
		spawn_bullet(0) # создаём пулю с 0-м дополнительным поворотом
		_fire_couldown_timer.start()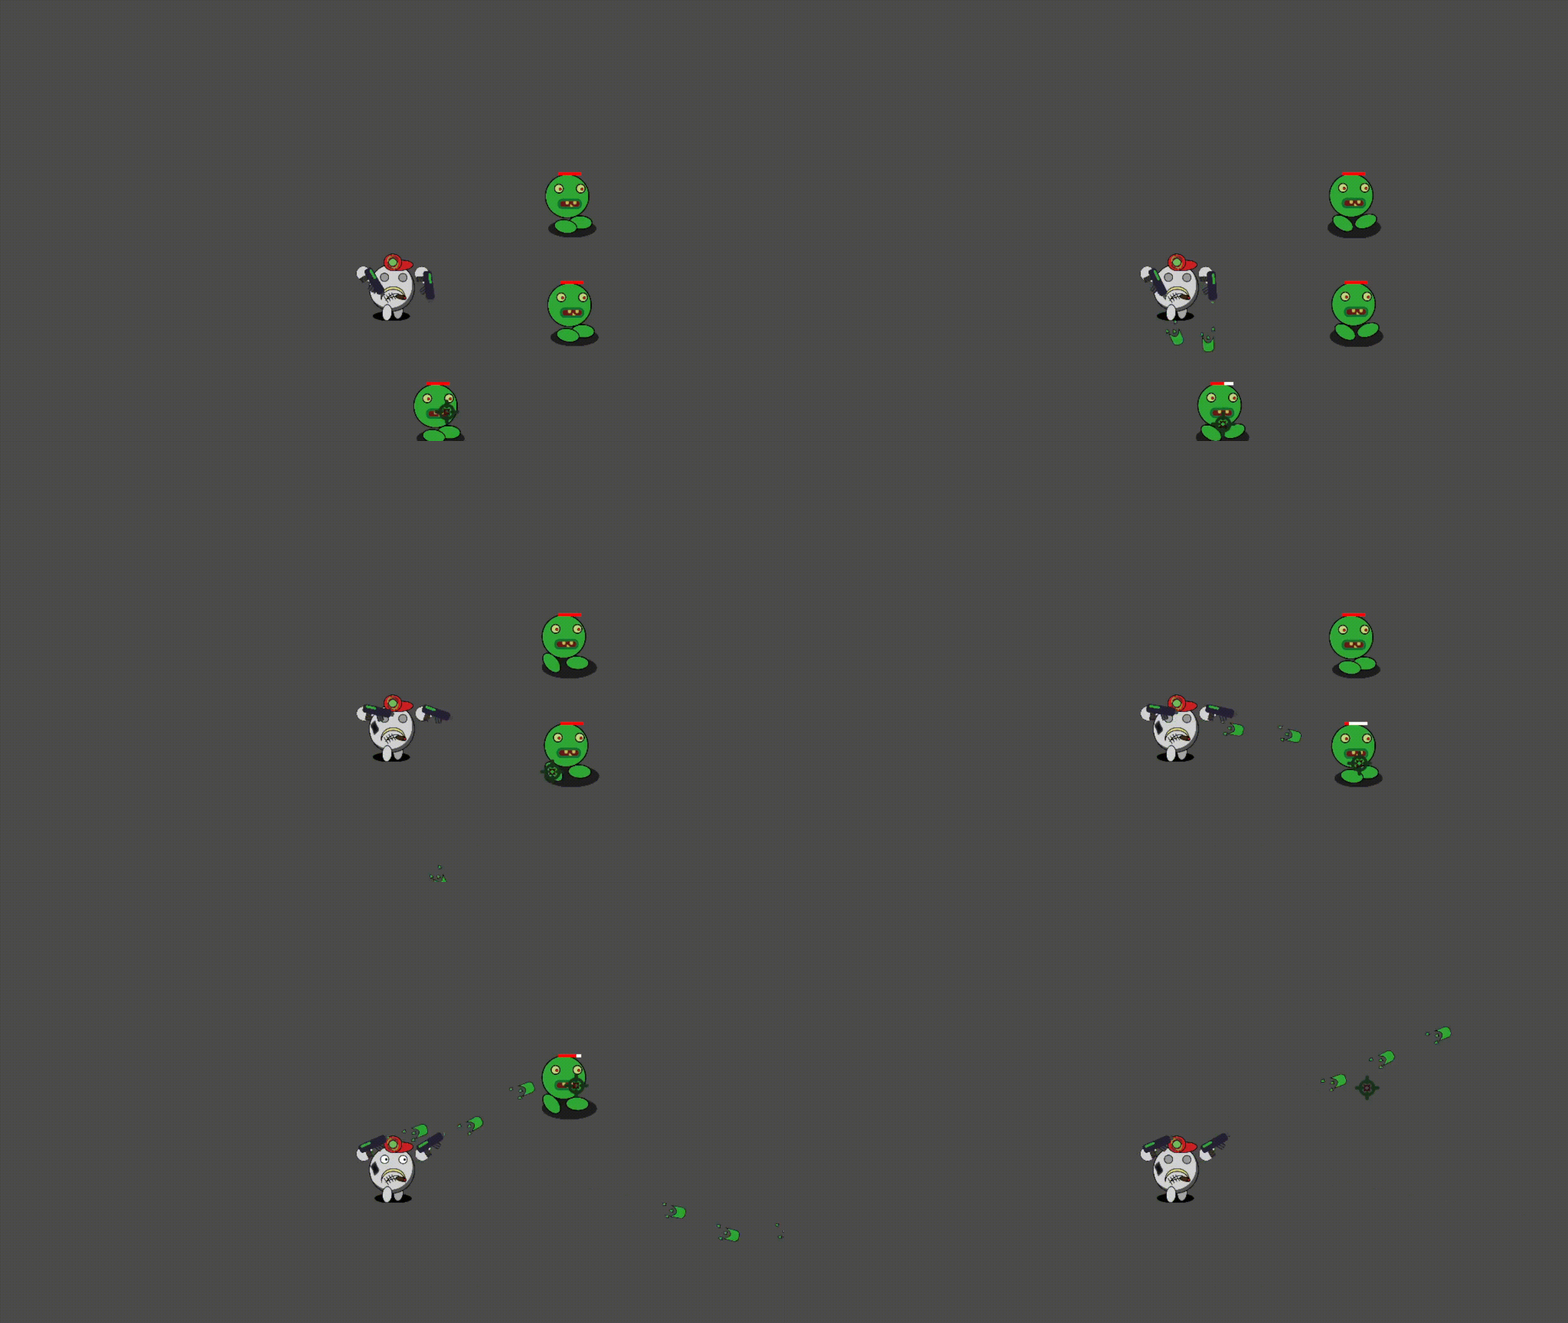
Our blaster is ready, let’s move on
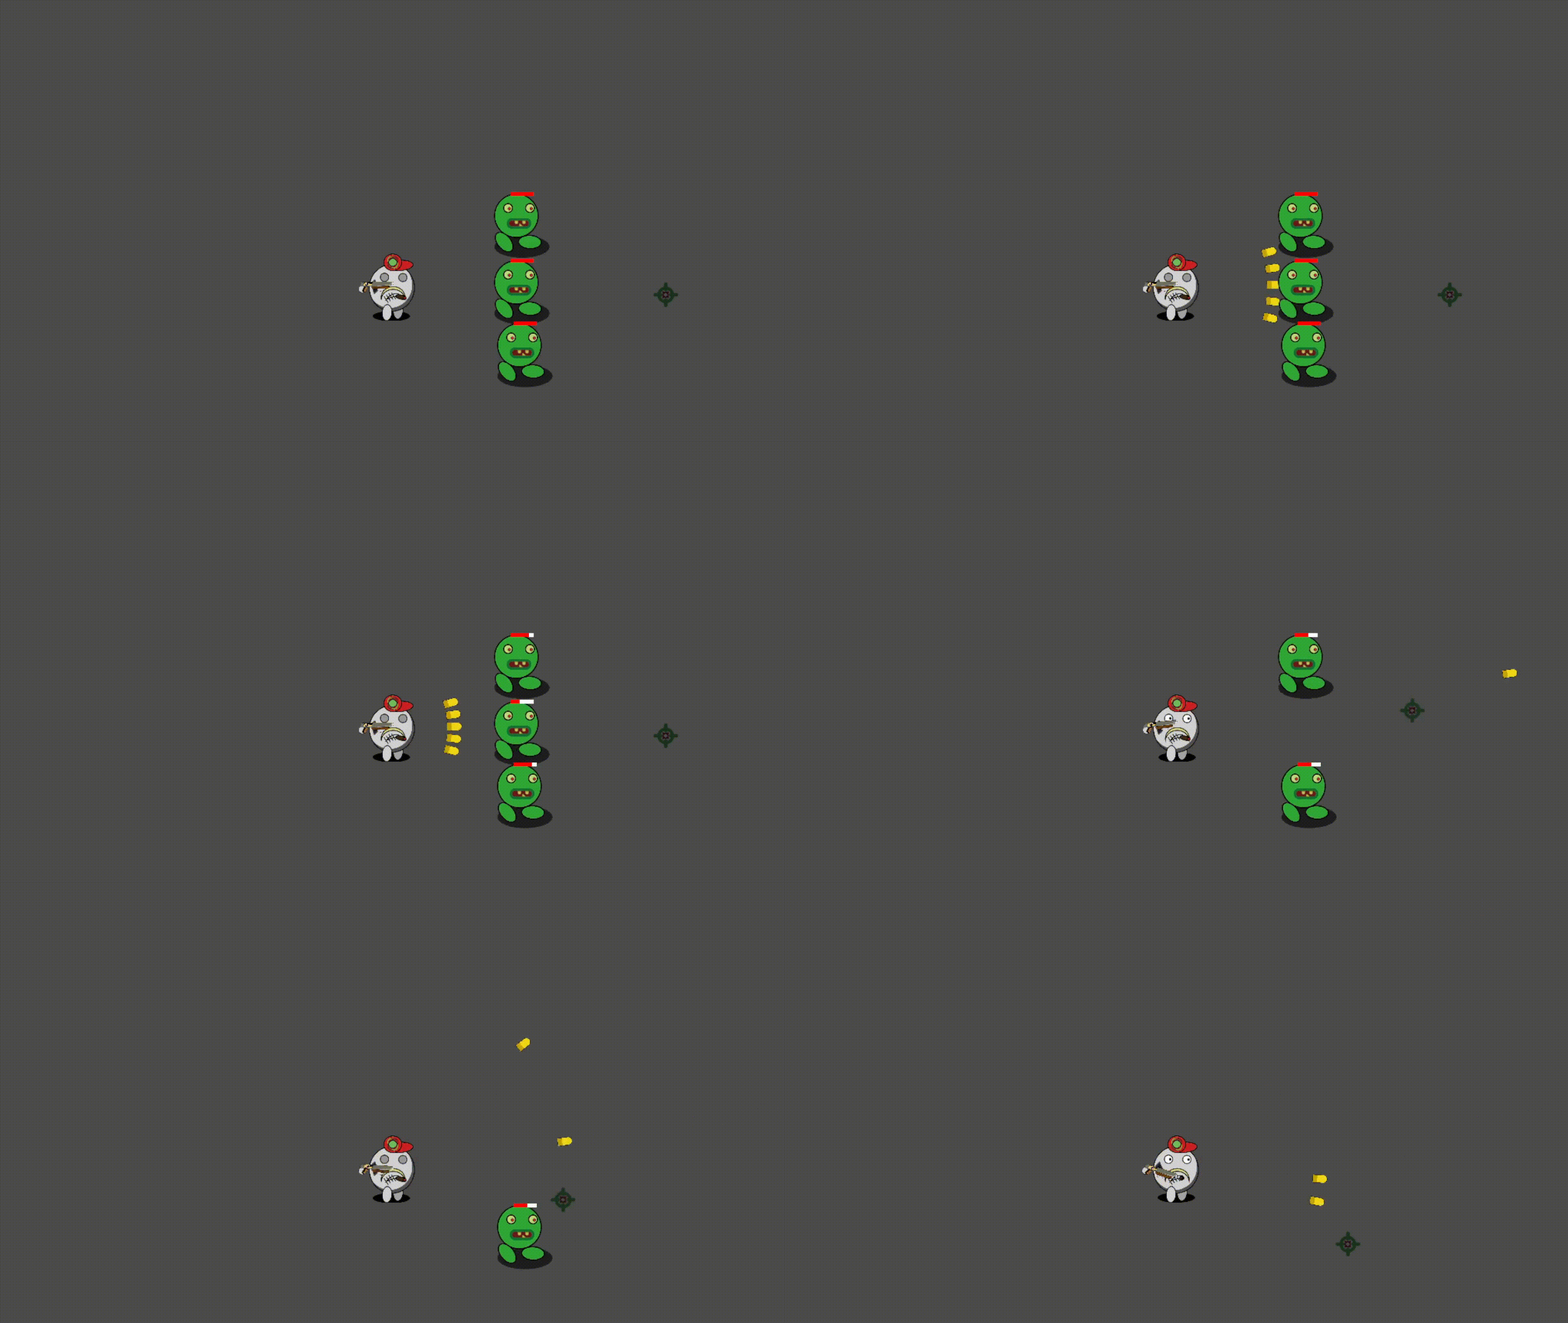
Shotgun
We leave the scenes for the shotgun as standard (of course, we put new sprites and animations). We extend the script for the bullet and redefine the collision_action () function, it will be the same as for the blaster.
Extending the shotgun script and overriding the fire() function
func fire():
	if (_fire_couldown_timer.is_stopped()):
		spawn_bullet(PI/12)# Поворачиваем пулю на ~15 градусов
		spawn_bullet(PI/24)# Поворачиваем пулю на ~7,5 градусов
		spawn_bullet(0)# выпускаем пулю прямо
		spawn_bullet(-PI/24)# Поворачиваем пулю на ~-7,5 градусов
		spawn_bullet(-PI/12)# Поворачиваем пулю на ~-15 градусов
		_fire_couldown_timer.start()# включаем перезарядку
For the shotgun, I set damage = 1 and attack speed = 0.5
Rifle
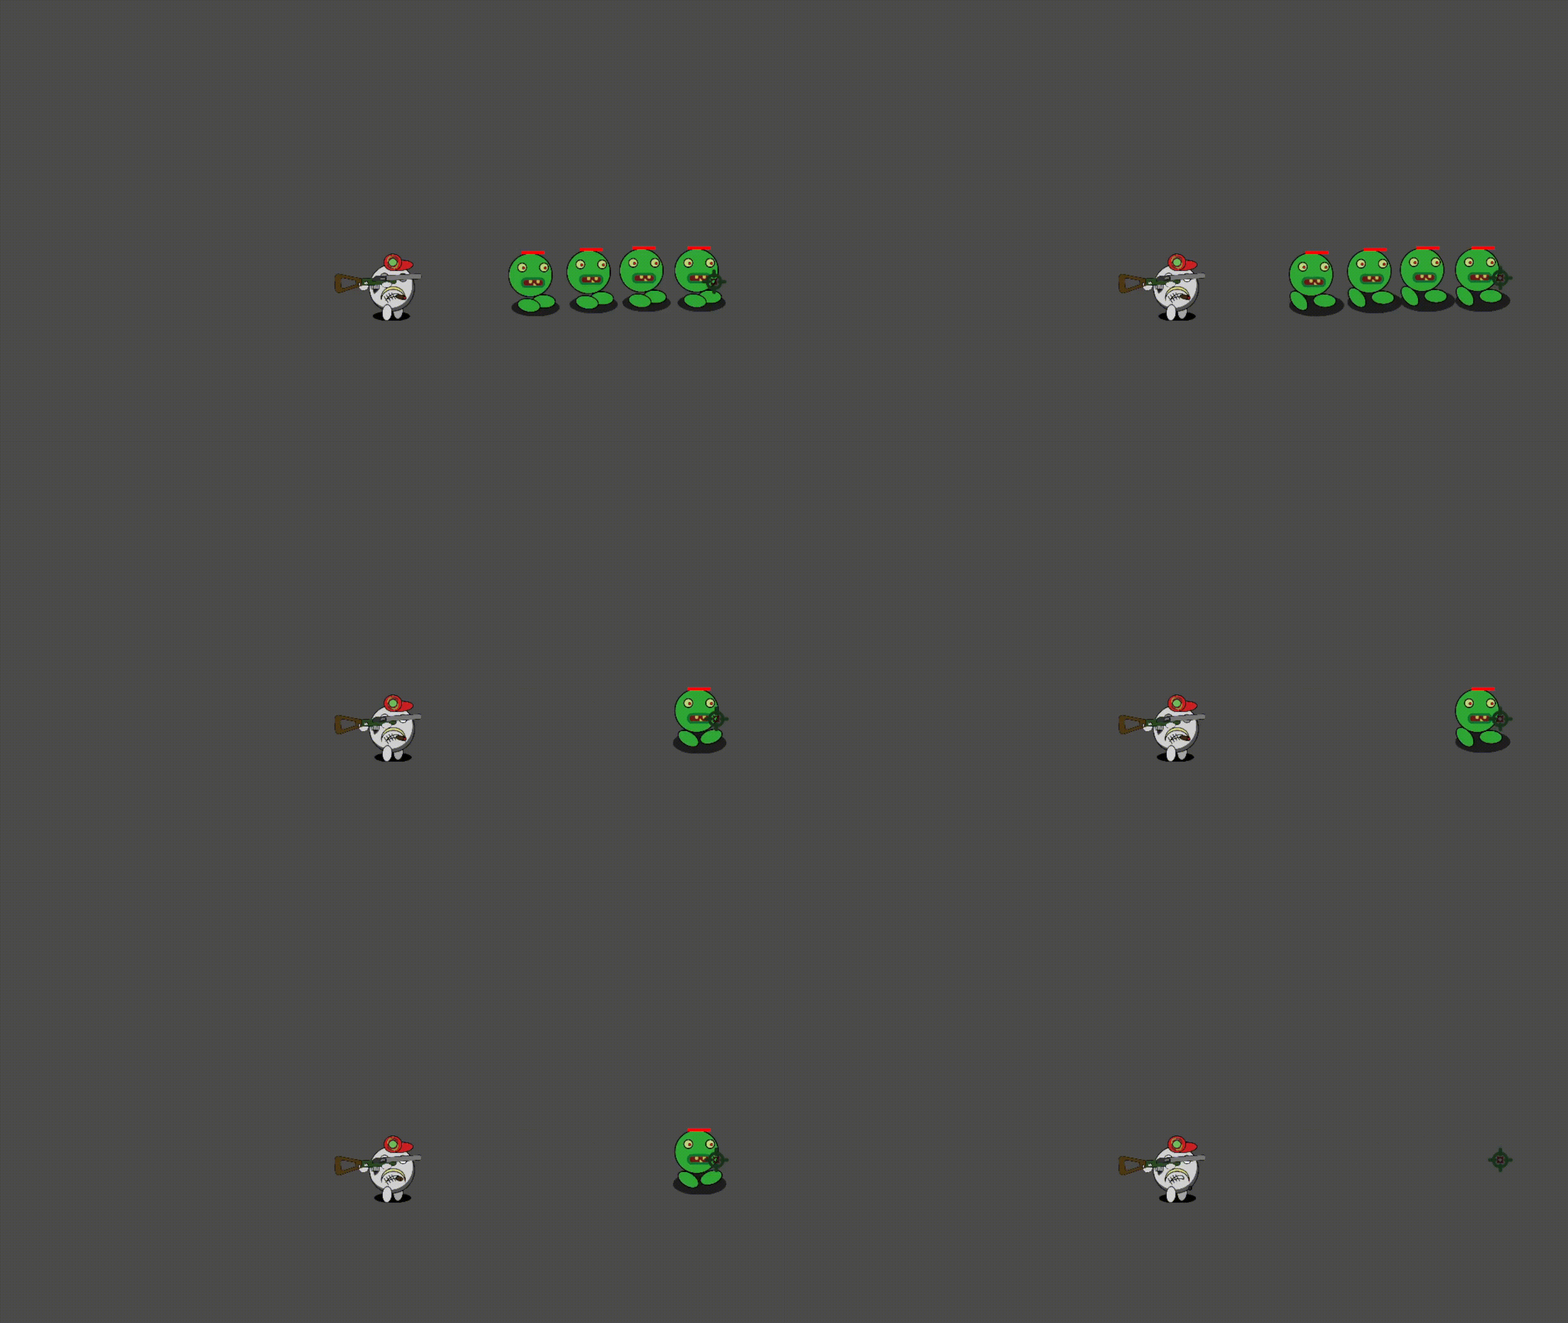
The scenes for the rifle do not need to be changed in any way, only of course to replace the animations. The firing script will be the same as for the blaster.
A rifle bullet will need to be able to pierce multiple enemies if the enemy dies after being hit. Let’s move on to the bullet script extension. The collision_action() function will take the following form:
export var fly_count = 3 #сколько врагов пробьёт на сквозь
var previous_enemy #враг который уже получил урон

func collision_action(_collision_object):
	if (_collision_object.has_method("hit") && previous_enemy != _collision_object):
      #Вызвали метод, если он есть
  	  #и враг не равен предыдущему
		_collision_object.hit(damage)
		fly_count -=1 # уменьшили счётчик возможных пробиваний
		previous_enemy = _collision_object # запомнили врага
		if (fly_count > 0): # если счётчик не 0, продолжаем движение
			move_and_slide(velocity)
		else:
			queue_free()
	else:
		queue_free()
And be sure to remember to declare new variables.
For the rifle, I set the damage to 5 and the reload to 2, the fire() function is no different from the blaster.
BAZUUUUKAAAAA
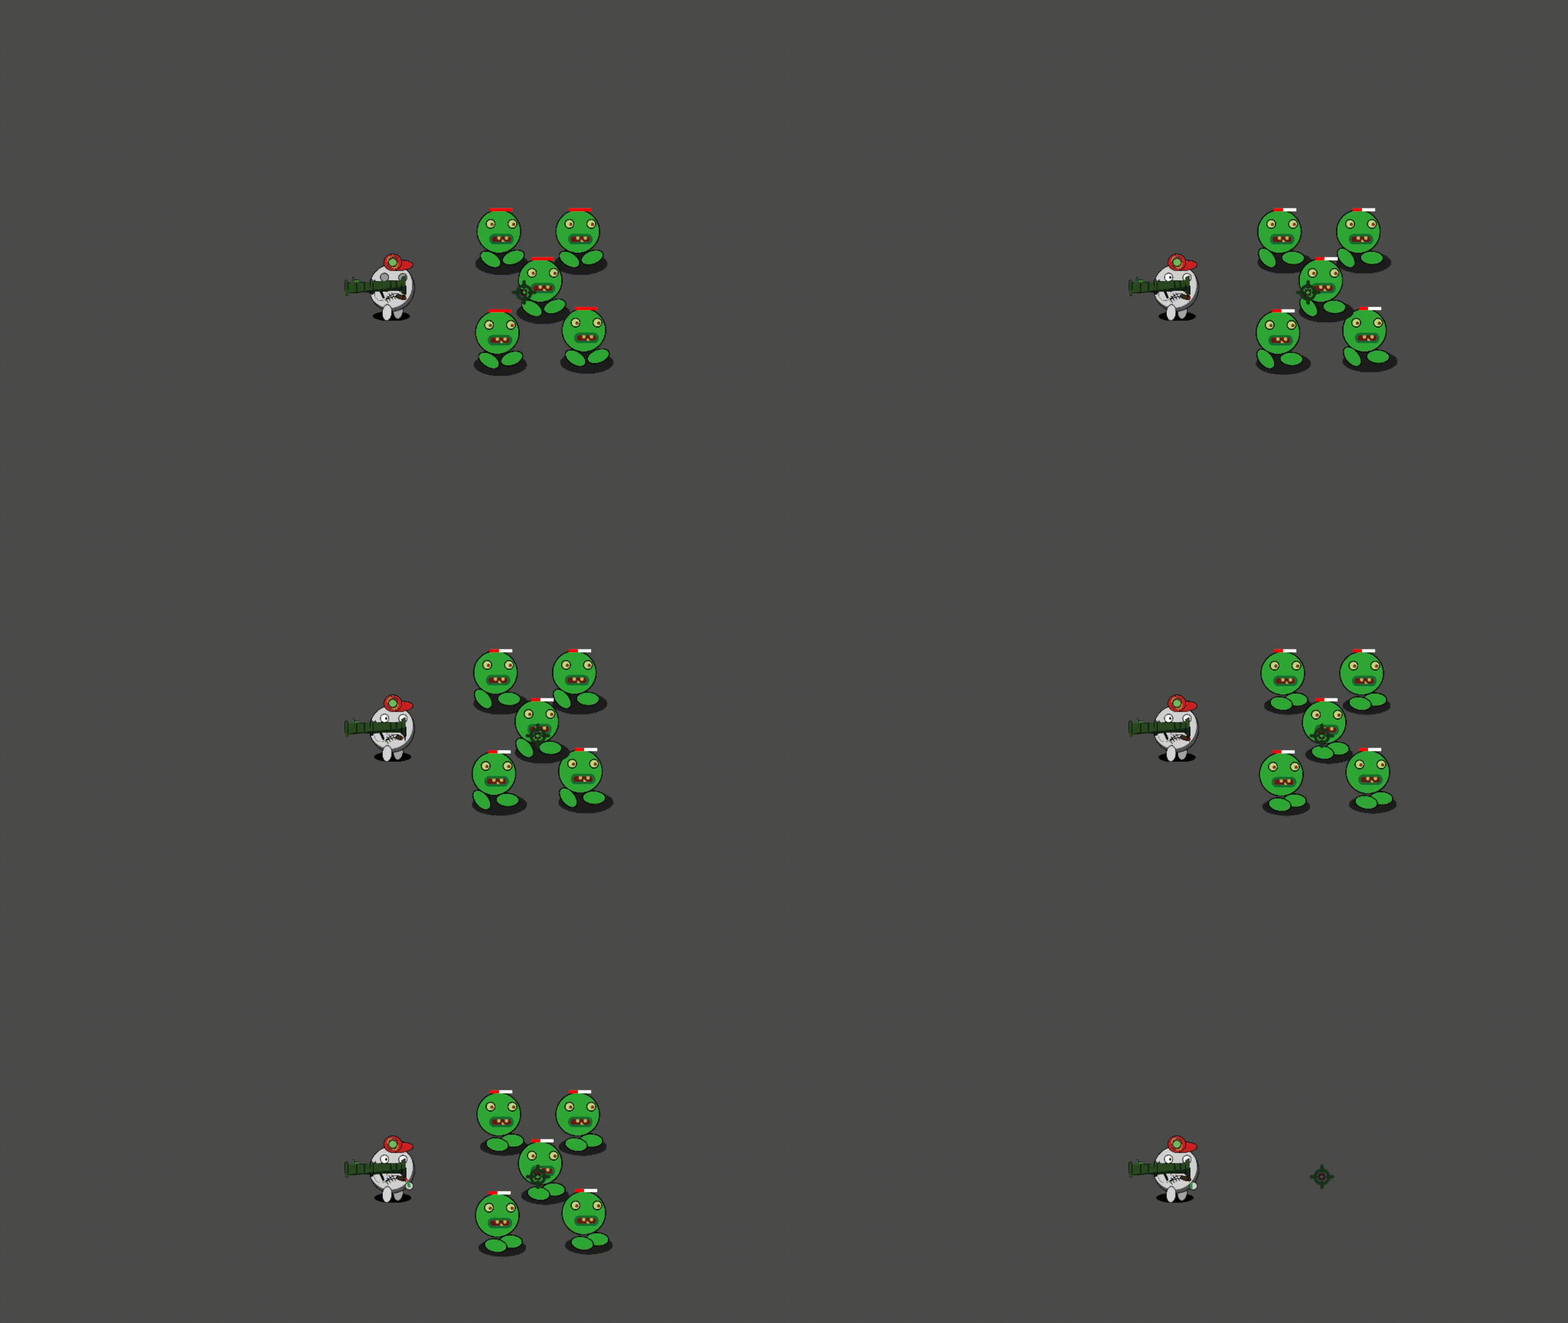
What action shooter can do without beautiful explosions from a shot from a rocket launcher, right, no. Here it will already be necessary to tinker a little with the rocket scene, so let’s start with the scene of the bazooka itself.
You don’t need to add anything here, just change the characteristics and add bazooka sprites. I have damage = 3, and cooldown = 5.
Now let’s move on to the interesting part, the rocket scene.
There are, as they say, 2 chairs. You can either create a separate scene for the explosion, and when the projectile touches any game object, create an explosion and remove the projectile through the code, or create an explosion as a second animation for the rocket and add a couple more elements to the scene. If your project provides for several objects that should explode (various grenades, rocket launchers), then most likely you should choose the first option, but I chose the second option, it is somehow simpler, in my opinion.

To begin with, the following should be added to the object tree:
⦁ Area2D(Bum)
⦁ CollisionShape2D(CollisionShapeBum), as a child of Area2D
⦁ Timer(BumLiveTime), as a child of Area2D
And at CollisionShapeBum, in the inspector, the Disabled parameter, enable. Fit all elements. For me it looks like this:

⦁ circled in red – CollisionShapeBum
⦁ green – CollisionShape2D
We will set the timer to be small, I have 0.2 seconds, this is the lifetime of the explosion, it did not immediately explode and that’s it, it must have Oneshot = true.
The logic is simple, when an object is touched with something, it becomes a CollisionShape2D explosion, turns off, and CollisionShapeBum turns on. We add a signal from Area2D body_entered to the script, for the body to enter the collision area and we already deal damage in it, if possible
Expand the script and proceed to editing it:
onready var _collision_shape = $CollisionShape2D#Фигура столкновений ракеты
onready var _collision_shape_bum = $Bum/CollisionShapeBum#Фигура столкновений взрыва
onready var _bum_live_time = $Bum/BumLiveTime #Таймер жизни взрыва

func collision_action(_collision_object):# обработка столкновения снаряда
	if(_animated_sprite.animation == "Fly"):# если он был снарядом
		_animated_sprite.play("Bum")# превращаем в взрыв
		_collision_shape.disabled = true # выключаем обычную фигуру столкновения
		_collision_shape_bum.disabled = false # включаем фигуру столкновения взрыва
		scale = Vector2(10,10)  # увеличиваем размер в 10 раз,
		#у вас может быть в другое количество раз, для моего проекта это в самый раз
		velocity=Vector2(position.x,position.y)
		_bum_live_time.start()
func _on_Bum_body_entered(body):
	if(body.has_method("hit")):
		body.hit(damage)

func _on_BumLiveTime_timeout():
	queue_free()
Let’s move on to modifying the character scene
Character
⦁ To the blank of the character’s scene, you need to attach the camera.
⦁ Make something like a backpack in which the weapons used will be stored.
⦁ Add signals about the character receiving damage and death
Let’s start simple. Add Camera2D to the DefaultCharacter node and set current = true in the inspector. That’s all, the camera was added.
What I mean by backpack, there will be a node in the scene containing 6 position2D, these positions will display the weapon that the character currently has. The character itself will have an array with links to the scenes of the weapons they are using. Let’s start by adding a backpack node. We add Node2D(Backpack) and 6 Position2D(Slot1…Slot6) to the character as children of Node2D:
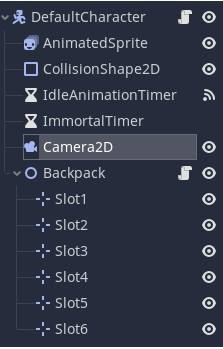
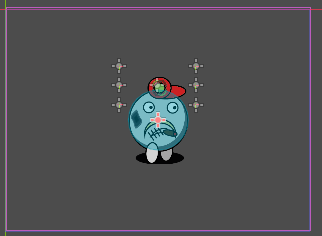
We hang a script on the Backpack and proceed to editing it. We need to add a simple function that returns the Position Vector of the given slot.
extends Node2D

#Массив Слотов
onready var backpack = [$Slot1,$Slot2,$Slot3,$Slot4,$Slot5,$Slot6]

#функция получения текущего положения
func get_slot_position(elem):
	return backpack[elem].position
Next, we move on to editing the character script:
At the beginning of the script, we need to declare a new variable, backpack_items, for 6 elements, it will store either the scene or null. Also declare the signal take_damage(damage) and dead
#Рюкзак персонажа
var backpack_items = [preload("res://scenes/Weapons/Shotgun/Shotgun.tscn"),null,null,null,null,null]
#Сигнал о получении урона
signal take_damage(damage)
#Сигнал о смерти
signal dead
In the function of receiving damage, you need to add sending signals:
#Функция получения урона
func take_damage(dmg):
	if(_immortal_timer.is_stopped()): #Проверяем не бессмертен ли наш персонаж
		health -= dmg
		_animated_sprite.play("TakeDamage")
		emit_signal("take_damage",dmg) #Отправляем сигнал о получении урона
		_immortal_timer.start() #Запускаем таймер после получения урона
	if(health == 0):
		emit_signal("dead")#Отправляем сигнал о смерти
Now let’s move on to creating functions for working with a backpack.
First, let’s write a function that takes as an argument the slot number from 0 to 5 in which to draw the weapon:
#функция прикрепления оружия
func equip_item(slot):# передаём номер слота в котором нужно отрисовать оружие
	if (backpack_items[slot] != null):#Если слот объявлен
		var weapon = backpack_items[slot].instance()
		weapon.position = _backpack.get_slot_position(slot)#получаем позицую данного слота
		weapon.name = "WeaponSlot" + String(slot)#Именя оружия WeaponSlot0..5
		add_child(weapon)
		weapon.scale = Vector2(0.5,0.5)# у меня стоит масштабировать оружие, возможно у вас нет
Next, we need a function that will create all elements of the backpack on the stage, and if there is already one on the stage, then delete it and draw it again:
#одеваем всё доступное оружие
func equip_all():
	for i in range(6):#Пробегаем по всему массиву backpack_item
		if(get_node("WeaponSlot"+String(i)) != null):
			var item =get_node("WeaponSlot"+String(i)) #Ищем узел
			if (item != null): #Если есть то удаляем его со сцены
				item.queue_free()
		equip_item(i)# и рисуем новый
You will also need a function to remove a weapon from a character, which as an argument receives the number of the slot from which the object should be removed:
#удаляем оружие
func remove_equip_item(slot):#Передаём номер слота
	if (slot >= 0 && slot <=5):#Проверяем номер слота
		var item = get_node("WeaponSlot" + slot)
		backpack_items[slot] = null#обнуляем значение в рюкзаке
		item.queue_free()#удаляем объект
And at the end, you need a function that will add an item to the backpack, it will take the scene as an argument:
#добавляем оружие
func add_equip_item(item):
	for i in range(6):
		if (backpack_items[i] == null):#Находим первый пустой элемент массива
			backpack_items[i] = item#заливаем в него сцену оружия
			equip_all()#Одеваем всё оружие
			return
Full character script
extends KinematicBody2D


#Добавляем элементы дерева объектов в код
onready var _animated_sprite = $AnimatedSprite
onready var _idle_animation_timer = $IdleAnimationTimer
onready var _immortal_timer = $ImmortalTimer
onready var _backpack = $Backpack
#Объявляем переменные, которые можно менять извне
export var health = 5 #Жизни
export var speed = 200 #Скорость
#Объявляем переменные только для этого скрипта
var velocity = Vector2.ZERO #Вектор направления
var direction = Vector2.ZERO #Вектор движения
var backpack_items = [preload("res://scenes/Weapons/Blaster/Blaster.tscn"),preload("res://scenes/Weapons/Blaster/Blaster.tscn"),null,null,null,null]
#Сигнал о получении урона
signal take_damage(damage)
#Сигнал о смерти
signal dead
#Функция считывания нажатий
func get_input():
	velocity = Vector2.ZERO
	if Input.is_action_pressed("left"):
		velocity.x -= 1
	if Input.is_action_pressed("right"):
		velocity.x += 1
	if Input.is_action_pressed("up"):
		velocity.y -= 1
	if Input.is_action_pressed("down"):
		velocity.y += 1
	direction = velocity.normalized() * speed

#Функция воспроизведения анимаций
func get_anim():
	if (_immortal_timer.is_stopped()): #Проверяем не воспроизводится-ли анимация бессмертия
		if (velocity != Vector2.ZERO): #Если есть направление движения, то идём
			_animated_sprite.play("Walk")
		else:
			if (_animated_sprite.animation != "IdleAnimation"): #Иначе если не брутальная анимация, то просто стоим
				_animated_sprite.play("Stand")
				if (_idle_animation_timer.is_stopped()): #Запускаем отчёт до брутальной анимации
					_idle_animation_timer.start()
	if (velocity.x > 0): # поворачиваем нашего персонажа в сторону движения
		_animated_sprite.flip_h = false
	if (velocity.x < 0):
		_animated_sprite.flip_h = true

#Функция получения урона
func take_damage(dmg):
	if(_immortal_timer.is_stopped()): #Проверяем не бессмертен ли наш персонаж
		health -= dmg
		_animated_sprite.play("TakeDamage")
		emit_signal("take_damage",dmg) #Отправляем сигнал о получении урона
		_immortal_timer.start() #Запускаем таймер после получения урона
	if(health == 0):
		emit_signal("dead")#Отправляем сигнал о смерти


func _ready():
	_animated_sprite.animation = "Stand" # При старте персонаж должен просто стоять
	equip_all()


func _physics_process(delta):
	get_input()
	get_anim()
	var collider = move_and_collide(direction * delta) # записываем в переменную collider для дальнейшей обработки столкновения


func _on_IdleAnimationTimer_timeout():
	_animated_sprite.play("IdleAnimation") # Включаем БРУТАЛЬНУЮ анимацию по истечении таймера

#функция прикрепления оружия
func equip_item(slot):# передаём номер слота в котором нужно отрисовать оружие
	if (backpack_items[slot] != null):#Если слот объявлен
		var weapon = backpack_items[slot].instance()
		weapon.position = _backpack.get_slot_position(slot)#получаем позицую данного слота
		weapon.name = "WeaponSlot" + String(slot)#Именя оружия WeaponSlot0..5
		add_child(weapon)
		weapon.scale = Vector2(0.5,0.5)# у меня стоит масштабировать оружие, возможно у вас нет


#одеваем всё доступное оружие
func equip_all():
	for i in range(6):#Пробегаем по всему массиву backpack_item
		if(get_node("WeaponSlot"+String(i)) != null):
			var item =get_node("WeaponSlot"+String(i)) #Ищем узел
			if (item != null): #Если есть то удаляем его со сцены
				item.queue_free()
		equip_item(i)# и рисуем новый

#удаляем оружие
func remove_equip_item(slot):#Передаём номер слота
	if (slot >= 0 && slot <=5):#Проверяем номер слота
		var item = get_node("WeaponSlot" + slot)
		backpack_items[slot] = null#обнуляем значение в рюкзаке
		item.queue_free()#удаляем объект

#добавляем оружие
func add_equip_item(item):
	for i in range(6):
		if (backpack_items[i] == null):#Находим первый пустой элемент массива
			backpack_items[i] = item#заливаем в него сцену оружия
			equip_all()#Одеваем всё оружие
			return
Let’s also change the standard cursor to the one we drew
Cursor
Go to project settings -> Display -> Mouse cursor. In the custom image, we specify the path to our cursor.
Let’s move on to creating the menu and the main scene, but first we need to write a small singleton that will be responsible for switching scenes.
Singleton SceneLoader
To get started, go to the script tab and create a script file. Be sure to check that it inherits the Node. I will save it in a separate scripts folder

Now go to the project settings, the autoload tab, click on the folder icon ![]() and specify the path to our script, click add, in the column the global variable should be set to true
and specify the path to our script, click add, in the column the global variable should be set to true

Let’s move on to editing this script:
extends Node
# Константа хранящая путь к папке со сценами
const MAP_ROOT = "res://scenes/Game/"

var current_scene = null # текущая сцена

#При первом запуске объявляем текущую сцену
func _ready():
	var root = get_tree().root
	current_scene = root.get_child(root.get_child_count() - 1)

#подготавливаем полный путь сцены, тоесть сюда будет передаваться только название
func build_map_path(map_name):
	var path = MAP_ROOT.plus_file(map_name + "Scene/"+ map_name + ".tscn")
	#у меня сцены карт хранятся в папке scenes/Game/Папка с названием сцены/файл с названием сцены.tscn
	_change_map(path)

#функция смены карты
func _change_map(path):
	#безопасно удаляем текущую сцены
	current_scene.free()
	# загружаем в в переменную текущей сцены, требуемую сцену
	current_scene = ResourceLoader.load(path).instance()
	# добавляем требуемую сцену, как потомка корня дерева
	get_tree().root.add_child(current_scene)
	# передаём параметр установленной сцены через API
	get_tree().current_scene = current_scene
We’re done here, now let’s throw in a simple main menu
Main menu
Let’s think logically, the main menu should have something like a background and buttons. In our project, I will also add an animation of the dancing main character to the background. Select Node2D(MainMenu) as the main node of the scene. Next, add elements to the object tree:

⦁ Sprite(Background)
⦁ AnimatedSprite
⦁ TextureButton(StartGameBtn)
⦁ Label(StartGameLbl) – subordinate TextureButton
⦁ TextureButton(SettingBtn)
⦁ Label(SettingLbl) – subordinate SettingBtn
⦁ TextureButton(ExitGameBtn)
⦁ Label(ExitGameLbl) – subordinate ExitGameBtn
In the inspector for the labels, you need to write the text of the button itself, then in the inspector go to the Control-> Theme Overrides -> Fonts tab and in the Font property, select a new DynamicFont, double-click on it, open the Font property and specify the path to our font. Next, from the Fonts->Font menu, select Settings and specify the desired font size (I have 36). The font is set up, now let’s set up the layout. In the top panel, click “Layout” and select the location “Centered” in it.
The menu should look something like this:

The character on the phone screen is just the AnimatedSprite, it will dance. We will make the settings scene in the next part of the article.
Let’s go to the script:
extends Node2D

#Переменные
onready var _animated_sprite = $AnimatedSprite
onready var _start_btn = $StartGameBtn
onready var _settings_btn = $SettingsBtn
onready var _exit_btn = $ExitGameBtn
#При запуске включается анимация
func _ready():
	_animated_sprite.play("Dance")

#Когда анимация закончилась, персонаж поворачивается
func _on_AnimatedSprite_animation_finished():
	_animated_sprite.flip_h = !_animated_sprite.flip_h


#При нажатии кнопки начала игры, вызывается функция нашего Синглтона и переключается на сцену игры
func _on_StartGameBtn_pressed():
	SceneLoader.build_map_path("GameScene")

#При нажатии кнопки выхода, игра закрывается
func _on_ExitGameBtn_pressed():
	get_tree().quit()
The script is short and quite understandable, we receive signals from the buttons and process them.
Now we will make a simple scene of the game, enemies will appear randomly around the perimeter of the map. For every second lived, points will be awarded.
First, let’s create a scene with a user interface:
User interface
We select Node2D as the main node of the scene, its children:

⦁ ColorRect(CurrentHealthBar)
⦁ TextureRect(HealthBar) – child of ColorRect
⦁ Label(Health) – child of ColorRect
⦁ Label(Score)
⦁ Timer(ScoreAddTimer) – child of Label
Label(Health) – will display current and maximum health, separated by a slash.
ColorRect is just a green life bar that will decrease like an enemy
TextureRect is the texture of the HealthBar
Label(Score) – displays earned points
Timer – report before scoring ( 1 sec)
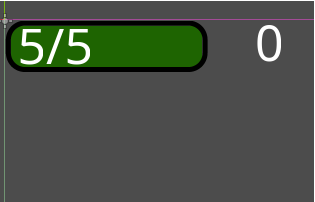
Now we hang the script on Node2D and proceed to editing it:
extends Node2D

#Элементы дерева
onready var _score_add_timer = $Score/ScoreAddTimer
onready var _score = $Score
onready var _current_health_bar = $CurrentHealthBar
onready var health = $CurrentHealthBar/Health

var max_health #Максимальное кол-во хп
var current_health #Текущее кол-во хп
var health_bar_size #Размер на который нужно уменьшать зелёный квадрат

# Функция заадния всех переменных
func init_health(hp):
	max_health = hp
	current_health = hp
	health.text = String(current_health) + "/" + String(max_health)#записываем в лэйбэл наши хп
	health_bar_size = _current_health_bar.rect_size.x / max_health# определяем длинну деления

# При старте запускаем таймер
func _ready():
	_score_add_timer.start()
# Функция вызываемая при получении урона
func take_damage(damage):
	current_health -= damage
	health.text = String(current_health) + "/" + String(max_health)
	_current_health_bar.rect_size.x -= health_bar_size * damage

# Сигнал от таймера
func _on_ScoreAddTimer_timeout():
	_score.text = String(int(_score.text) + 1)
I commented on everything in sufficient detail, I see no reason to supplement something
Now we create the game scene and move on to editing it.
game scene
Select Node2D as the main element of the scene, child elements:

⦁ StaticBody2D, its children
⦁ Sprite(background), child of StaticBody2D
⦁ 4 CollisionShape2D child of StaticBody2D
⦁ Timer(MobSpawnTimer)
⦁Path2D(MobPath)
⦁ PathFollow2D(MobFollowPath), child of Path2D
⦁ Our character scene
⦁ UserInterface scene child of our character
Why do we need a StaticBody with 4 CollisionShape, These will be the screen borders that the character cannot go beyond, how should we arrange all this:

For StaticBody2D, We need to set up the CollisionObject2D, as we did in the previous part, now we need to name the 5th layer in the list (Mine is Map) and assign our StaticBody2D, Layer 5. Next, we will edit the collision for DefaultCharacter and DefaultEnemy:
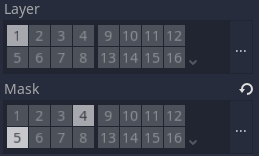
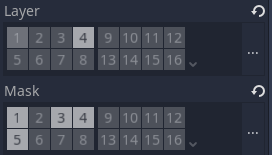
We will spawn zombies in the same way as in the first article on the test scene, in the next part we will rework it.
We hang a script on Node2D and proceed to editing it:
#Сцена Врага
export (PackedScene) var zombie_enemy

#Элементы дерева
onready var _mob_spawn_timer = $MobSpawnTimer
onready var player = $BrutalHero
onready var _user_interface = $BrutalHero/UserInterface
#Функция призыва Зомби
func spawn_zombie():
	var z = zombie_enemy.instance()

	var zombie_spawn_location = $MobPath/MobPathFollow

	zombie_spawn_location.unit_offset = rand_range(0.0,1.0)#Генерируем случайную точку спавна

	z.position = zombie_spawn_location.position#Настраиваем позицию

	z.player = player
	get_parent().add_child(z)# добавляем зомби

	z.speed = 2# присваеваем ему статы
	z.health = 5

func _ready():
	_mob_spawn_timer.start()
	randomize()# подключаем генератор случайных чисел
	_user_interface.init_health(player.health)# инициализируем наш UI


func _on_MobSpawnTimer_timeout():
	spawn_zombie()
	spawn_zombie()
	spawn_zombie()
	_mob_spawn_timer.start()

#Добавляем сигнал, от нашего персонажа на получение урона
func _on_BrutalHero_take_damage(damage):
	_user_interface.take_damage(damage)

#Добавляем сигнал, от нашего персонажа о смерти
func _on_BrutalHero_dead():
	get_tree().call_group("all_enemy", "queue_free")#Удаляем всех врагов со сцены
	SceneLoader.build_map_path("MainMenu")#Переходим в главное меню
I commented on everything in detail, it’s worth stopping at only one point, in the line get_tree().call_group(“all_enemy”, “queue_free”) (line 42), we call some group, we do something with it, how is it?
To do this, we need to go to the DefaultEnemy scene, Click on the main scene node and go to the “Node” tab. On the Node tab, go to Groups, enter a name (all_enemy) and click add. Now, when a DefaultEnemy scene instance appears, it will be added to the “all_enemy” group, and when the queue_free() function is called, we remove everyone who is in this group.
That’s basically it. On this we can say we have made the first ULTRA-alfa version of our game. In the next part, we will add music and sound effects, otherwise you can play, but it’s boring in silence. We will also add a goal for the game, otherwise at this stage the points we have scored are not even saved anywhere and are not displayed. We will add a character selection menu and various characters, rework the game scene and add a large number of enemies.
Vote in the poll, the 3 most popular options will be added in the next part.
