VPN IKEv2 server with login and password on MikroTik
This article is about how to stop worrying about certificates for IKEv2-RSA and installing them.
There are many articles and videos on the Internet on setting up IKEv2 authentication using certificates. The main problem with this configuration is the need to generate many certificates, deliver and install them on each client device. Pretty confusing process, agree?
At the same time, the IKEv2 protocol provides fast, secure access to the local network with the ability to automatically transfer routes and DNS settings to the VPN client.
But the access scheme can be greatly simplified using login and password authentication. The resulting scheme can be scaled to other VPN protocols – l2tp, pptp, sstp, ovpn. To do this, you need to transfer the MikroTik VPN server to the seventh version of RouterOS. And we need to install just one certificate – for the VPN server.
In the seventh version of RouterOS, very useful features have appeared that allow you to turn MikroTik into a full-fledged VPN server. Among the things that make life easier for the admin, two innovations are very suitable for our task:
Now, for a single MikroTik vpn server, a third-party certificate generator and installer is no longer required. The mechanism for requesting and installing a valid certificate from Let’s Encrypt allows you to do this in a few seconds. An embedded Radius server solves the problem of not having one in a small local network or being unable to use it for other reasons.
An important clarification on certificates from Let’s Encrypt as part of the OS.
You need to make sure that valid certificates from Let’Encrypt are installed correctly on the client. This is important not only for our task, but also for the correct operation of other services and applications that use certificates.
The fact is that the Let’s Encrypt chain of trust looks like this today:
https://letsencrypt.org/certificates/
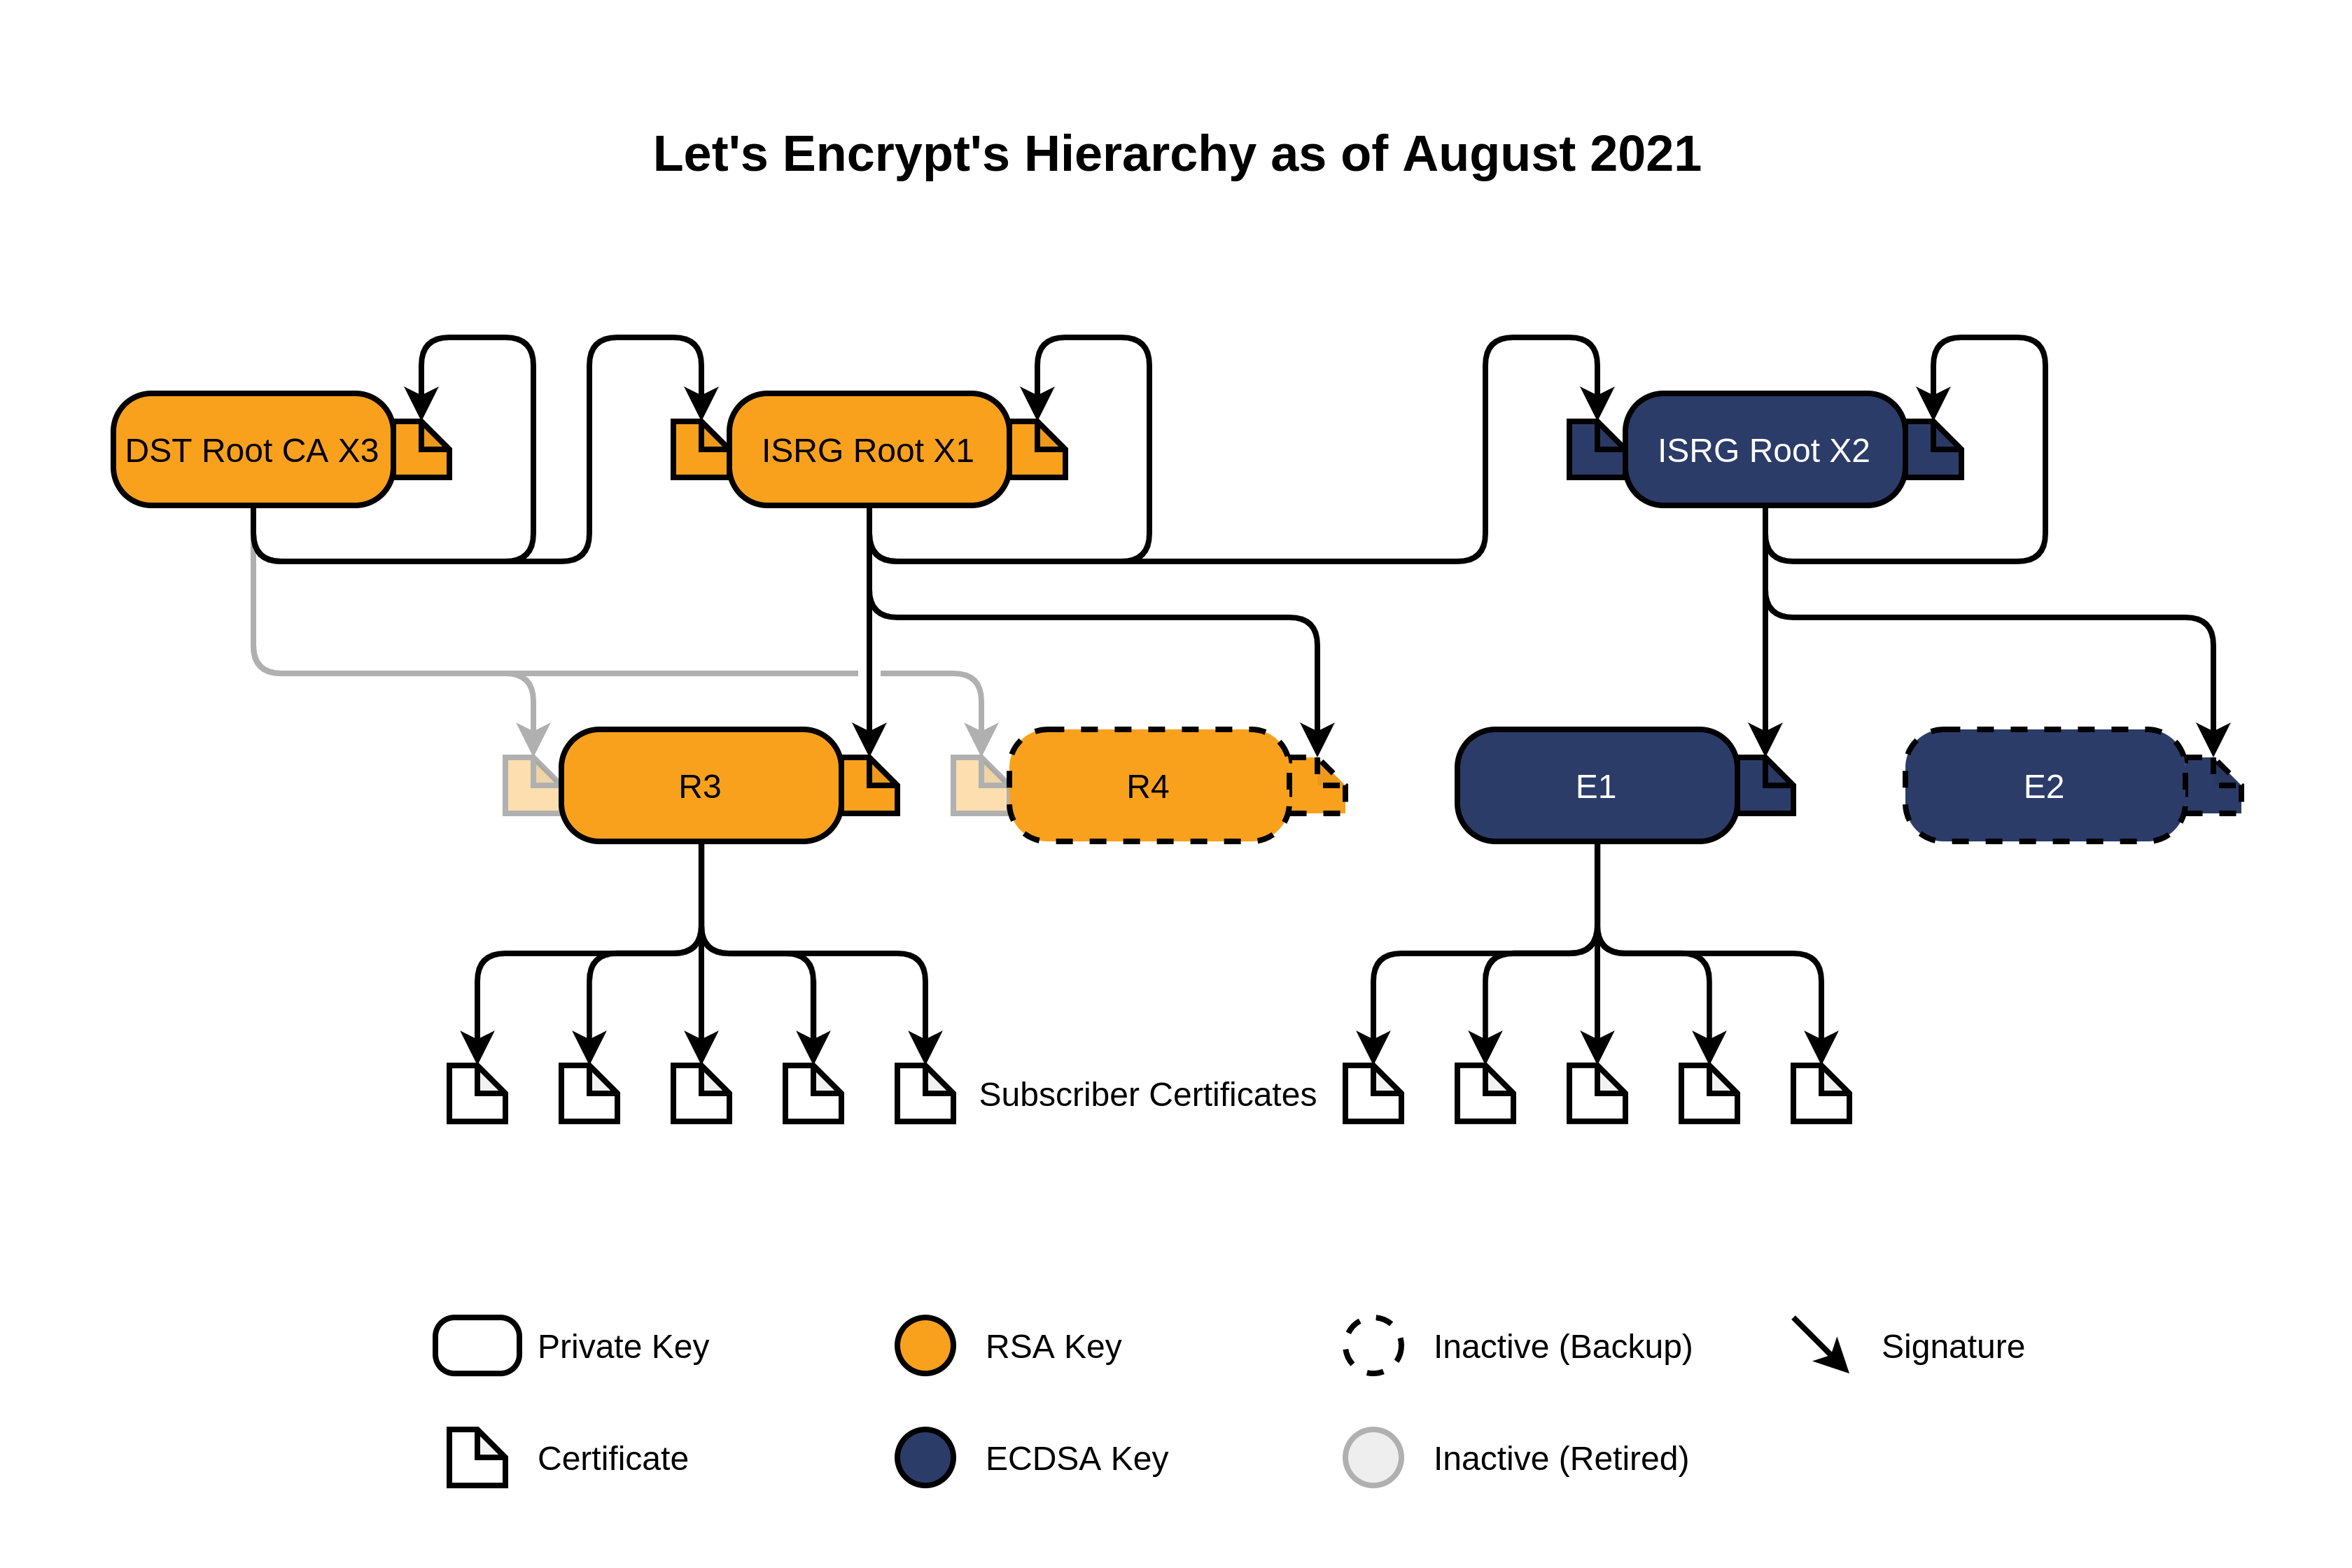
All certificates automatically issued to Mikrotik clients are signed on behalf of R3.
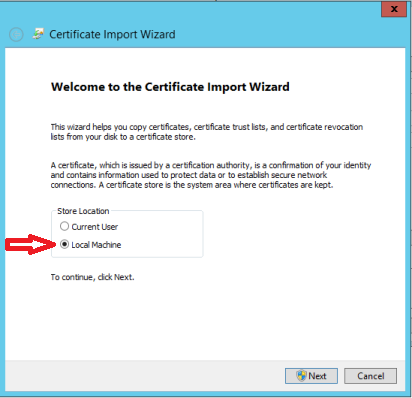
On a Windows client OS, the certificate R3 must be set as “intermediate trusted CA” in storage COMPUTER (Local Machine). The most common problem when importing a certificate is usually a meter away from the PC and clicks the “mouse”. By default, Windows tries to install this certificate in the store userleading to access issues.
So. Verify that the R3 certificate is present in the “Intermediate Trusted Certification Authorities” store COMPUTER. If not, download from the link. https://letsencrypt.org/certs/lets-encrypt-r3.pem and install the certificate correctly.
Initial conditions:
External IP (FQDN): gw1.mt-courses.ru
LAN: 10.10.4.0/24
Addresses for ikev2 clients: 192.0.2.0/24
Router running MikroTik RouterOS version 7.x
Setting up MikroTik RouterOS. Preparation.
Generating a request and installing a certificate on the server:
Prerequisites: the http (tcp:80) port must be open and accessible from the outside on the router. By default, the webfig service runs on this port. It is highly NOT recommended to leave access to it from the outside for everyone in a row, so you can open the port only at the time of generating / updating the certificate.
It is also desirable to have an FQDN associated with the external IP of your MikroTik. For example, gw1.mt-courses.ru.
Script for obtaining a certificate:
/ip/firewall/filter add chain=input protocol=tcp dst-port=80 action=accept comment="temporary filter rule" place-before=1
/certificate/enable-ssl-certificate dns-name=gw1.mt-courses.ru
/ip/firewall/filter remove [find comment="temporary filter rule"]
If as a result of the command you see the message “progress: [success] ssl certificate updated“, then the certificate was successfully generated and installed in the store. Check:
/certificate/printResult:
Flags: K – PRIVATE-KEY; A-AUTHORITY; I, R – REVOKED; T – TRUSTED
Columns: NAME, COMMON‑NAME
0 KT letsencrypt‑autogen_2023–xx–xxThh:mm:ssZ gw1.mt‑courses.ru
Obtaining and installing the additional user-manager package on MikroTIk:
To do this, you need to go to the site https://www.mikrotik.com in the “Software” section and download the “extra packages” archive corresponding to the hardware architecture of your MikroTik router
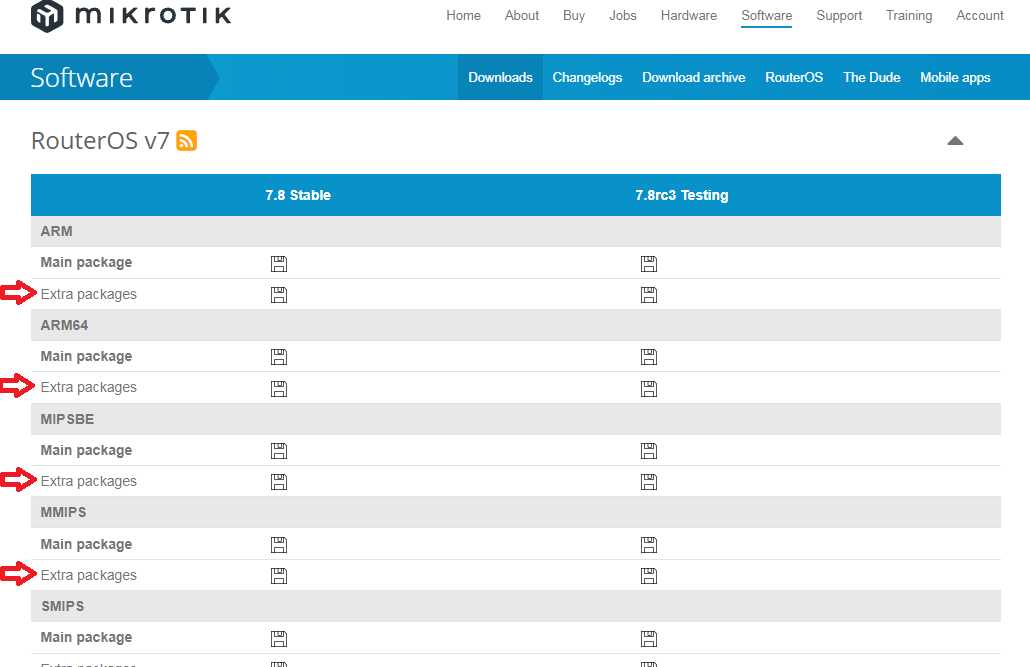
Please note that the version number of the package exactly matches the version of RouterOS installed! It is not possible to install packages of a version that differs from the version of the operating system installed on the router.
From the archive you will need a single file “user-manager-7.x.npk”
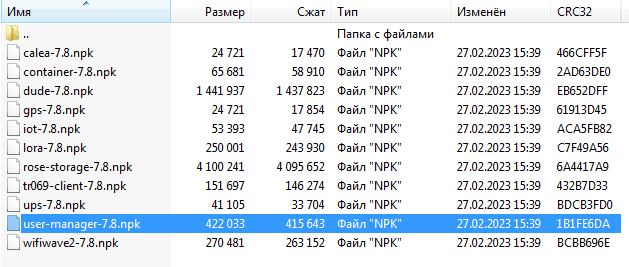
This file must be extracted from the archive, copied to the root of the file system of the MikroTik router and rebooted (/system reboot).
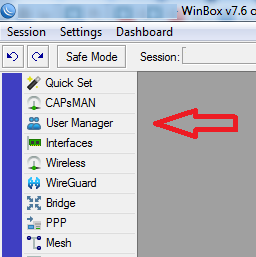
If the package is successfully installed, a new item “User Manager” will appear in the WinBox root menu (if not, read the LOG. The cause of the error will be described at the beginning)
Setting up IKEv2.
Now let’s move on to the most basic, actually setting up a VPN access server using the IKEv2 protocol. Since when a client connects, it is allocated a certain virtual IP address, we first need to create an address pool for connecting clients:
/ip/pool add name=vpn-pool ranges=192.0.2.1–192.0.2.254We proceed directly to the IPSec configuration. Setting up IPSec requires the creation of several entities:
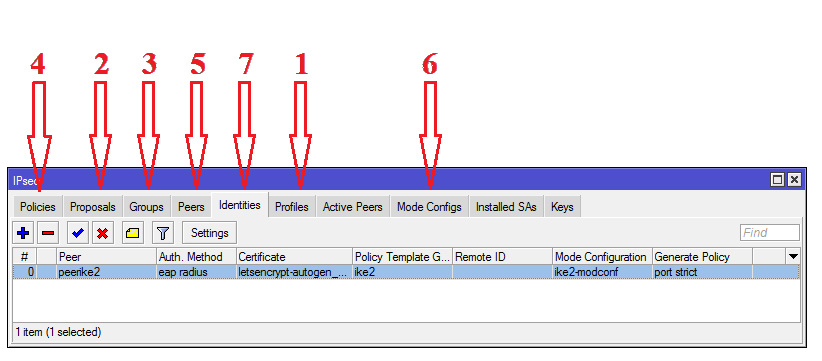
Profile
Proposal
group
Policy Template
Peer (template)
modeconf
Identity
group used as a tag for linking Identity and Policy Template to generate individual Policies from a template when a client connects. In essence, Identity is what gathers all the settings together when the client connects to the server. Therefore, Identity is configured last, when the rest of the parameters are created.
Here I want to give you advice: Never. N-and-to-o-g-d-a, without urgent need, do not change profiles with the name “Default” in RouterOS, if for sure NOT know how it will affect future work. In Winbox it is always possible to create copy profile and experiment with the copy. The console also has such an opportunity – the keyword “copy-from=“.
1.2) For clarity, let’s create copies of the existing Proposal and Profile. At the same time, disable in Proposal PFS:
/ip/ipsec/proposal
print
add copy-from=0 name=proposal-ike2 pfs-group=none
/ip/ipsec/profile
print
add copy-from=0 name=profile-ike2
3) Let’s create a separate Group for Policy:
/ip ipsec policy group add name=ike2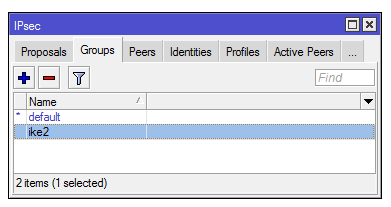
4) Create a Policy Template for connected peers that have received an address from the 192.0.2.0/24 pool:
/ip/ipsec/policy add dst-address=192.0.2.0/24 group=ike2 proposal=proposal-ike2 src-address=0.0.0.0/0 template=yes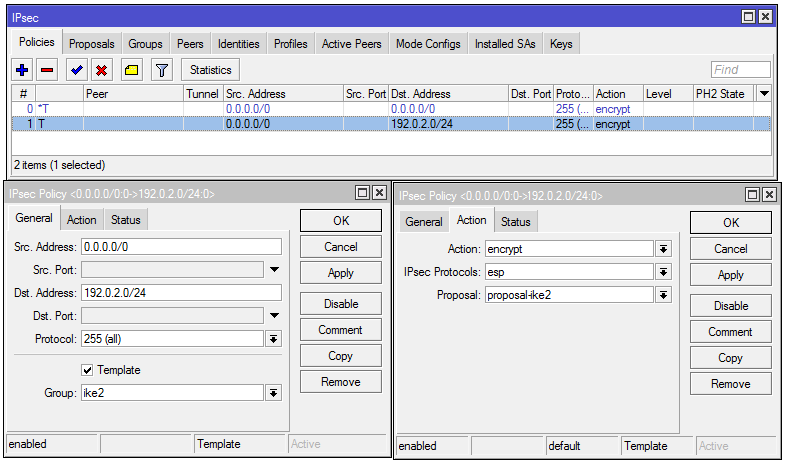
5) Create a peer (client) template:
/ip/ipsec/peer add exchange-mode=ike2 name=peerike2 passive=yes profile=profile-ike2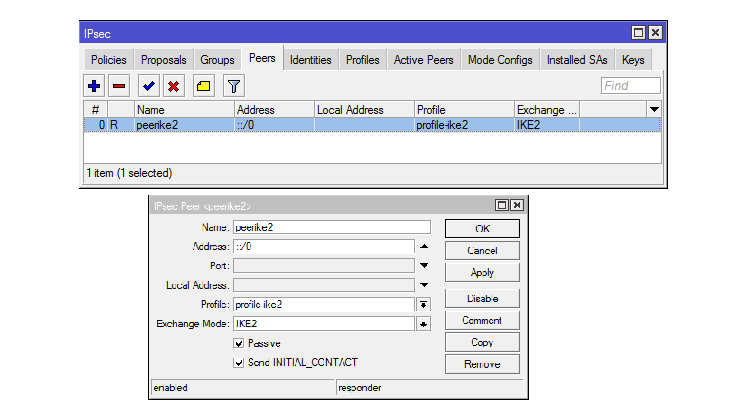
6) We create mode-config. This is a set of parameters that will be passed to the client, including the DNS server address and routes to local networks. In the example, the route to the local network 10.10.4.0/24 is sent to the client:
/ip/ipsec/mode-config
add address-pool=vpn-pool name=ike2-modconf split-include=10.10.4.0/24 system-dns=yes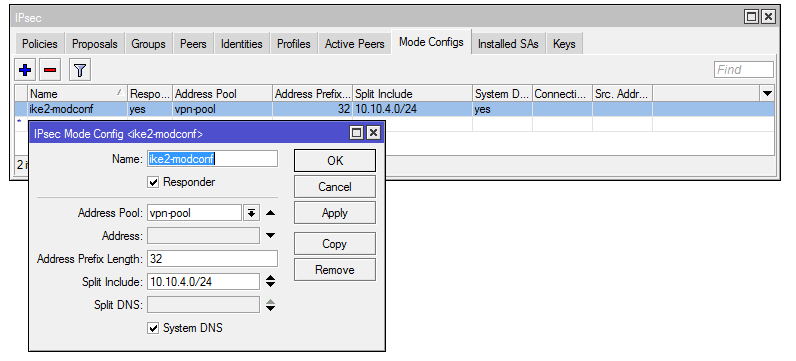
7) We create the final identity. In it, we will also use the link to the received certificate from Let’s Encrypt:
/ip/ipsec/identity
add auth-method=eap-radius certificate=letsencrypt-autogen_2023-xx-xxThh:mm:ssZ generate-policy=port-strict mode-config=ike2-modconf peer=peerike2 policy-template-group=ike2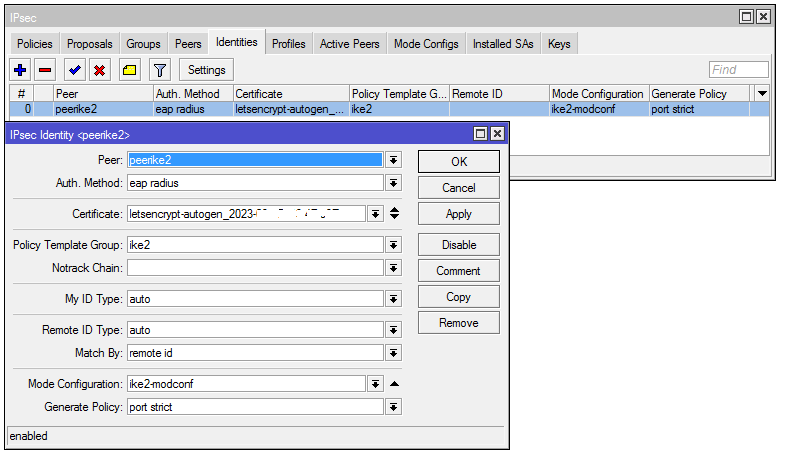
The “auth-method=eap-radius” parameter tells Mikrotik that authentication requests should be forwarded to the Radius server. It remains to configure it directly on MikroTik. Our built-in radius (UserManager) will use the password “MySuperPass1234” and, in addition to IPSec IKEv2 clients, will additionally process requests from regular ppp clients (pptp/l2tp/sstp…)
/radius
add address=127.0.0.1 secret=MySuperPass1234 service=ppp,ipsec
/radius incoming
set accept=yes
The minimum, most primitive user-manager setup consists of enabling commands, allowing interaction with the local access server using the password “1234” and adding a user with the login “user1@gw” and the password “1234567890”:
/user-manager
set enabled=yes
/user-manager router
add address=127.0.0.1 name=router1 shared-secret=MySuperPass1234
/user-manager user
add name=user1@gw1 password=1234567890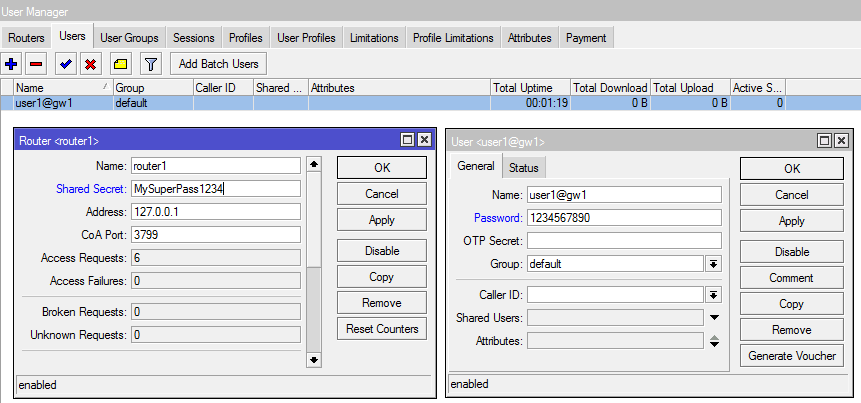
Entire code for RouterOS
/ip/firewall/filter add chain=input protocol=tcp dst-port=80 action=accept comment="temporary filter rule" place-before=1
/certificate/enable-ssl-certificate dns-name=gw1.mt-courses.ru
/ip/firewall/filter remove [find comment="temporary filter rule"]
/ip/pool add name=vpn-pool ranges=192.0.2.1–192.0.2.254
/ip/ipsec/proposal
print
add copy-from=0 name=proposal-ike2 pfs-group=none
/ip/ipsec/profile
print
add copy-from=0 name=profile-ike2
/ip/ipsec/policy group add name=ike2
/ip/ipsec/policy add dst-address=192.0.2.0/24 group=ike2 proposal=proposal-ike2 src-address=0.0.0.0/0 template=yes
/ip/ipsec/peer add exchange-mode=ike2 name=peerike2 passive=yes profile=profile-ike2
/ip/ipsec/mode-config add address-pool=vpn-pool name=ike2-modconf split-include=10.10.4.0/24 system-dns=yes
/ip/ipsec/identity add auth-method=eap-radius certificate=letsencrypt-autogen_2023-xx-xxThh:mm:ssZ generate-policy=port-strict mode-config=ike2-modconf peer=peerike2 policy-template-group=ike2
/radius add address=127.0.0.1 secret=MySuperPass1234 service=ppp,ipsec
/radius incoming set accept=yes
/user-manager set enabled=yes
/user-manager router add address=127.0.0.1 name=router1 shared-secret=MySuperPass1234
/user-manager user add name=user1@gw1 password=1234567890
We connect the client windows.
Create a new VPN connection
Server name / address: specify the FQDN, your own, for which the certificate was issued (I have it gw1.mt-courses.ru)
Login in the example: user1@gw1 Password: 1234567890

If everything is done correctly, then a successful connection to the VPN should occur.
If an IKE error occurs with code 13801, then most likely the R3 certificate is installed incorrectly or in the wrong place in the system.



Hello,
Fist of all thank you very much for this post which help me to establish a VPN connexion between my mikrotik v7.7 and a windows 11 client.*
Unfortunately there is no ping response through the tunnel. After checking the route table in windows it appear there is no gateway for the remote subnets.
Looking at your confirguration I didn’t find a gateway for the subnet 192.0.2.0/24. How come it can work without it.
Thanks for your help