Personal home VPN based on Raspberry (Shadowsocks) (for the little ones)
Setting up your small, home and lamp VPN based on Shadowsocks (Outline). You need a Raspberry and a custom wi-fi router. Step-by-step instruction. No monthly fee and no VPS rental.
First of all, a small disclaimer: I’m not a real welder, I just shoveled a lot of information, compiled it and got the result I needed. And I will share it with the whole world, where a well-known government is trying to block already private VPN connections.
So far, only commercial VPN services have been blocked. While the WireGuard and OpenVPN protocols fall under the distribution (August 2023). The first is very popular for its ease and speed, quick setup. Unfortunately, such traffic has “I am a VPN connection” written on the forehead. The second protocol is already quite old and popular, but also quite easily detected by the ILV. As of today, RKN is only practicing with bans, but it looks like Shadowsocks is running smoothly so far. Nevertheless, “Roskomsvoboda experts also suggest that the authorities’ next step could be to block Shadowsocks, a non-standard protocol created to bypass the Great Firewall of China, and similar tools.“. So far, we have not yet reached this protocol, based on it, or rather Outline, using Shadowsocks technology, we will configure our VPN server.
What will we need?
Please keep in mind that I am telling my personal case, but if you are smart, you can easily adapt it for yourself.
So, my close people who are in the Russian Federation need unblocked access to the Internet. Yes, and I may also need it if I myself will (no) be in the Russian Federation.
What I have:
I live outside the Russian Federation;
I have a regular home Internet connection with a regular ISP (with a dynamic IP address);
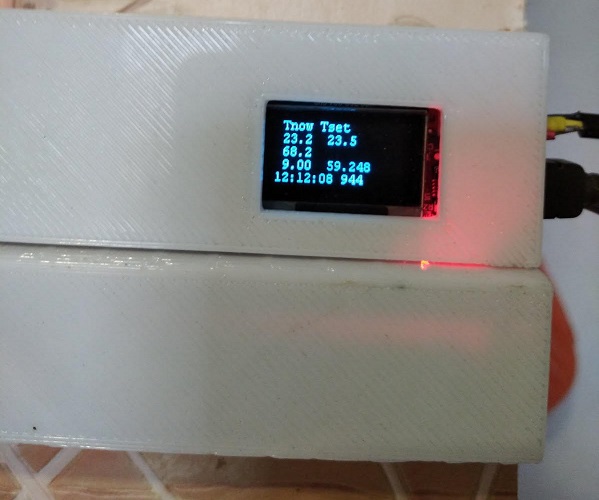
Raspberry PI 400 (I had a gift for DR);
wifi router Fritz! Box 6690 (you can have any other not stupid router that can be configured in detail);
personal computer.
Let’s get started
First of all, with the help Raspberry Pi Imager, install a lightweight 64-bit Raspberry Pi OS Lite on a microSD flash drive. We insert the card into the Raspberry and connect to it via SSH from the computer:
ssh user@192.168.178.44Where user your Raspberry username, and 192.168.178.44 – The IP address of your Raspberry on your home network.
We enter the password, then we update (we enter the commands in turn, we agree with everything):
sudo apt update
sudo apt dist-upgrade
sudo apt clean
sudo reboot
After the reboot, connect to the Raspberry via SSH again:
ssh user@192.168.178.44Where user your Raspberry username, and 192.168.178.44 – The IP address of your Raspberry on your home network.
Enter the password and install Docker. First, download the script for installation.
curl -fsSL https://get.docker.com -o get-docker.shRun the Docker installation script:
sh get-docker.shWe allow a regular user to work with Docker without root rights:
sudo usermod -aG docker $USERSetting up a router and DynDNS
A typical home internet provider by default issues a dynamic IP address that changes from time to time. You can fix it either by renting a permanent IP address, or by using the DynDNS service. Its meaning is that every time the provider changes the dynamic IP address, the service updates the data and thus the domain name always remains static (which is what we need), and the IP address can change at least once an hour.
I used the free service https://ydns. io/ – it does not ask for any of your data, except for email, very simple and without ads:
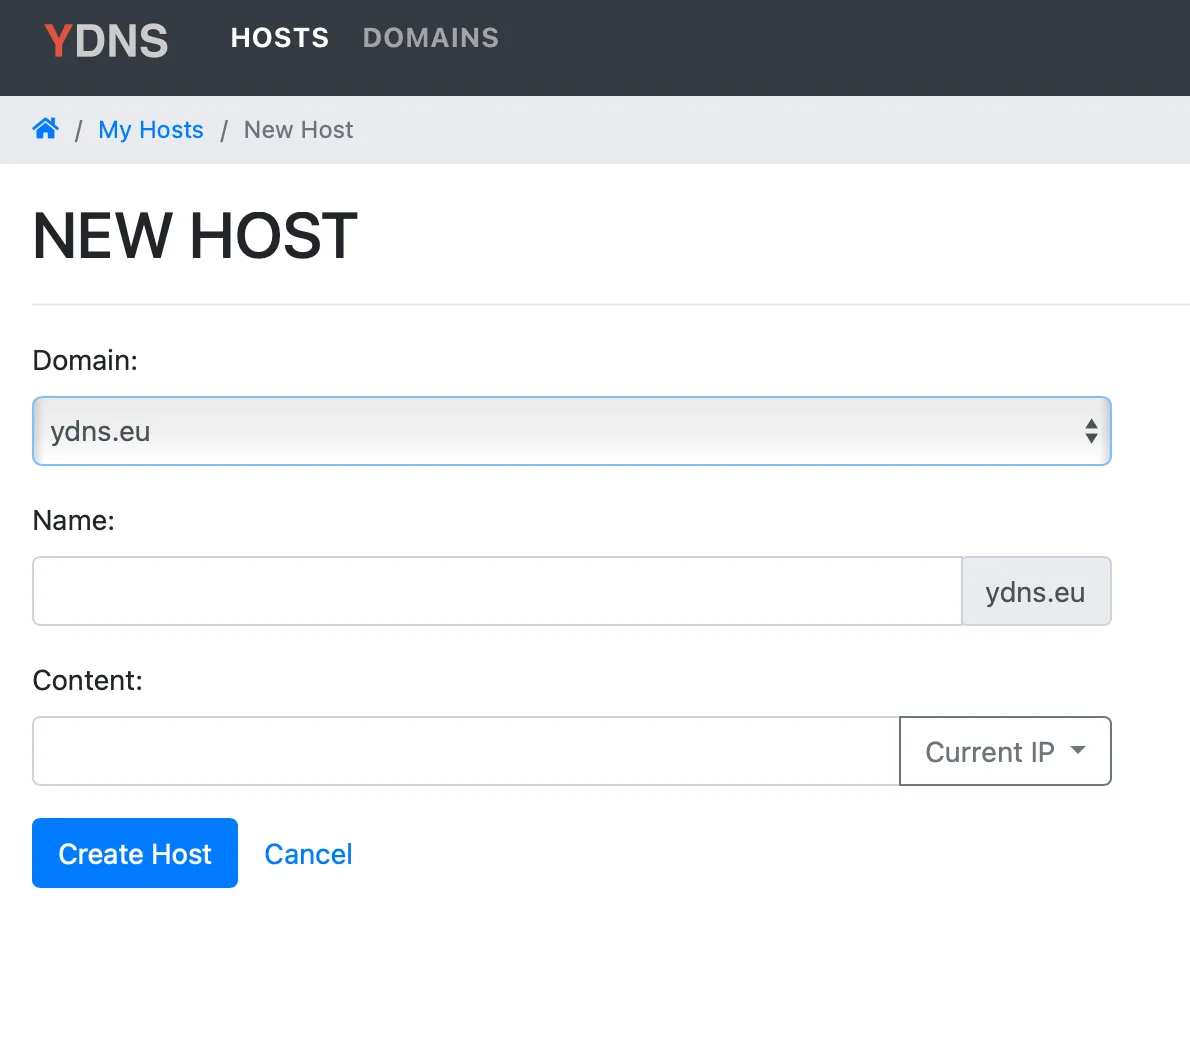
after registering in the Hosts section, create a new one, assign some name and indicate your IP address, which was given to you by your provider. You can find out if, for example, go to https://2ip. en (please note that iCloud Private Relay is turned off if you have a Mac, and any other VPN or services that can hide your real IP address) or look in the router settings;
in the settings of the created host, click the Get Update URL button and copy the link;

in the router settings in the DynDNS section, enter: login, password from ydns. io and the copied Update URL link (each time the provider changes the IP address, the router will “click” on this link, thus passing its new IP address to the service).
Please note that the service itself is on the domain ydns.ioand it provides the domain ydns.eu

Now we have a static domain name that can be used to access our IP address and a configured router that, when the IP address changes, updates the data on the DynDNS service.
Outline installation
Developers from JigSaw provide the simplest script for installation, you need to write one command in the terminal, the script will do the rest. Unfortunately, when trying to install an Outline server on a Raspberry, it will give an error that the Raspberry is not an x86 machine and the installation will abort.
The script has been improved by enthusiasts and now Outline works great on arm64 Raspberry.
It is also worth considering that by default the script takes your dynamic IP address and sets it in its settings. This does not suit us, because when the provider changes the IP, we will not be able to connect to the VPN server. That’s why we made the DynDNS host higher.
SB_IMAGE=oreoluwa/shadowbox:daily sudo --preserve-env bash -c "$(wget -qO- https://raw.githubusercontent.com/EricQmore/installer/main/install_server.sh) --hostname user.ydns.eu"Where at the end user. ydns. eu is your host that you created above. Thus, we tell the script to specify our domain name in the settings of the created server.
If everything is OK, then the script will give a green line like this:

Also, most likely, he will swear at the Firewall settings that certain ports are not available. He will also indicate them: one UDP port, as well as two TCP and UDP ports.
In case our server reboots, we need to provide for the automatic launch of containers so that the VPN server always rises. We enter the commands in turn:
sudo systemctl enable docker.service
sudo systemctl enable containerd.service
Now let’s restart Raspberry to make sure the containers start up again and the VPN server comes up by itself:
sudo rebootConnecting to Rasberry again:
ssh user@192.168.178.44Where user your Raspberry username, and 192.168.178.44 – The IP address of your Rasberry on your home network.
Check if containers are running:
docker psThe list should contain at least two entries: watchtower (watches for updates) and shadowsocks.
Let’s go back to the computer:
We launch the already downloaded Outline Manager from the official website https://getoutline. org/ru/get-started/#step-1click Set Up in the lower right corner (Advanced section).


VPN server is ready.
Open the Settings tab and in the “Port for new access keys” field, replace it with one of the TCP ports that the script indicated to us in the terminal.
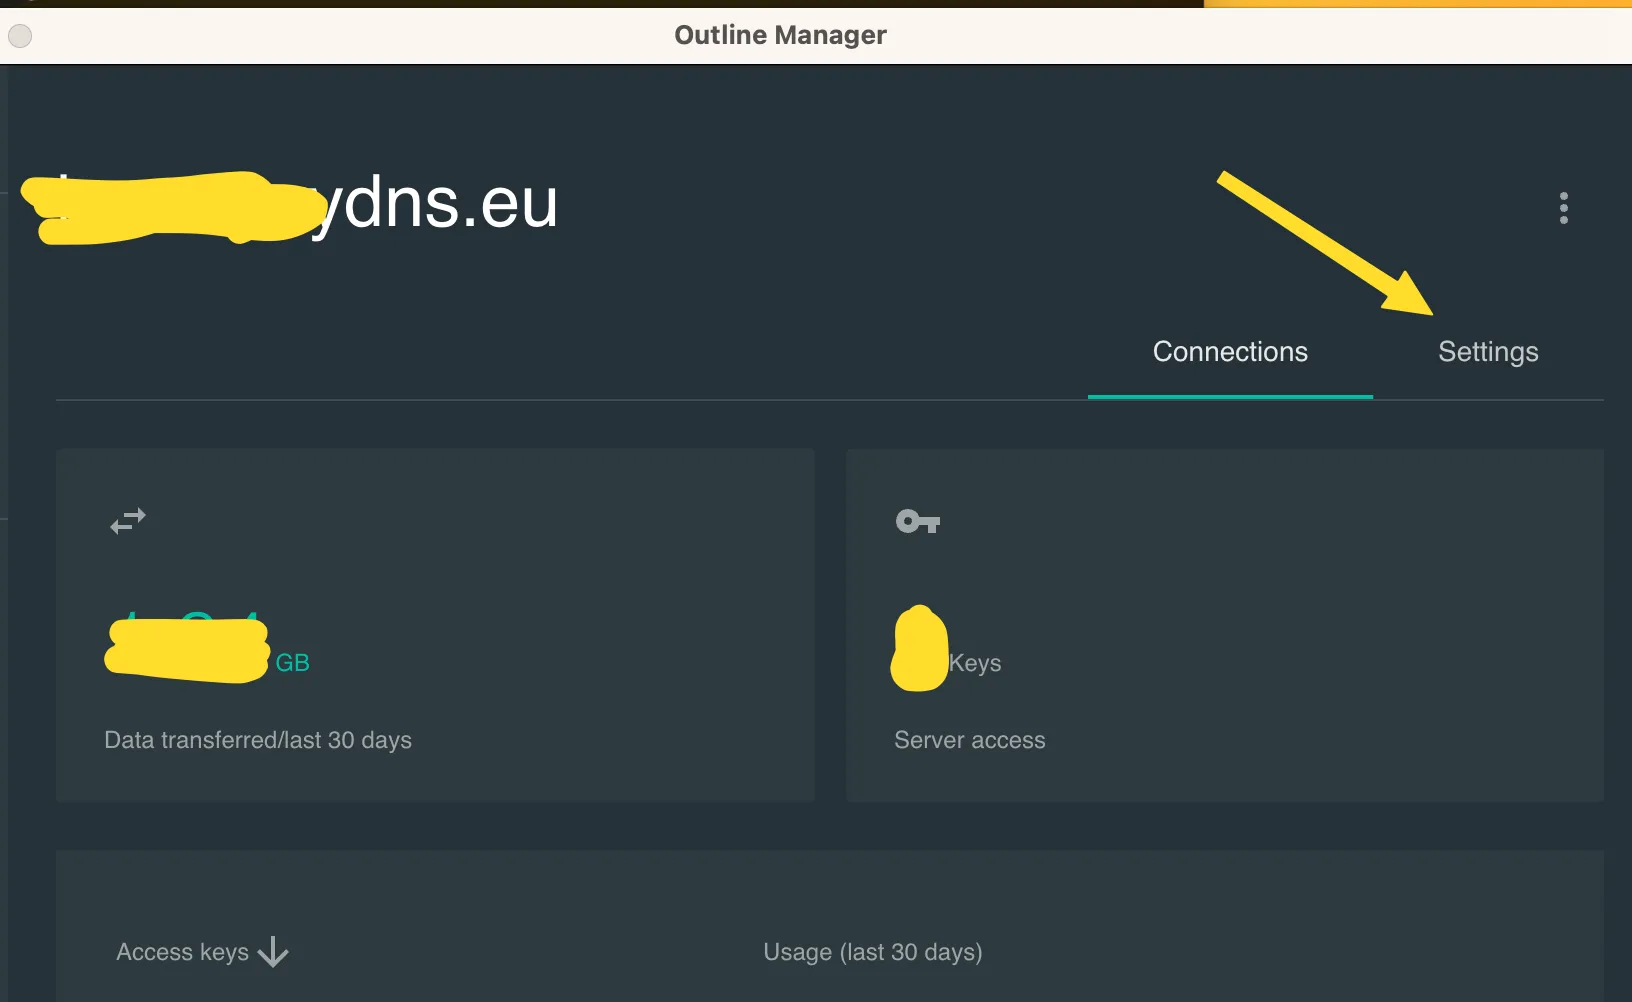
In the Connections tab, click “Add new key”, call it whatever you like (“mama iphone”), click the “Share” symbol on the right and click “Copy access key” in the window that appears.

Forwarding ports in the router
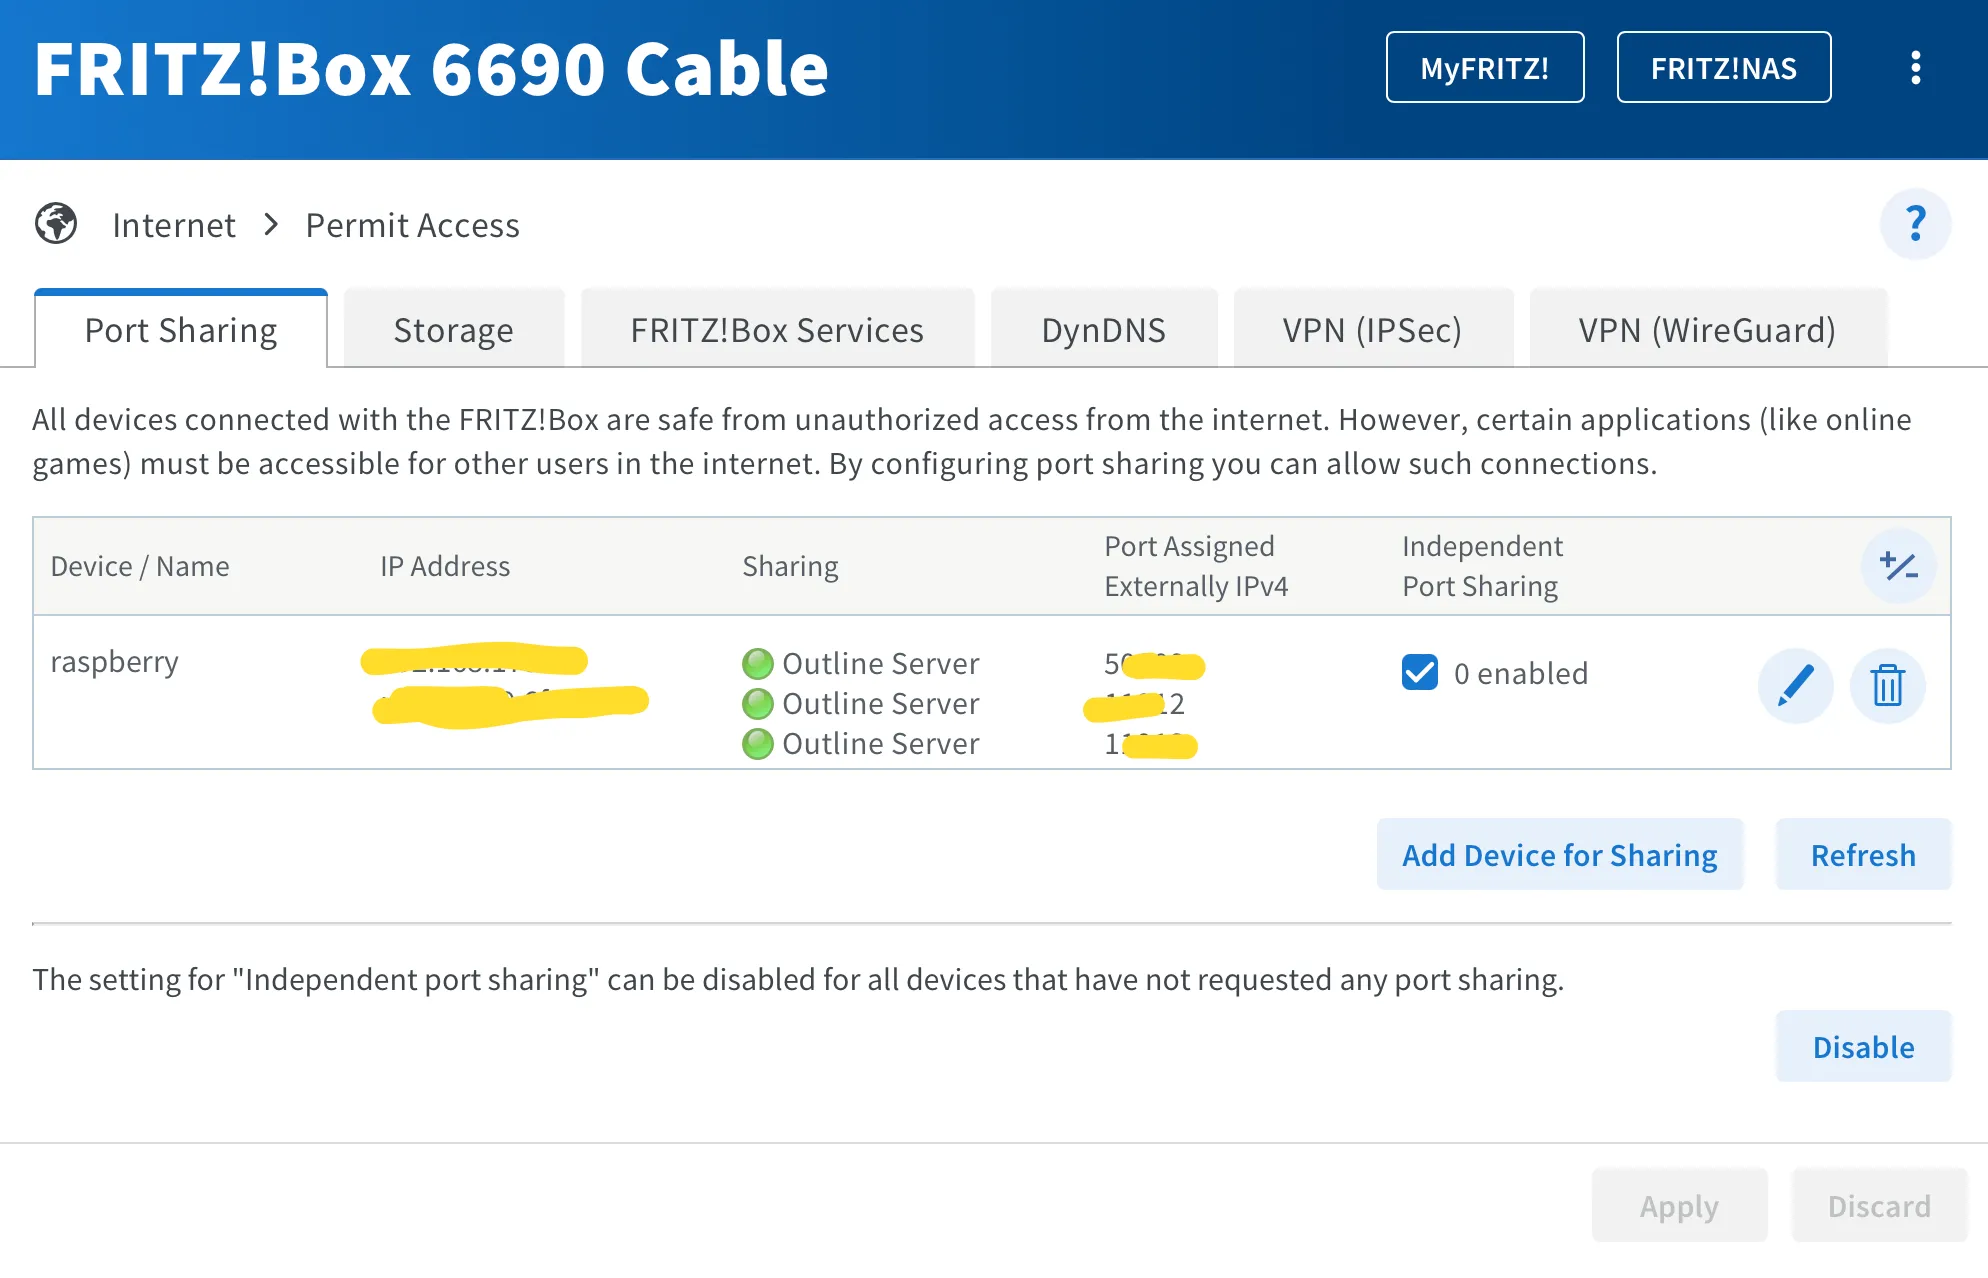
We have our own VPN server running on a Raspberry on our home network, but right now we can’t connect to it because it’s not accessible from the “outside” internet. Therefore, we need to forward the ports that the script indicated to us in the terminal output in the router settings. In my Fritz router! Box 6690 this is done elementarily:
in the Home Network section, select Network Connections and in the list of home network devices we find Raspberry, for example, 192.168.178.44
press the “pencil” to edit the settings;
click “Permit Access” and check the box Permit independent port sharing for this device;
press the Change port sharing button and in the section that appears, press the “pencil” again;
then select New sharing and in the Create sharing window that appears, select Port sharing;
In Application, you can select Other application and select the port protocol;
So you should have three entries for three ports: 1 UDP port and 2 TCP ports, apply the settings.
Our VPN server is available on three ports from the “external” Internet, we are trying to connect.
Before you announce to your loved ones that you have raised your VPN server and are ready to share a window to the unblocked Internet, you should try to connect to your server from the “external” Internet yourself.
Install Outline Client from the official site https://getoutline. org/ru/get-started/#step-3 on your smartphone and disconnect from wifi, that is, use the mobile Internet;
Enter the key copied in the previous steps from the Outline Manager in “Add Server”;
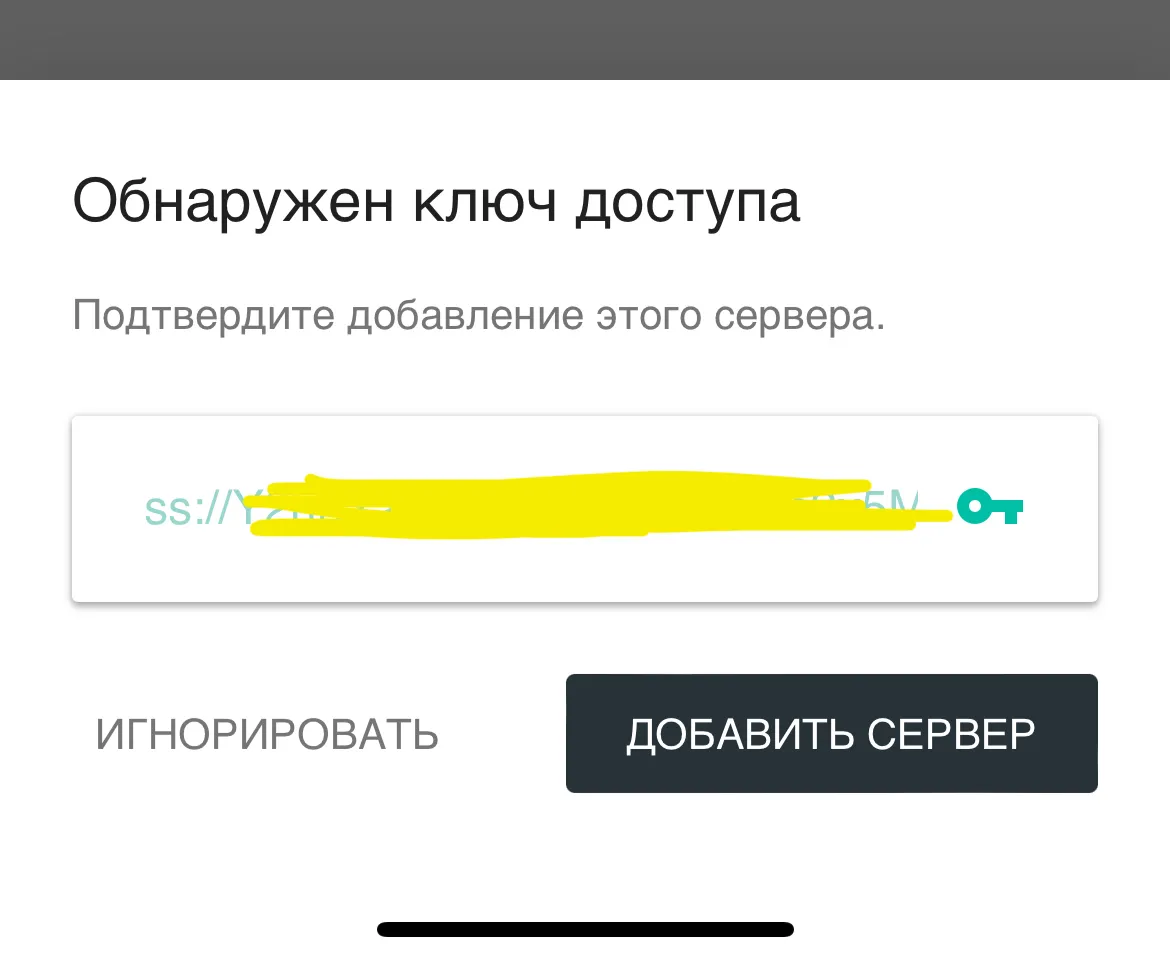

If the connection has been made, the circle turns green, the “Disconnect” button appears;
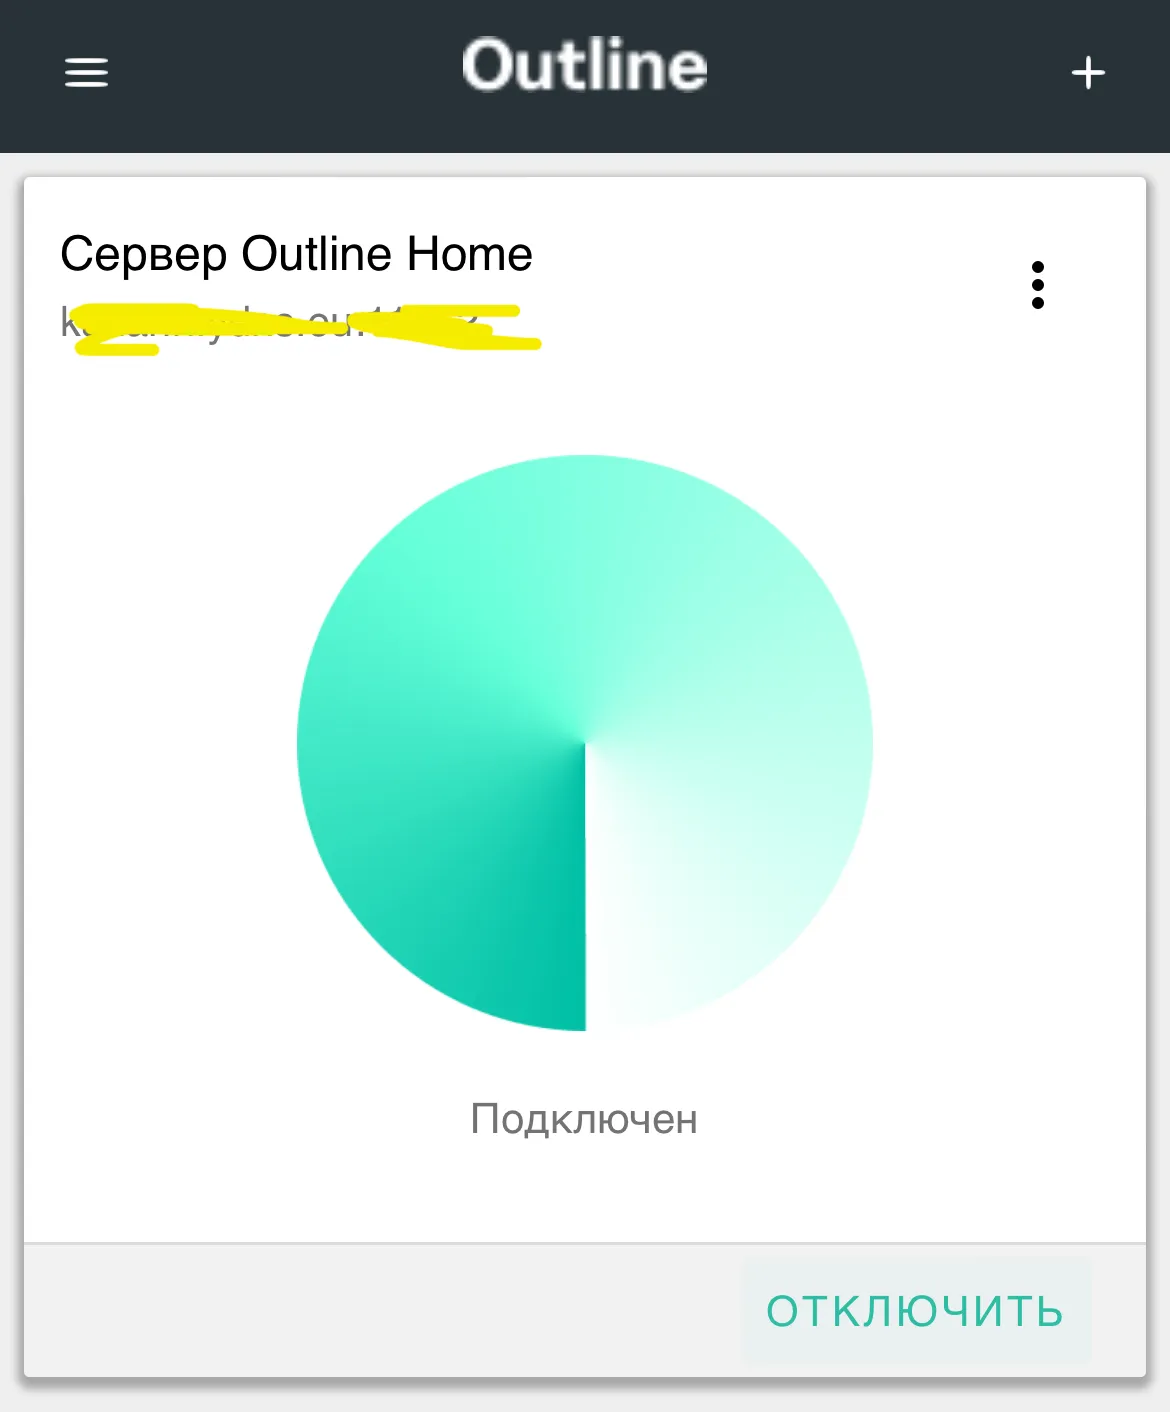
On https://2ip. en check our IP address. Must be home IP address. You can open a couple more sites to check that there is a connection and traffic is flowing through it.

The VPN connection is working, everything is fine.
Outcome
We set up our own Raspberry Shadowsocks VPN server on our home network, which works quite autonomously even with reboots and dynamic IP updates. No subscription fee, that is, almost free. And we can administer this business a little: give everyone an access key, see the volume of his traffic and even limit it and, if necessary, disable (delete) the key.
In the future, you can still think about what services can be raised on Raspberry, since it already exists. For example, AdGuard Home – it will be even more effective to cut advertising banners, block malicious sites, and counteract tracking of your devices.
In theory, such a VPN connection will be difficult to determine by the RKN, and the advantage is that the connection is not established with the hosting provider, which would look to the RKN as a “private VPN connection with a VPS rented abroad.”
Keep in mind that you do everything at your own peril and risk, I disclaim any responsibility. Good luck!
!!!ATTENTION!!! If you live in a country where downloading torrents is punishable by a 45-year prison sentence, then be extremely careful about giving away the access key to your VPN server. “Mission Impossible”, downloaded from torrents by a younger brother, in your country will look like you did it with all the ensuing consequences.