One repository to rule them all

We are building a cross-platform (server-client, static-client, gh-pages, android, ios, mac, linux, windows, chrome extension, kuber, docker) React application. In this article I will hardly touch on the Deep backend, only a little at the end. But I will consider Open Source template/blank for building cross-platform React applications which we use at Deep.Foundation.
Yes, obviously for the most productive UI/UX you need the most native Swift/Java/…, but if the goal is to quickly launch a product and have universal access and approach to everything, then this gives you one ring out of the box to rule them all for a quick start .
Do not take into account the preparation of the system, it is enough to immediately place your React code in your fork, replacing the content this component:
export default function Page() {
  const deep = useDeep();
  const { t } = useTranslation();
  const router = useRouter();

  // @ts-ignore
  if (typeof(window) === 'object') window.deep = deep;
  console.log('deep', deep);

  return (<Center p={'1em'}>
    <VStack p={3} spacing={3} width={'100vw'} maxWidth={500}>
      <Box pt={3}>
        <Heading as={'h1'} size="xl">
          {t('sdk')}
          <HStack spacing={3} float="right">
            <Button isDisabled={router.locale === 'ru'} onClick={() => router.push(router.asPath, router.asPath, { locale: 'ru' })}>ru</Button>
            <Button isDisabled={router.locale === 'en'} onClick={() => router.push(router.asPath, router.asPath, { locale: 'en' })}>en</Button>
          </HStack>
        </Heading>
        <Heading as={'h4'} size="md">{t('sdk-description')}</Heading>
      </Box>
      <Connection/>
    </VStack>
  </Center>);
}
Why do we need an SDK at Deep.Foundation (difficult)
In addition to using it to assemble Deep.Case as such, the SDK is needed so that the components stored in Deep, in connections, can be exported directly from the interface in the next versions of Deep.Case to any cross-platform application and immediately published to the store with one button. For this purpose, deep-foundation/deepcase is initially installed in the SDK (npm, git) from which you can import a React component <ClientHandler linkId={123}/> which loads the most suitable component to display the specified connection.

The component is very flexible, supports props context={[...ids]} designed to select a more suitable component, for example components in the database can be labeled with context links as “menu items” or “full screen” or “workspace” or symbolize size, or a specific application. In the context of associativity, these can be any connections, since everything is uniform. Thus, build the sdk where as the index component this is <ClientHandler/> displaying a specific connection, in a specific way, and pre-filled with Minilinks with the connections necessary for the operation of this component and all its subcomponents. This will be covered in future articles. We are currently working on a new modular version of Deep.Case, with various ClientHandlers for grids and placement of other ClientHandlers such as react-grid-layout or react-flowand there are also plans to develop a ui around ChakraUI grid, flex, simple-grid etc. for visual editing of responsive meshes inside Deep.Case.
The table will be updated as circumstances change. The article will be supplemented with examples and instructions. Uniform instructions for customizing application icons, extensions, and splash screens will be in the article about publishing an application.
Preparing ourselves
Only basic knowledge is required to use this sdk JavaScript (our free video lessons), Reacthtml/css, git And NextJS. May be useful for fine tuning Capacitor, Electron, Cardova.
Preparing the development environment
We will need some IDE, let's say VSCode. I recommend using it on Windows WSL. It is also necessary to install git for cloning repositories and nvm for ease of version control nodejs/npm. We are using version 16 of node so we will install it by default:
nvm i 16; nvm alias default 16; nvm use default;To generate Android applications we need installed Android Studio with the following components in SDK Tool: Android SDK Command-line Tools, Android Emulato, Android SDK Platfrom-Tool, Google Play services and some version of SDK Platforms, now we will use Android 14. Required to install Homebrew (if you're on a Mac) and then Gradle.
brew install gradleScreenshots from Android Studio


To generate iOS applications, we need XCode installed, in our case version 10. Required to install Homebrew And Сocoapods.
brew install cocoapodsBegin
In a real case, the ideal would be to fork the sdk and clone it, and then in the future update it from the source with the following code:
git remote add sdk https://github.com/deep-foundation/sdk.git
git fetch sdk
git merge sdk/main --allow-unrelated-histories --strategy ours
However, we will be working directly to build the sdk, so we will clone it.
git clone https://github.com/deep-foundation/sdk.git;
cd sdk;
npm ci; (cd electron; npm ci)
On average, after installing all development dependencies, the sdk directory weighs approximately
to#$&5.5GB but this is the price of development on NodeJS.
Development mode
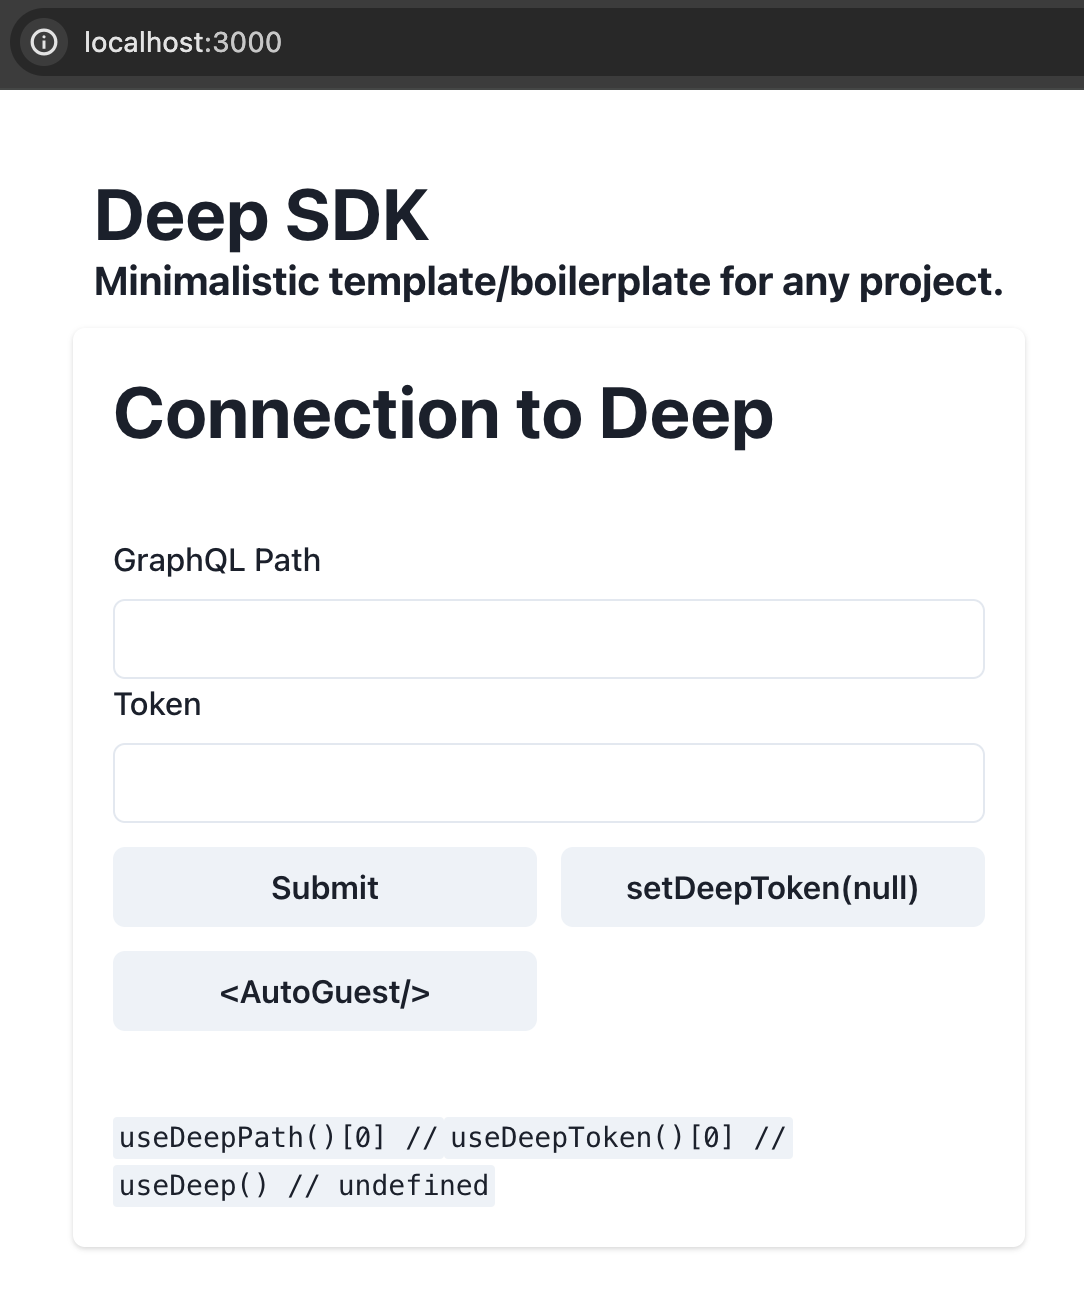
We are launching the development version. In this mode, it is convenient to develop an application in the browser using the chrome inspector and react chrome extension.
npm run dev; # запус режима разработки на PORT=3000 по умолчанию
PORT=3001 npm run dev; # запуск на альтернативном порте
Screenshot localhost:3000

Server-client build
npm run build; # генерация sdk/app, PORT использовать нельзя
npm run start; # запуск сгенерированного sdk/app, PORT=3000 по умолчанию
PORT=3001 npm run start; # запуск на альтернативном порте
Approximate weight of the sdk/app directory is 76MB
Screenshot localhost:3000
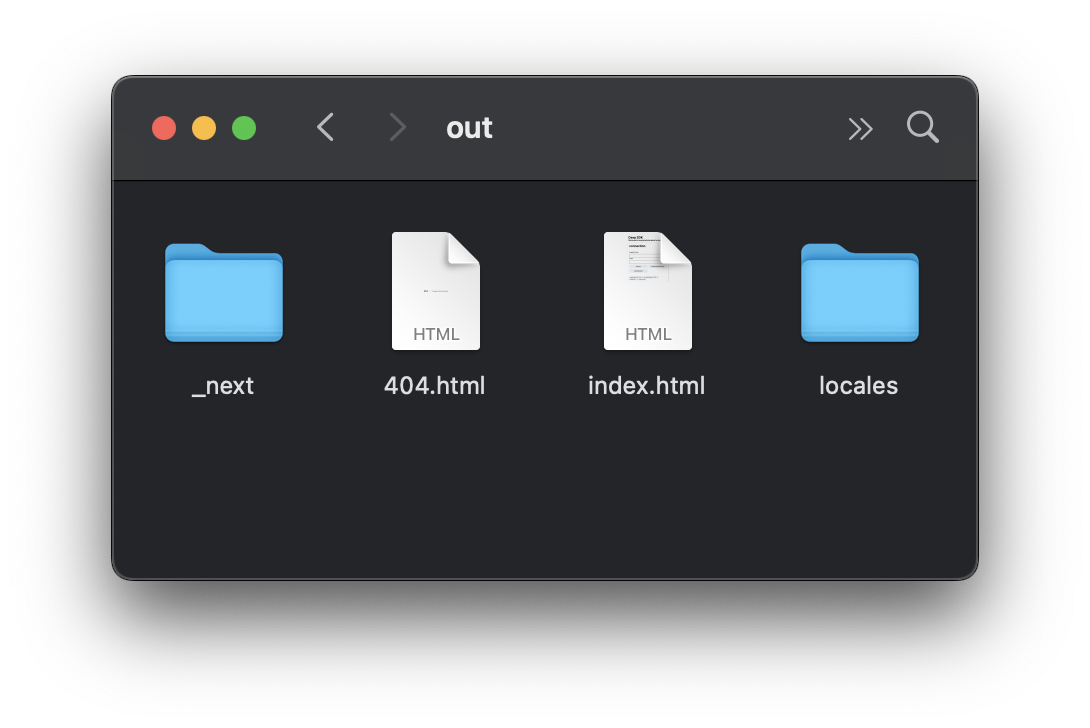
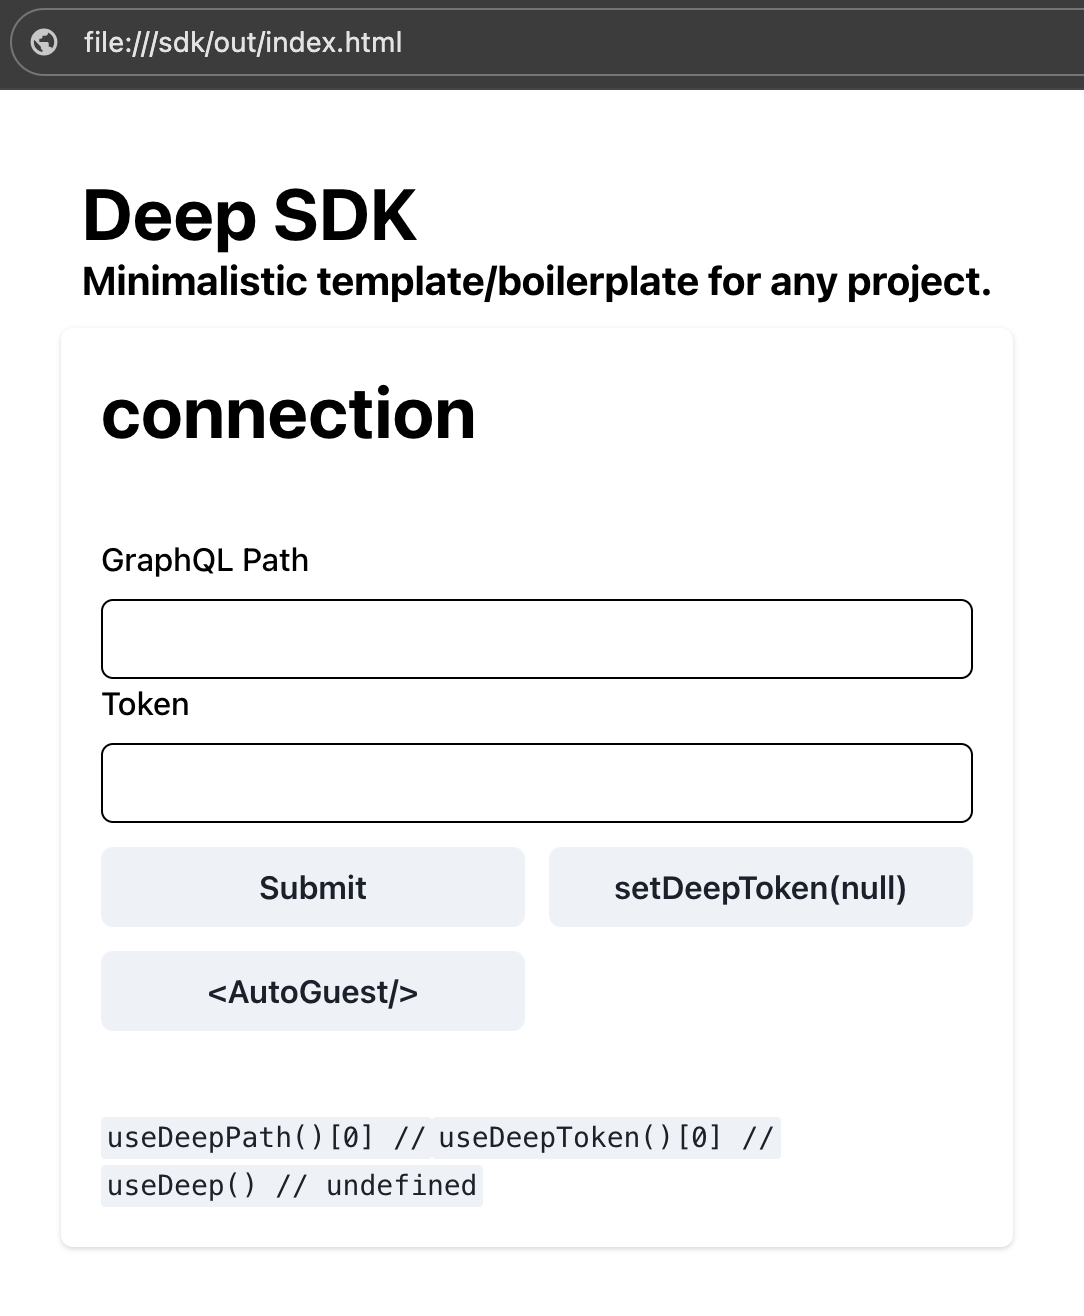
Static client build
Pre-configured in the SDK next-i18next
npm run export; # генерация sdk/out директории
# .html файлы в директории можно открыть
# директорию можно залить на любой статический хостинг
Approximate weight of the sdk/out directory is 1.6MB
Screenshot of the directory and open application
Android application
npm run build-android; # генерирует sdk/app, sdk/out, обновляет sdk/android
npm run open-android; # запускает AndroidStudio с нужной конфигурацией из sdk/android
# генерирует apk по адресу sdk/android/app/build/outputs/apk/debug/app-debug.apk
# подробнее о генерации release билда будет в статье про публикации в сторы
Approximate weight of the apk file is 4.1MB
It can be convenient to use capacitor config server key for debugging changes in real time by specifying in the config the path to the running application in development mode (
npm run dev).
Instructions for launching the emulator and a screenshot of the running application.

1 Wait for the build process to complete in the lower right corner.
2 Perhaps at the first start or after updating the dependency to the sdk, you may need to click Sync Project with Gradle files.
3 Add the desired device for the emulator and follow the instructions inside.
4 When finished, press the green ▶️ Run button on top. This will launch the Android emulator, install the app on it, and launch it.

iOS app
# Перед работой нужно установить cocoapods библиотеки используемые в ios
(cd ios/App/App; pod install);

npm run build-ios;  # генерирует sdk/app, sdk/out, обновляет sdk/ios
npm run run-ios # запускает XCode с нужной конфигурацией из sdk/ios
# где лежит билд приложения не так важно, так как любая заливка в TestFlight
# делается прямиком из XCode, это будет рассмотрено в следующей статье?")
run-ios the terminal will prompt you to select an iOS emulator to choose from. The choice is made using the arrows and enter. I'll choose my se, without fingerprints anywhere… do you agree ;)?
Approximate weight of the apk file is 4.1MB
It can be convenient to use capacitor config server key for debugging changes in real time by specifying in the config the path to the running application in development mode (
npm run dev).
Screenshot of the running emulator and application.

Mac application
This can only be done on the MacOS operating system. Required Apple Developer account. Need to generate an app-specific password for an ADC Apple ID account and remember it. Then generate teamId. Update Variables APPLEIDPASS, APPLEID, CSC_NAME, APPLETEAMID in your package.json.scripts.build-macand also perform security add-generic-password -l "sdk" -a "YOUR-APPLEID-EMAIL" -s "keychain" -T "" -w "APP-PASSWORD-FROM-APPLE" replacing the corresponding values, where APP-PASSWORD-FROM-APPLE the previously received app-specific password.
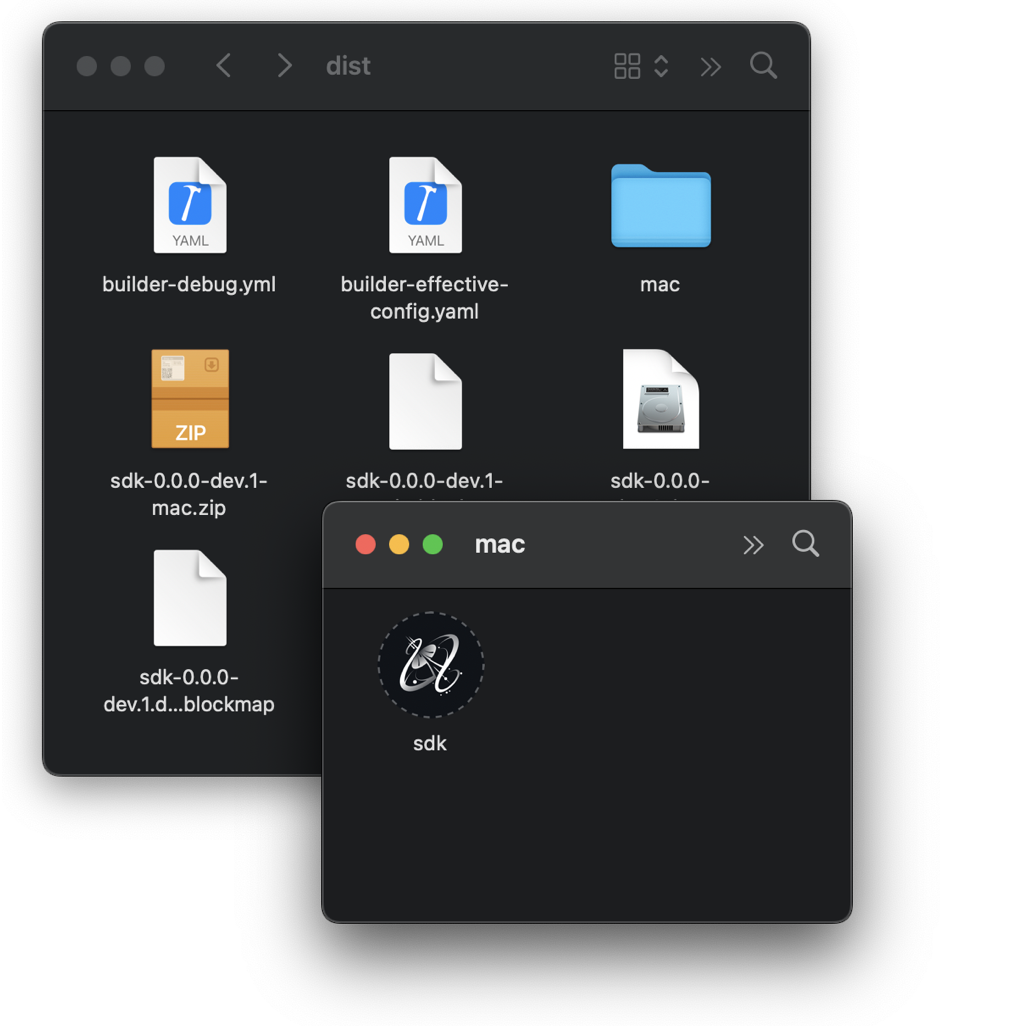
npm run build-mac # генерирует sdk/app, sdk/out, обновляет sdk/electron
# генериует dmg, zip и папку mac с бинарником по адресу sdk/electron/dist
Approximate weight of the dmg file is 350MB
Screenshot of the sdk/electron/dist directory and the running application

Linux application
An application for Linux can only be compiled from under Linux.
npm run build-unix # генерирует sdk/app, sdk/out, обновляет sdk/electron
# генериует Appimage и папку linux-unpacked с исполнимым файлом
The approximate weight of the Appimage file is 350MB
Screenshot of the sdk/electron/dist directory and the running application

Windows application
npm run build-windows # генерирует sdk/app, sdk/out, обновляет sdk/electron
# генериует exe и папку linux-unpacked с исполнимым файлом
Approximate installer weight 350MB
Approximate weight after installation 1GB
Screenshot of the sdk/electron/dist directory and the running application
Chrome extension
npm run build-chrome-extension
# Result path: `sdk/extension.crx` and `sdk/extension.pem`
The approximate weight of the crx file is 1MB
Screenshot of an extension added and opened in Chrome

Environment Variables
PORT=3000 # по умолчанию
# NextJS пробрасывает NEXT_PUBLIC_ переменные до клиента

NEXT_PUBLIC_GRAPHQL_URL= # по умолчанию не указан, выбирается в ui
NEXT_PUBLIC_DEEP_TOKEN= # по умолчанию не указан, выбирается в ui

NEXT_PUBLIC_I18N_DISABLE=0 # по умолчанию
# next-i18next не поддерживает next export, то есть бессерверный nextjs
# sdk оборачивает асинхронным i18n провайдером, если NEXT_PUBLIC_I18N_DISABLE=1
# так-же если NEXT_PUBLIC_I18N_DISABLE=1 то оригинальный next-i18next отключен
# это автоматически включается при npm run export
Backend
Surely you have your own solution for the backend, and you can, like in any NextJS install the methods you need to access your api, or use already installed ones @apollo/client, axios. We use Deep as a backend. I won't delve into the process of launching a dip; that can be found in our community. I will describe just a couple of examples of how we operate with associations. Deepusha will come back with a more detailed example later in a separate article.
Example of React code for working with the Deep backend and client-side associative memory minilinks using hooks (difficult)
Let's say we created an associative package in Deep.Case in advance @ivansglazunov/checked and there are connections in it User |- Checked -> Any to indicate the fact of completion. We will use one that already exists in the package @deep-foundation/coretype SyncTextFileas a store of value. The involvement of our pseudo task with the user will be denoted by the fact that the instance is nested SyncTextFileto the user through instances of an existing one in the package @deep-foundation/coretype Contain .
The code below is just an example,
@ivansglazunov/checkedpackage does not exist.
const deep = useDeep();
// deep.linkId указывает на связь авторизованного в этом клиенте пользователя
// эти два запроса вернут одинаковое количество связей
// однако этот способ сделает больше join и нагрузки на сервер
// и вернет иерархию связей
const { data: nested, loading } = deep.useDeepSubscription({
  type_id: { _id: ['@deep-foundation/core', 'SyncTextFile'] },
  in: {
    from_id: deep.linkId, type_id: { _id: ['@deep-foundation/core', 'Contain'] },
  },
  return: { checkeds: {
    relation: 'in',
    type_id: { _id: ['@ivansglazunov/checked', 'Checked'] }
  } }
});
// nested // { ...link, checkeds: link[] }[]
// а этот сделает поиск по ассоцитавной индексации деревьев
// так как для работы системы прав мы вкладываем Checked экземпляр Contain связью
// он доступен в едином дереве собственности
// в этом случае мы заранее получим используемые идентификаторы
// что бы снизить нагрузку на запросы
// это можно сделать по разному, это не самый оптимальный способ
// но для наглядного примера сойдет...
const { data: Checked } = deep.useDeepId('@ivansglazunov/checked', 'Checked');
const { data: SyncTextFile } = deep.useDeepId('@deep-foundation/core', 'SyncTextFile');
const { data: Contain } = deep.useDeepId('@deep-foundation/core', 'Contain');
const { data: containTree } = deep.useDeepId('@deep-foundation/core', 'containTree');
const { data: all, loading } = deep.useDeepSubscription({
  // верни все те связи у кого выше по дереву containTree есть указанная связь
  up: {
    tree_id: containTree,
    parent_id: deep.linkId,
  },
  // нас интересуют только SyncTextFile и Checked связи
  type_id: { _in: [Checked, SyncTextFile] },
});
// all // link[] // всё найденное плоским списком
// Все найденные данные доступны в нашем Глубинном аналоге
// клиентского MeteorJS minimongo - minilinks.
// например можно найти именно все не чекнутые SyncTextFile в оперативной памяти
// на клиенте и вывести на экран
const unchecked = deep.useMinilinksSubscription({
  type_id: SyncTextFile,
  _not: { in: { type_id: Checked } },
});
const checked = deep.useMinilinksSubscription({
  type_id: SyncTextFile,
  in: { type_id: Checked },
});
return <>
  {unchecked.map(l => <div>
    <input type="checkbox" onClick={async () => {
      await deep.insert({
        type_id: Checked, from_id: deep.linkId, to_id: l.id,
        // и обязательно вкладываем его в дерево владения
        // что бы можно было иерархически искать или давать права
        in: { data: { type_id: Contain, from_id: l.id } },
      });
    }}/>
    {l?.value?.value}
    <button onClick={async () => await deep.delete({
      // удаляем всех по дереву contain у кого выше есть l.id включительно
      up: { tree_id: containTree, parent_id: l.id }
    })}>x</button>
  </div>)}
  {checked.map(l => <div>
    <input type="checkbox" onClick={async () => {
      await deep.delete({ type_id: Checked, from_id: deep.linkId, to_id: l.id });
      // любопытно то что благодаря minilinks можно записать это так
      await deep.delete(l.inByType[Checked][0].id]);
      // или так
      await deep.delete(deep.minilinks.query({ type_id: Checked, to_id: l.id })[0].id);
    }}/>
    {l?.value?.value}
    <button onClick={async () => await deep.delete({
      // удаляем всех по дереву contain у кого выше есть l.id включительно
      up: { tree_id: containTree, parent_id: l.id }
    })}>x</button>
  </div>)}
</>;
// а так можно допустим создать новый таск
const [value, setValue] = useState('');
return <>
  <input type="text" value={value} onChange={e => setValue(e.currentTarget.value)}/>
  <button onClick={async () => await deep.insert({
    type_id: SyncTextFile,
    string: { data: { value } },
    in: { data: { type_id: Contain, from_id: deep.linkId } },
  })}>+</button>
</>;
// PS сорри если где накосячил с примером ;)
// разбор реального кейса дипуша принесет в следующих статьях