Loose laptop screen hinges? We’ll fix it. Epoxy is not needed, the main tool is a glue gun and a soldering iron
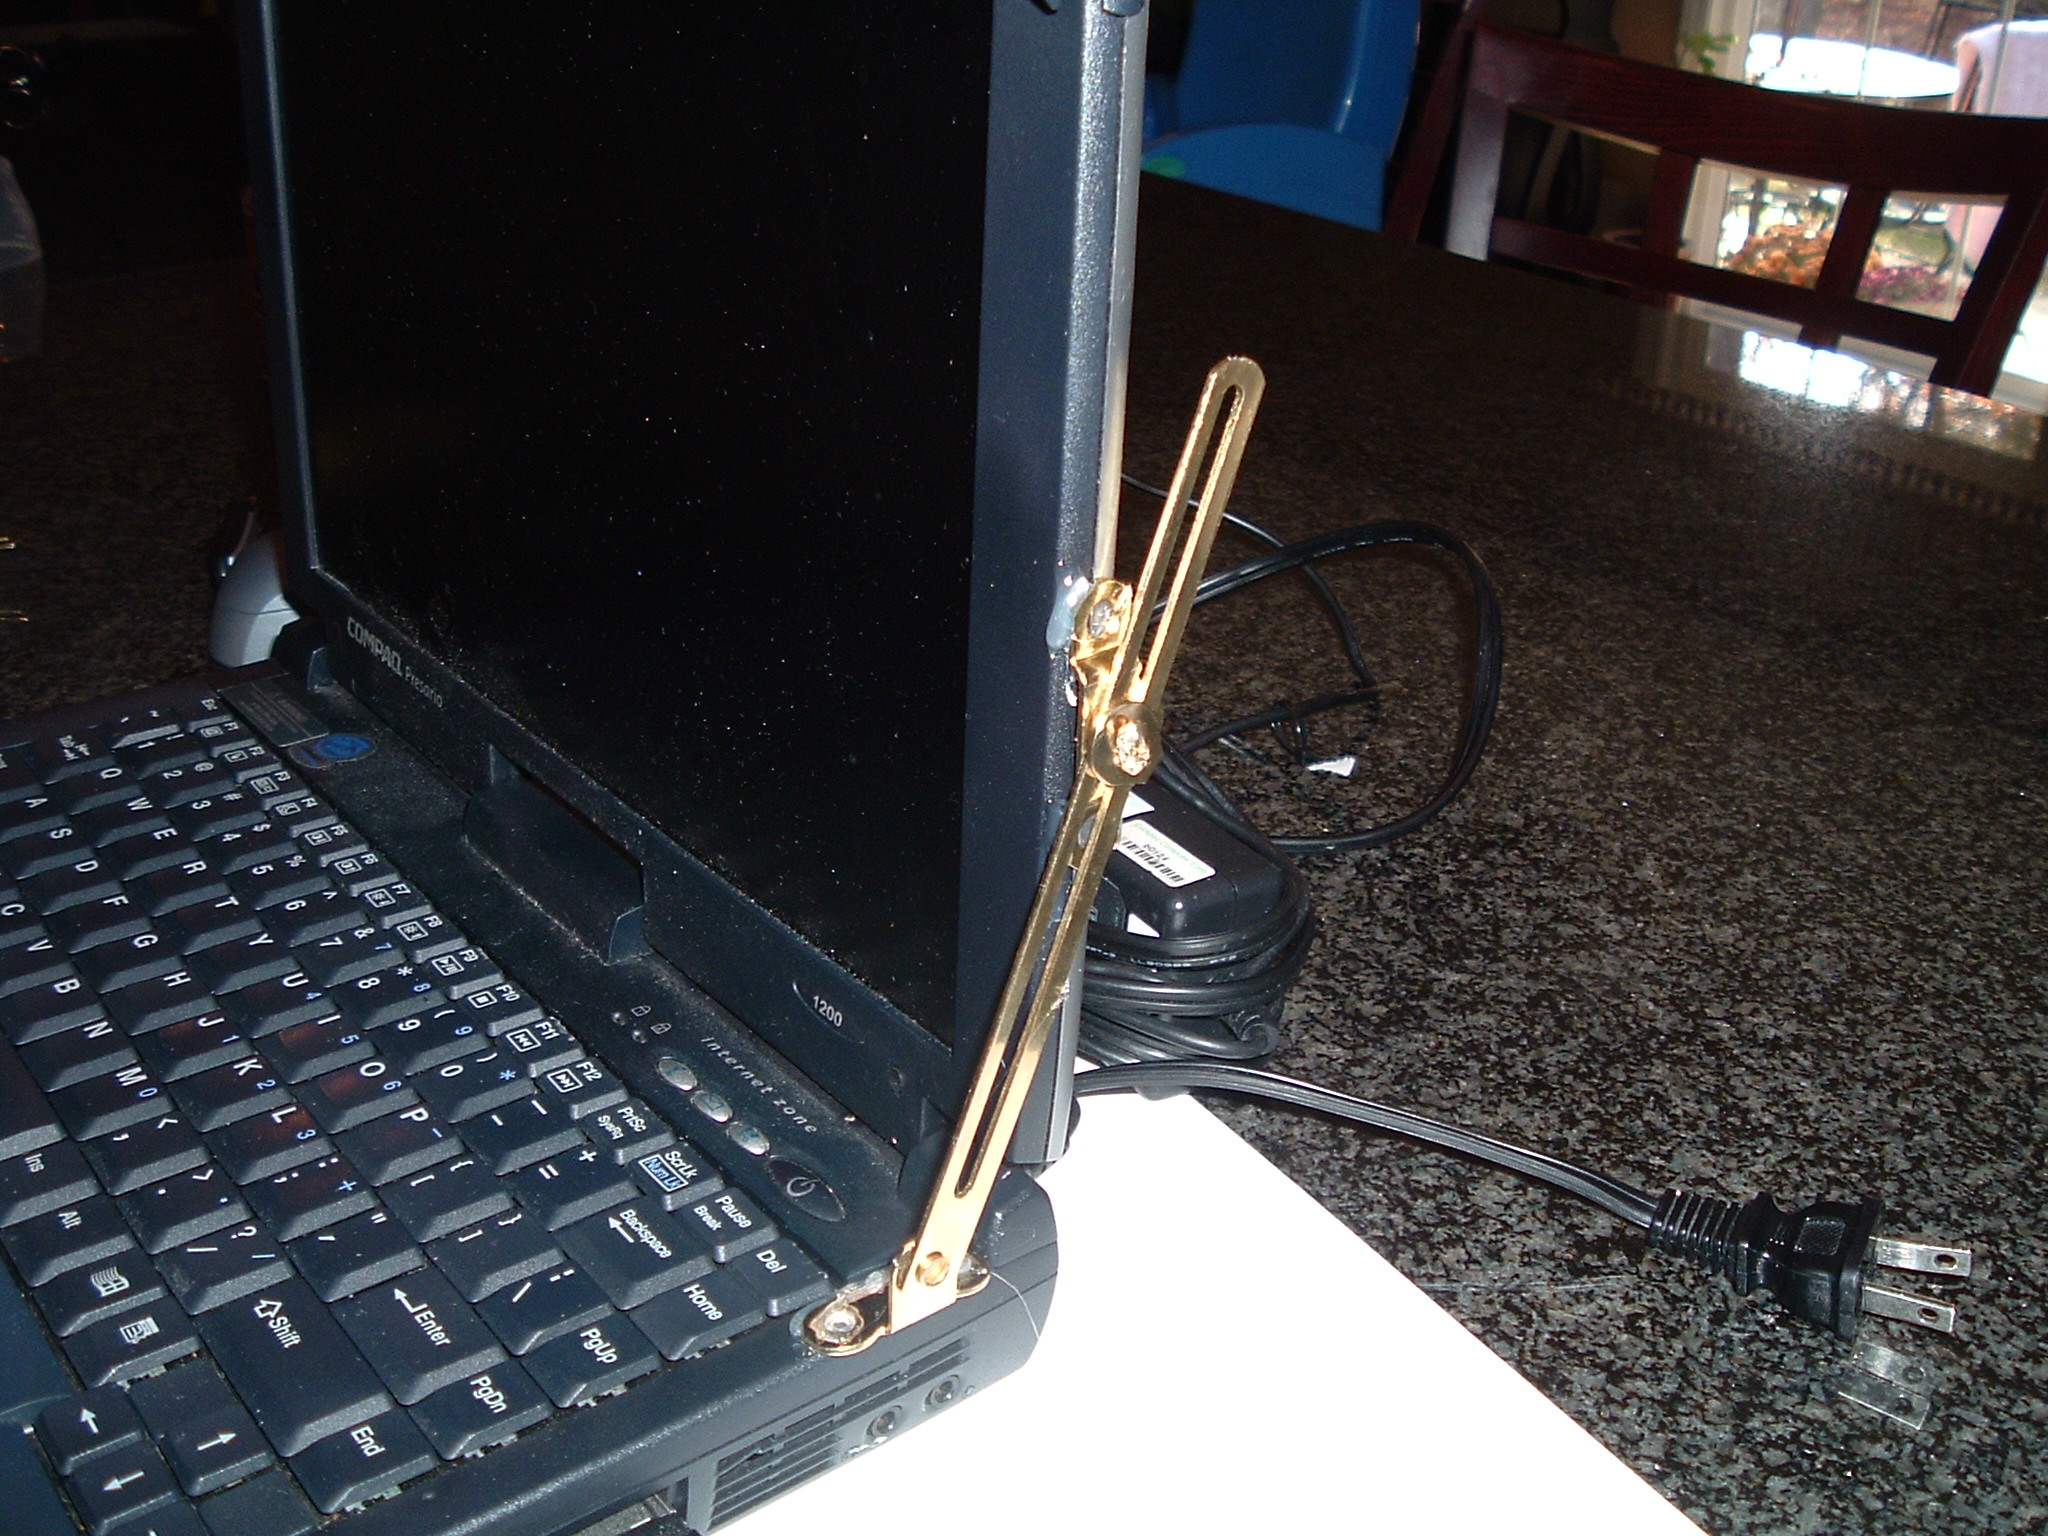
Someone comes up with especially sophisticated methods like the one shown in the photo below. This is the highest class of techno-perversions. Here it seems that the person’s hands are in place, and the head is working. But the result, of course, is the same. It’s more of a plumbing job than an electronics fix.
I use a soldering iron and a glue gun to repair this problem, including the crumbled screen mounts to the body. You can say that this glue is useless, and only lamers use it, and you will be wrong. I have repaired several dozen laptops using the method described below, and not one of them has broken again in the place of the repaired mount. My daughter has been using one such laptop for two years now, and there are no problems with it – and everything was much worse there than in the case of this ASUS Strix.
I gave several laptops to friends – and these machines are also OK, after repair they are in operation from a couple of years to several months. So the reliability of the repair is tested by practice. I repeat, out of several dozen cars, not one broke down again in places that were repaired.
So what kind of repair is this?
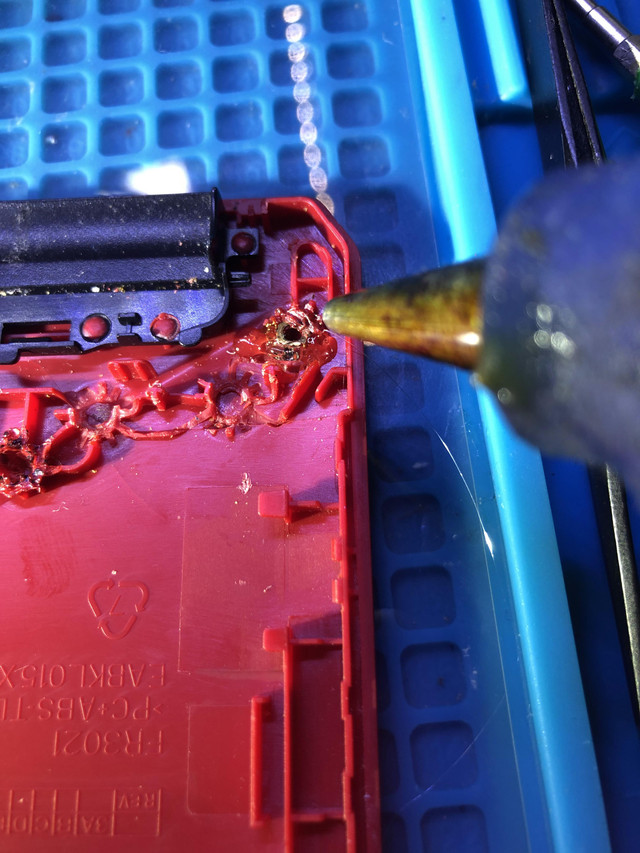
I recorded a complete laptop repair on video and posted it below. To better see, I made repair examples with a different lid, from another gaming laptop. This lid is cracked, so I took it for testing. Its advantage is red, so everything is perfectly visible in the pictures. So here is the patient.
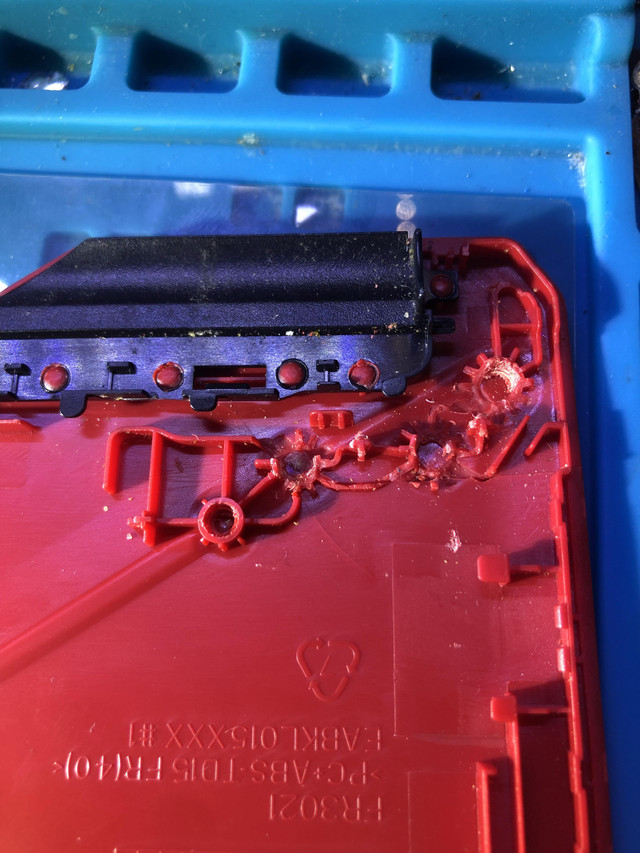
The condition of the plastic is about the same as in the laptop that I am repairing. There is just a flying “seat” where the plastic is in good condition. And there’s broken plastic. We will do both.
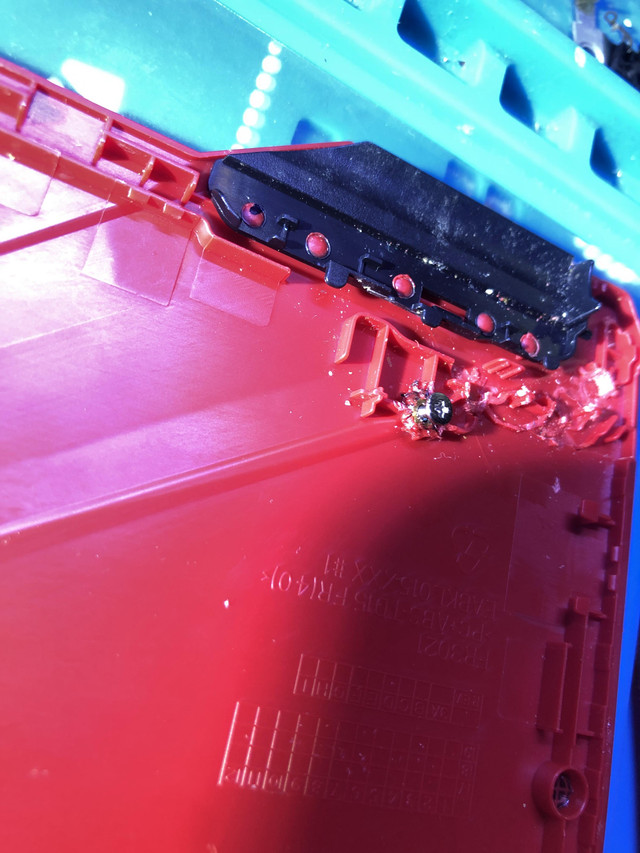
The first case is normal plastic. Everything is very simple here.
We take a metal mount (to be honest, I don’t know what it’s called – a washer or something). And put it in place for repairs.
Then, with a heated soldering iron tip, the tip should be more or less large, we press this washer into the plastic and turn it a little.
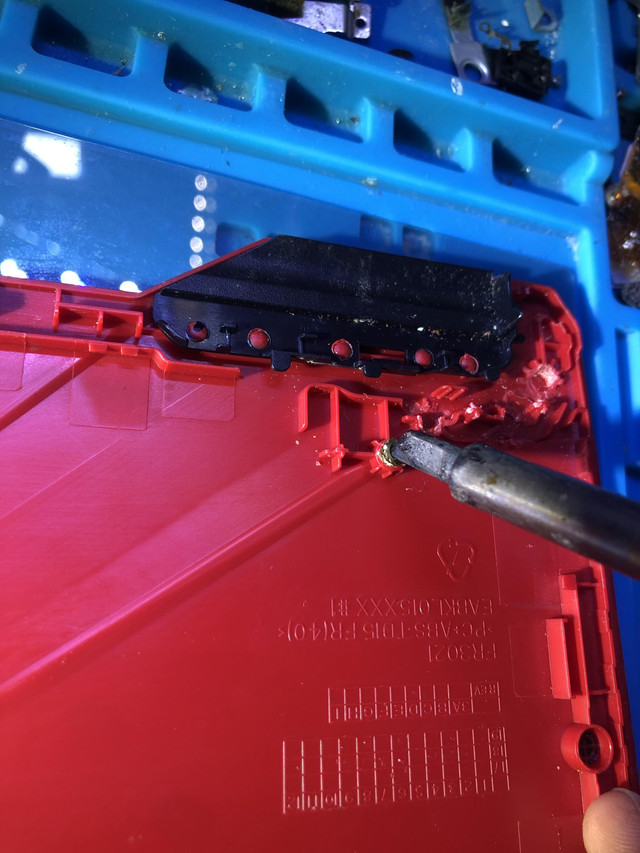
Everything, the repair is over. You can also melt the plastic around the edges and carefully spread a little on the top of the washer with the same sting – you need to do this so as not to clog the inlet.
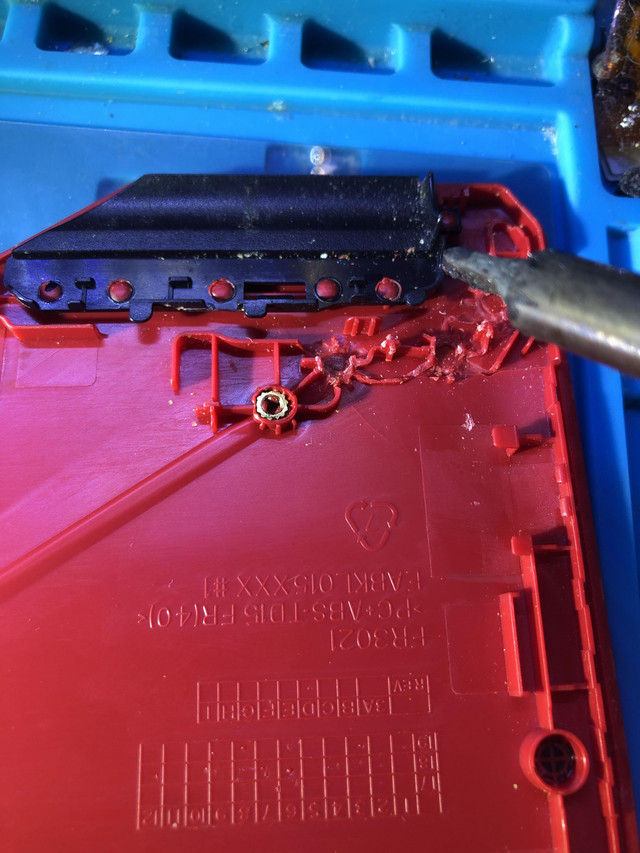
This is the place with the screw screwed in, it is longer than necessary, I took it so that everything could be seen. After this operation, I took the screw with pliers and lifted the entire cover – nothing fell off.
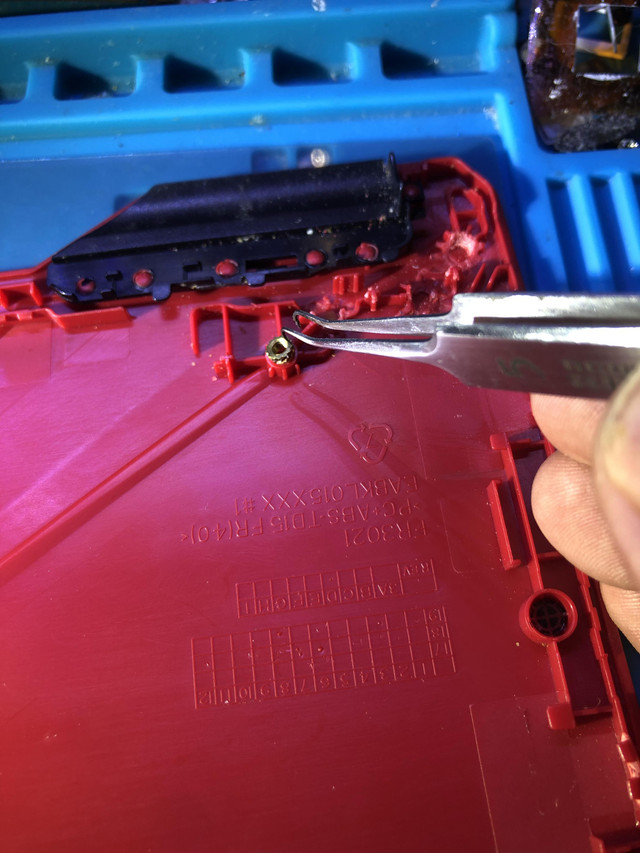
Then the case is more complicated – we take the seat where the plastic fell apart. Here we start in the same way – we put the washer in place and immerse it a little with a soldering iron in plastic. A little – so as not to push through the cover and the washer did not come out from the back. It is better to hold your finger on the other side – if it gets too hot, then stop pressing. This should be done slowly, do not apply force.
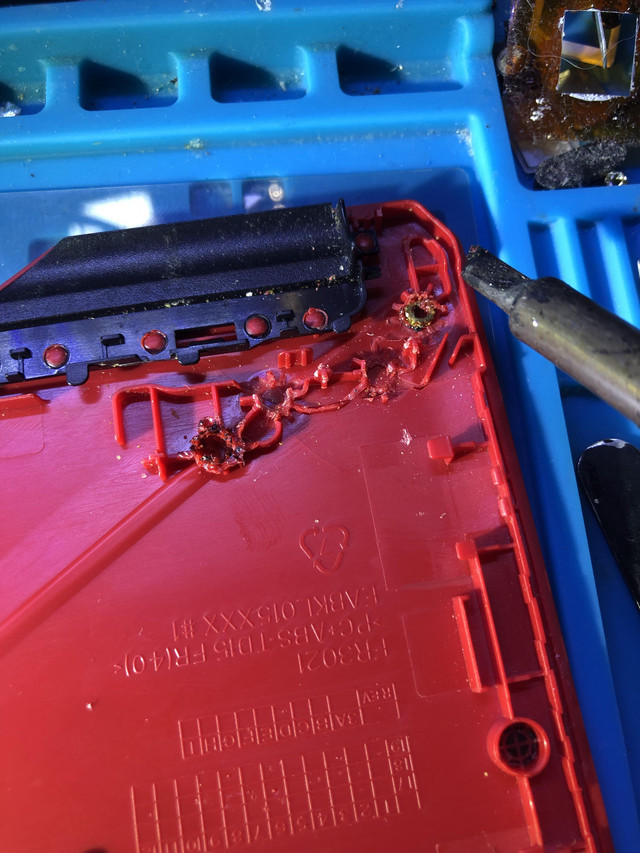
Then we take a glue gun, heat it up and spread the glue around the seat, creating an additional mount. It is better to take another piece of plastic from the same cover (as a rule, if everything has fallen apart, then these pieces are quite enough) and also melt by smearing around the washer.
Glue, of course, holds worse than plastic. But if other fasteners are not affected, everything will be fine. If injured, repeat the operation several times for all seats. And then, before applying the loop, fill the surface with glue. We impose a loop – and wait a couple of minutes, then carefully screw in the screws and wait again. After that, it will serve for years. I do not rule out that there are situations where it’s a disaster, but in my ASUS Strix everything was very difficult. But this moment helped.

Now let’s move on to the further repair of the ASUS Strix itself (let me remind you that the red cover above is just an example so that everything is clearly visible and understandable). Here is a section of the lid with the washers already in place, secured with a soldering iron and melted plastic.
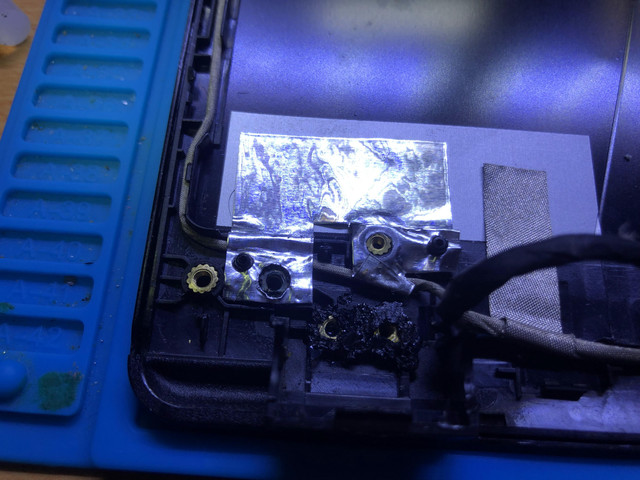
Ugly? Of course, but it’s solid. It’s not about aesthetics. But the plastic cover then fits perfectly, no bumps, bumps, etc. No. And here are the loops already put in place, on the other side of the lid. There I did as I said above – after fusing the washers, I filled the place with glue over the entire surface where the mount would be, and while the glue was hot, I put a loop. I waited a couple of minutes until the glue hardened and screwed in the screws (all the way, but without fanaticism, you don’t need to twist with all your might).
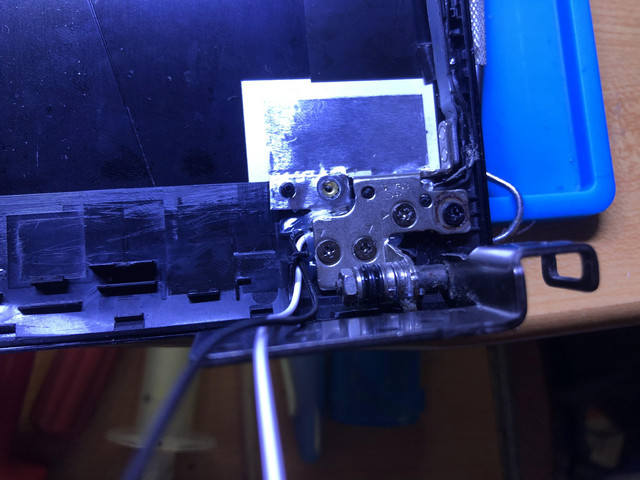
And here is the lid with the mount attached.
We impose the second fastening, close the screen (it snaps into place normally, there should not be any bumps and not fully closed latches if everything was done correctly).
Yes, very important! I have already said above that most laptops have hinges tightened from the factory. And so that the problem does not arise again, you need to loosen the loop.
This is easy to do – with pliers, slightly unscrew the washer in the place shown by the red circle. Of course, before we put the mount back in place, you need to pick it up. And it is also desirable to lubricate this place later.
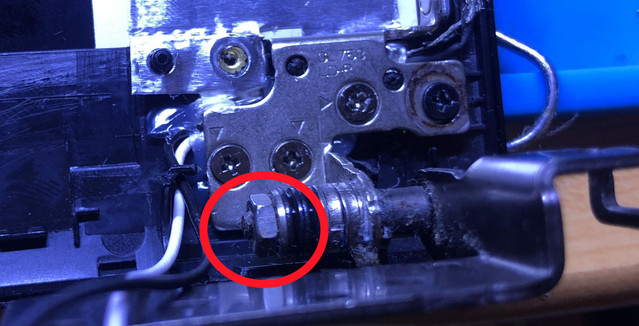
Do not overdo it – the loop should turn around with your hands, with effort. If she walks freely, then you have loosened too much, you need to tighten it again. Usually this loop needs to be unbent with your hands with almost all your might, you need to make it so that the effort is applied, but not directly with all your might. I usually get it so that the lid is then opened with one hand, like a MacBook. That is, the laptop lies, you lift the lid with one hand. But it holds the position from 90 degrees as it should. Does not fall on the back side, everything is ok with that. It takes a little practice to get it right the first time.
What’s next?
Yes, the repair is over. We collect a laptop, and rejoice. I was not sure that the device was working entirely. I also had to restore the antenna cables of the WiFi module, they were torn. I did this behind the scenes.
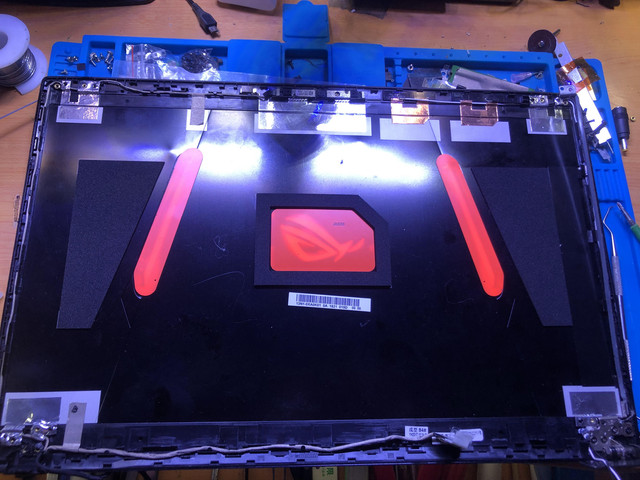
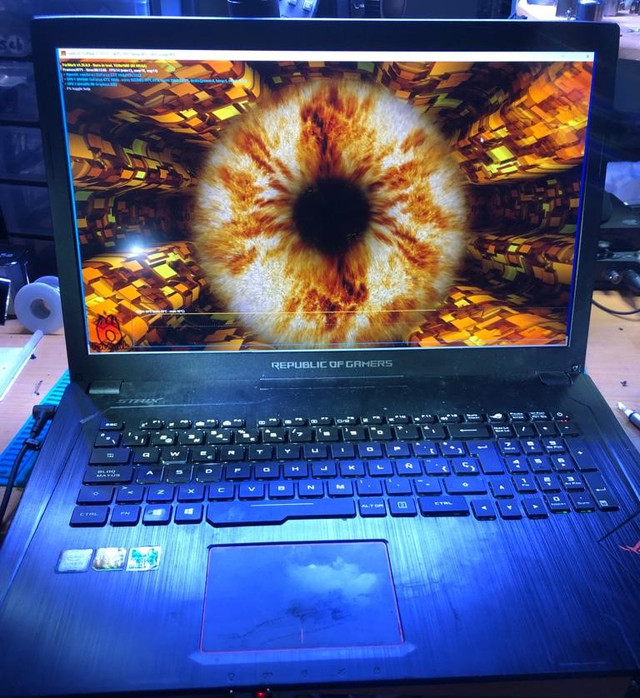
Here is the assembled laptop.
And here it is, with added buttons (taken from the same donor laptop keyboard). What I don’t like is fiddling with these buttons – sometimes they take more time than electronics repairs.
I have not had time to clean the laptop yet, because first the tests, and then the cleaning. Suddenly something is wrong and you have to disassemble it again.
Well, a repair video (without disassembling the laptop, so as not to waste time). The quality is not very good, I took an old camera by mistake, but the process is visible well. I make the video in English, because I’m counting on viewers from other countries. And, if it’s not difficult, subscribe – I regularly post videos of repairs.
If you have personal experience of such a repair, tell us what and how you did it, perhaps there is another way. But what I showed – works, and very well.
You may also be interested in these texts:
→ 10 ChatGPT request templates that will give high-quality answers to help the product manager
→ OpenStack vs VMware: which is better – open source or proprietary platform
→ Shawarma as a service: how to create a bot for ordering shawarma and leave only 1.1% of colleagues hungry