KSMG 2.0. Integration with Kaspersky Anti Targeted Attack Platform (KATA). Integration setup and testing
In one of our previous articles, we deployed the Kaspersky Secure Mail Gateway email security gateway and carried out basic configuration. If you have not read the previous article, we recommend starting there: Kaspersky Secure Mail Gateway 2.0
In this article we will configure integration of Kaspersky Secure Mail Gateway with Kaspersky Anti Targeted Attack Platform (KATA). As a result of integration, Kaspersky Secure Mail Gateway will be able to send email messages for scanning by Kaspersky Anti Targeted Attack Platform and receive the scan result. KATA checks messages for signs of targeted attacks and intrusions into an organization's IT infrastructure.
One of the main advantages of the KATA platform is high-performance sandbox, which allows you to launch suspicious objects in an isolated environment and carry out their multi-level analysis. The ability to study in detail the behavior of analyzed objects, as well as compare detected suspicious activity with the MITER ATT&CK knowledge base, allows you to quickly respond to complex incidents.
Based on the results of the KATA scan, Kaspersky Secure Mail Gateway can block individual messages.
This article will not cover installing and configuring the KATA platform, only setting up KSMG integration with it.
Integration setup
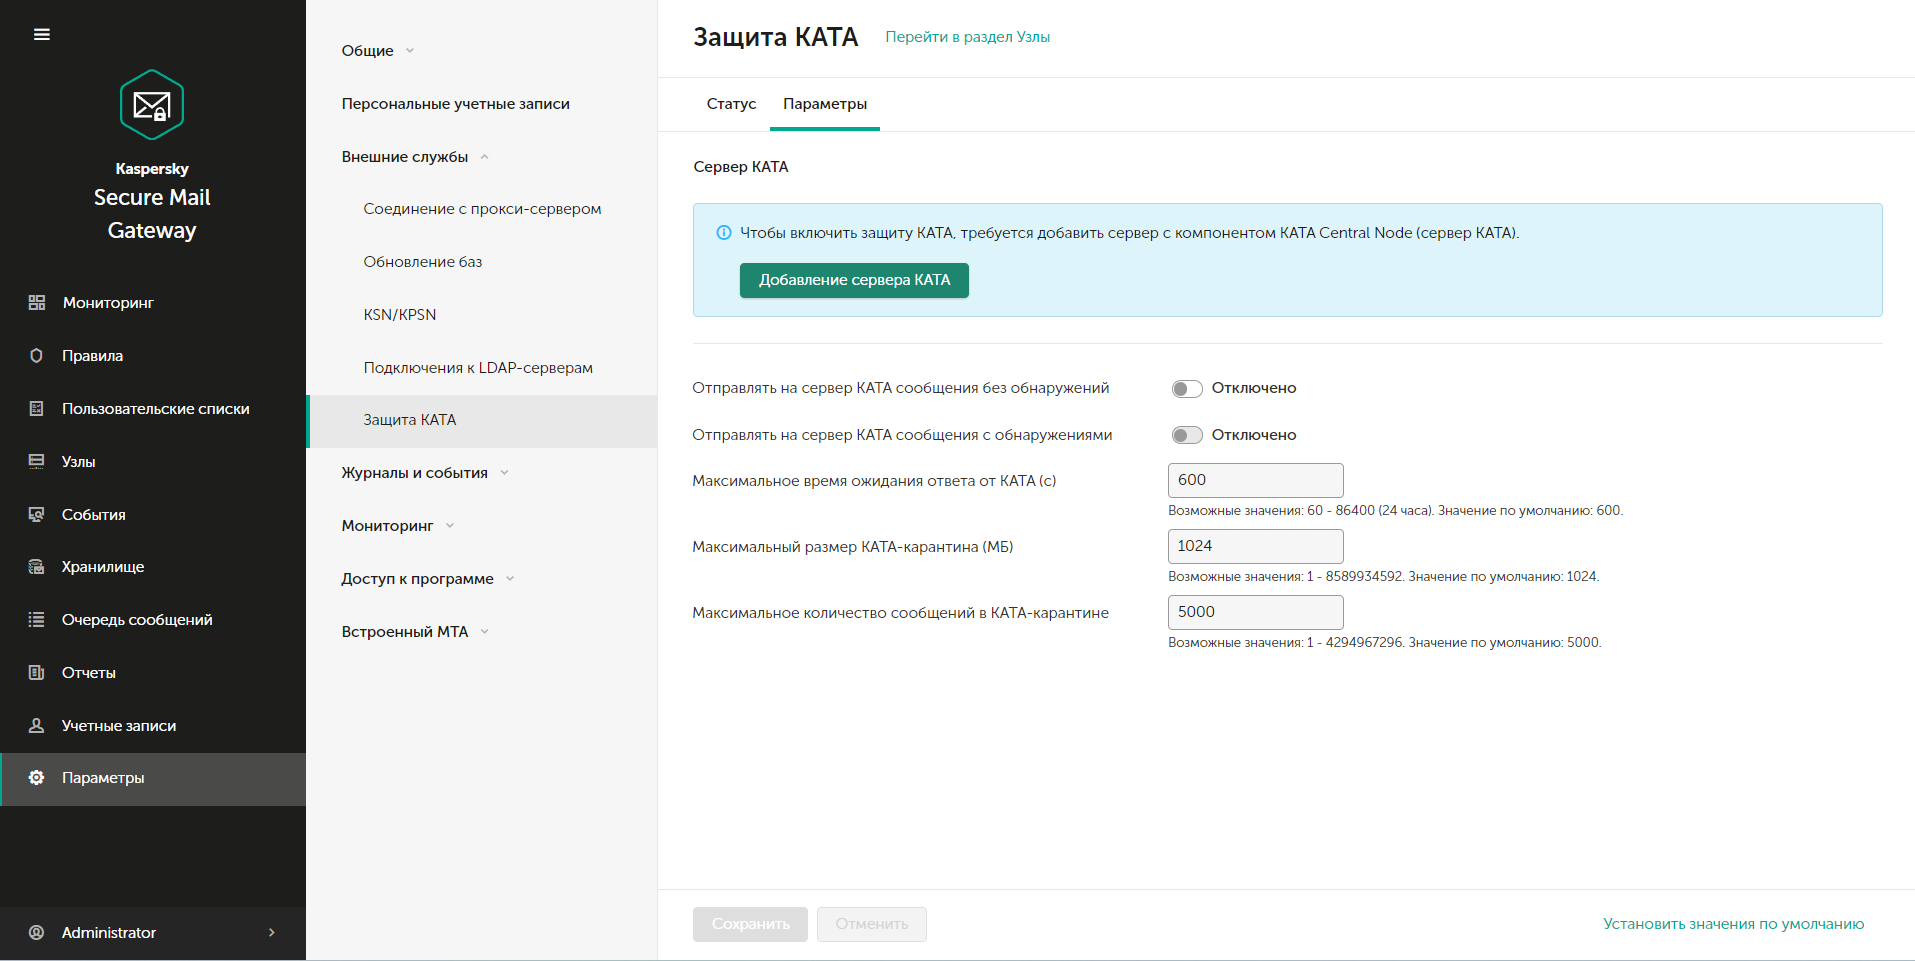
You should start by adding the KATA server in the KSMG web interface. Let's open it and go to Options -> External Services -> KATA protection. Click “Adding a KATA server” in the ” tabOptions“
A menu for adding a server will open in front of us. You must specify the KATA server IP address and port (default 443) and click “Further“

If the connection is successful, you will see the SHA256 fingerprint of the KATA server.

This fingerprint must be compared with the certificate fingerprint in the KATA administrator web interface in the “External systems“

In the illustration above, you can see in the list of servers that you already have connection with another Kaspersky Lab product, namely Kaspersky Web Traffic Security. KWTS allows you to detect and block access to dangerous elements that users interact with via the web, acting as a proxy server or receiving data from an existing proxy server in the organization, such as Squid, using the ICAP protocol. We will talk about how to deploy and configure this product in another article.
Let's return to setting up the KSMG and KATA integration. If the fingerprint matches, we can complete adding the server by clicking “Save” in the KSMG web interface. Otherwise, examine the network for software that replaces the certificate; it could be a firewall that decrypts HTTPS traffic. After that, in the “KATA Protection” menu in the KSMG parameters, the server’s IP address and the fingerprint of its certificate will begin to be displayed. By default, after adding a server, KSMG does not send anything to KATA for verification.
To activate this feature on the same tab, we have 2 options available:
1) Send messages to the KATA server without detection – messages that the KSMG mechanisms have not identified as dangerous will be sent;
2) Send detection messages to the KATA server – all possible messages will be sent.
These are 2 levels of protection depth, the second item is not available without enabling the first. In this article, we will only look at sending messages without detections, but when setting up, you will base your setup on the information security needs of your organization. The parameters for sending messages to the KATA server are adjusted taking into account the volume of mail traffic, in this case we will leave everything at default.

After enabling sending messages to KATA, you must accept a request to add an external system in the KATA web interface.

After accepting the request in the KSMG web interface, in the menu “KATA protection” in the ” tabStatus“node status should update to “Connected“

But our setup is not over yet. Technically, the integration is complete and the KSMG server can send letters to the KATA server, but in order for it to start doing this, we need to create a new rule or change an existing one. Let's go to the menu “Rules” I'll change the standard rule “Default” and turn on “KATA protection“, click “Save“

At this point, the basic setup can be considered complete. Let's move on to testing.
Testing
To send a test malicious message, we will use the SwithMail program. Let's fill in the sender's parameters and specify the KSMG gateway as the mail server:

The malicious file will be the EDRtestFile executable file.

We denote the subject and body of the letter as “KSMG Test KATA»

And let's press Test Settings.
In the KSMG web interface, go to the menu “Message Queue” and make sure that this message is waiting for a response from the KATA server in the so-called KATA quarantine.

The message may remain in the queue for some time while the message is checked on the KATA server, but no more than the time specified in the integration parameters, in our case 10 minutes. If a message exceeds the maximum response time, it will be skipped without checking.
When the check is completed and a response comes from the KATA server, you will see in the menu “Events” result.

In this case, the message was deleted. Click on the event and see the details.

Based on the event and its verification result, it was KATA that detected the malware. We can also see the detection in the dashboard:

If there is a need to analyze what KATA's mechanisms found in a message, we should go directly to its web interface, but use an account with security officer rights. Let's go to the menu section “Detections” and find the detection for the message we are looking for:

Let's move on to the detection card:

Here we will be able to see both basic information that was also available in KSMG, such as Email of the sender, recipient and subject of the message, as well as message headers for analysis.
If we scroll below the detection card, we can download the message in eml format and we will be provided with information about the technologies that detected the malware.

In our case, we see that the Sandbox (SB) component detected Trojan.Script.Generic.Poweliks. If you open the item “Sandbox detection“, then we will be able to obtain detailed information about which processes were launched, which registry branches were changed, which IP addresses the program tried to access, etc.
conclusions
Kaspersky Anti Targeted Attack Platform is a solution designed to protect an organization's IT infrastructure and timely detect threats such as zero-day attacks, targeted attacks and advanced persistent threats (hereinafter also referred to as “APT”).
Two-way integration with Kaspersky Lab's solution for protection against targeted attacks allows you not only to use email systems as an additional source of information for detecting targeted attacks, but also to block the further spread of messages with dangerous content, depending on the results of an in-depth analysis of the Kaspersky Anti Targeted Attack Platform. The most sophisticated malicious emails detected by Kaspersky Anti Targeted Attack mechanisms are sent to quarantine.
Author of the article: Ilya Papazov, engineer TS Solution.
All the significant news from the world of cybersecurity, practical cases of implementing and configuring solutions, as well as invitations to useful training are already waiting for you on our channels: