CI/CD Kubernetes platform Gitorion. Single Sign-On (SSO) to all platform services using Keycloak
Hi all! In the previous article, we looked in detail at the implementation of continuous CD delivery in the Gitorion platform based on Jenkins. In this article, we will take a closer look at the intricacies of implementing the Single Sign-On (SSO) single sign-on system into all services of the Gitorion platform using Keycloak.
Justification for the need for implementation
The Gitorion platform consists of services that implement CI/CD, monitoring and database management:
Gitea/Forgejo – lightweight code hosting and version control system based on Git;
Jenkins – continuous CD delivery;
Grafana – monitoring and visualization of Prometheus metrics;
phpMyAdmin – MySQL database management;
pgAdmin – PostgreSQL database management.
In total, a basic set of 5 services, each of which has its own authentication system and user database. With a small number of project participants, you can create user logins in each of the five services separately. With a large number of users, the task will become impossible. A unified authentication system and user database is required. We decided to implement Single Sign-On (SSO) using Keycloak.
How Keycloak works
Most modern applications are equipped with Keycloak clients (adapters) that allow you to connect to a Keycloak server. On the application login page there is a button “Connect using Keycloak”. The user clicks on this button, the adapter connects to Keycloak and redirects the user to the Keycloak authentication window. The user enters his username and password. Keycloak checks the user's login and password and redirects the already authenticated user back to the personal account of the service from which the user came.
Realm
Adapters of different services (in our case, all five services of the Gitorion platform) are combined into one area (Realm). By logging into the Web interface of any of the services connected to the Realm area, the user receives a token from Keycloak, which is recorded in the browser Cookie. In the Web interfaces of all other services whose adapters are connected to the same area, the user uses a token, without having to re-enter the login and password. This is how the mechanism of seamless authentication and single sign-on SSO is implemented.
Log in to the Keycloak Administration Console.
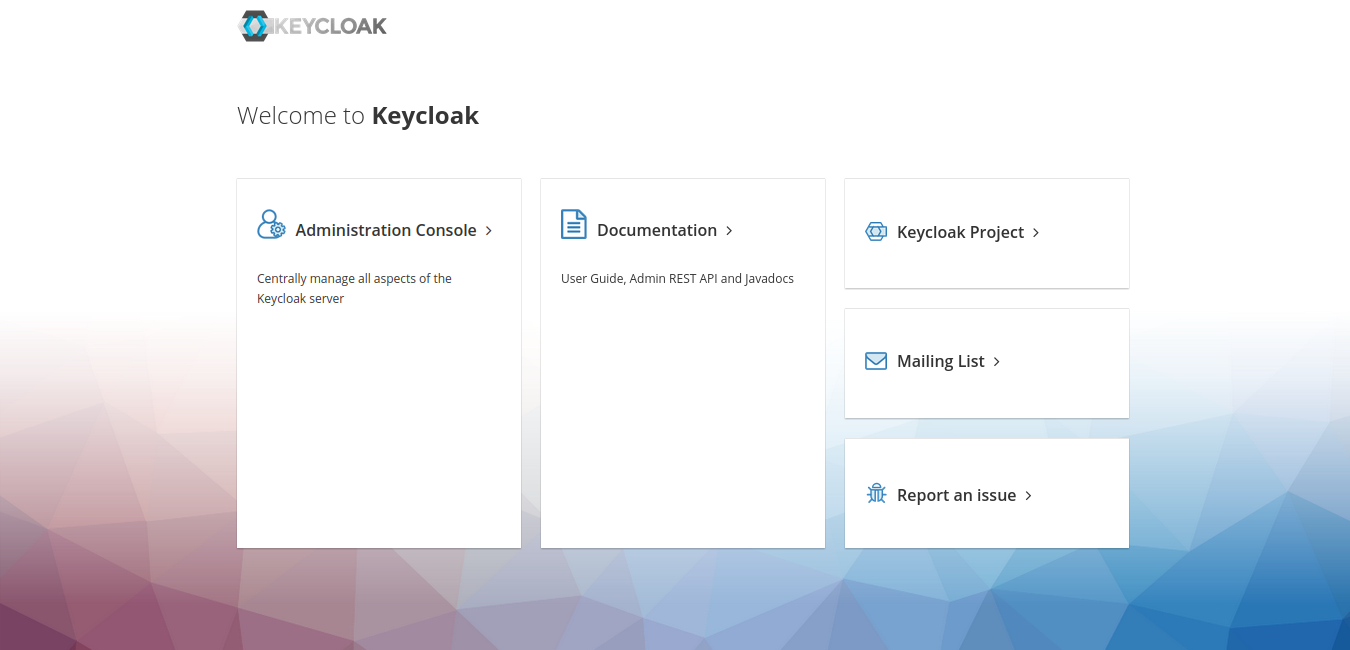
In the region selector at the top left, click the “Create realm” button.
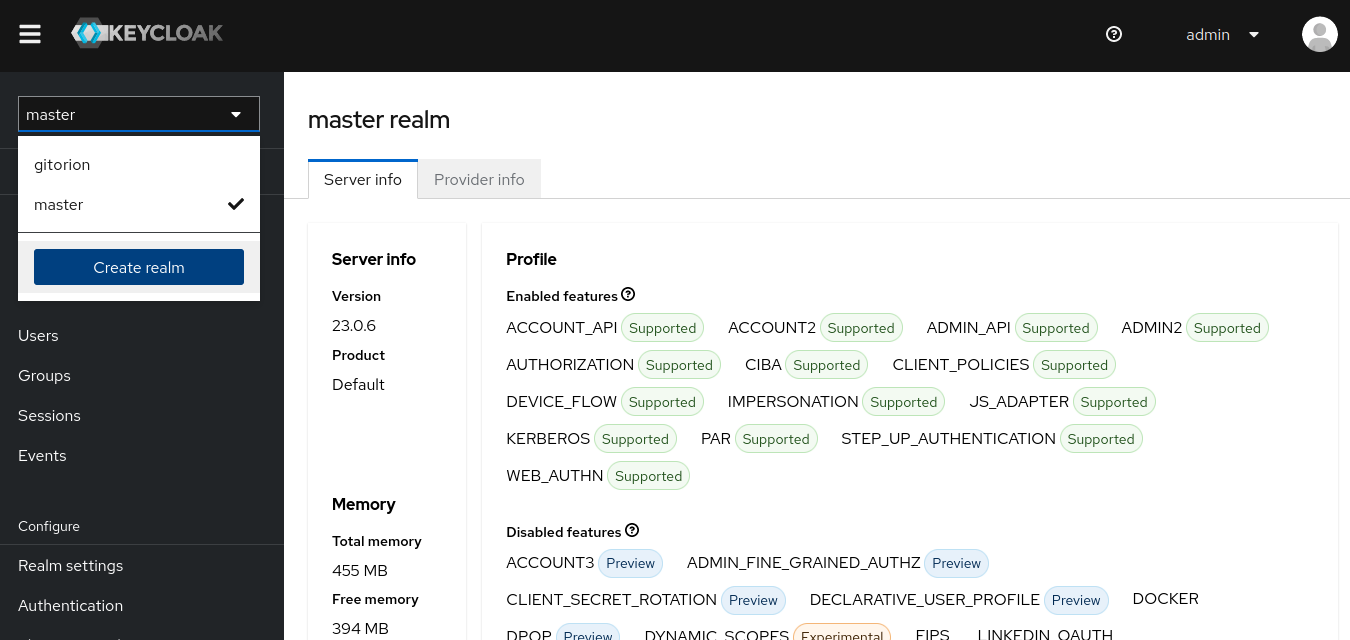
At a minimum, it is enough to set only the name of the area “Realm name” and click the Create button.
Connecting the client (adapter) of the application to Keycloak
4 out of 5 services are equipped with adapters out of the box – Gitea/Forgejo, Jenkins, Grafana and pgAdmin. Below we will look at connecting the Gitea/Forgejo adapter to Keycloak as an example. Adapters for other services are well documented and connected in the same way. phpMyAdmin does not have a Keycloak adapter under the hood. We will consider connecting applications that do not have a Keycloak adapter or are not protected by an authentication window at all below.
Select the area created above, go to the Clients menu and click the “Create client” button.
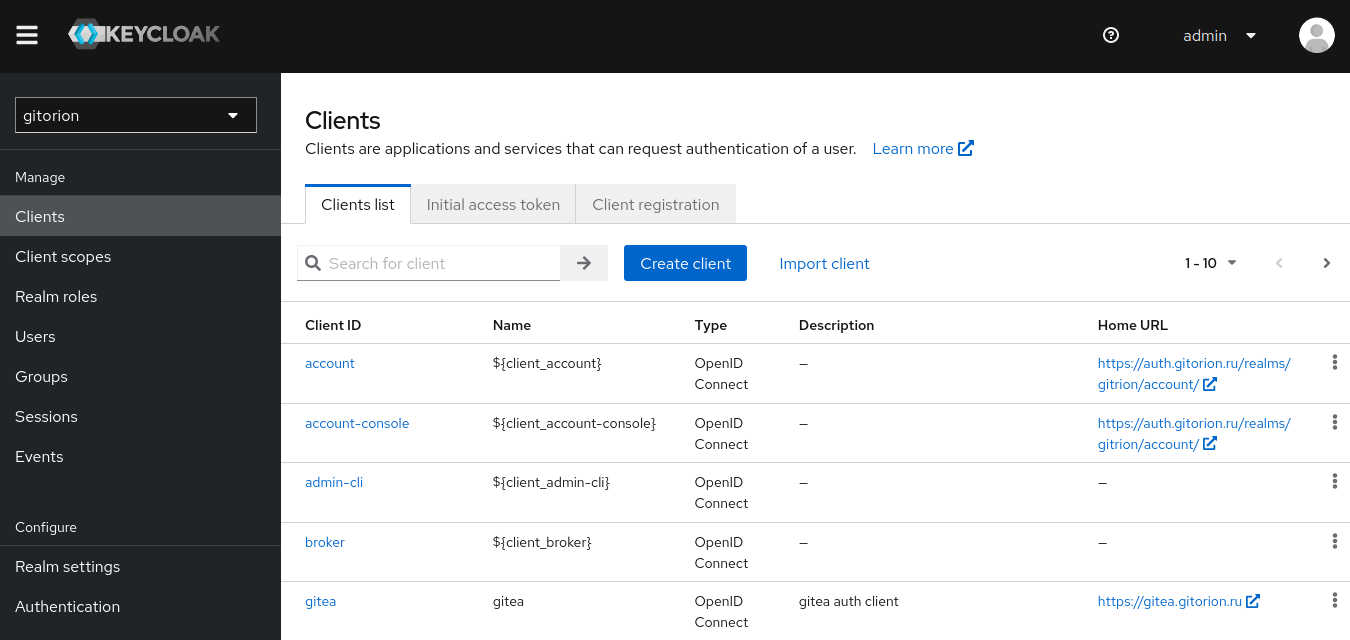
Set “Client ID” – this is the unique identifier of the client (adapter). Click Next.

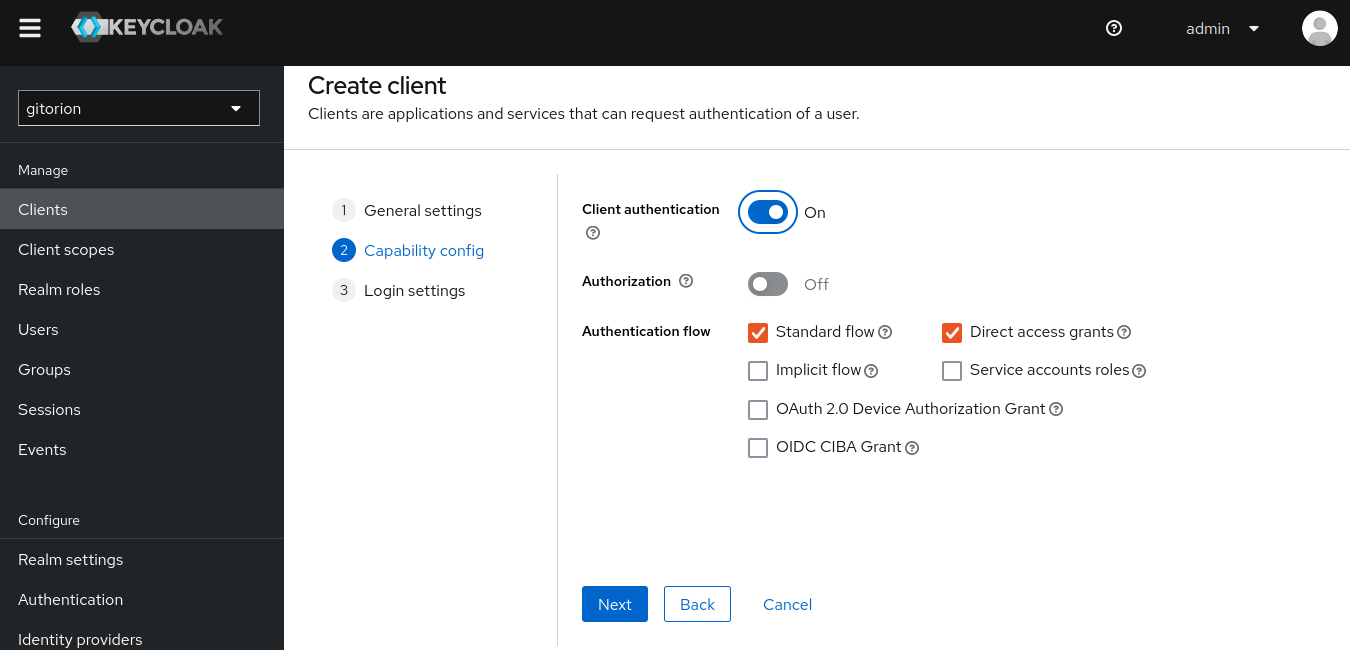
In the next window, enable “Client authentication” and click Next.
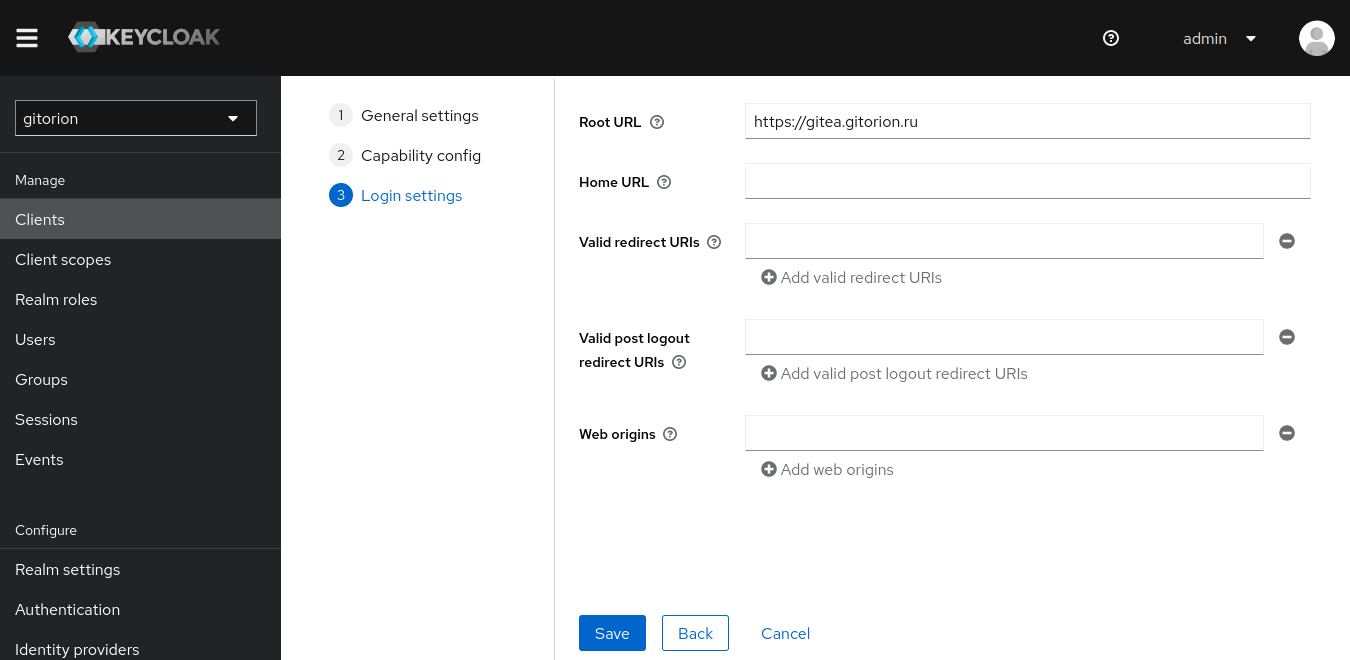
In “Root URL” specify the application URL to which the user will be redirected if Keycloak authentication is successful. Click the Save button.
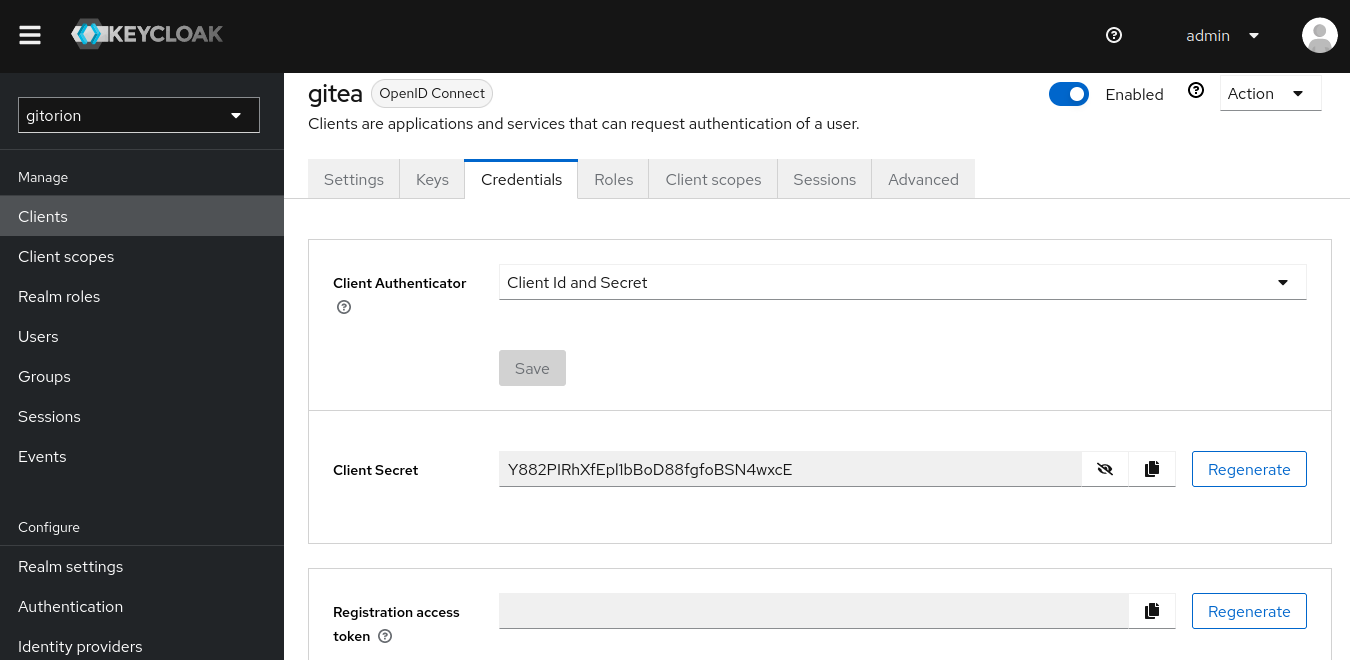
After the client has been created, go to the Credentials tab and copy the “Client Secret”, which will be required below when setting up Gitea/Forgejo. With this key, the Gitea/Forgejo client will confirm its authenticity when connecting to Keycloak.
Let's move on to setting up Gitea/Forgejo. Log in to Gitea/Forgejo as a user with administrative rights and go to the control panel.
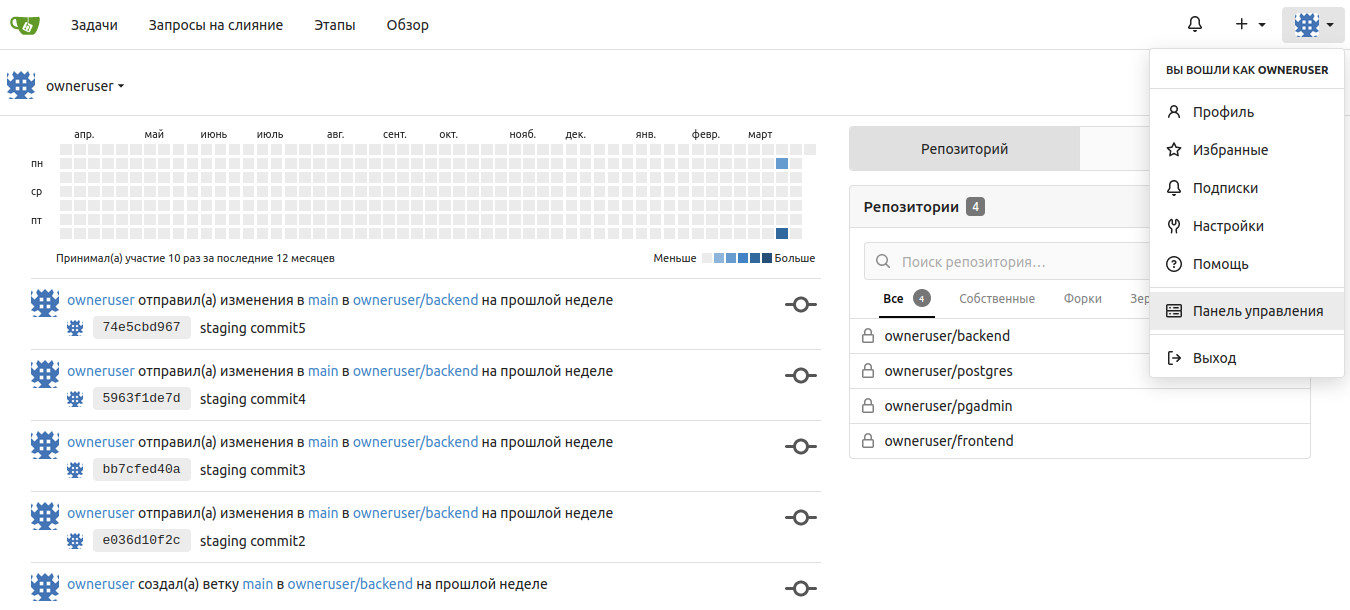
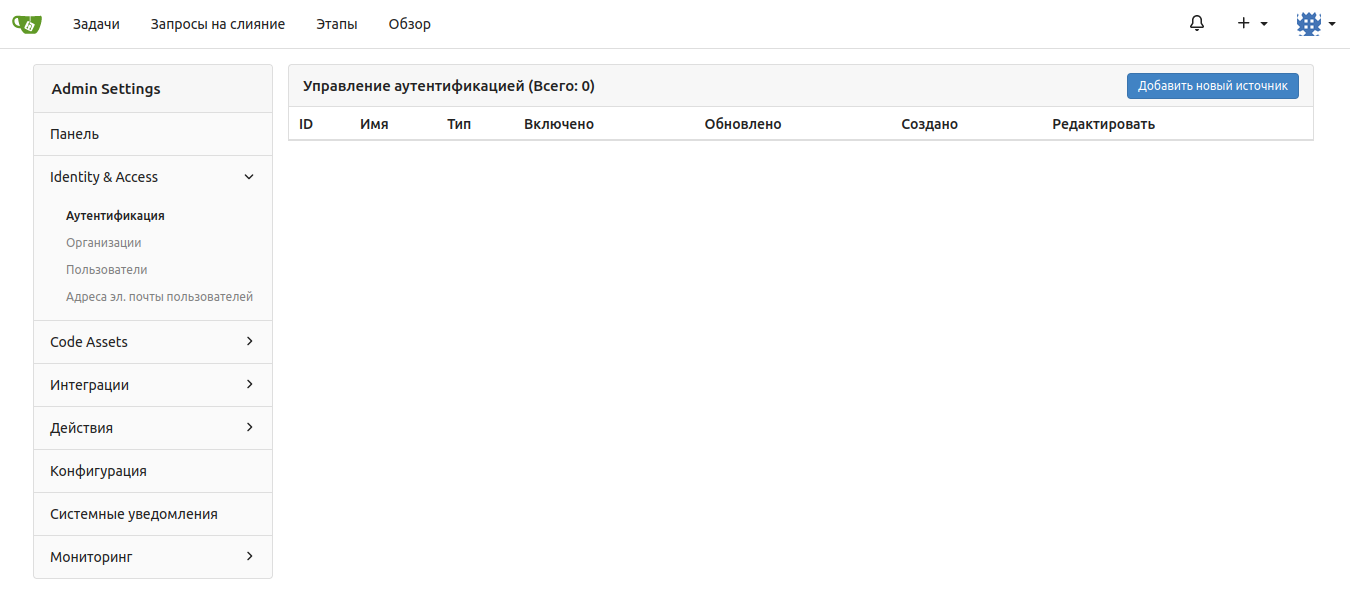
Go to the “Identity & Access” Authentication submenu and click the “Add New Source” button.
In the “Client ID (key)” field, enter the value that you entered above when setting up the client in Keycloak in the “Client ID” field. In the “Client Key” field, set the value to “Client Secret”, copied above from the Credentials tab of the client settings in Keycloak. In the “Icon URL” field, specify the icon that will be displayed on the Gitea/Forgejo authentication window opposite the “Log in with keycloak” button.
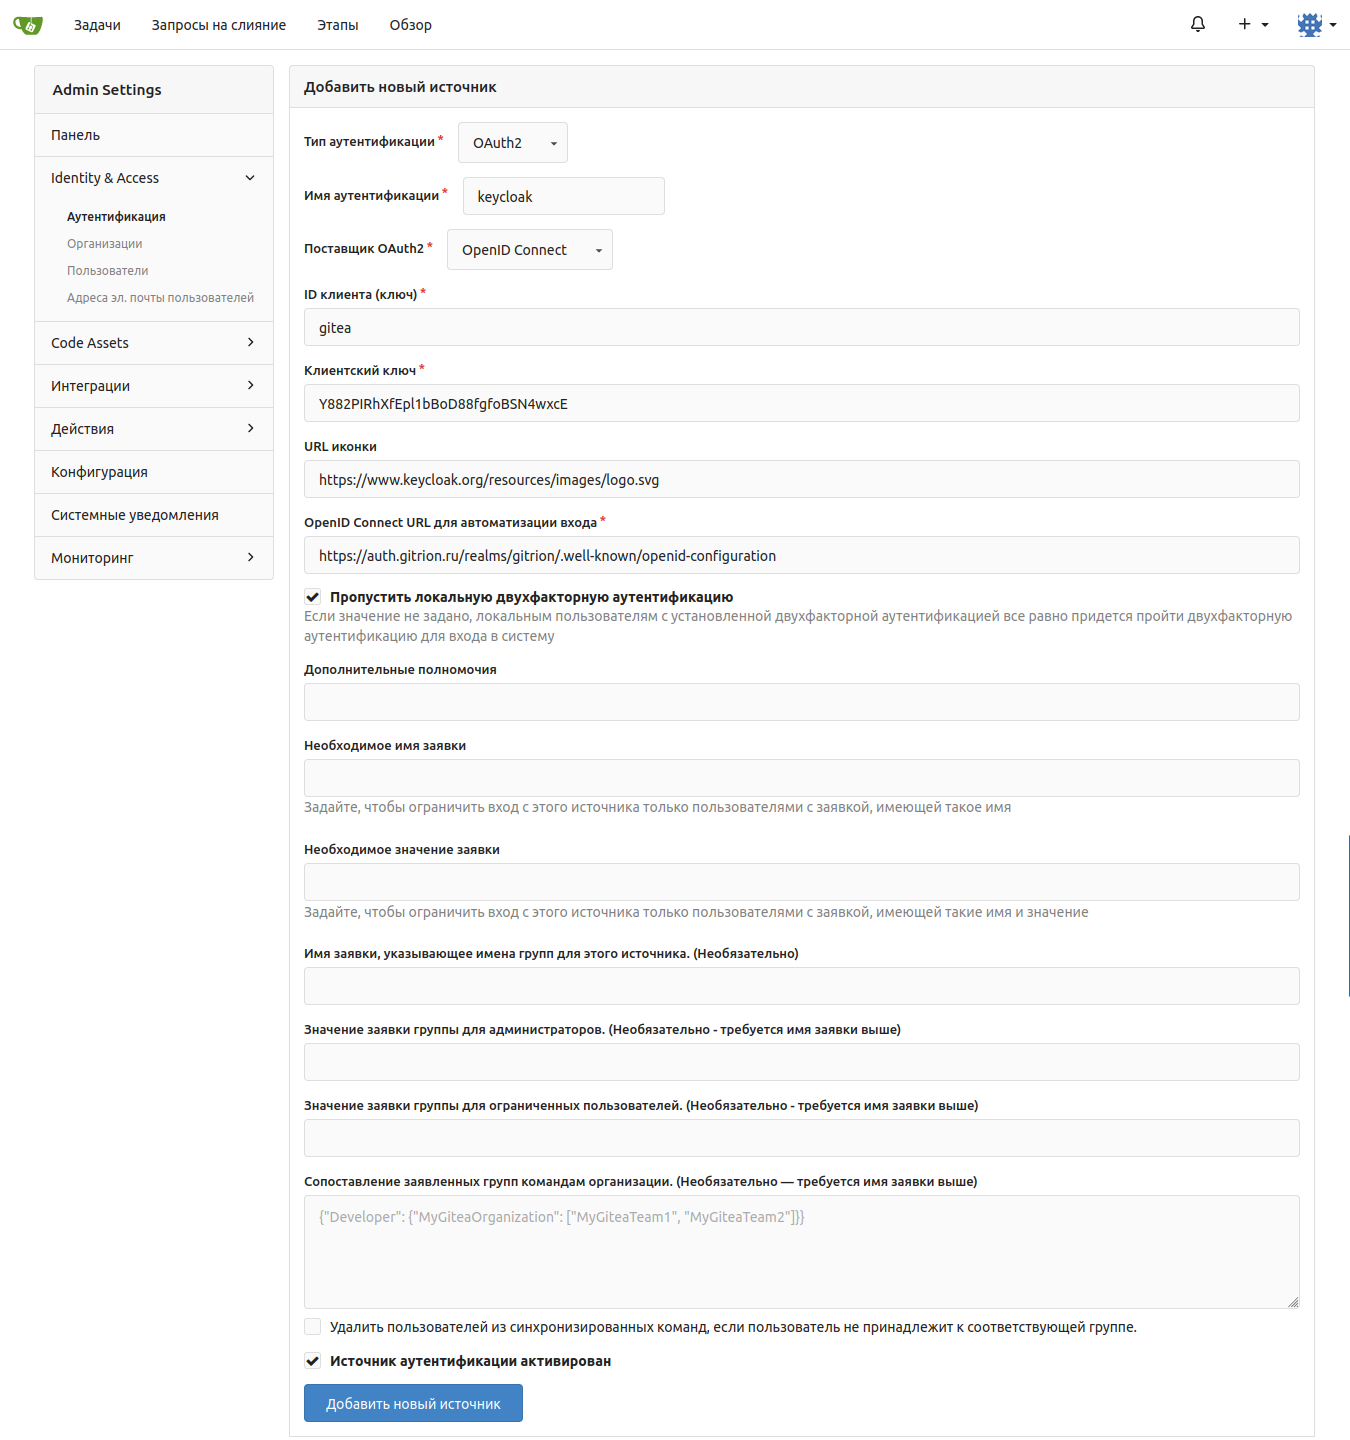
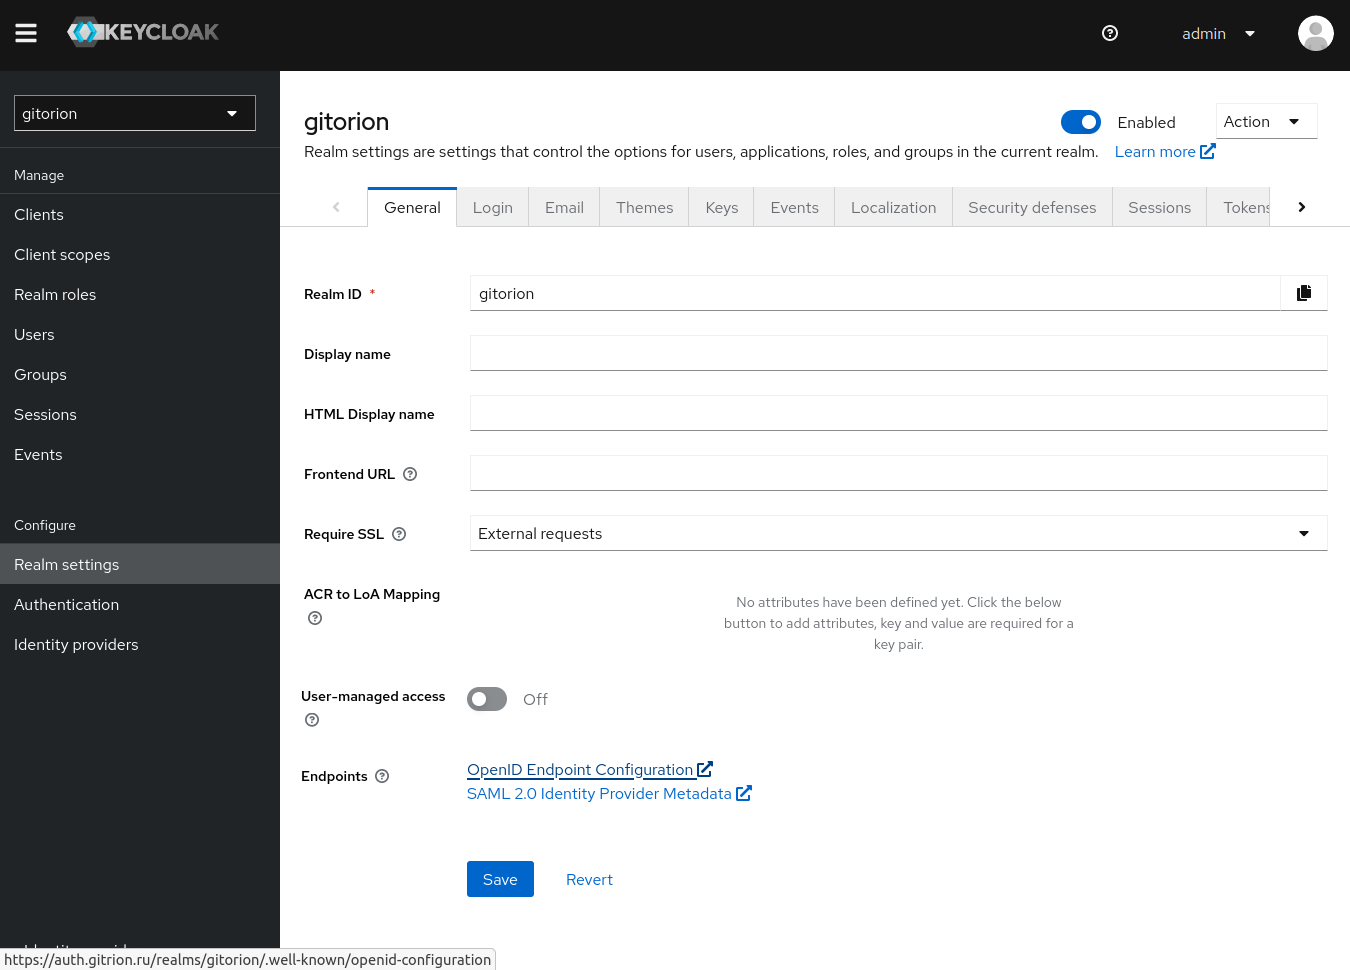
“Open ID Connect URL for login automation” go to the “Realm Settings” settings menu by copying the “Open ID Endpoint Configuration” link into Keycloak.
Click the “Add New Source” button in Gitea/Forgejo and a new authentication source will be created, bound to Keycloak. A “Login with keycloak” button will appear on the Gitea/Forgejo authentication page.
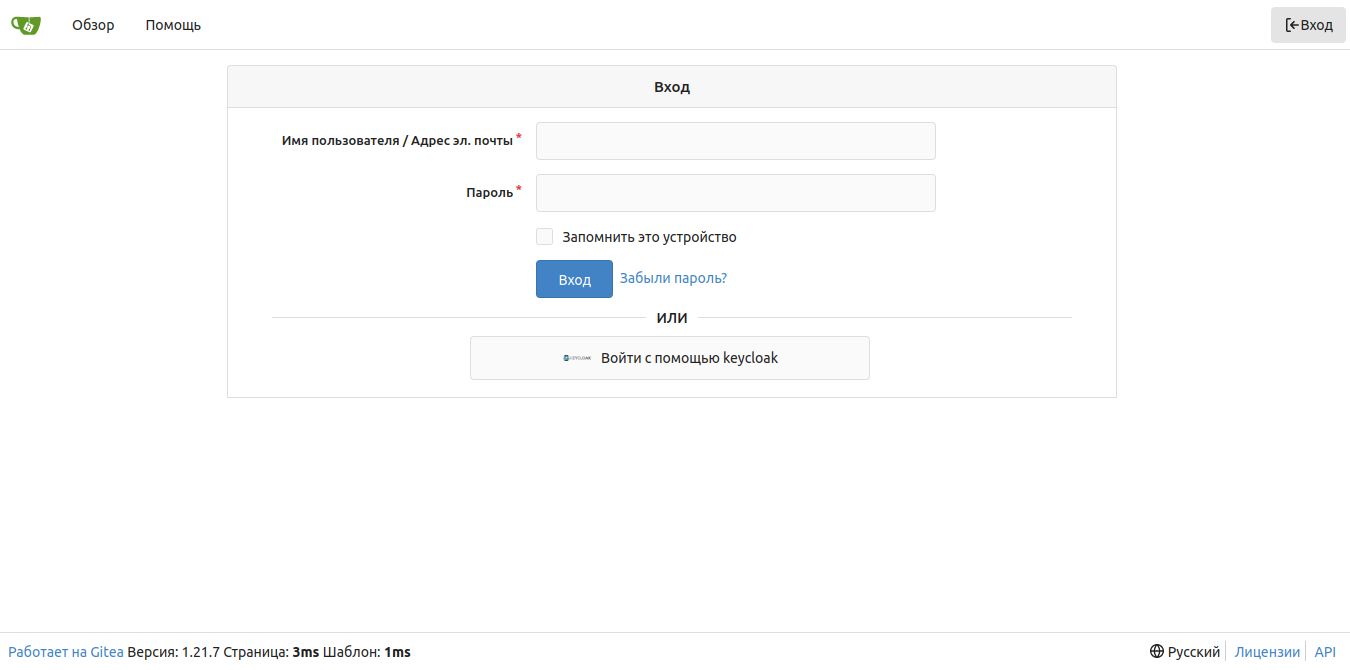
The user clicks on the “Login with keycloak” button and is redirected to the Keycloak authentication window.
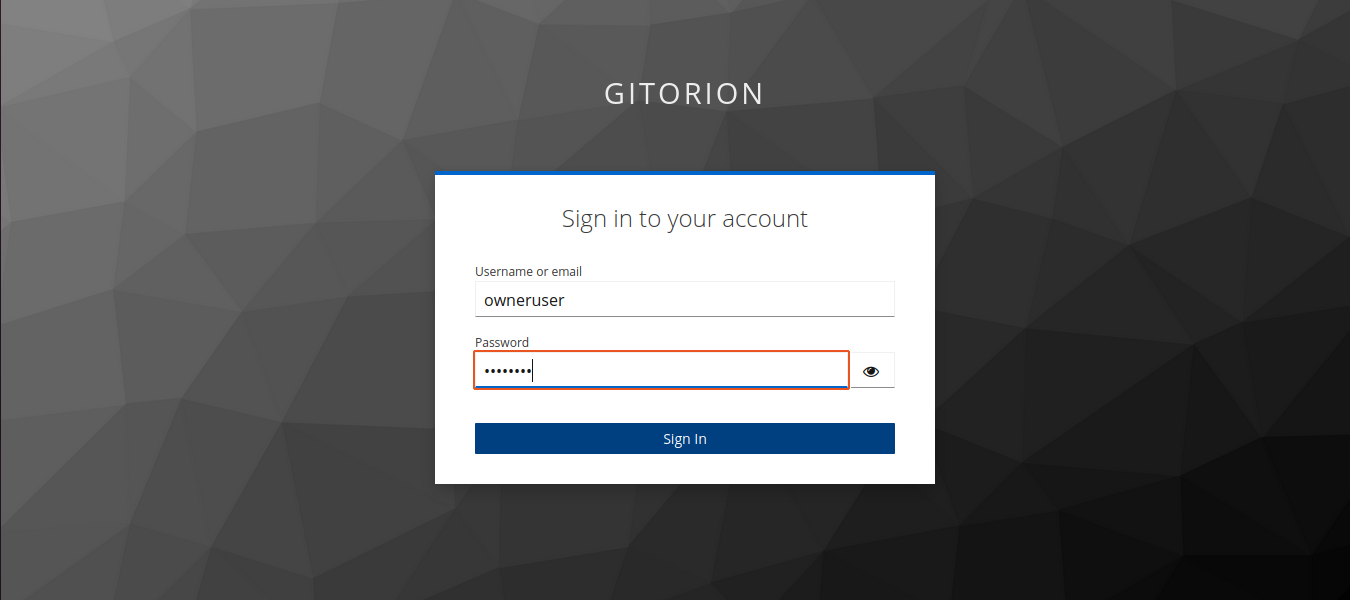
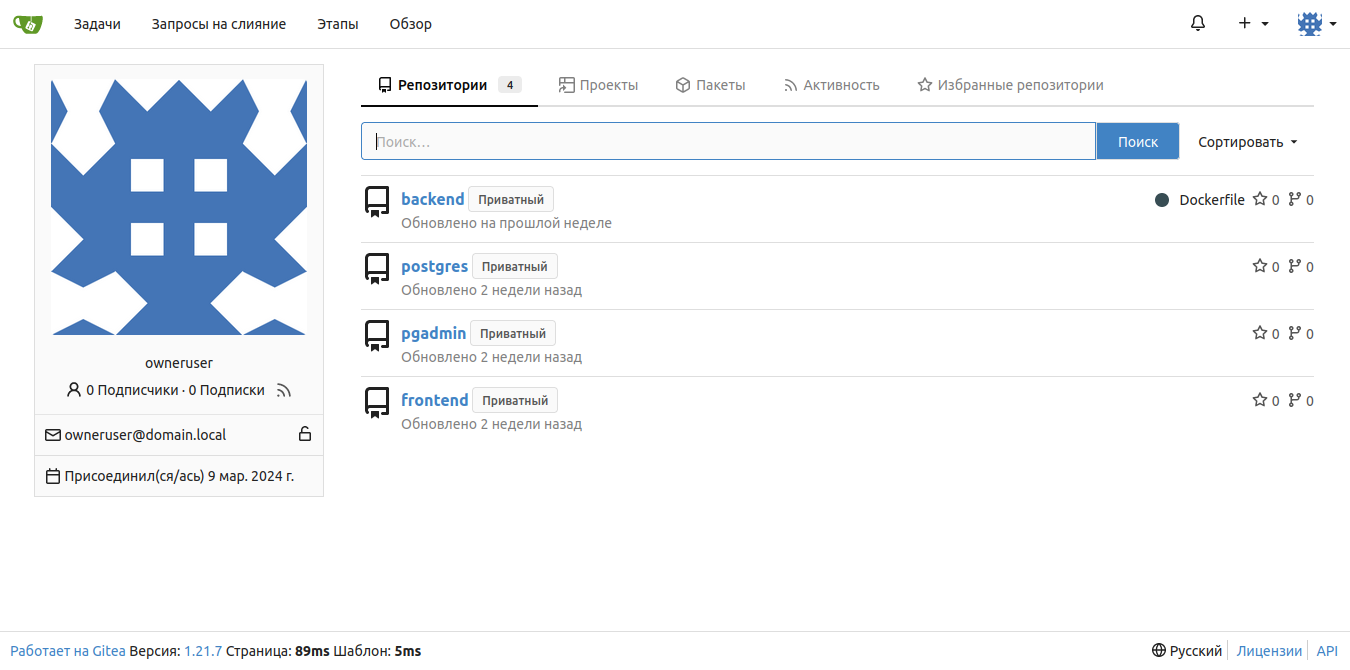
The user enters the username and password, and if authentication is successful, Keycloak redirects the user to his personal account in Gitea/Forgejo.
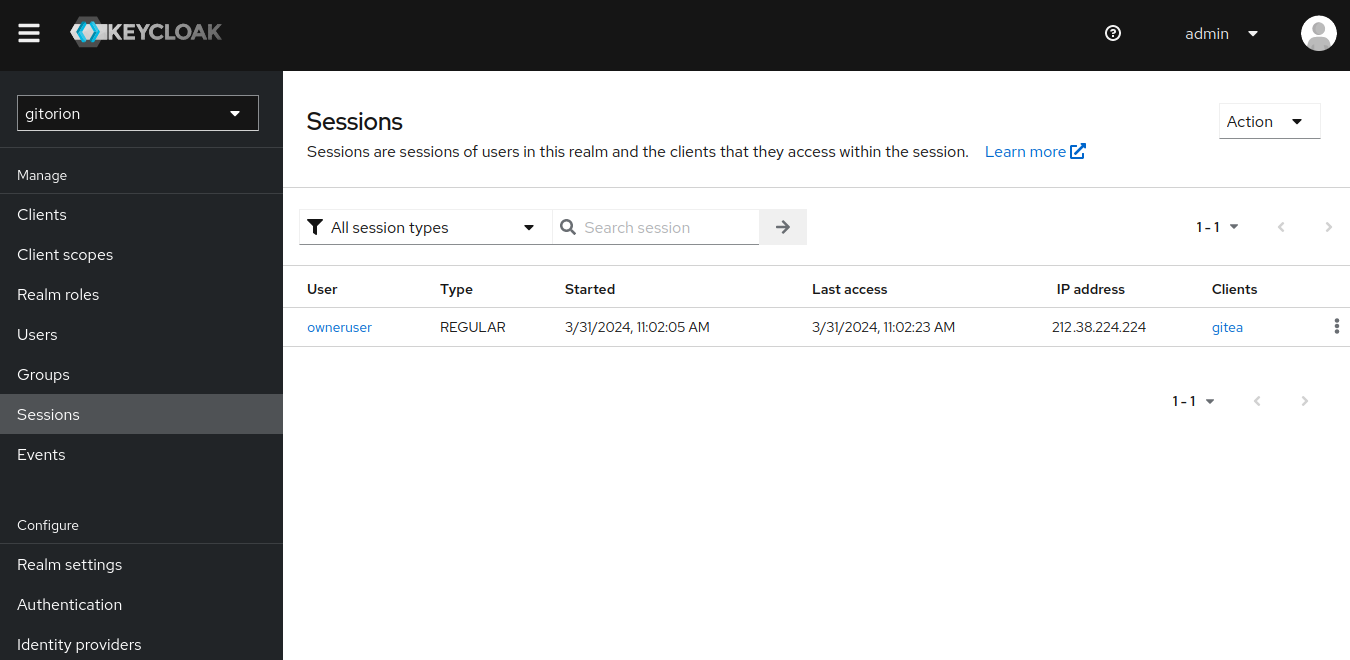
And a user session will appear in Keycloak.
Database of logins and user groups
Keycloak can either independently store logins, passwords and other information about users in its own database, or act as a provider to external authentication sources, such as Microsoft Active Directory, LDAP, etc. In our case, an external authentication source was not required, and we created logins and user groups directly in Keycloak.
Login to your Keycloak admin console, select an area and go to the Groups menu. In our case, we divided all users into two groups:
admins – users with administrative rights in all services (for team leads);
devs – users with read-only rights (for developers).
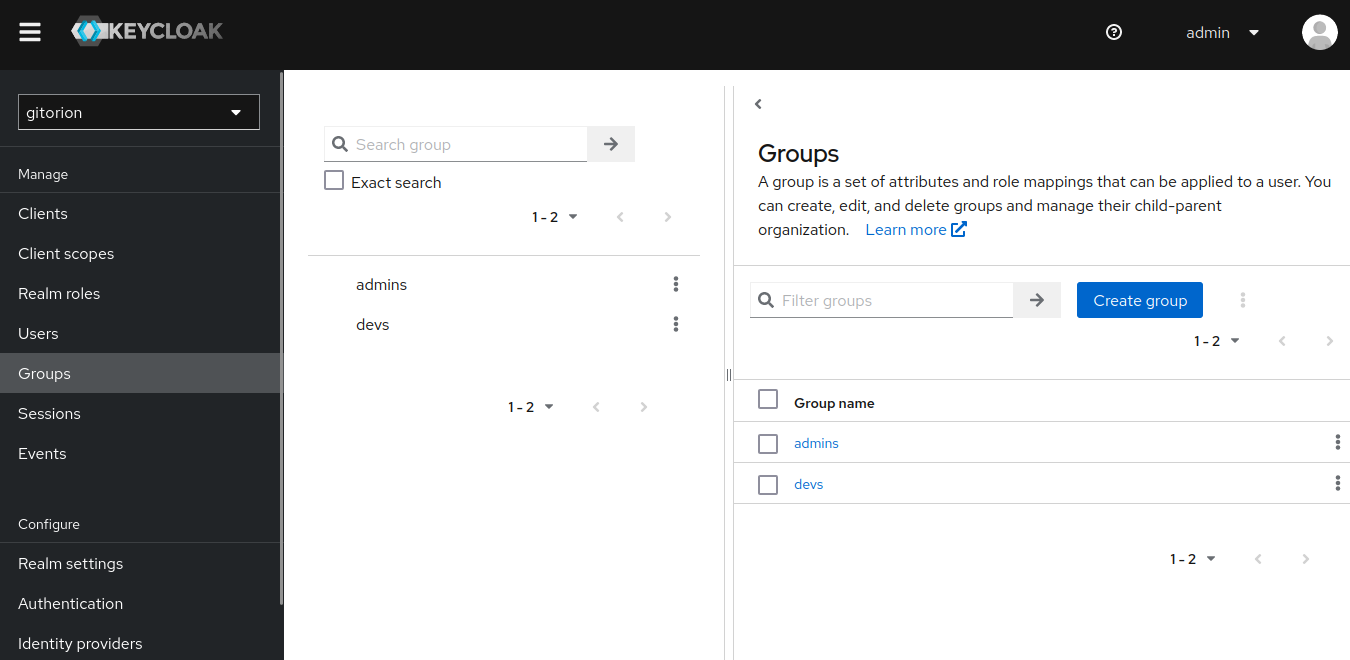
Click the “Create group” button and enter a group name.
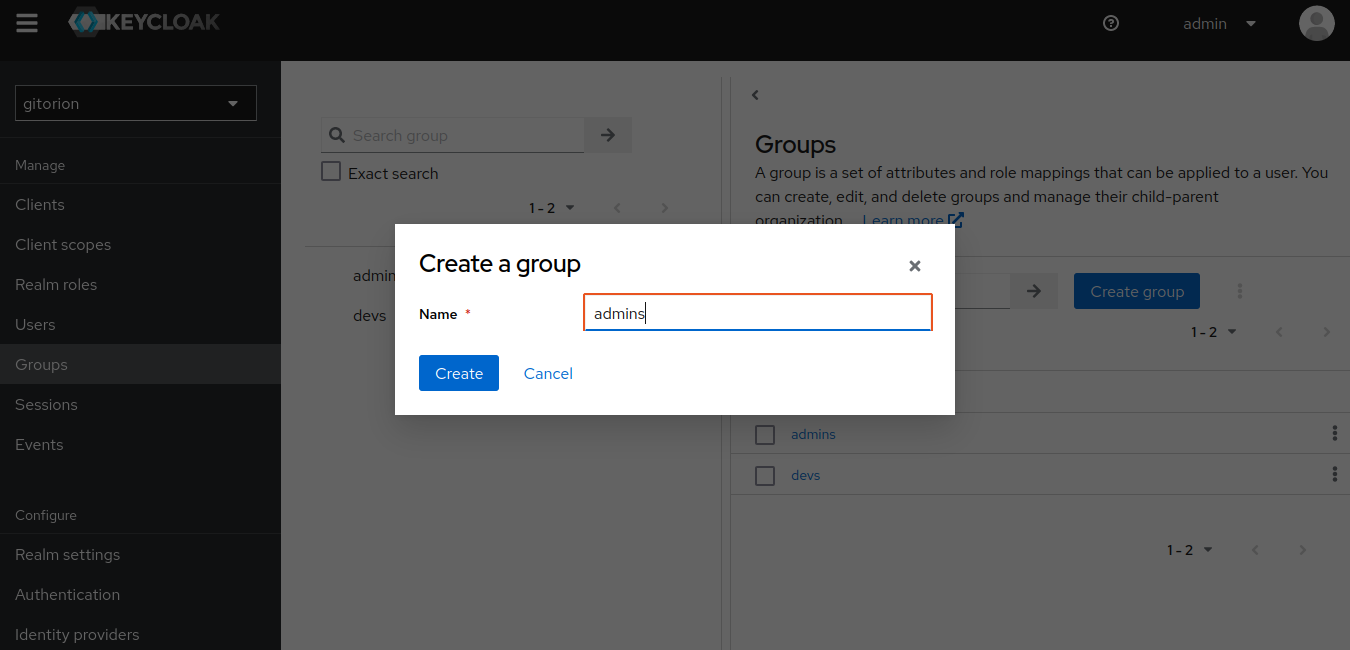
Click the Create button. Repeat the same steps and create the devs group.
Next, as an example, let's create a user owneruser and add it to the admins group. And also the user user1 and add him to the devs group. Go to the Users menu and click the “Add users” button.
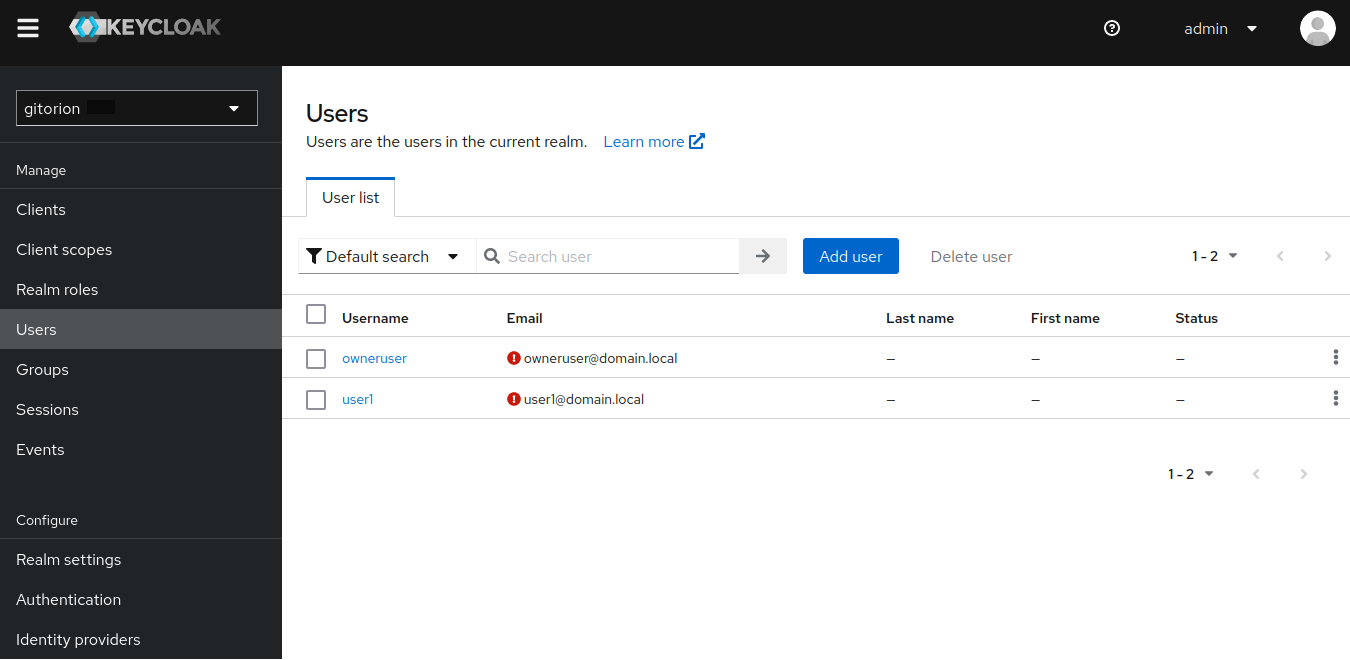
Enter user details. Be sure to specify an email (Grafana uses the user's email instead of a login for authentication).
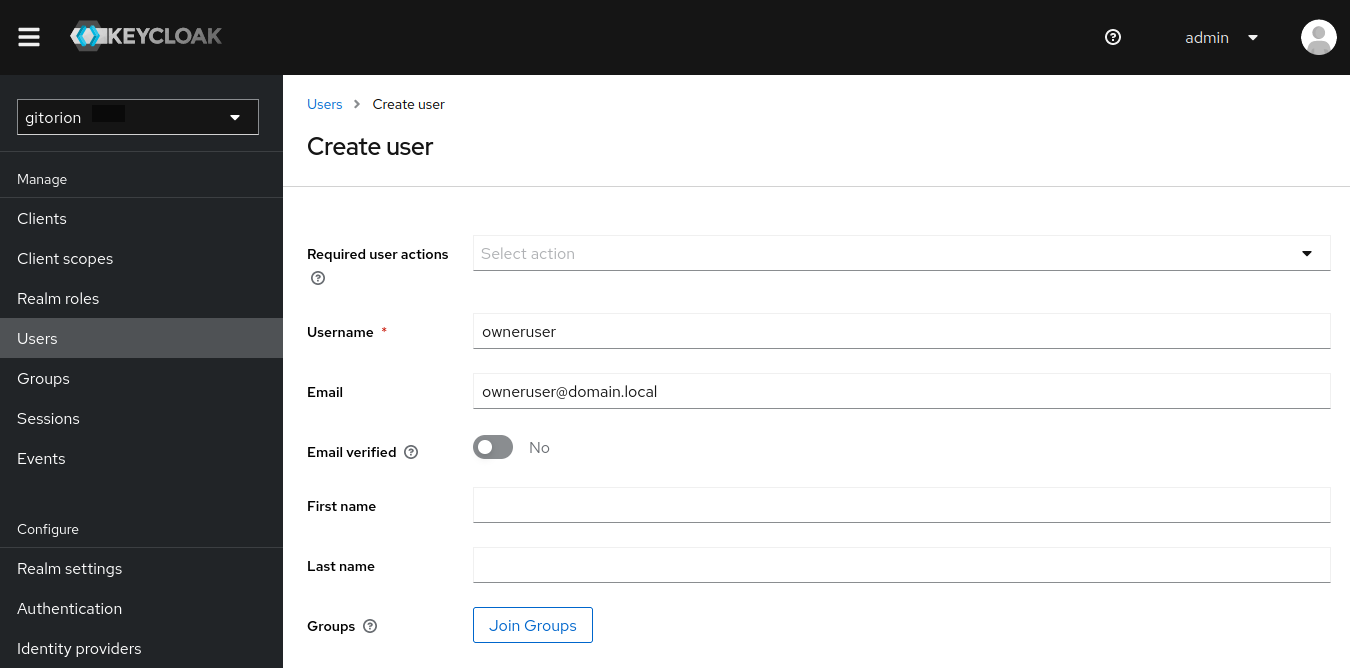
Click the “Join Groups” button, add the user to the admins group and click the Join button.
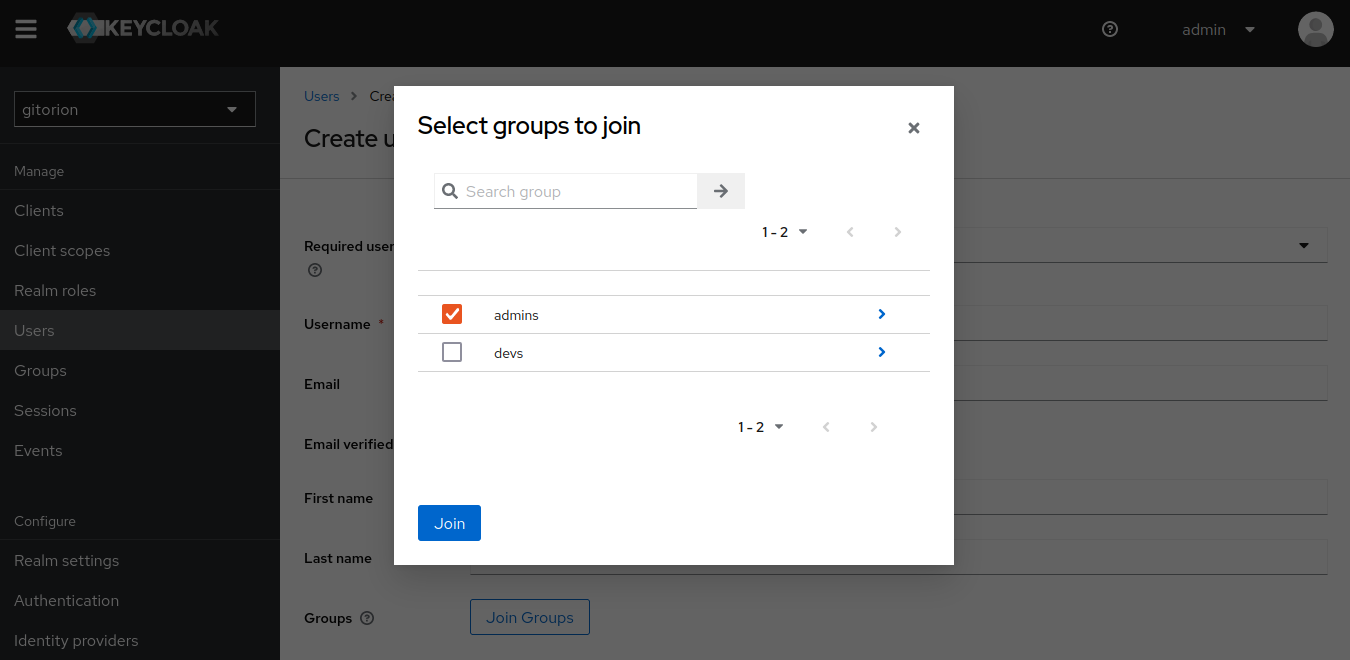
Click the Create button to create a user. Similarly, create the user user1 and add it to the devs group.
Authorization based on Roles
Authorization and delimitation of powers were required in Jenkins and Grafana. Team leads needed to be given full access so that they could create pipelines in Jenkins and dashboards in Grafana. And give developers read-only permissions so that they can monitor their pipelines and monitor the load on dashboards in Grafana.
Login to the Keycloak admin console, go to the “Realm roles” menu.
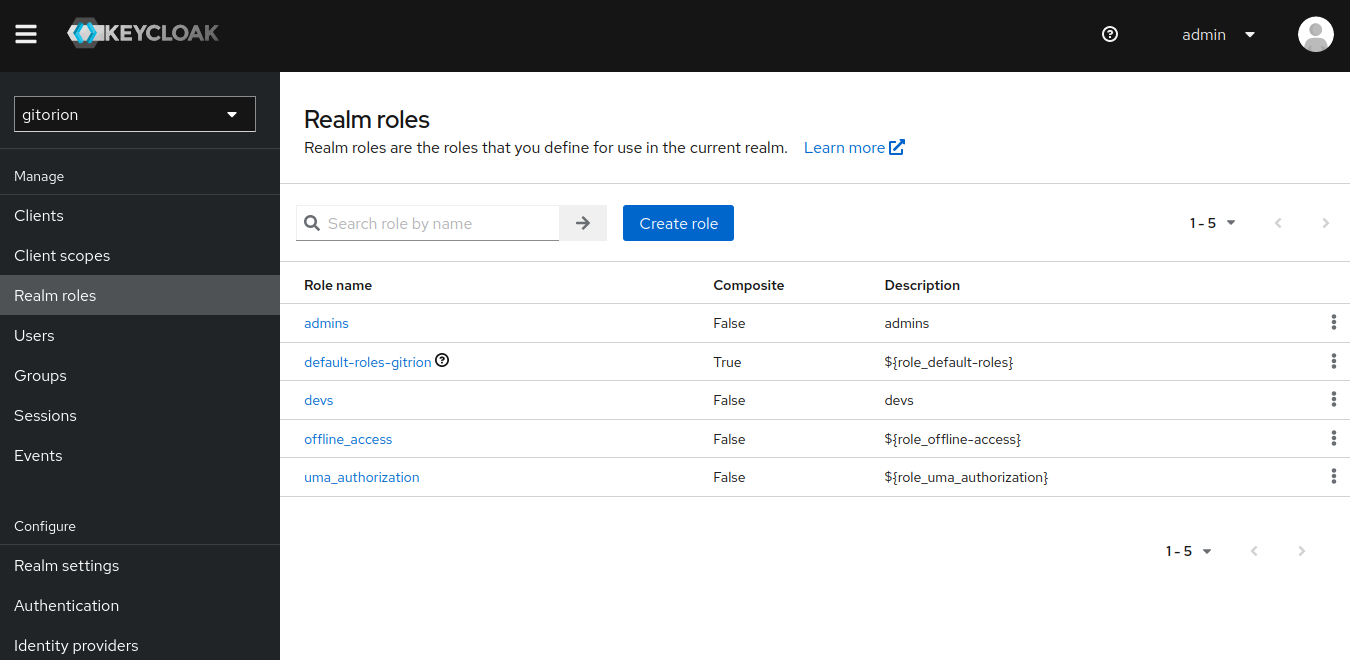
Click the “Create role” button. In the next window, specify a name for the role and click the Save button.
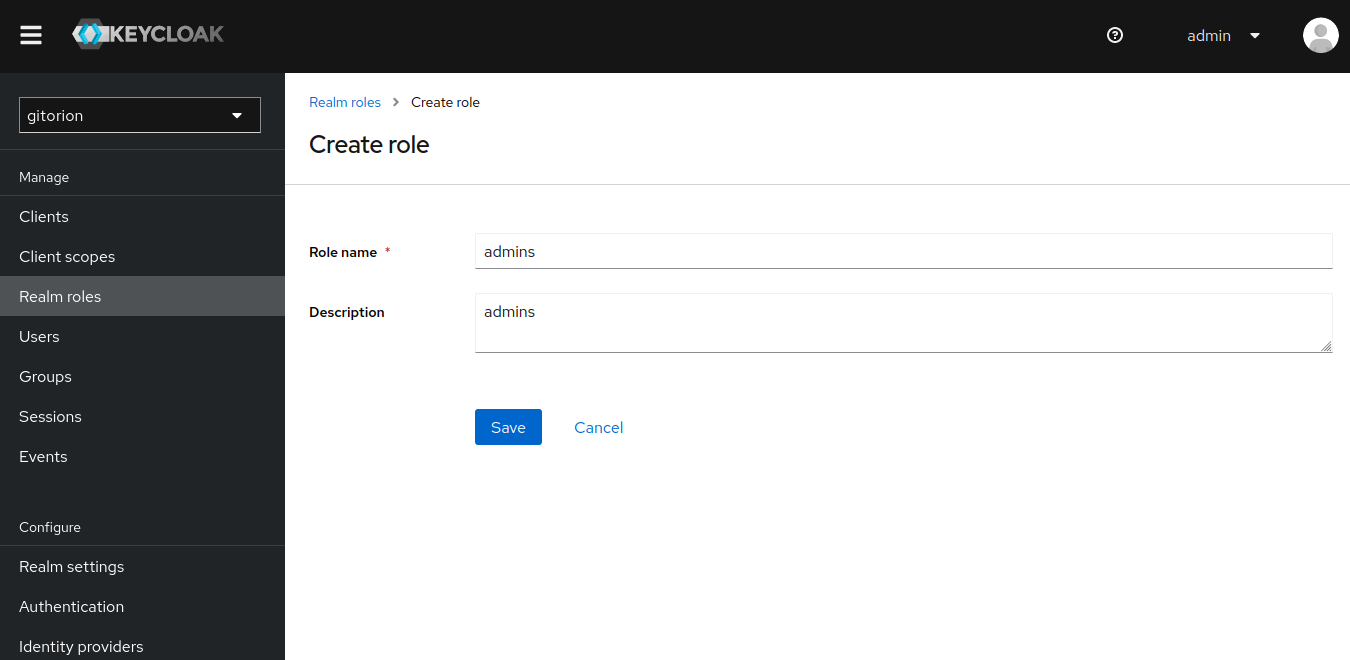
Go to the Groups menu, select the admins group and go to the “Role mapping” tab.
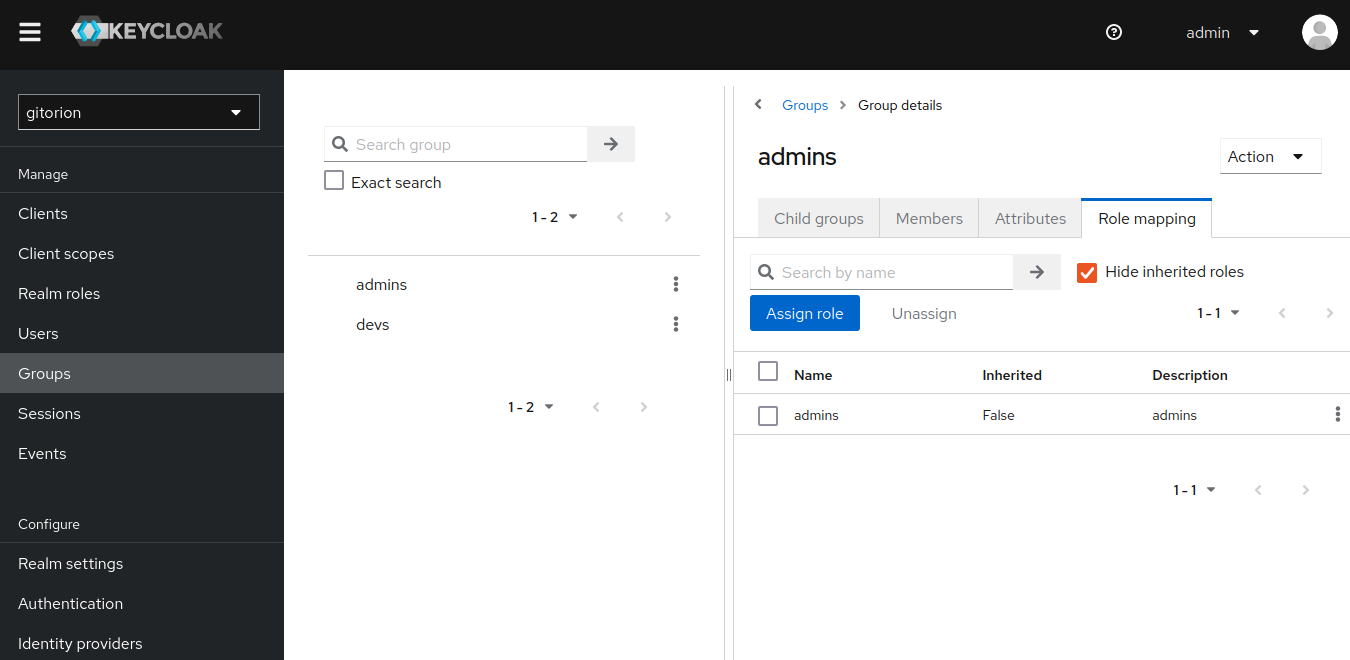
Click the “Assign role” button, select the admins role and click the Assign button.
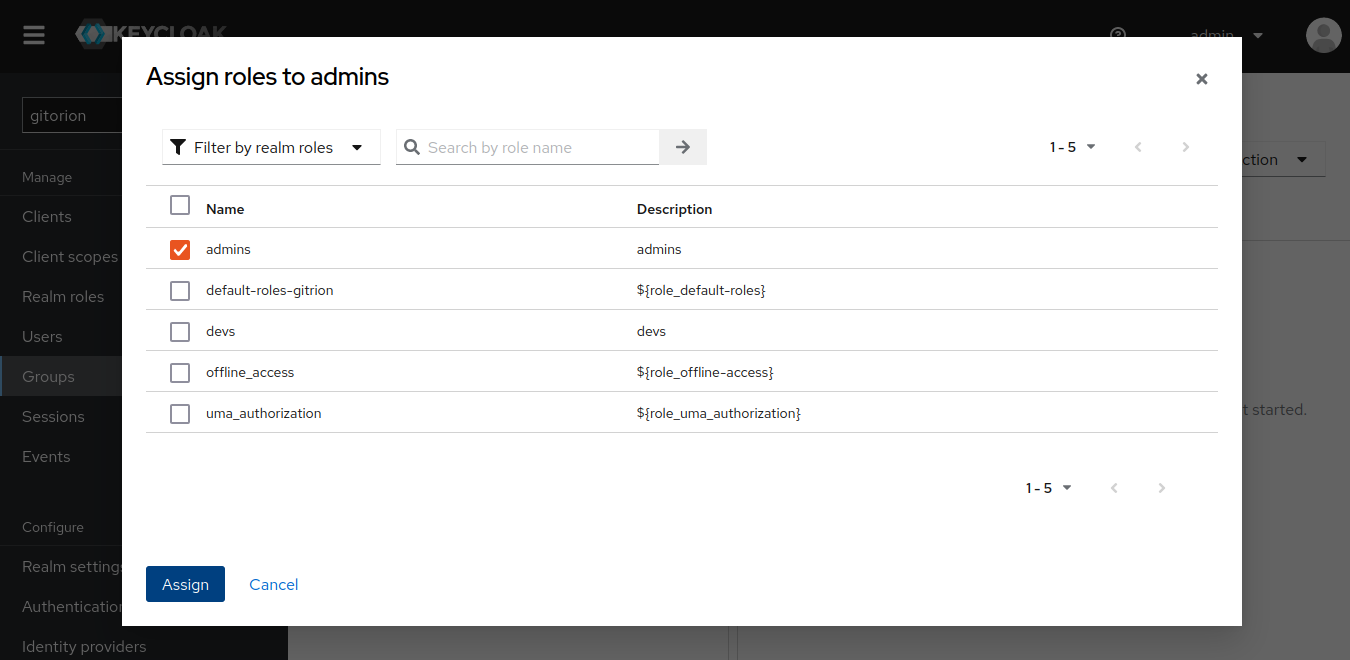
Likewise, associate the devs group with the devs role. Now, in case of successful authorization, Keycloak, among other information about the user, will also transfer the user’s role to the service from which the user came to authenticate. And the service will be able to authorize the user and assign permissions in accordance with his role. Keycloak transmits information about the client to Scopes, a list of which can be viewed in the “Client scopes” menu.
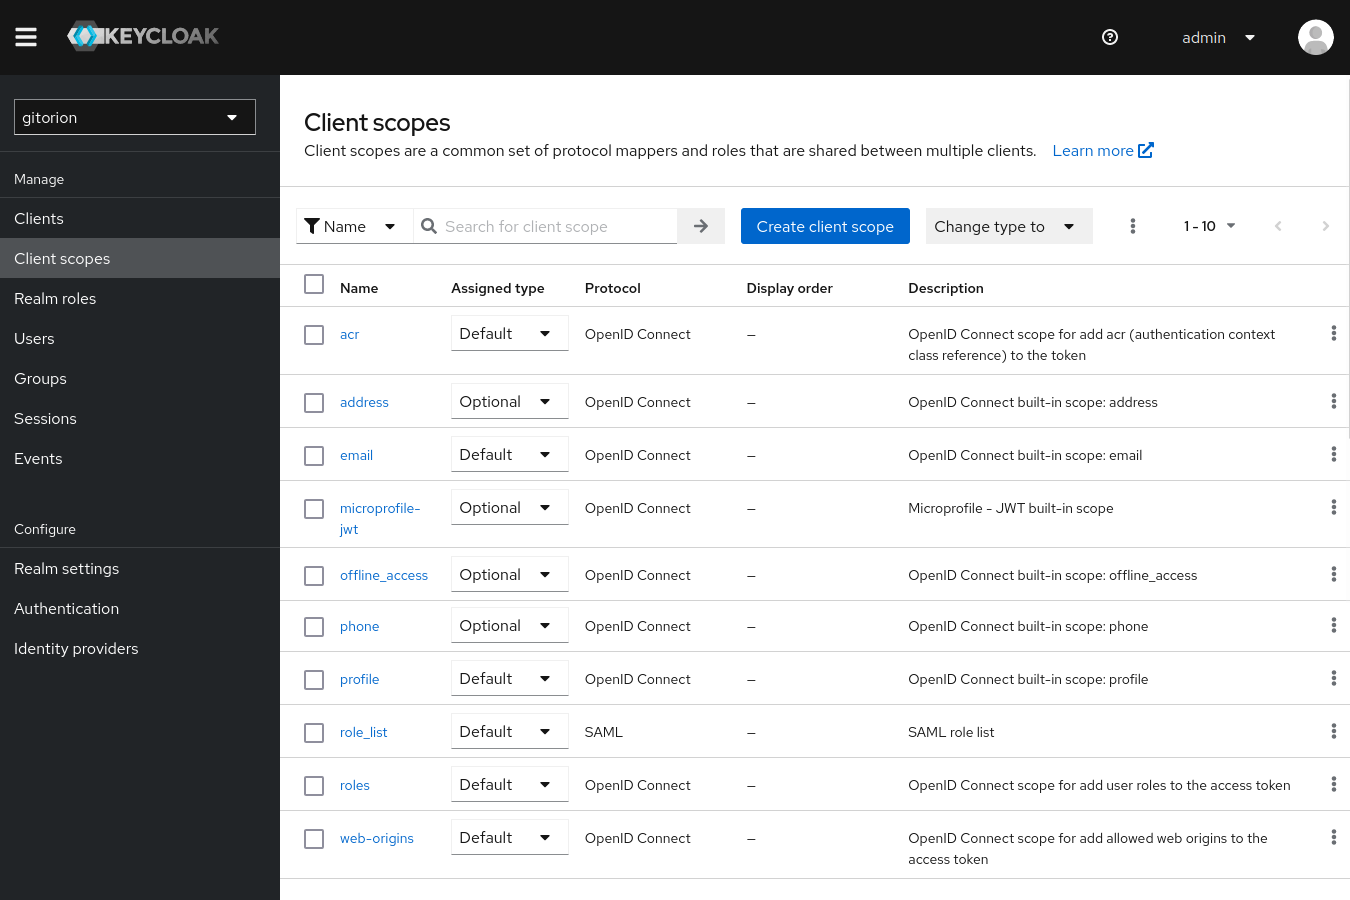
Among other Scopes, there are roles by default.
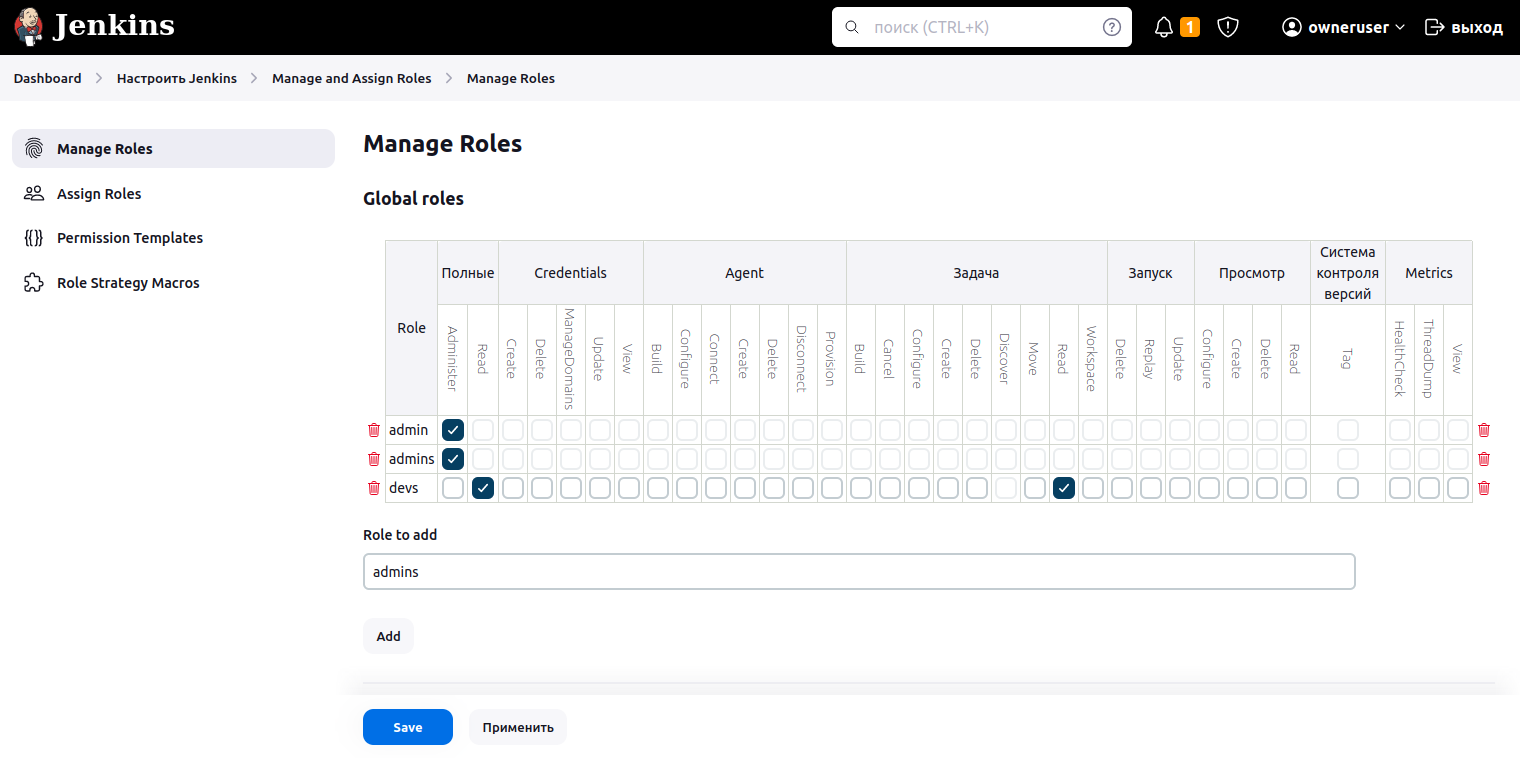
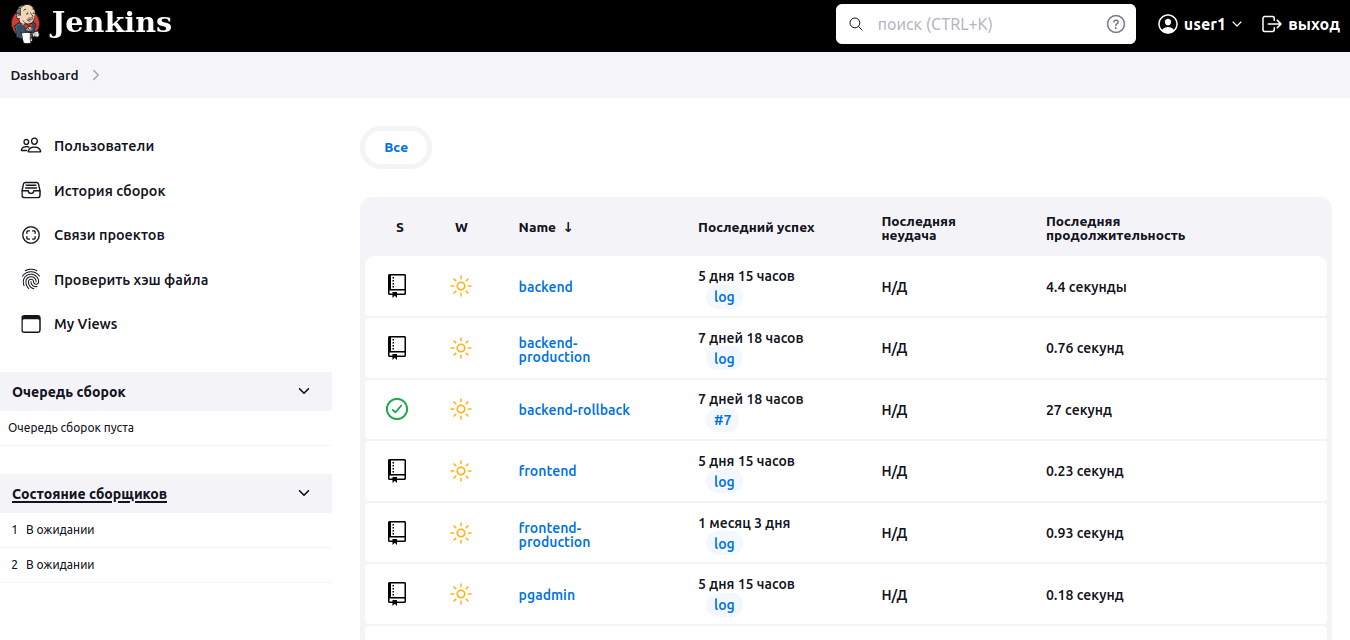
Configure role-based permissions in Jenkins. Go to the “Manage and Assign Roles” section in the Jenkins settings and select the “Maname Roles” sub-item. In the window that appears, in the “Role to add” field, enter the name of the role admins and click the Add button. Add the devs role in the same way. In the access matrix, set the Administer checkbox for the admins role in the Full column, and for the devs role check the Read checkbox in the Full and Task columns.
Log in to Jenkins as owneruser from the admins group, and you will have access to the “+ Create Item” option for adding pipelines and the “Configure Jenkins” settings item.
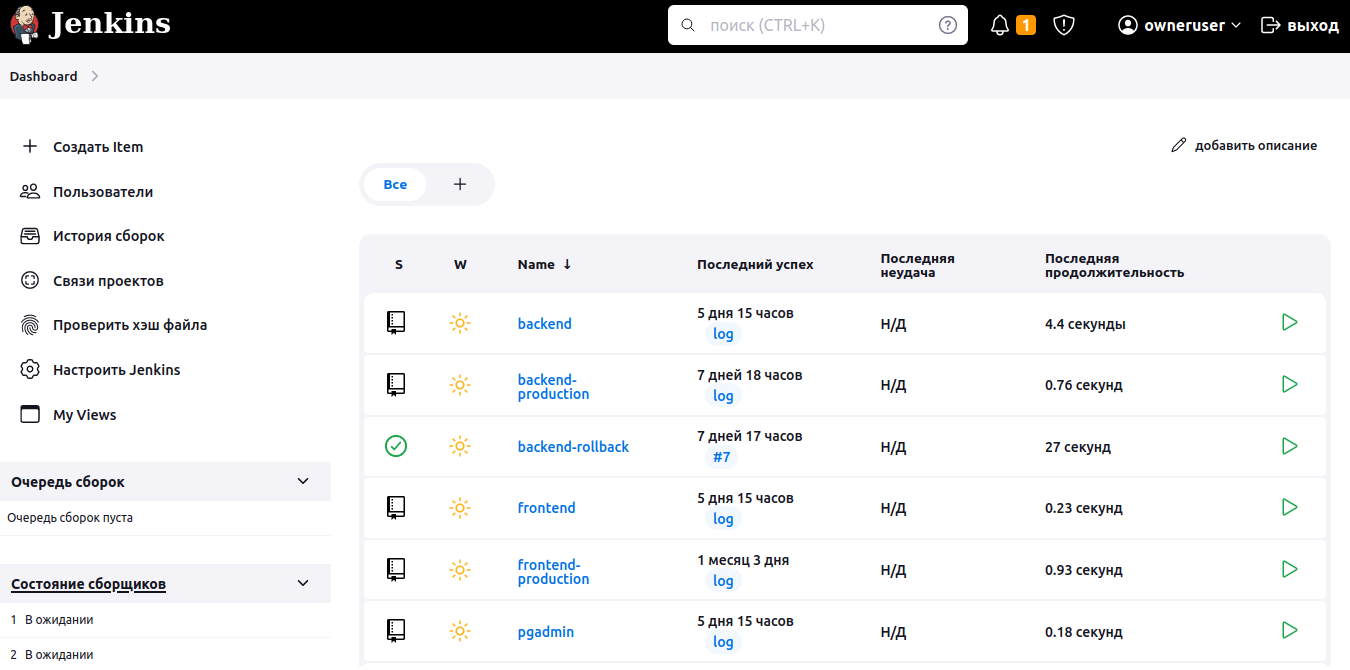
Log in as user1, and the items for creating pipelines and Jenkins settings will disappear. It will only be possible to view information about pipelines.
For Grafana, you need to associate Keycloak roles with the built-in Grafana roles in the grafana.ini configuration file.
role_attribute_path: contains(realm_access.roles[], 'admins') && 'Admin' || contains(realm_access.roles[], 'editor') && 'Editor' || 'Viewer'Associate the admins role from Keycloak with the Admin role from Grafana. All other roles are associated with the Viewer role in Grafana.
Login to Grafana via Keycloak as owneruser from the admins group and you will have full access to Grafana settings.
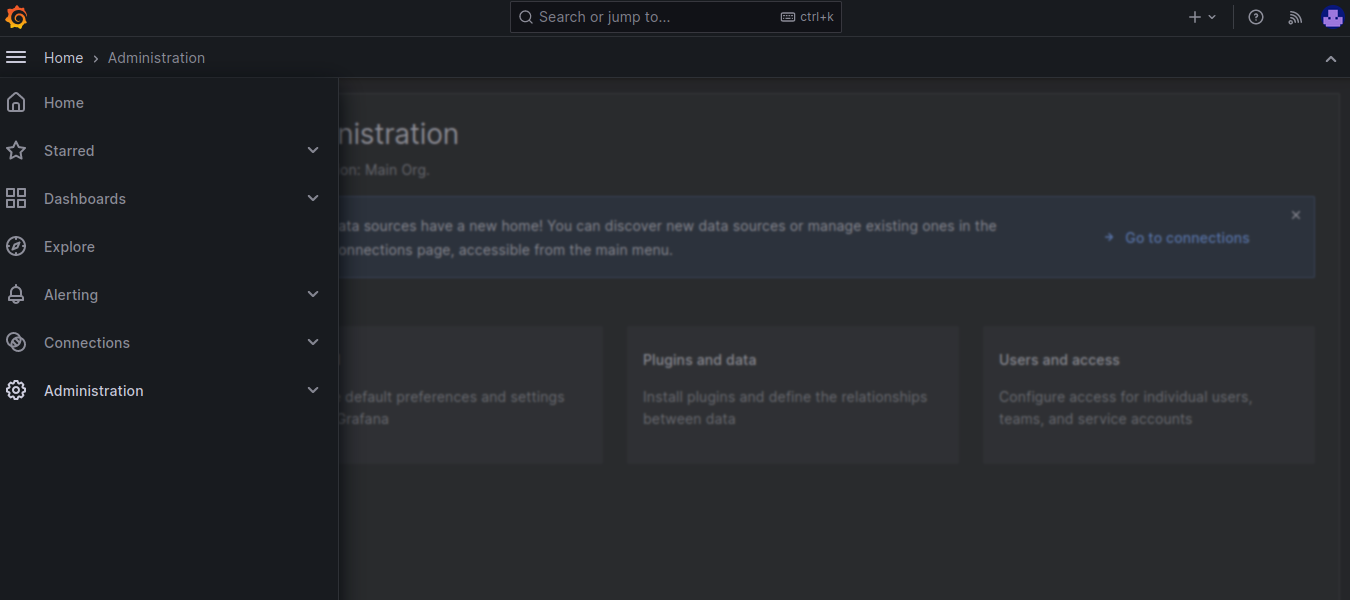
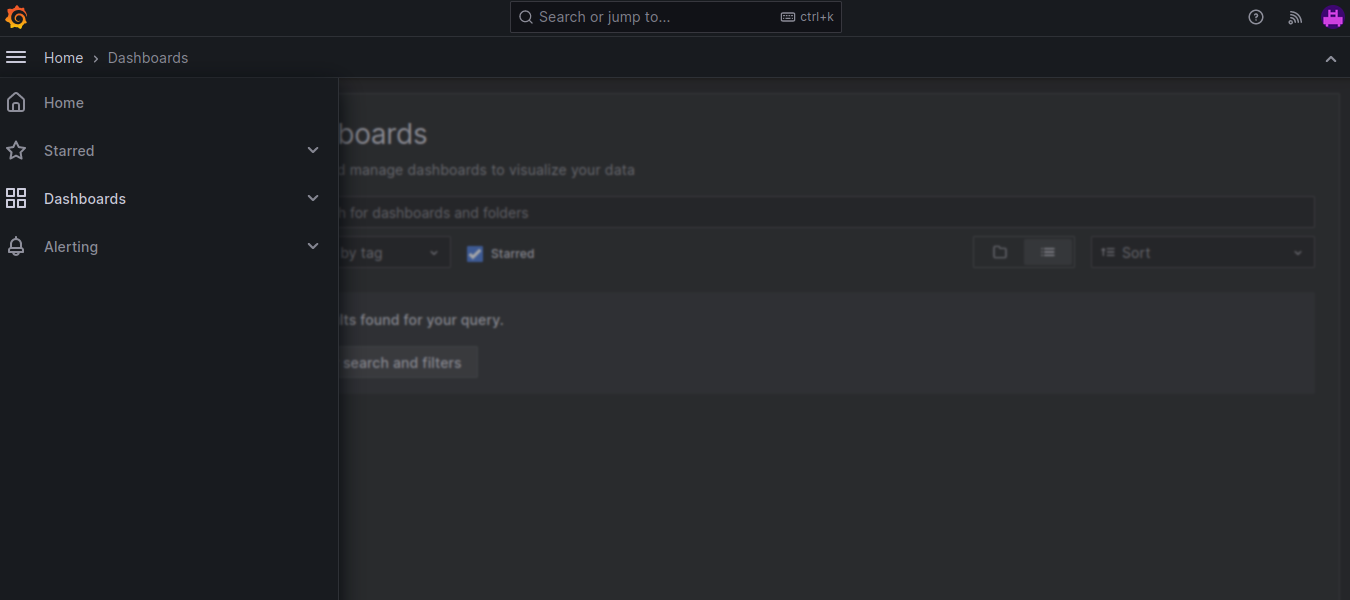
The user user1 from the devs group has read-only rights, and the Administration item is missing from the menu.
Application authentication without adapter
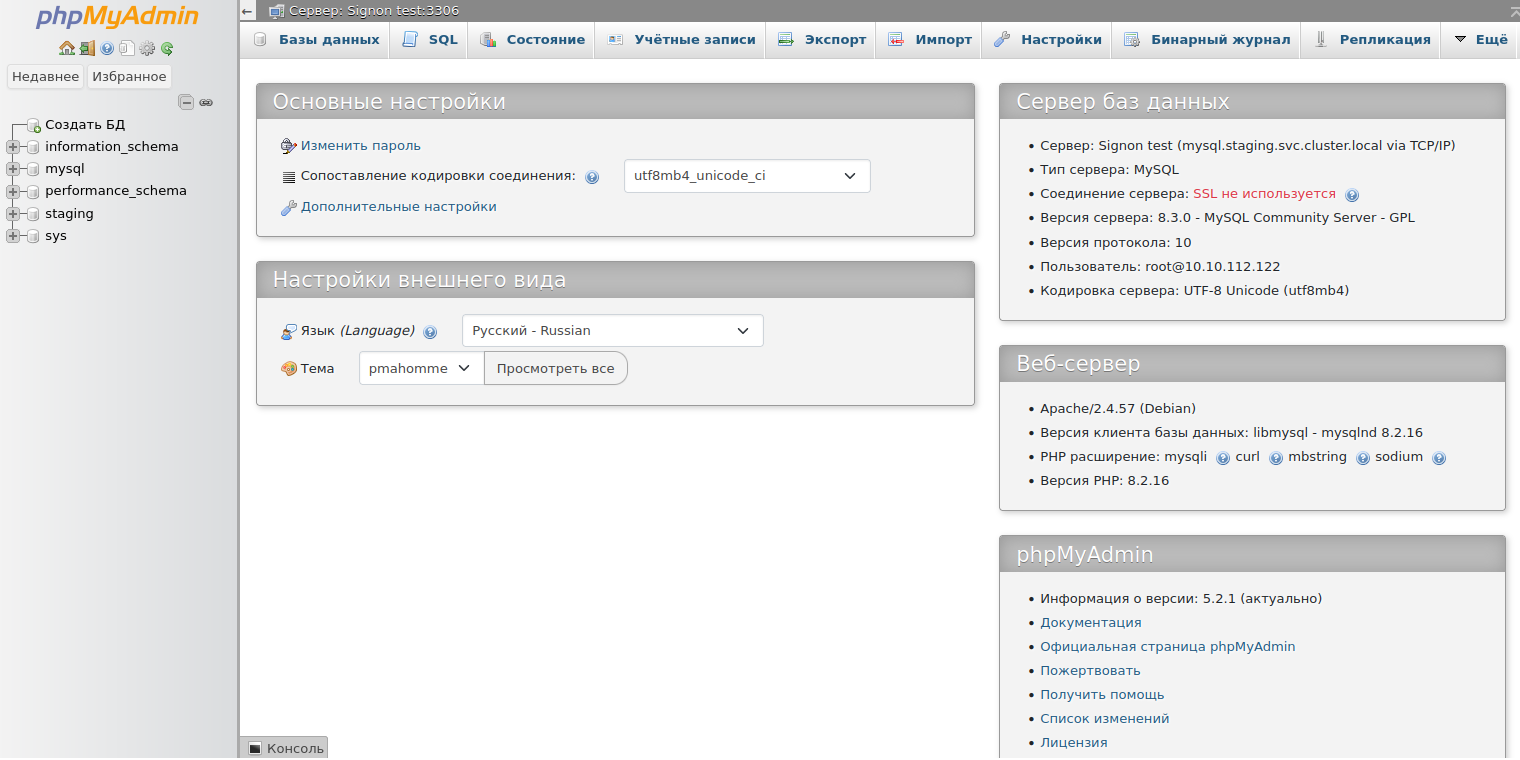
Some applications do not have a Keycloak adapter under the hood, and sometimes are not protected by an authentication window at all. You can close such applications with a login and password and configure authentication for them via Keycloak using the mod_auth_openidc module included in Apache2. In this case, the apache2 server interacts with Keycloak and implements authentication for the Location, where the application that requires authentication needs to be located. Such an application in our case turned out to be phpMyAdmin, which has its own authentication, but does not have a Keycloak client. The developers suggest implementing SSO yourself using this script.
In the config.inc.php configuration file for phpMyAdmin, switch the standard authentication using login and password to authentication using the signon.php script
$cfg['Servers'][$i]['auth_type']     = 'signon';
$cfg['Servers'][$i]['SignonSession'] = 'SignonSession';
$cfg['Servers'][$i]['SignonURL']     = 'examples/signon.php';
And configure Location for phpMyAdmin in apache2
LoadModule auth_openidc_module modules/mod_auth_openidc.so

ServerName gitrion.ru

<VirtualHost *:80>

    ServerName phpmyadmin
    ServerAdmin webmaster@localhost
    DocumentRoot /var/www/html/
    DirectoryIndex examples/signon.php

    OIDCProviderMetadataURL https://auth.gitorion.ru/realms/gitrion/.well-known/openid-configuration
    OIDCRedirectURI /redirect_uri
    OIDCDefaultURL https://phpmyadmin.staging.gitorion.ru:443/
    OIDCCryptoPassphrase 0123456789
    OIDCClientID phpmyadmin
    OIDCClientSecret 2jb0IUaoAfYUxPpAuJSwtcF2EEMEMdOb

    OIDCRemoteUserClaim preferred_username

    OIDCXForwardedHeaders X-Forwarded-Host
    OIDCXForwardedHeaders X-Forwarded-Port
    OIDCXForwardedHeaders X-Forwarded-Proto

    <Location />
    FallbackResource index.php
    DirectoryIndex index.php
        AuthType openid-connect
        Require valid-user
    </Location>

    ErrorLog ${APACHE_LOG_DIR}/error.log
    CustomLog ${APACHE_LOG_DIR}/access.log combined

</VirtualHost>
When going to the phpMyAdmin web interface, the user is redirected to the Keycloak authentication window. If authentication is successful, Keycloak will redirect the user to the phpMyAdmin personal account.
Browser Flow and restricting access within an area based on Roles
Adapters for the Gitea/Forgejo, Jenkins, Grafana Web interfaces and the phpMyAdmin and pgAdmin database Web interfaces for the development, staging and production circuits are located in the same area. A developer, having logged into any of the platform’s Web interfaces, will have access to the Web interfaces for database management in the development circuit, as well as in the staging and production circuits. Which is unacceptable! It was possible to block developer access to the Web interfaces of databases in the staging and production circuits by adding Roles-based access checks to the Browser Flow for phpMyAdmin and pgAdmin clients (adapters). Browser Flow specifies the order in which client access parameters are checked. By default, the presence of the token in Cookei is first checked. If the user has previously logged in and has a token, then the user is granted access to the service. If not, you are prompted to enter your username and password. We created a custom Browser Flow based on the default one, which, after checking the token in Cookie and login with password, also checks the user’s Role and denies access to users with the devs role to the Web interfaces of databases in the staging and production circuits.
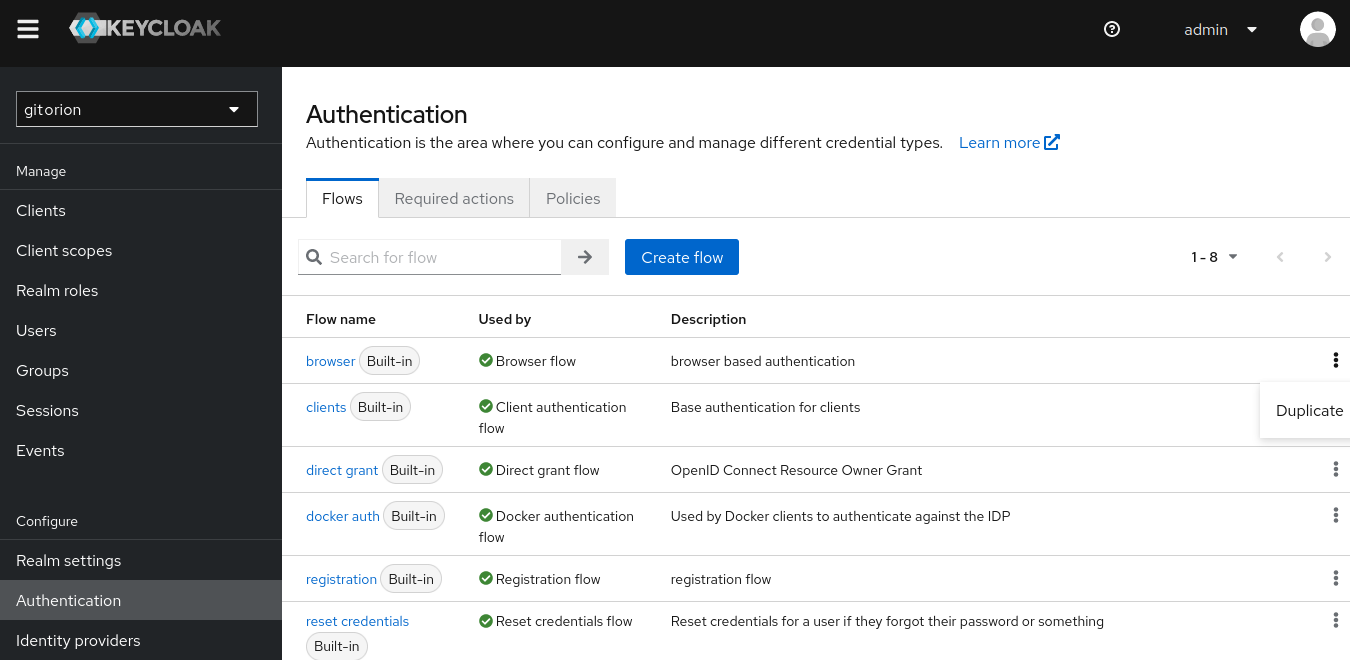
Log into the Keycloak administrative console, select an area, go to the Configure menu, Authentication submenu, click the three-dot icon to the right of Flow called browser and click the Duplicate button.
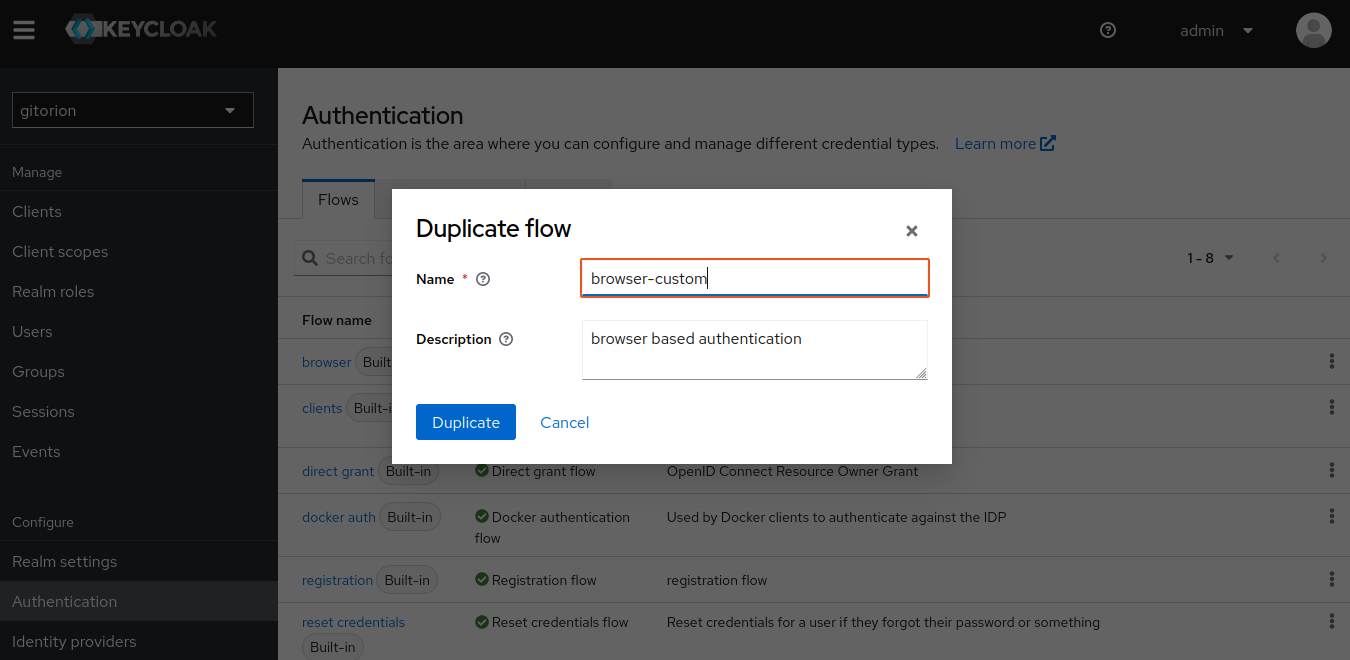
Set a name for the custom Flow and click the Dupliacate button.
Go to Flow browser-custom and add a Sub-flow named RBAC to browser-custom forms.
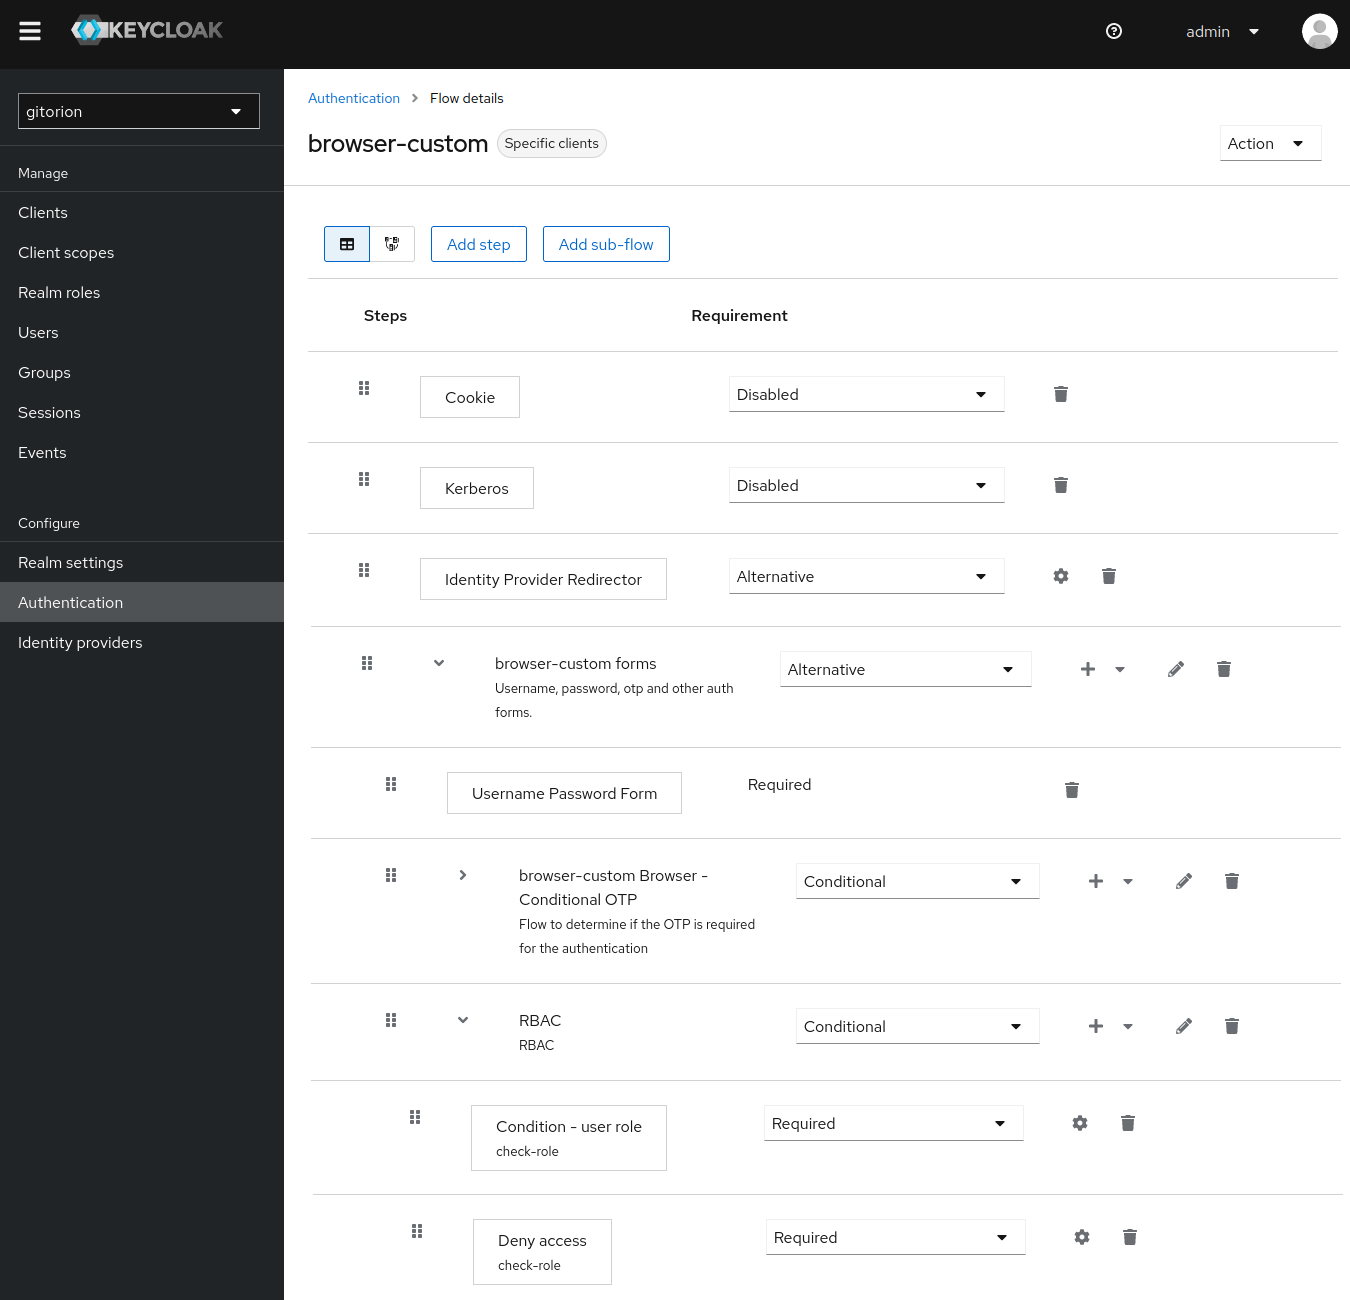
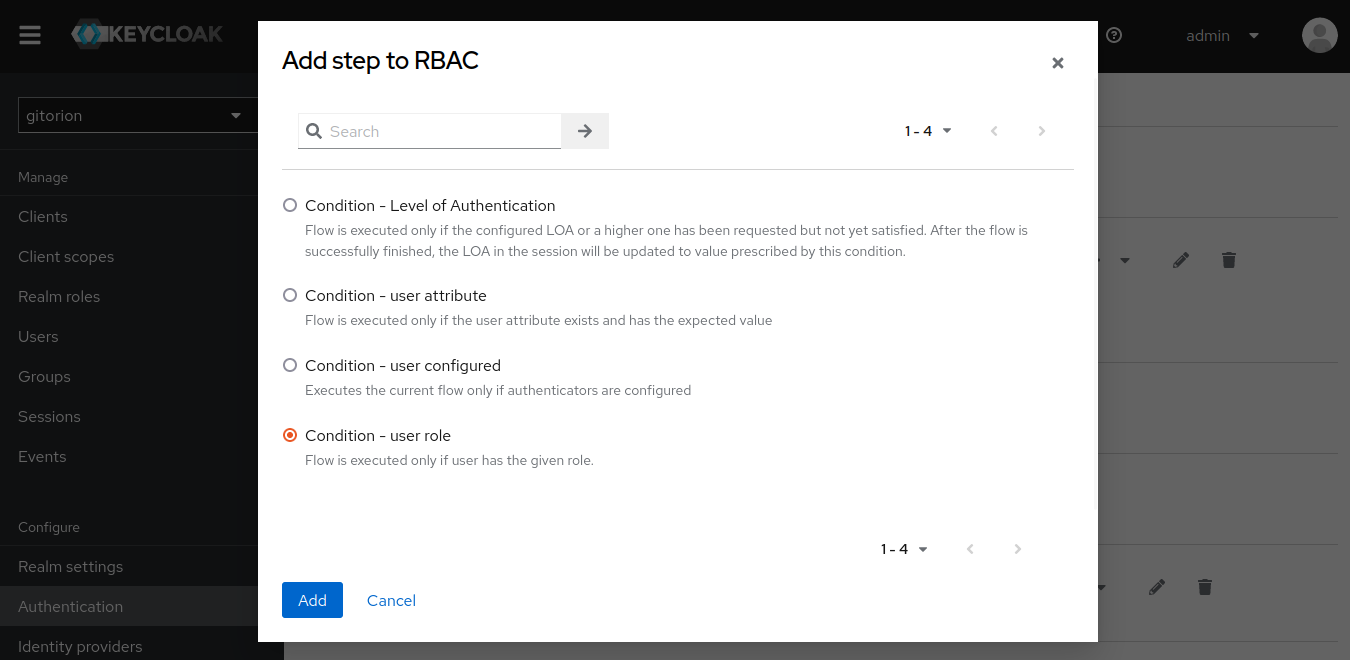
In Sub-flow RBAC, add Condition user-role.
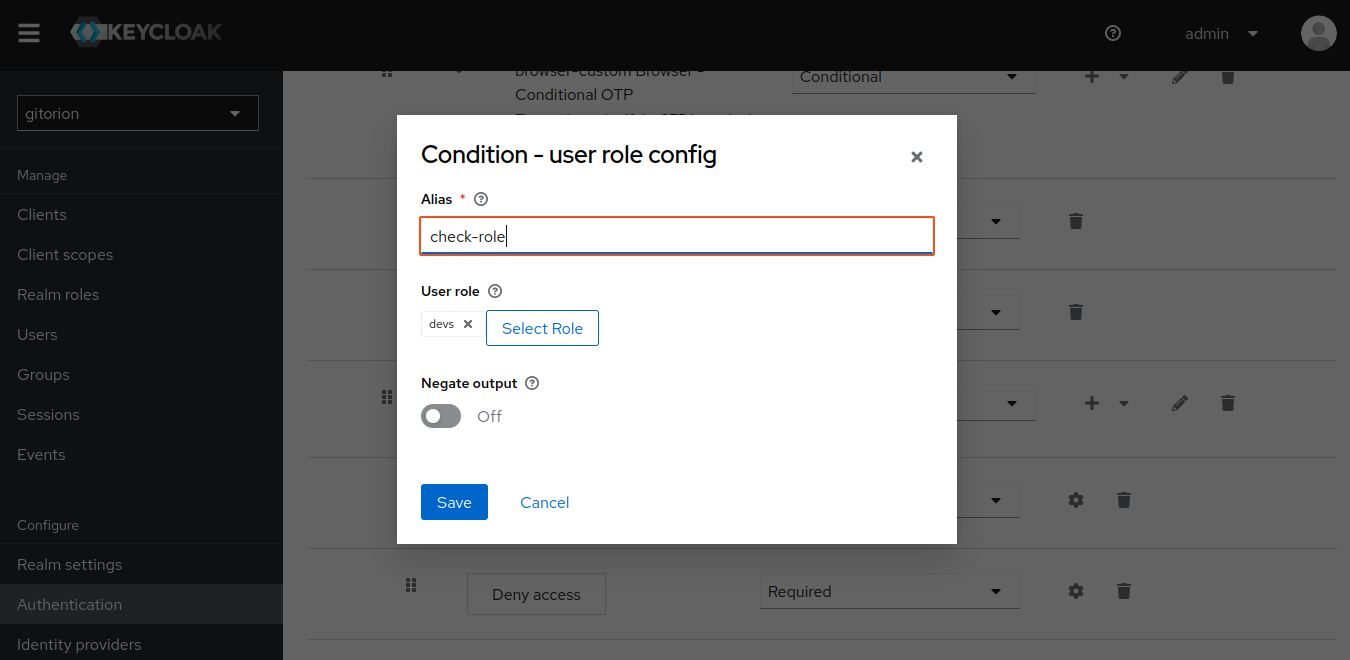
Click on the gear to the right of Condition user-role, set Alias and associate it with the devs role.
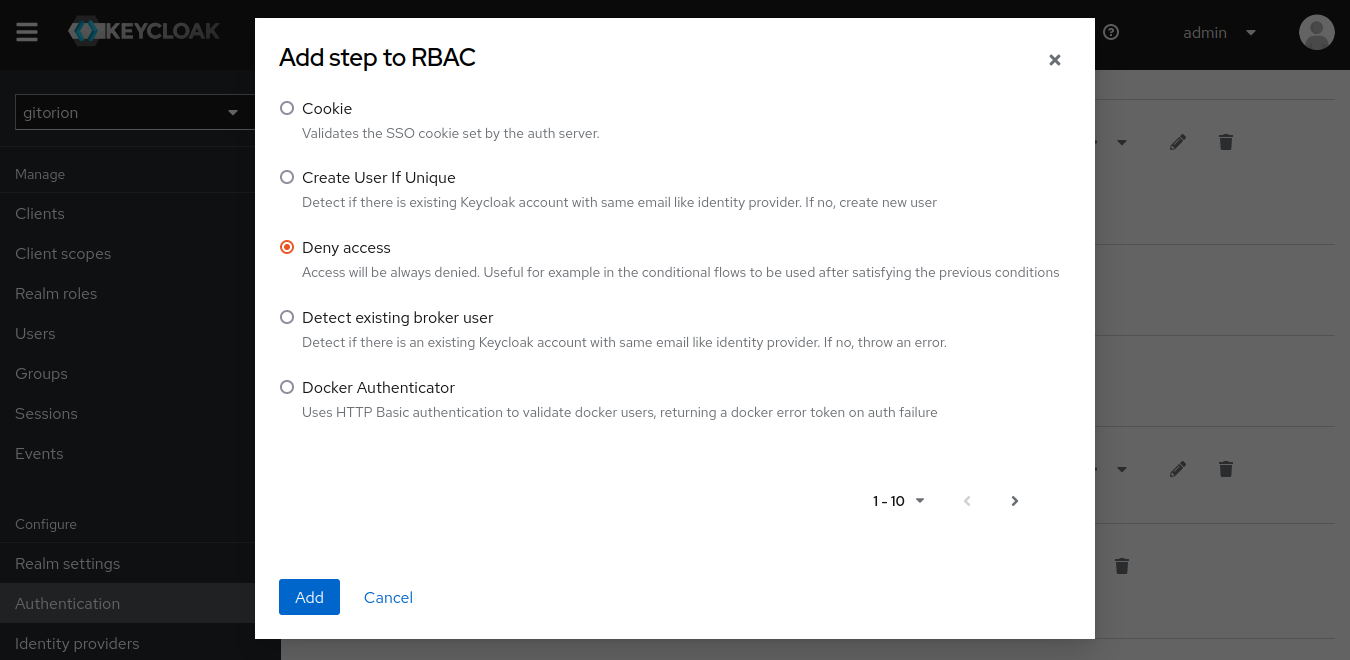
Add Step Deny Access
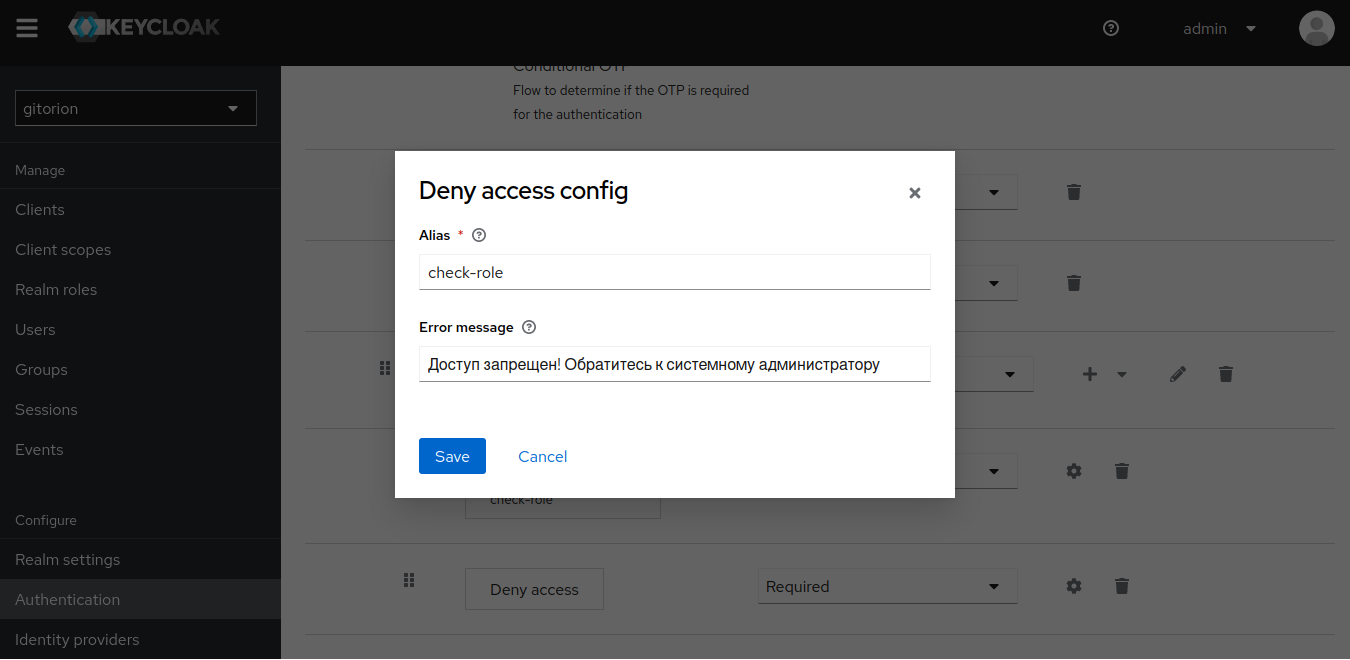
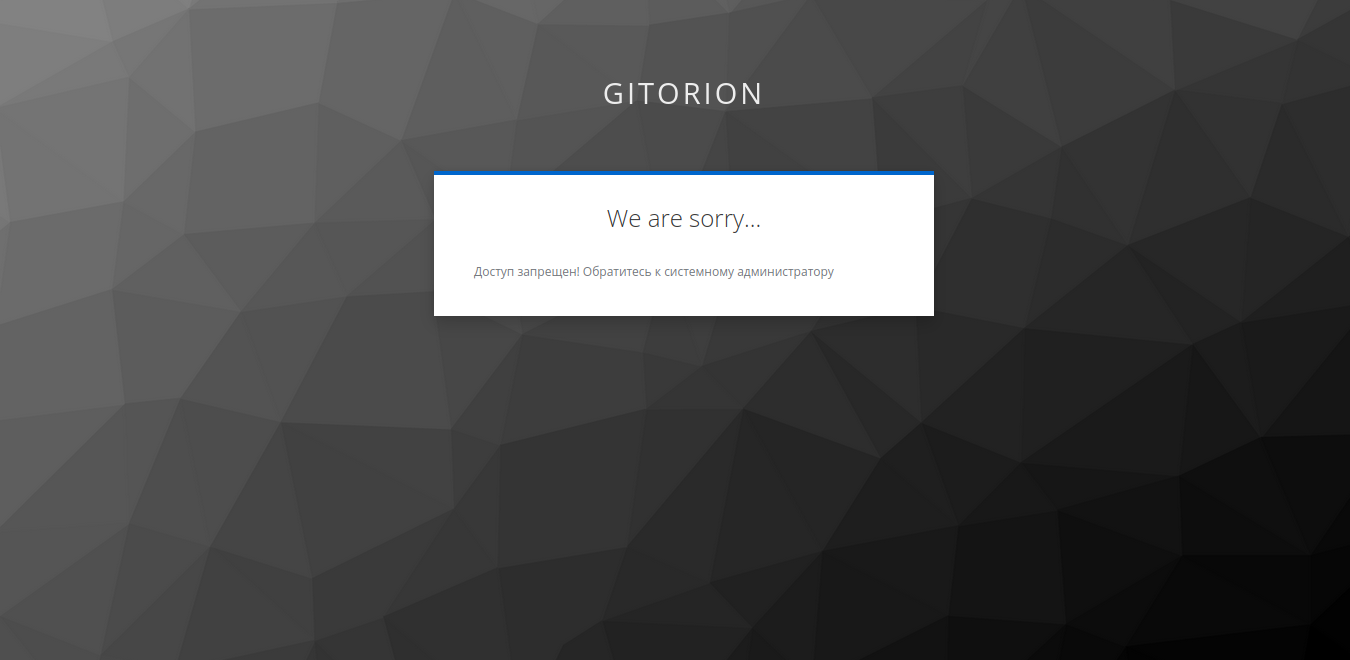
Click the gear to the right of Step Deny Access, set the Alias and the text of the message that will be displayed to the user from the devs group when trying to access databases in the staging and production circuits.
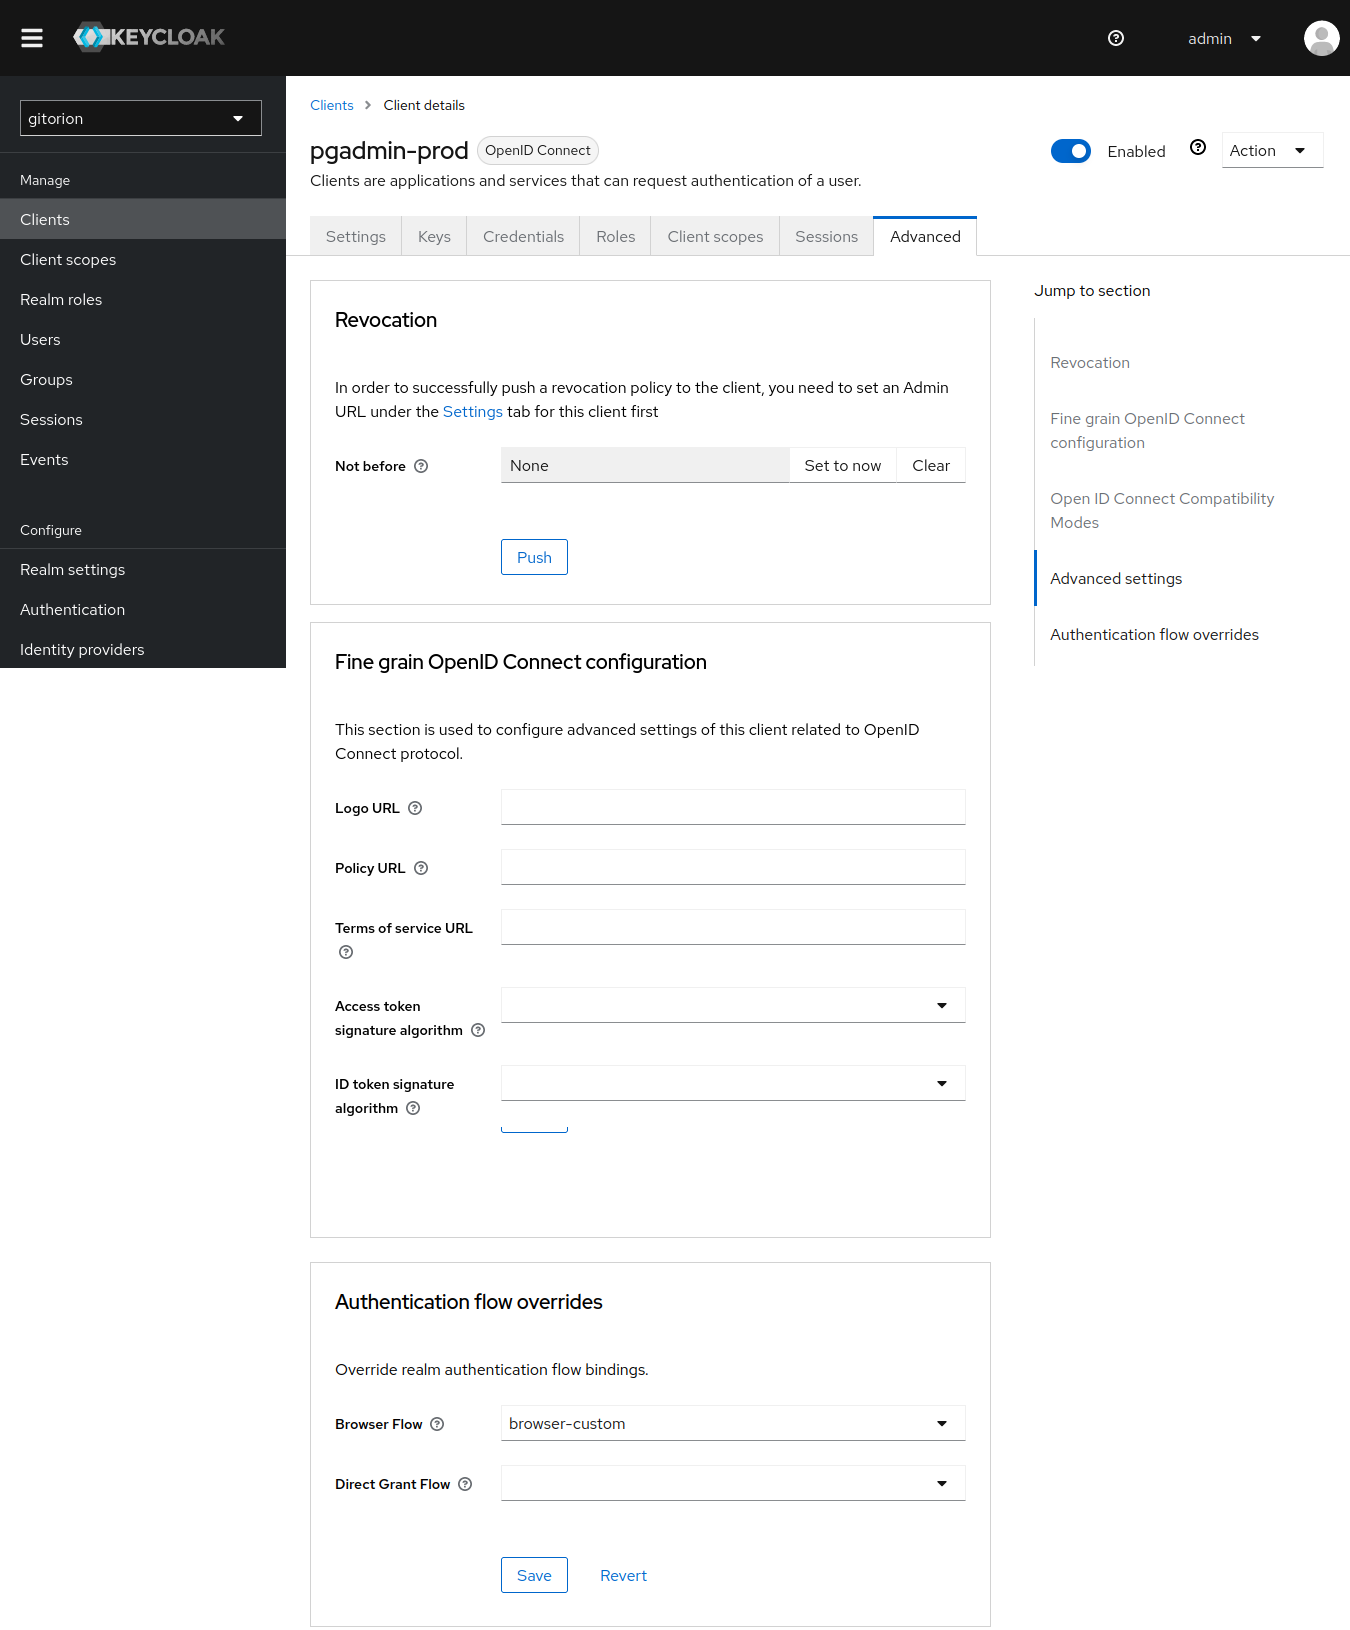
Connect a custom Flow browser-custom to the phpMyAdmin and pgAdmin clients (adapters) in the staging and production circuits. Go to the Advanced tab in the client settings, go to the very bottom and set browser-custom in the Browser Flow field.
When a user with the devs role tries to access the database Web interface in the staging or production loops, a warning will appear.
Conclusion
In this article, we highlighted our experience in implementing Single Sign-On (SSO) into all services of the Gitorion platform using Keycloak. We welcome feedback, comments and constructive criticism. Thank you.

