Zextras Drive and Docs – document storage and collaboration in Zimbra OSE
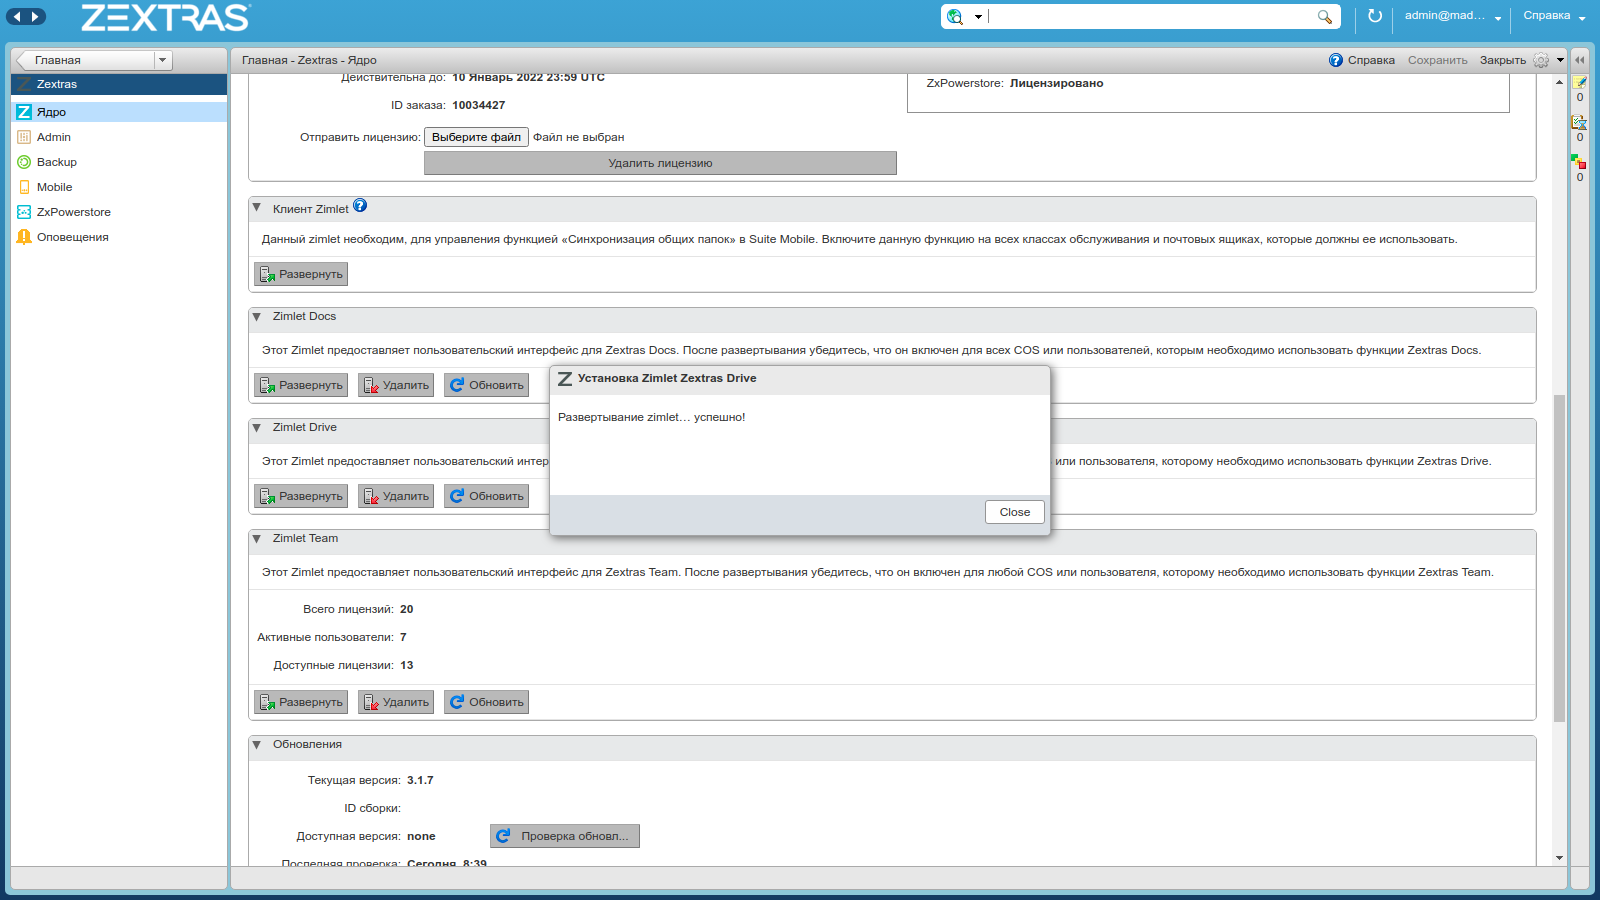
All the necessary components for the operation of Drive and Docs services are included in Zextras Suite Pro and are available after its installation. Services are deployed from the Zimbra OSE admin console. To do this, go to the Zextras tab and select the “Kernel” section. On the page that opens, find the Zimlet Docs and Zimlet Drive sections, and click the Expand button in each of them. After a message appears about the successful deployment of zimlets, a Drive tab will appear in the user’s web client, in which they can use this service.
The Zextras Docs Service requires the Docs Server to be installed on a dedicated Zimbra infrastructure node. To do this, you need to download the distribution kit of the server application for Ubuntu 16.04, Ubuntu 18.04 or CentOS 7 from the Zextras website, and then unpack and install it. At the final stage of the installation, the server will ask you to specify the ip-address of the LDAP server, as well as a username / password pair that will be used to enter data about the new server into LDAP. After the installation is complete, the Zextras Docs server will be available to all other nodes in the infrastructure.
Zextras Drive interface includes:
- Quick access and navigation bars
- Dashboard
- Control panel
- Folder and file display panel
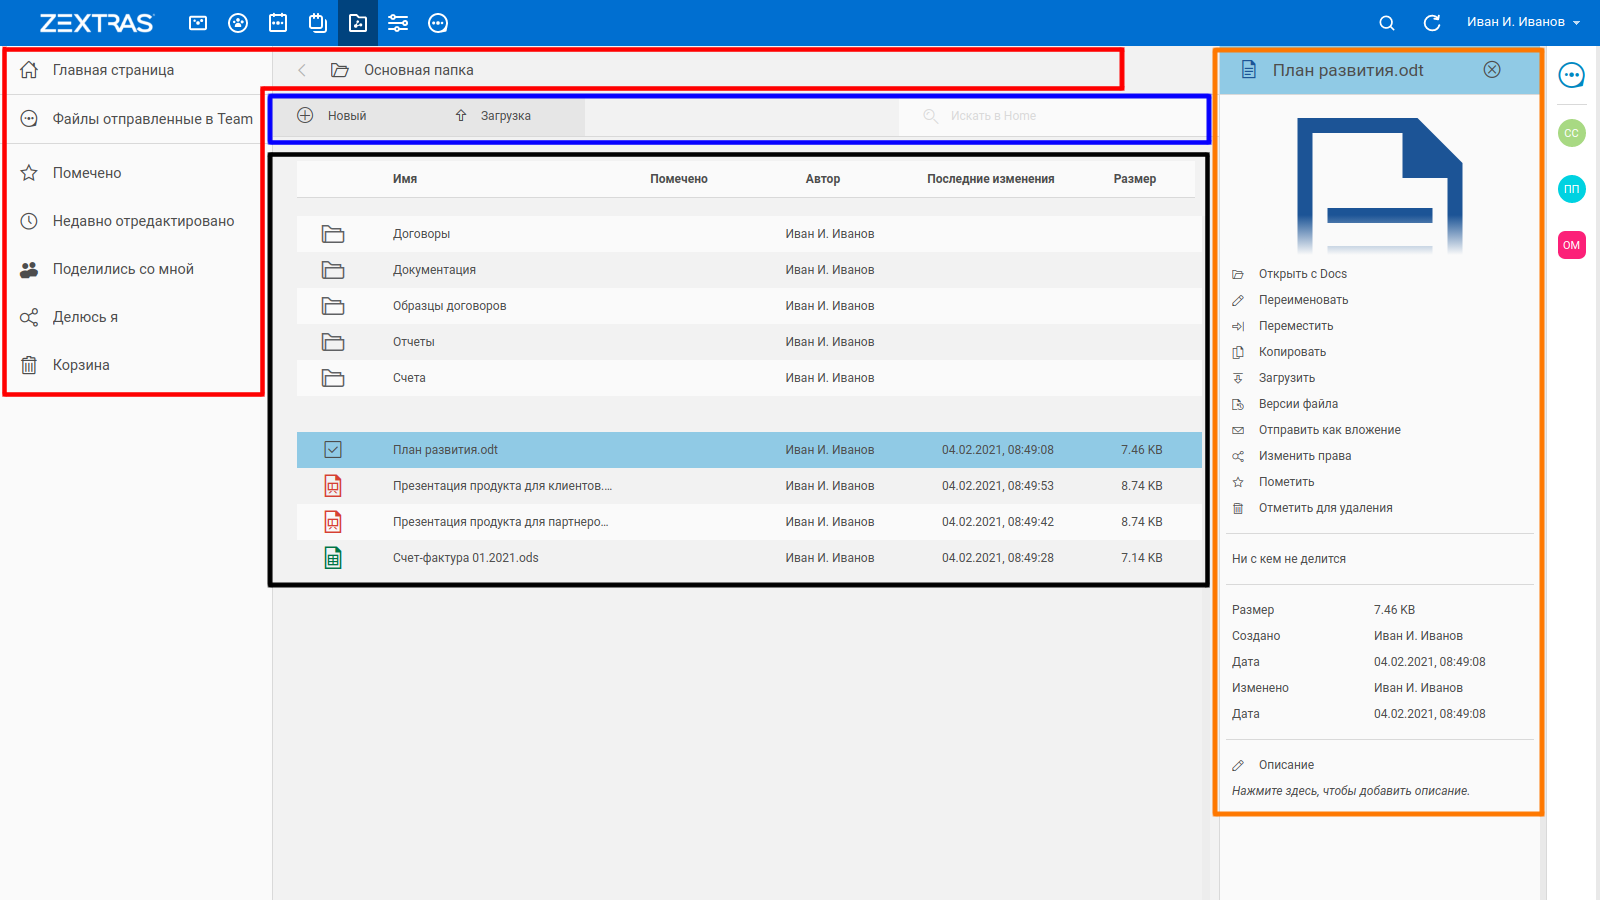
The design of the Quick Access and Navigation Bar makes it easy to navigate the disk. On the left side of the quick access panel, you can select files that:
- Recently edited
- Marked as important
- Marked for deletion
- Files that were uploaded to Team
- Files you share with other users
- Files other users share with you
The “Files sent to Team” section appears after at least one file has been transferred to the user via chat or group chats in Zextras Team. Files sent in this way are automatically sent to the user’s Drive with the name of the sender.

The control panel contains the “New”, “Load” buttons and the search bar. Using the New button, you can create a new folder as well as a new text document, spreadsheet, and presentation. Using the Upload button, you can upload a file to the storage from your computer. The search bar allows you to search for files in the vault. The user who creates the file becomes its owner.

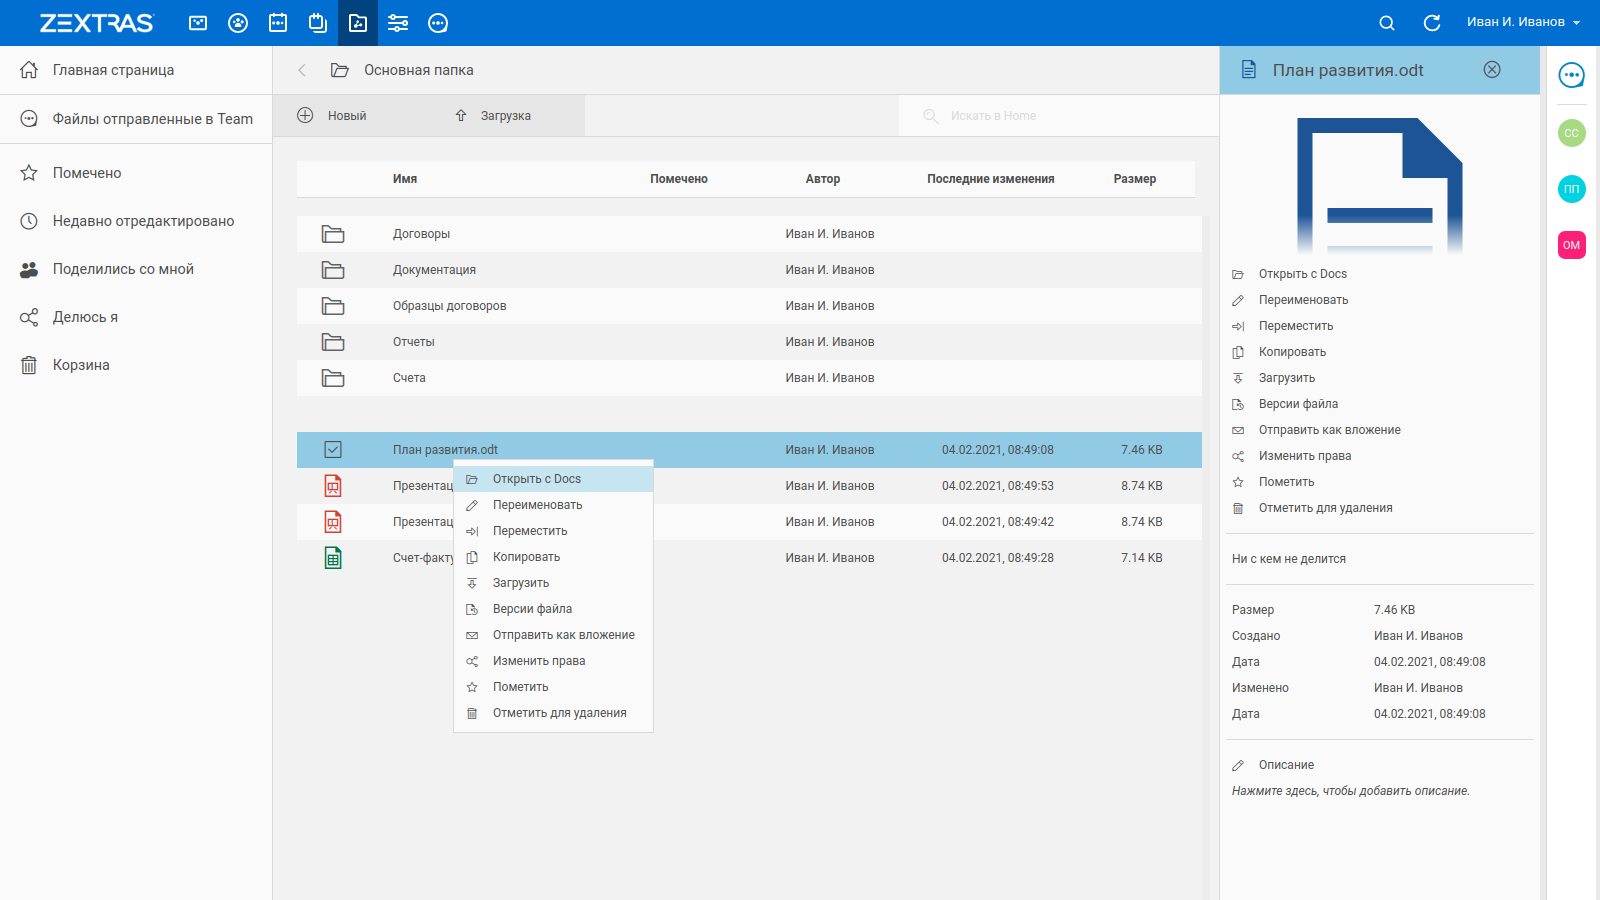
The folder and file display pane displays the folders and files that are located in your storage. A number of files such as photographs, text documents, presentations and tables can be opened directly in the Zextras Docs online editor by double-clicking the left mouse button. By clicking on the file with the right mouse button, you can bring up a context menu that allows you to open, rename, copy, move and download the file. You can also view file versions from the context menu, mark a file as important, send a file as an attachment, share a file, and mark it for deletion.
The user can access files in his Drive not only in the Zimbra OSE web client, but also using the Zextras Drive mobile application, available for iOS and Android…
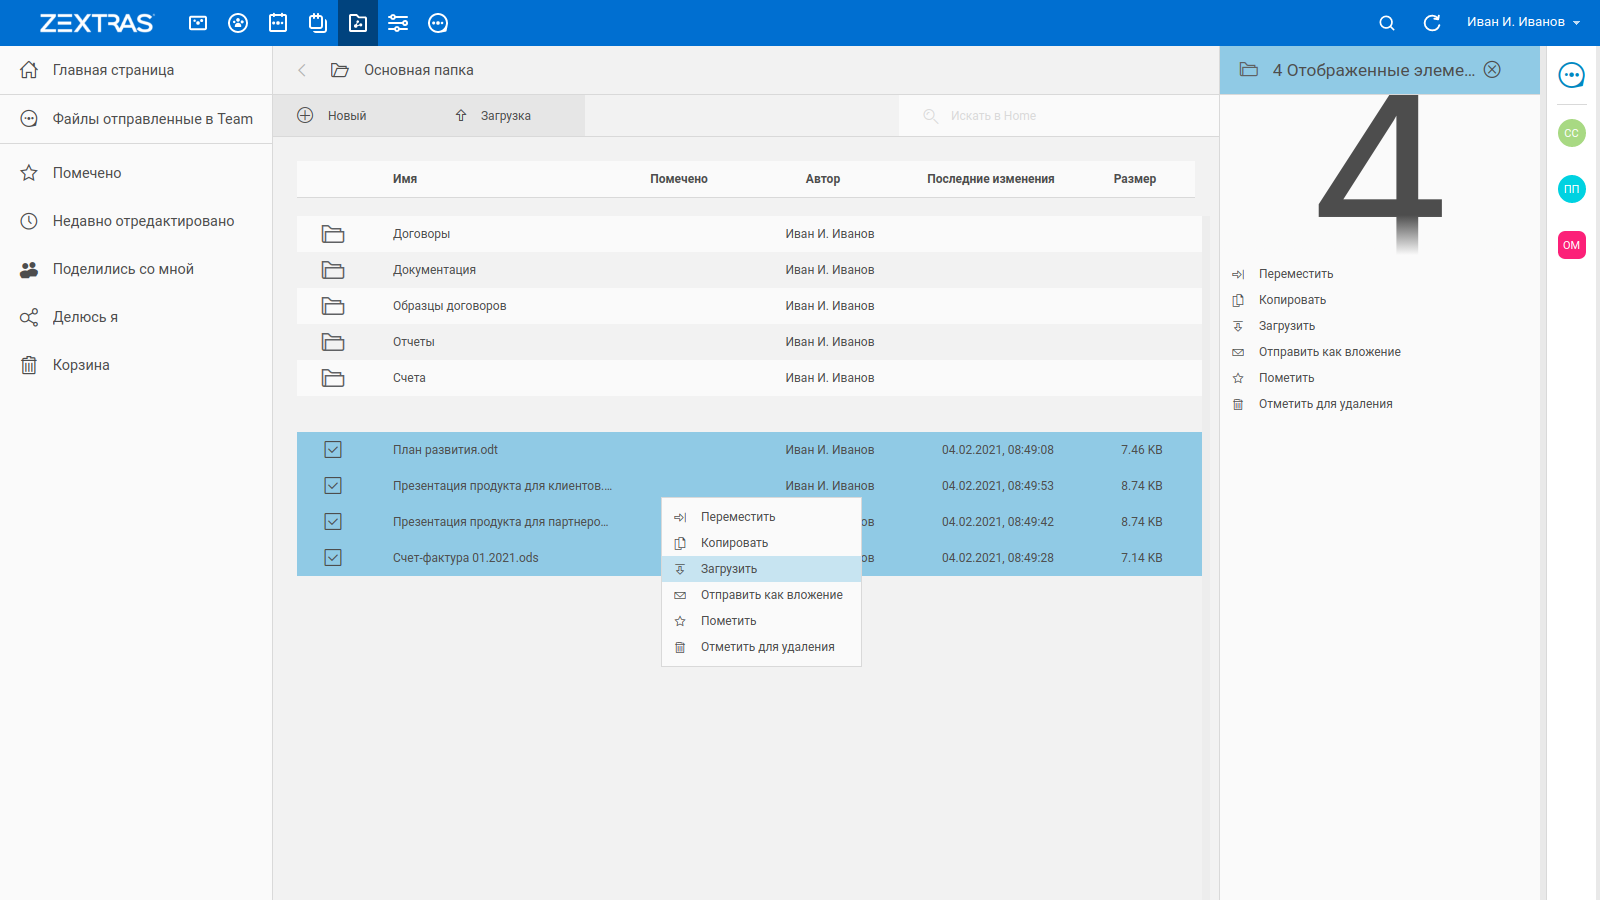
Zextras Drive allows you to highlight multiple files for bulk move, copy and delete. To do this, move the cursor over the icon of the file that you plan to select so that it changes its shape into a square, and click on it with the left mouse button. Multiple files can be selected this way. By clicking with the right mouse button, you can call the context menu, in which you can:
- Open in Docs – opens the selected file in Zextras Docs (works only with files of supported formats)
- Rename – allows you to change the file name
- Move – allows you to move a file to another folder in your Drive
- Copy – allows you to copy a file to another folder in your Drive
- Download – allows you to download a file from Drive to your computer
- File Versions – allows you to view the available versions of the selected file
- Send as Attachment – opens a compose email window with an attachment as a selected file
- Change rights – opens the “Shares” window, where you can configure file access settings for internal and external users
- Mark – allows you to mark the selected file as important in order to be able to quickly access it through the Quick Access Toolbar
- Mark for deletion – marks the selected file for deletion
Deleting files in Zextras Drive is a two step process. First, the file to be deleted must be marked for deletion. Files marked for deletion move to the bottom of the file list and are displayed with a line through. A file can be marked for deletion by its owner, or by a user who has permission to edit the file. Files marked for deletion can be restored by right-clicking on it and selecting “Restore”, or completely deleted by right-clicking on it and selecting “Delete permanently”. Only the owner of the file can completely delete a file.

The information panel is located on the right side of the interface. It opens when you click on the “i” button and disappears when you click on the close button in the upper right of the panel. If no file is selected, the information panel will be empty. If a file is selected, a preview will be displayed in the information pane, if supported, context menu options, file sharing options, and file information. If multiple files are selected, the information pane will display the number of selected files and the context menu options.
To share a file with another user, you need to select the file to which you are going to provide access and in the information panel click on the status “Does not share with anyone.” In the “Shared Resources” window that opens, you can enter the addresses of the employee accounts with whom you intend to share this file and set the rights to it. There are three types of rights available:
- “View” – the user will be able to view the file
- “Edit” – the user will be able to view and make changes to the file
- “Edit and share” – the user will be able to view, make changes to the file, and also share it with other users.

After the username is entered and his rights to the file are indicated, you need to click on the “+” button to add him to the list of accounts that have access to the file.
You can also share the file with external users. To do this, at the bottom of the “Shared Resources” window, click on the “Create Link” button and select the “Make Link Public” option. After that, users who have followed the public link will be able to download the file. To protect a file from unauthorized downloading via a public link, you can protect it with a password. To remove a file from public access, you need to click on the “Withdraw link” button.

Clicking on “Share link by email” will send a link to the document that was shared in Drive in a notification letter and then click on the link from the letter. By sending files as a link to Drive instead of an attachment, you can reduce mailbox quota usage for both senders and recipients, as they will all access the same file version.
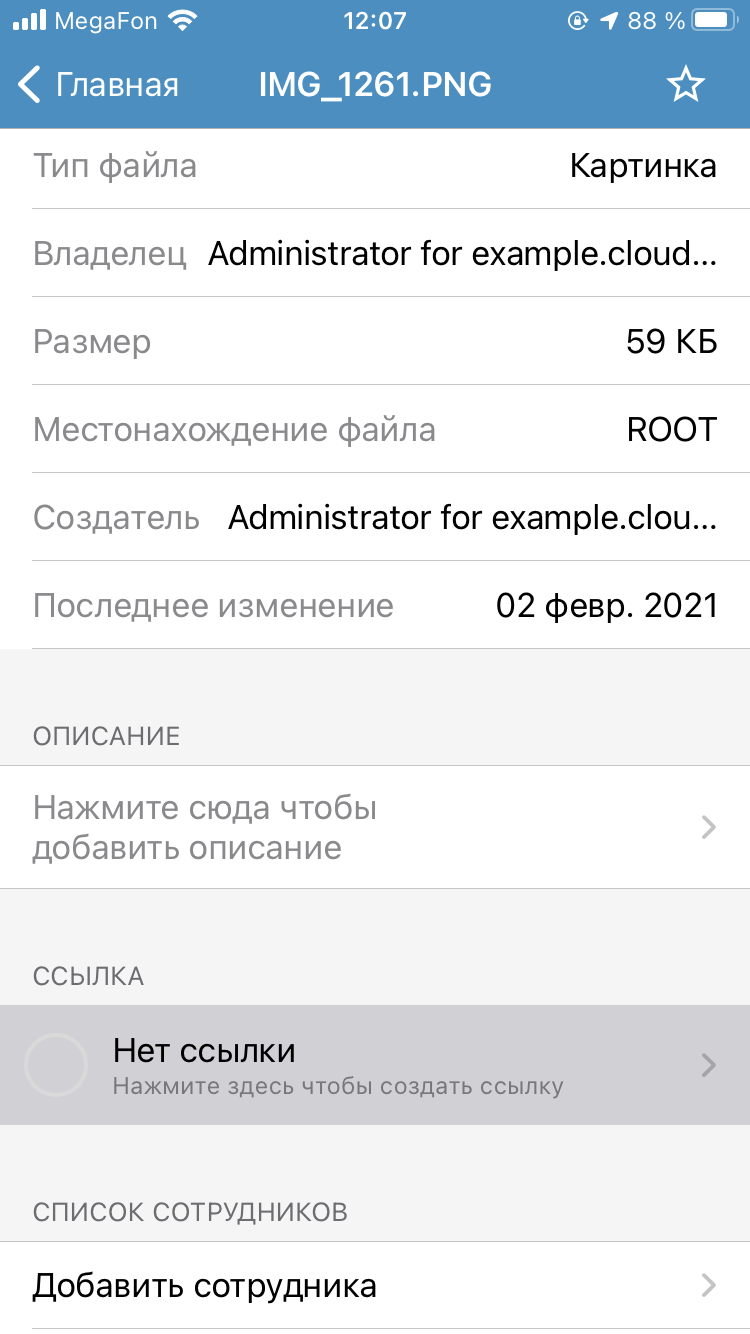
Also, the user can share the file with another user from the Zextras Drive mobile application. To do this, you need to click on the desired file and hold your finger until the context menu appears. In the menu, you need to select the “Add employee” section and on the screen that opens, select the employee and the rights to the file that you intend to grant him. In order to share a link to a file, you must also click on the desired file and hold your finger until the context menu appears. In the menu, select the “Details” section and in the window that opens, click on the “Link” section. Immediately after that, a public link to the file will be created and it will be possible to configure it by analogy with setting up a public link in the web client.

In the event that the same text file, presentation or table is simultaneously opened by several users with the rights to edit them, using the Zextras Docs service, they will be able to work together on the same document. It is important to note that Zextras Drive supports file versioning, that is, saving several versions of a document so that in case of any problems, you can return the document to its previous state.


A number of settings for Zextras Drive are available to the administrator:
- Turn file sharing on or off in Drive
- Maximum allowed size of uploaded files
- Retention time of old versions of files
- The maximum number of versions of files to keep.

They can be changed both for individual users and for entire Classes of Service. In order to change the settings for a user, go to his settings in the administrator console and select the “Drive” section in the left part of the window. In order to change the settings for the Class of Service, go to “Settings – Class of Service” in the administrator console and double-click on the required Class of Service. In the left part of the window that opens, select the “Drive” section and in the window that opens, make the necessary changes to the settings.