overview of the platform and creation of the first mobile application
Hello! My name is Andrey Grunenkov, I am an iOS developer at the InstaDev agency. We make mobile applications that help businesses grow. In this article I will talk about how to develop your first mobile application for the Apple Vision Pro platform.
First, we need to say a few words about the platform itself. Apple Vision Pro is an Apple computer that provides the user with a new experience of spatial interaction with the interface. Essentially it is a mixed reality (AR/VR) headset.
Simply put the device on your head to immerse yourself in the latest projects or 3D content.
The headset tracks the user's eye movements, transmits images from external cameras to displays in front of the eyes and shows 3D content. When you press one button, you can immerse yourself in the virtual world; the rest of the time, windows and applications move in the air in front of the user and allow you to interact with them.
Apple Vision Pro helps solve the following problems:
review of spatial photographs;
watching movies as if on a high-definition screen;
viewing games on Apple Arcade;
the ability to work processes using multiple virtual windows instead of monitors, which is an additional convenience for programmers;
surfing social networks;
communication via Facetime;
use as an external monitor for Mac.
Specifications
Apple Vision Pro | |
type of product | Virtual/augmented reality helmet |
Displays | Two 3D Micro-OLED displays; total resolution – 23 MP; pixel density – 3386 ppi; adaptive refresh rate – up to 100 Hz; interpupillary distance – 51-75 mm |
Hardware platform | Apple M2 (8 cores: 4 × Avalanche + 4 × Blizzard; 10-core graphics); Apple R1 data coprocessor |
Memory | 256/512/1024 GB |
Sensors | Dual main cameras (stereoscopic camera), six tracker cameras, four eye tracking cameras, TrueDepth camera, LiDAR scanner, four gyroscopes, ambient light sensor, flicker sensor, Optic ID user recognition sensor |
Camera | Stereoscopic camera; focal length of optics 18 mm, aperture – f/2.0; sensor resolution – 6.5 megapixels; taking photos and videos |
Sound system | Speakers supporting personal spatial audio; Low latency audio technology when connecting AirPods Pro 2; six microphones |
Audio transmission formats | AAC, MP3, Apple Lossless, FLAC, Dolby Digital, Dolby Digital Plus, and Dolby Atmos |
operating system | visionOS |
Wireless modules | Wi‑Fi 6 (802.11ax) Bluetooth 5.3 |
Battery | 35.9 Wh; connects via cable via a proprietary port |
Weight | Headset – 650 grams, battery – 350 grams |
Price | From $3,500 in the USA; from 478,000 rubles in Russia |
CPU
The mixed reality helmet has two powerful processors built into it. The first is M2, it has already proven itself in the latest generations of Mac and iPad. The second is the R1 VR processor, which collects information from all sensors, microphones and cameras, processes it and displays the image on the screen. Apple says this process takes no more than 12 milliseconds.

Memory
Helmets are available with built-in memory of 256 or 512 gigabytes, as well as one terabyte. The RAM is 16 gigabytes.
Image
Two Micro OLED displays with a resolution of 23 megapixels are responsible for pictures and videos. They create a 3D system, provide smooth images, as well as depth and variety of colors. The viewing angle in the helmet is 140 degrees.
Sound
The helmet has six microphones and a sophisticated audio system built into it. It scans the room in which the user is located and adapts the sound. The augmented reality headset is compatible with AirPods Pro 2 headphones.
Cameras
The device has a total of 13 cameras, including two high-resolution main cameras. In the inner part there are four more – to track eye movements. Another six cameras are focused on the outside world. They take photos and videos that are needed to create a 3D system.
Sensors
Also, various sensors and sensors are built into the headset: for example, a light sensor, a flicker sensor and others.
In addition, Apple has built a new iris-based authentication system into the helmet – Optic ID. It is able to respond to eye movements when opening the necessary windows, programs, and even when typing. It also protects data and encrypts information.
Control
You can control the gadget with your gaze and gestures. To activate the screen, you need to touch your index finger to your thumb, that is, “click” in the air. There is also a Digital Crown and buttons on the body. You can bring up the virtual keyboard and type by pressing buttons with your fingers in the air.
Compatibility
Vision Pro connects to your MacBook, working as a virtual monitor. The headset is also compatible with Apple mouse and keyboard. The interface is familiar to all users of the brand's products.
Charger
The device is charged from a removable battery, which can be connected using a cable. The battery itself is compact and easily fits in your pocket. The declared battery life of the headset is 2.5 hours.
Fastening
The headset is put on the head using straps, and you can choose one of two options presented by the manufacturer. The first, more compact and beautiful, includes one Solo Knit Band with 3D fastening. The second is Dual Band, for a more stable attachment. It takes the strain off your neck.
Materials
The helmet itself is made of glass and aluminum, the weight of the device is about 650 grams. The design follows the contours of the human face, which is why it looks more aesthetically pleasing and more futuristic than its competitors. The sides of the helmet have a soft Light Seal that blocks light from the outside world.
Before purchasing Vision Pro, you need to scan your face using Face ID technology on your iPhone so that the manufacturer can select the internal soft lining of the desired shape and size.

Next, I will cover several terms that you will need to understand later.
A virtual reality – completely digital environment. The environment, sounds and actions taking place around the user are simulated by the developers.
Augmented Reality is an environment in which the real world is complemented by digital elements, such as 3D objects, pictures, text, sound, animation and others.
Placing virtual objects in space is not chaotic, but in certain places you can do it in different ways, here are 3 of them.
1. Snap to marker
Objects are superimposed using special markers, such as QR codes or pictures. When the camera is pointed at such a marker, the user sees a virtual object in its place on the screen.
2. Snap to a plane
An object in augmented reality appears in space, tied to a specific point selected by the device as a result of scanning. Both horizontal and vertical planes are recognized.
3. Linking to geolocation
Virtual elements are placed in space based on the location of real objects and the time the user interacts with augmented reality. For this, data from the camera, device sensors, GPS and other sources and systems are used.
Let's look at creating the first application for VisionOS.
ARKit and RealityKi frameworks are used to develop applications for visionOSt.
When we create a new project in Xcode, a new Project Helper opens up for us.
It organizes project templates by platform and project type.
The application project template is available in the Application section of the Platform tab.

The new Project Assistant introduces us to several options, two of which are new to this platform.
Let's take a closer look at each of these options.
Initial Scene
The first new option, Initial Scene, allows us to specify the type of initial scene that is automatically included in the application. The new Project Assistant always creates a starting point from a single scene of the type you select here. As a developer, you can add additional scenes later.
They can be the same type as the original scene, or they can belong to a different scene type.
The template offers two scene types: Window and Volume.
Let's look at the differences between them.
Windows is designed to present content that is primarily two-dimensional. Their flat dimensions can be changed, but their depth is fixed.
Windows usually appears next to other running applications.
Volume is designed primarily for presenting 3D content.
Their sizes in all three dimensions are controlled by the application itself, but cannot be changed by the user using the application.
Like windows, volumes usually appear next to other running applications.
Immersive Space
The second new option, Immersive Space, gives you the ability to add a starting point for immersive content to your app.
SwiftUI offers three different styles for your scene: Mixed, Progressive and Full.
Mixed Allows your application to host unlimited virtual content in a full space while keeping people connected to their surroundings through end-to-end communication.
Progressive opens a portal that offers a more immersive experience that doesn't completely remove users from their environment. When the portal opens, users get approximately a 180-degree view of your immersive content and can use the Digital Crown to adjust the size of the portal.
Full completely hides the passage and surrounds users with your application's environment, transporting them to a new place.
By default, the Mixed type is added to your application.
Apple recommends making apps always run in a window and providing clear entry and exit controls so people can decide when to dive into your content.
SwiftUI is used to create UI and immersion content.
We create a project and see that Xcode has generated 3 structures: myFirstApp, ContentView and ImmersiveView.
myFirstApp describes the main scene of our application:
import SwiftUI
@main
struct myFirstApp: App {
    var body: some Scene {
        WindowGroup {
            ContentView()
        }
        ImmersiveSpace(id: "ImmersiveSpace") {
            ImmersiveView()
        }
    }
}
ContentView – the content of the main window of our application
import SwiftUI
import RealityKit
import RealityKitContent
struct ContentView: View {
    @State private var showImmersiveSpace = false
    @State private var immersiveSpaceIsShown = false
    @Environment(\.openImmersiveSpace) var openImmersiveSpace
    @Environment(\.dismissImmersiveSpace) var dismissImmersiveSpace
    var body: some View {
        VStack {
            Model3D(named: "Scene", bundle: realityKitContentBundle)
                .padding(.bottom, 50)
            Text("Hello, world!")
            Toggle("Show ImmersiveSpace", isOn: $showImmersiveSpace)
                .font(.title)
                .frame(width: 360)
                .padding(24)
                .glassBackgroundEffect()
        }
        .padding()
        .onChange(of: showImmersiveSpace) { _, newValue in
            Task {
                if newValue {
                    switch await openImmersiveSpace(id: "ImmersiveSpace") {
                    case .opened:
                        immersiveSpaceIsShown = true
                    case .error, .userCancelled:
                        fallthrough
                    @unknown default:
                        immersiveSpaceIsShown = false
                        showImmersiveSpace = false
                    }
                } else if immersiveSpaceIsShown {
                    await dismissImmersiveSpace()
                    immersiveSpaceIsShown = false
                }
            }
        }
    }
}
ImmersiveView – immersive content
import SwiftUI
import RealityKit
import RealityKitContent
struct ImmersiveView: View {
    var body: some View {
        RealityView { content in
            // Add the initial RealityKit content
            if let scene = try? await Entity(named: "Immersive", in: realityKitContentBundle) {
                content.add(scene)
            }
        }
    }
}
The newly created application has a main window with a toggle to add/remove the Mixed type immersive space.

Let's add to the project the ability to include immersive spaces of different types. For each type of space, we will create our own View and add them to the main structure of the application.
import SwiftUI
@main
struct myFirstApp: App {
    var body: some Scene {
        WindowGroup {
            ContentView()
        }
        ImmersiveSpace(id: "MixedImmersiveSpace") {
            MixedImmersiveView()
        }
        .immersionStyle(selection: .constant(.mixed), in: .mixed)

        ImmersiveSpace(id: "FullImmersiveSpace") {
            FullImmersiveView()
        }
        .immersionStyle(selection: .constant(.full), in: .full)

        ImmersiveSpace(id: "ProgressiveImmersiveSpace") {
            ProgressiveImmersiveView()
        }
        .immersionStyle(selection: .constant(.progressive), in: .progressive)
    }
}
Let's add switches for all types of spaces to the main window interface
import SwiftUI
import RealityKit
import RealityKitContent
struct ContentView: View {
    @State private var showMixedImmersiveSpace = false
    @State private var showProgressiveImmersiveSpace = false
    @State private var showFullImmersiveSpace = false

    @State private var immersiveSpaceIsShown = false
    @Environment(\.openImmersiveSpace) var openImmersiveSpace
    @Environment(\.dismissImmersiveSpace) var dismissImmersiveSpace
    var body: some View {
        VStack {
            Model3D(named: "Scene", bundle: realityKitContentBundle)
                .padding(.bottom, 50)
            Toggle("Show Mixed ImmersiveSpace", isOn: $showMixedImmersiveSpace)
                .disabled(showProgressiveImmersiveSpace || showFullImmersiveSpace)
                .font(.title)
                .frame(width: 360)
                .padding(24)
                .glassBackgroundEffect()

            Toggle("Show Progressive ImmersiveSpace", isOn: $showProgressiveImmersiveSpace)
                .disabled(showMixedImmersiveSpace || showFullImmersiveSpace)
                .font(.title)
                .frame(width: 360)
                .padding(24)
                .glassBackgroundEffect()

            Toggle("Show Full ImmersiveSpace", isOn: $showFullImmersiveSpace)
                .disabled(showMixedImmersiveSpace || showProgressiveImmersiveSpace)
                .font(.title)
                .frame(width: 360)
                .padding(24)
                .glassBackgroundEffect()
        }
        .padding()
        .onChange(of: showMixedImmersiveSpace) { _, newValue in
            Task {
                await handleImmersiveSpace(id: "MixedImmersiveSpace", isShown: newValue)
            }
        }
        .onChange(of: showFullImmersiveSpace) { _, newValue in
            Task {
                await handleImmersiveSpace(id: "FullImmersiveSpace", isShown: newValue)
            }
        }
        .onChange(of: showProgressiveImmersiveSpace) { _, newValue in
            Task {
                await handleImmersiveSpace(id: "ProgressiveImmersiveSpace", isShown: newValue)
            }
        }
    }

    private func handleImmersiveSpace(id: String, isShown: Bool) async {
        if isShown {
            switch await openImmersiveSpace(id: id) {
            case .opened:
                immersiveSpaceIsShown = true
            case .error, .userCancelled:
                fallthrough
            @unknown default:
                immersiveSpaceIsShown = false
                showProgressiveImmersiveSpace = false
            }
        } else if immersiveSpaceIsShown {
            await dismissImmersiveSpace()
            immersiveSpaceIsShown = false
        }
    }
}
Now let's launch the application and see how it behaves when switching spaces.
After turning on Full ImmersiveSpace, a warning will appear about immersion in virtual space, and the need to take precautions, and after tapping OK, you will switch to full immersive space. The entire environment disappears and we see only virtual content.
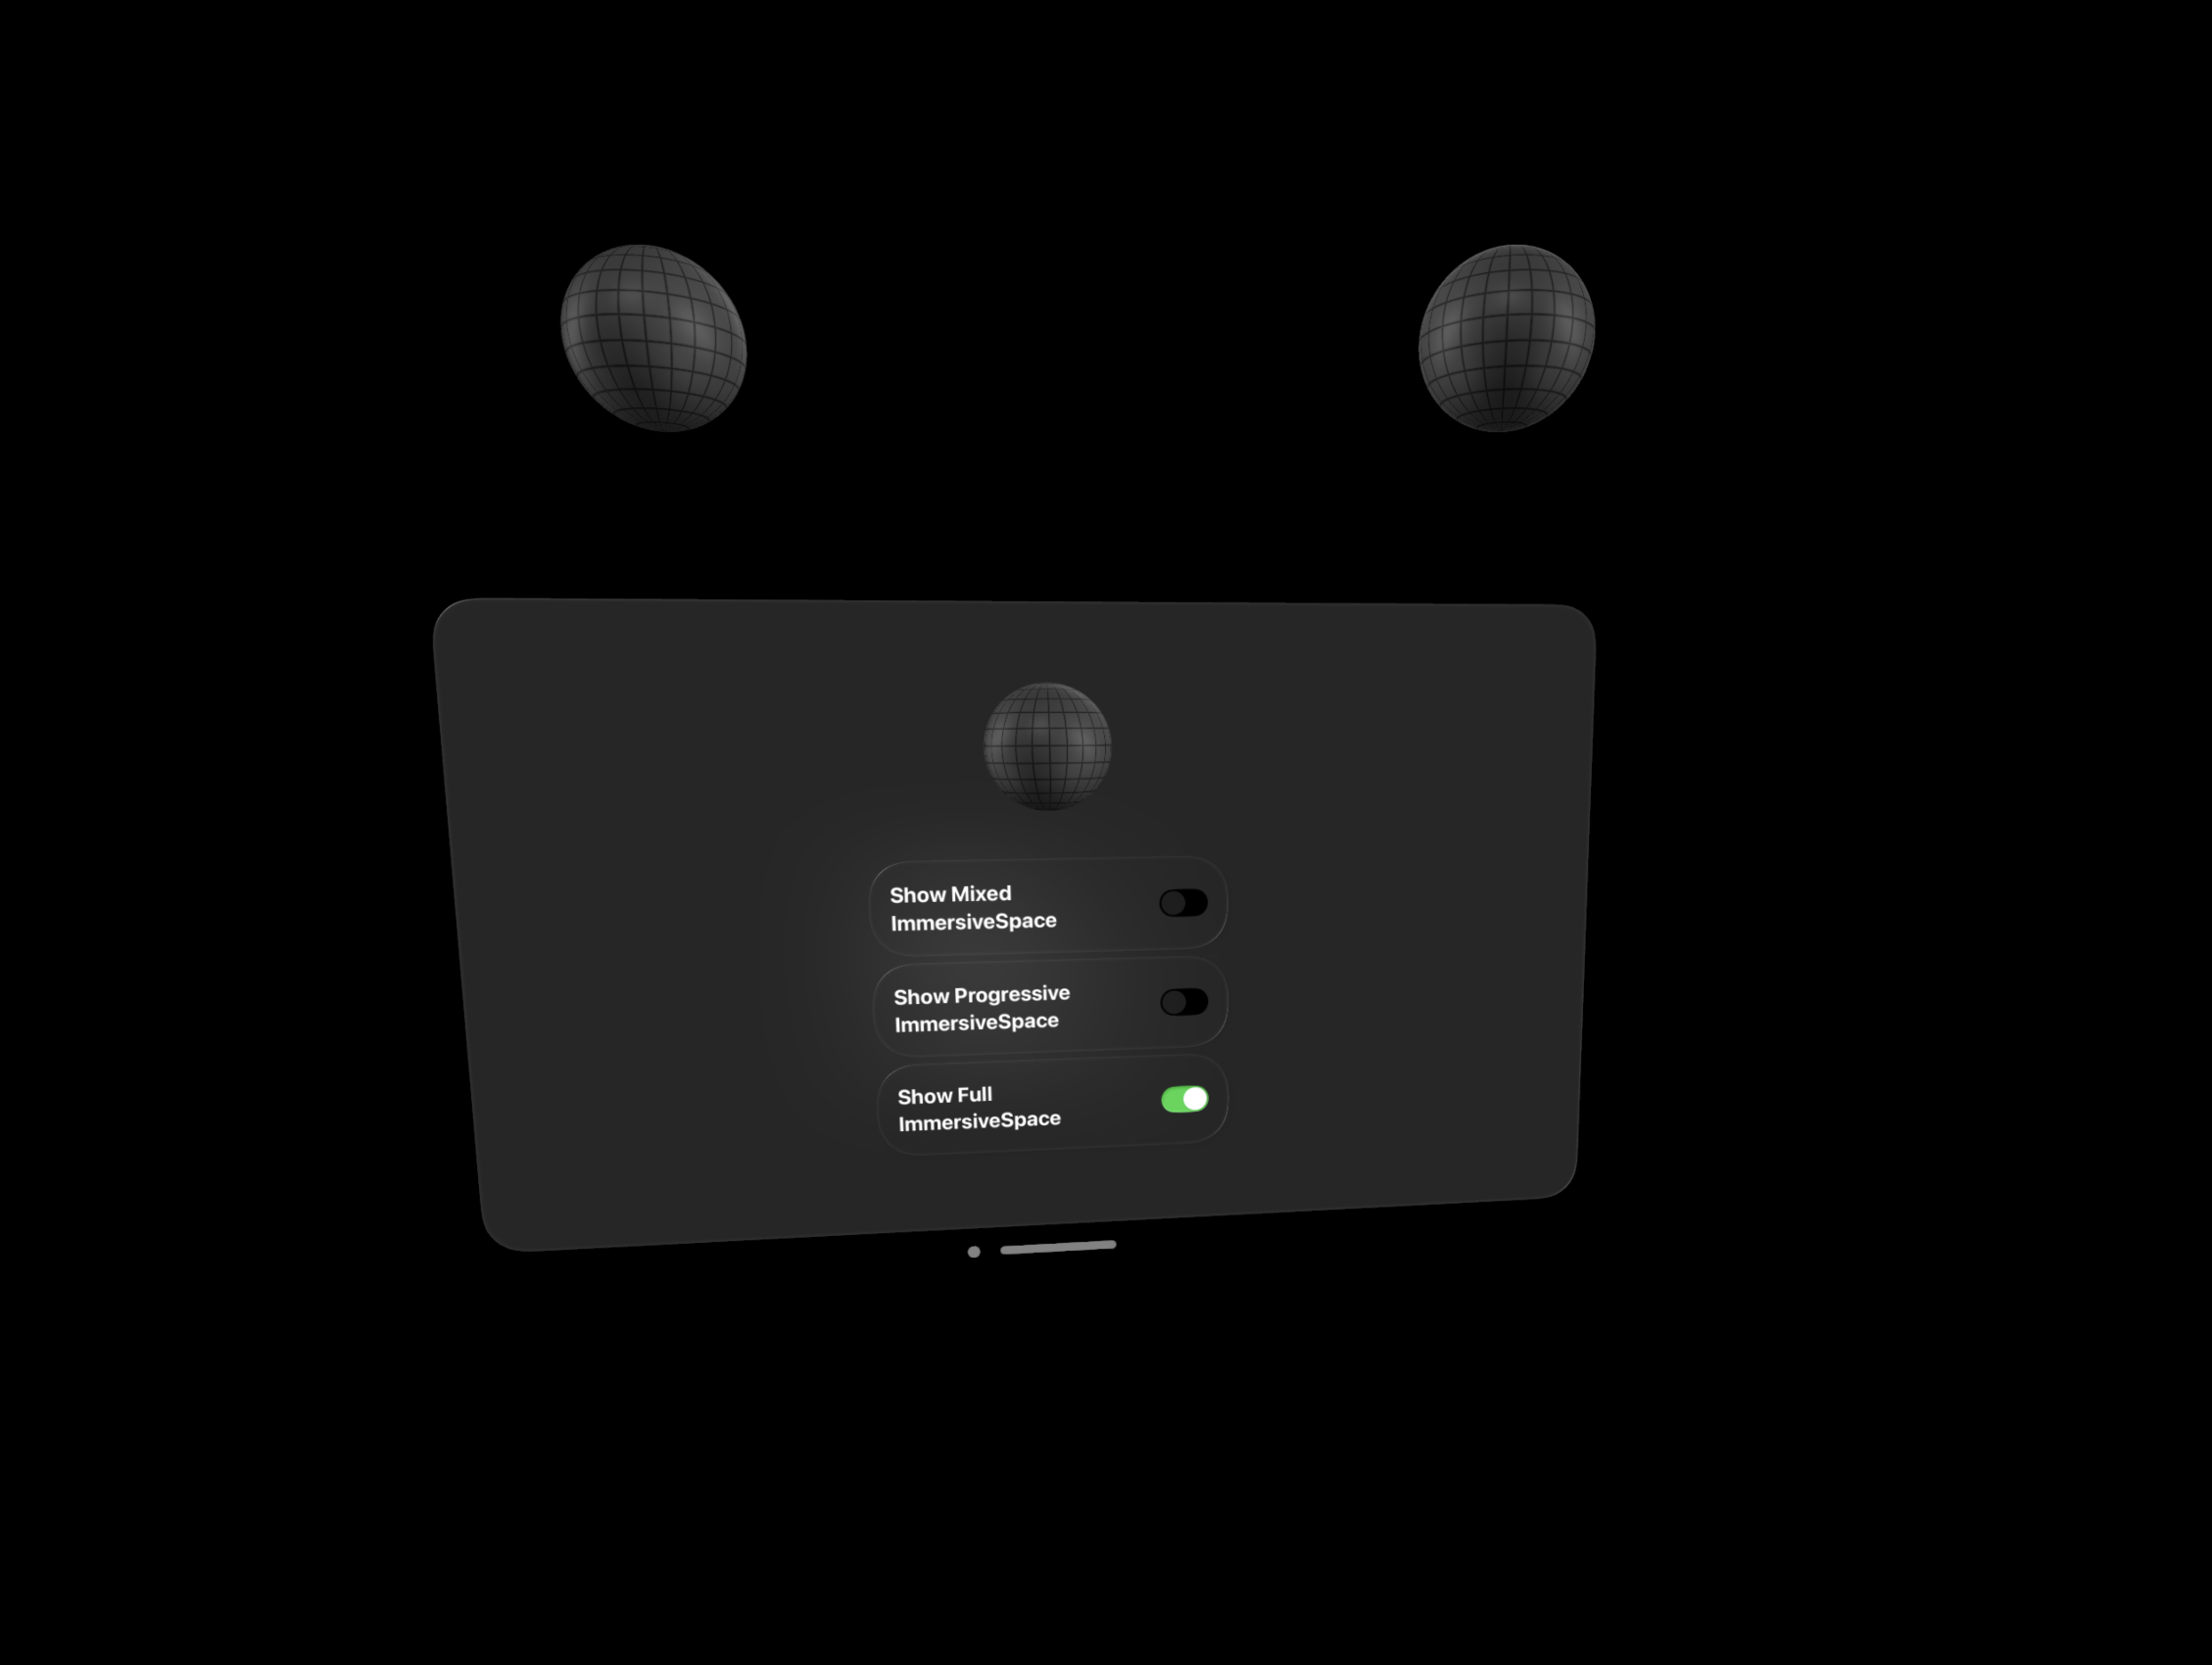
Let's switch to Progressive ImmersiveSpace. As in the previous case, a warning will appear. This time we will see virtual space inside a certain portal.

Let's switch to the Mixed type, which is installed by default, and we see the familiar environment and virtual content.

Next, we’ll try to add content to the mixed immersive space using the method of snapping to a plane; we’ll snap a sphere from the built-in default content package to the surface of the table.
For this purpose, RealityKit has the AnchorEntity class:
import SwiftUI
import RealityKit
import RealityKitContent
struct MixedImmersiveView: View {
    var body: some View {
        RealityView { content in
            if let scene = try? await Entity(named: "Scene", in: realityKitContentBundle) {
                let horizontalAnchor = AnchorEntity(.plane(.horizontal, classification: .table, minimumBounds: SIMD2<Float>(0.5, 0.5)))
                horizontalAnchor.addChild(scene)
                content.add(horizontalAnchor)
            }
        }
    }
}
Let's launch the project and enable Mixed ImmersiveSpace. After Apple Vision Pro scans the surface of the table, an augmented sphere will appear on it:
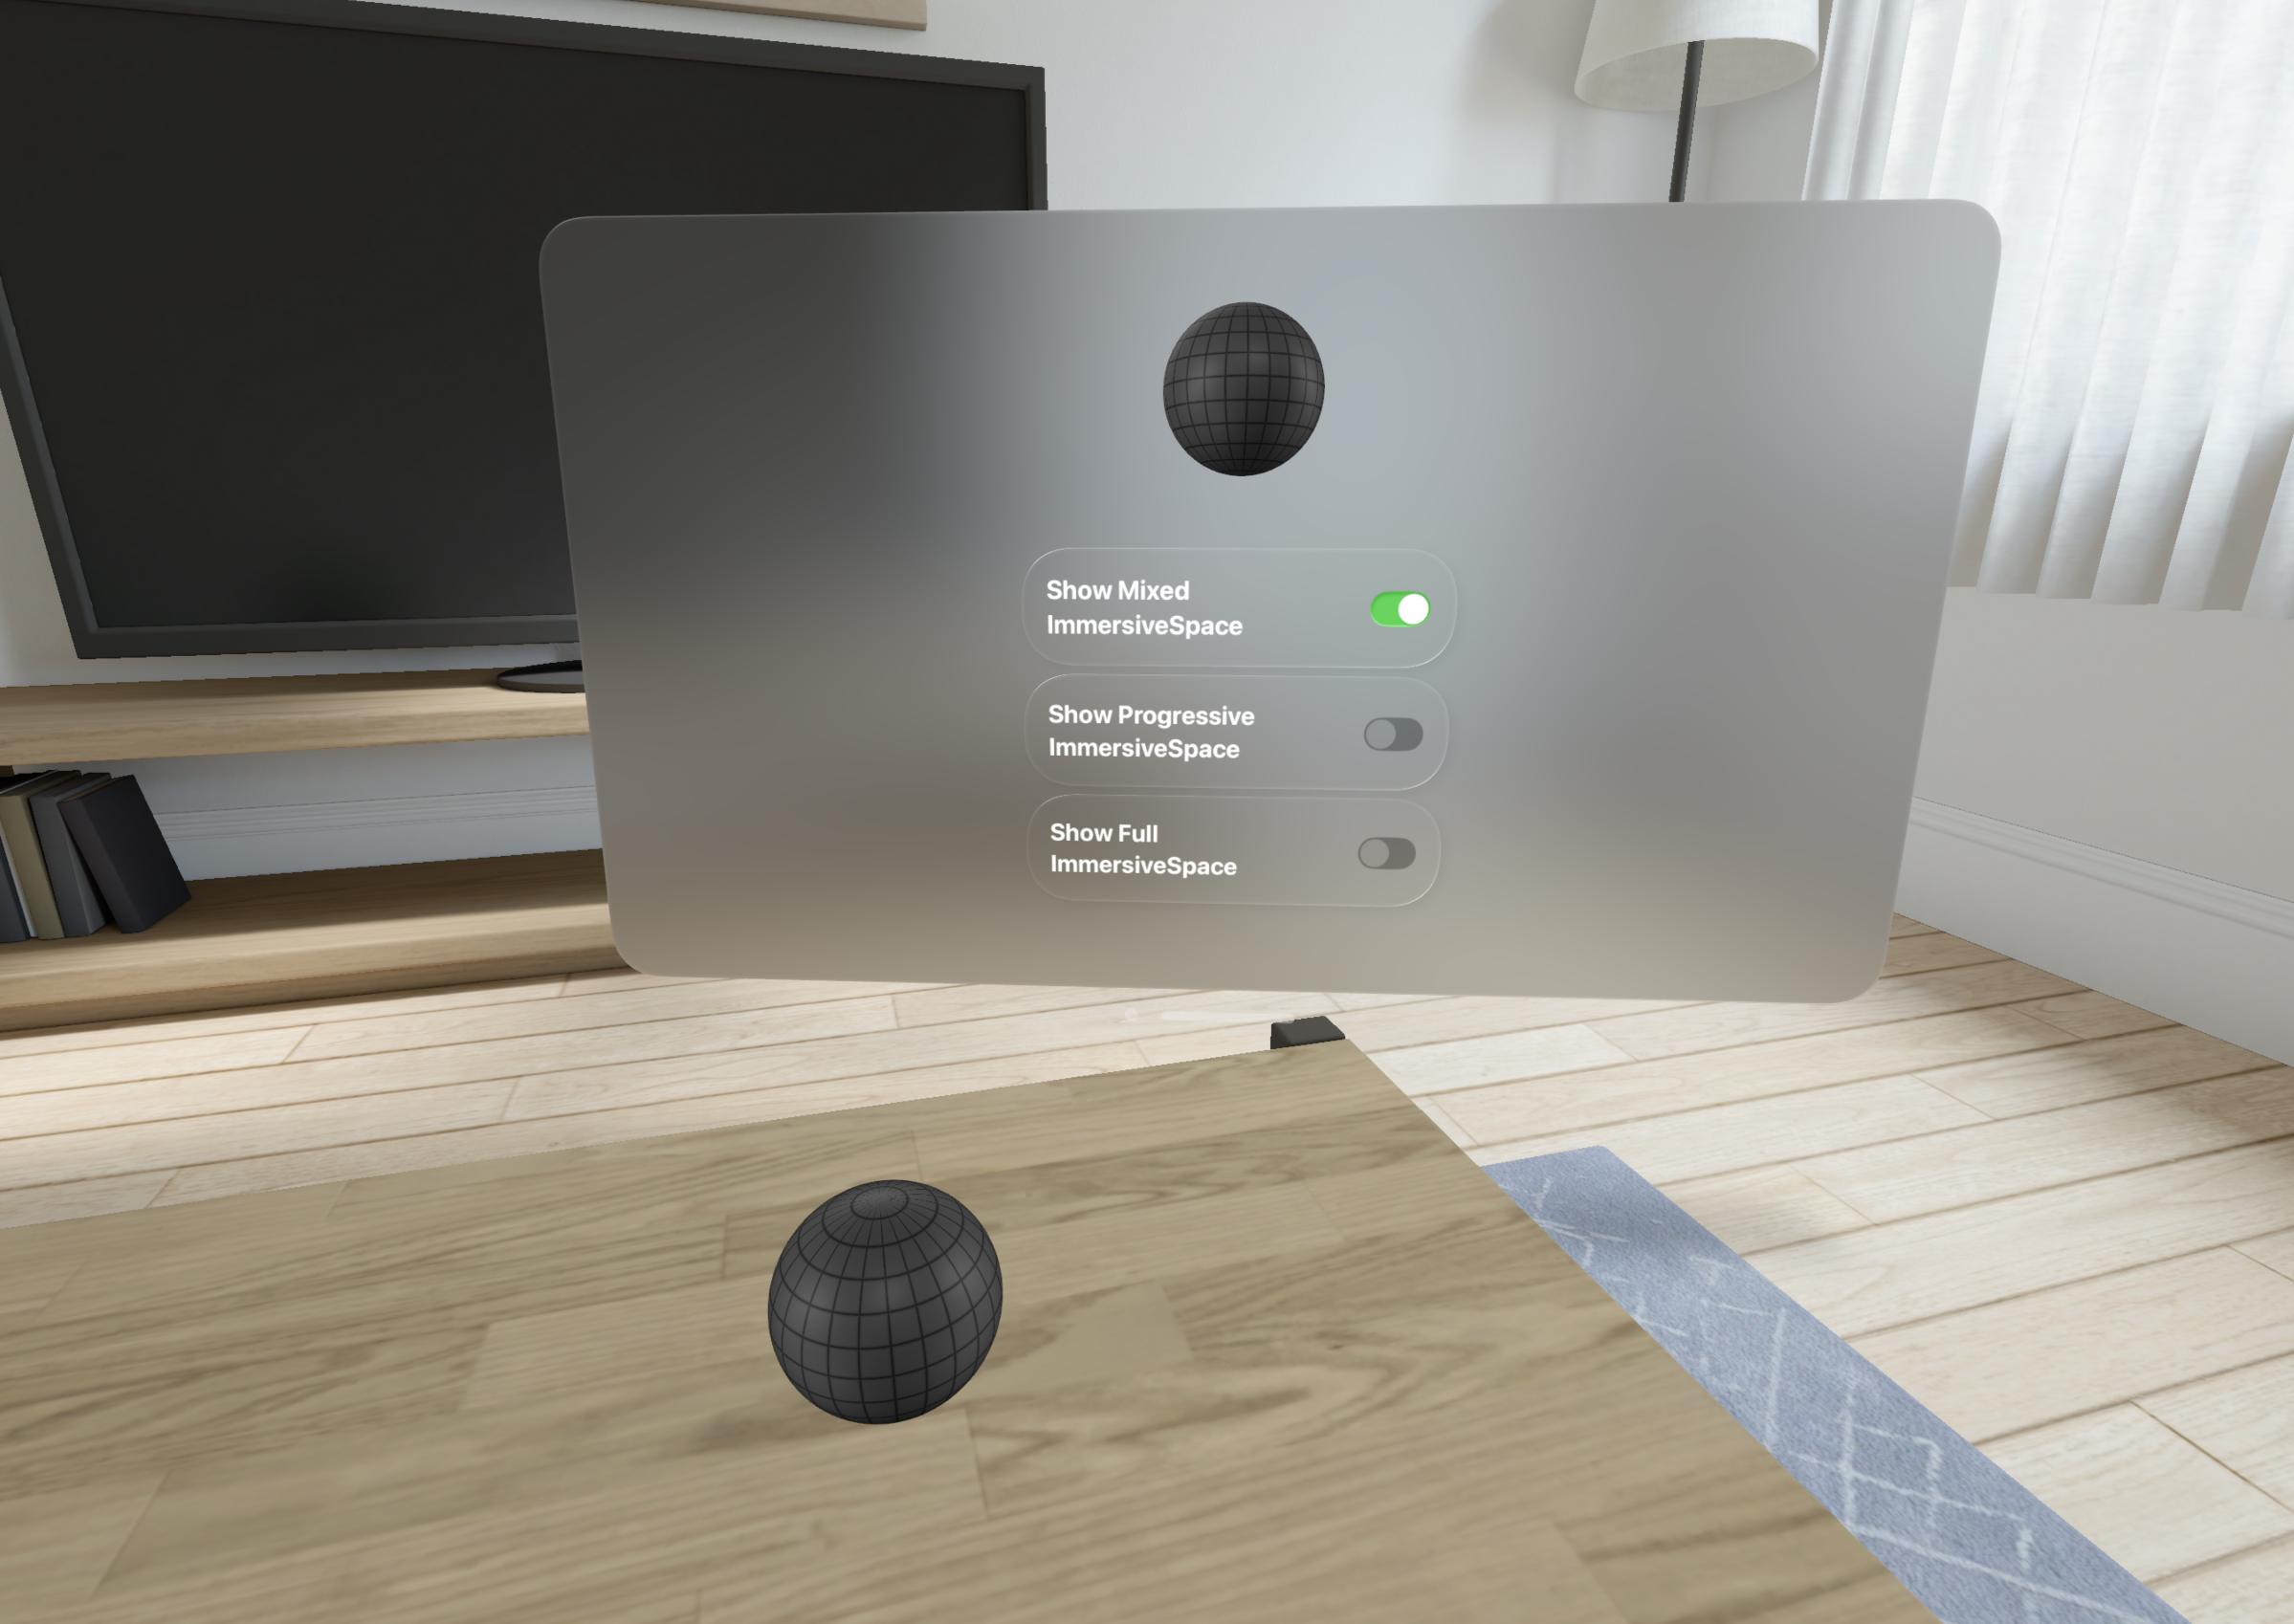
Thus, RealityKit provides developers with quite convenient tools for developing augmented reality applications and adding immersive content to them.
Let me summarize
Apple Vision Pro is a promising VR/AR headset that certainly contains innovative technologies. However, the device requires improvements.
The headset can be used by developers to create a virtually unlimited multi-window workspace that can replace multiple monitors.
To date, few applications for this platform have been published in the AppStore. However, we can assume that more applications will appear in the future, thanks to the use of SwiftUI, which allows you to quickly and painlessly transfer application components already created on it for other Apple platforms to VisionOS, and the ease of porting existing applications from other platforms to VisionOS.
Pros:
wide range of tasks to be solved;
new user experience;
the ability to create an endless working field;
high computing power gives a new level of mobility;
convenient development SDK that allows you to quickly create applications.
Minuses:
heavy weight;
new technologies are not yet ergonomic enough. Gaze control leads to rapid fatigue of the eye muscles;
not all users are satisfied with the picture quality;
high price;
Currently not available for the Russian region.