Insomnia – Instructions for use
For beginner testers
Author: Nadezhda Dudnik
I want to say in advance that I like Postman, it’s just that Insomnia is a frequently used tool at my work, and it’s important to share information about its capabilities.
Content:
Introduction
Collection import
User creation
Working with variables and the environment
User authorization
Getting a token
Create a project
authentication through the “Headers” tab
authentication through the “Auth” tab
An addition about automating the receipt of a token for methods that
require a bearer token.
General information about Insomnia
Certificate Installation
Automation options
Importing OpenAPI Documentation
Creating the first autotest when creating a user
Conclusion
Introduction
Insomnia – REST API testing tool (API interaction client)
For example, I will use my favorite website Vikunja.
ui: https://try.vikunja.io/login
API documentation: https://try.vikunja.io/api/v1/docs
Download API Documentation from https://try.vikunja.io/api/v1/docs (search for “Download OpenAPI specification on the page”)
Collection import
Open the Insomnia app (Insomnia.Core-2023.4.0 for Mac/Windows at the time of writing). I will be using the app on Mac.

Find button “Import” and click on it. Insomnia offers to download the data.

Select our docs.json file downloaded from https://try.vikunja.io/api/v1/docs

Click on the button “Scan” -> “Import”
Collection loaded:
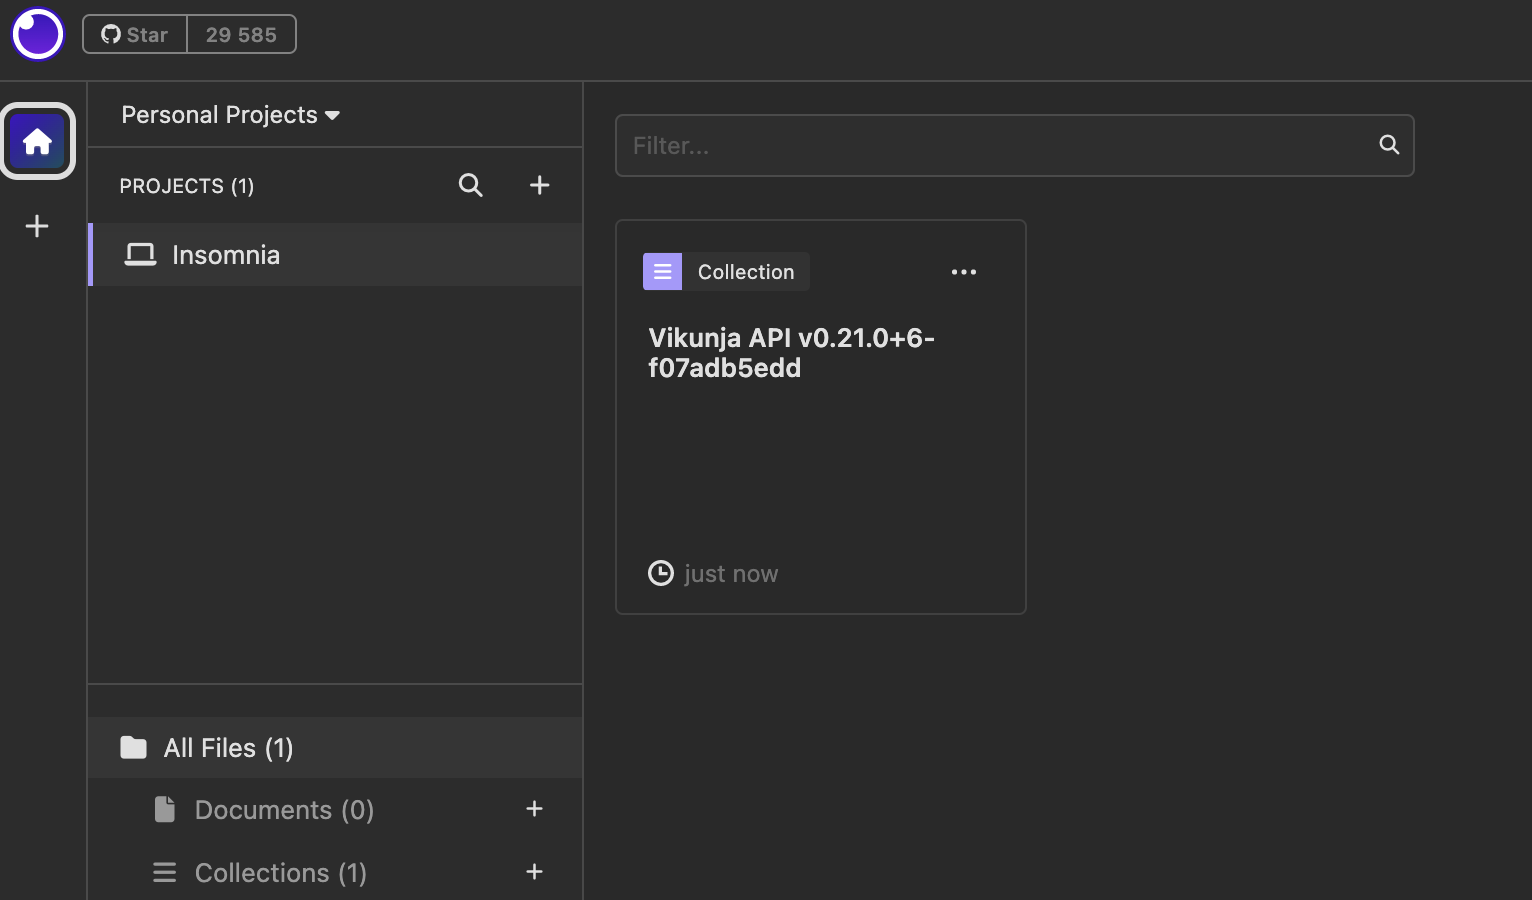
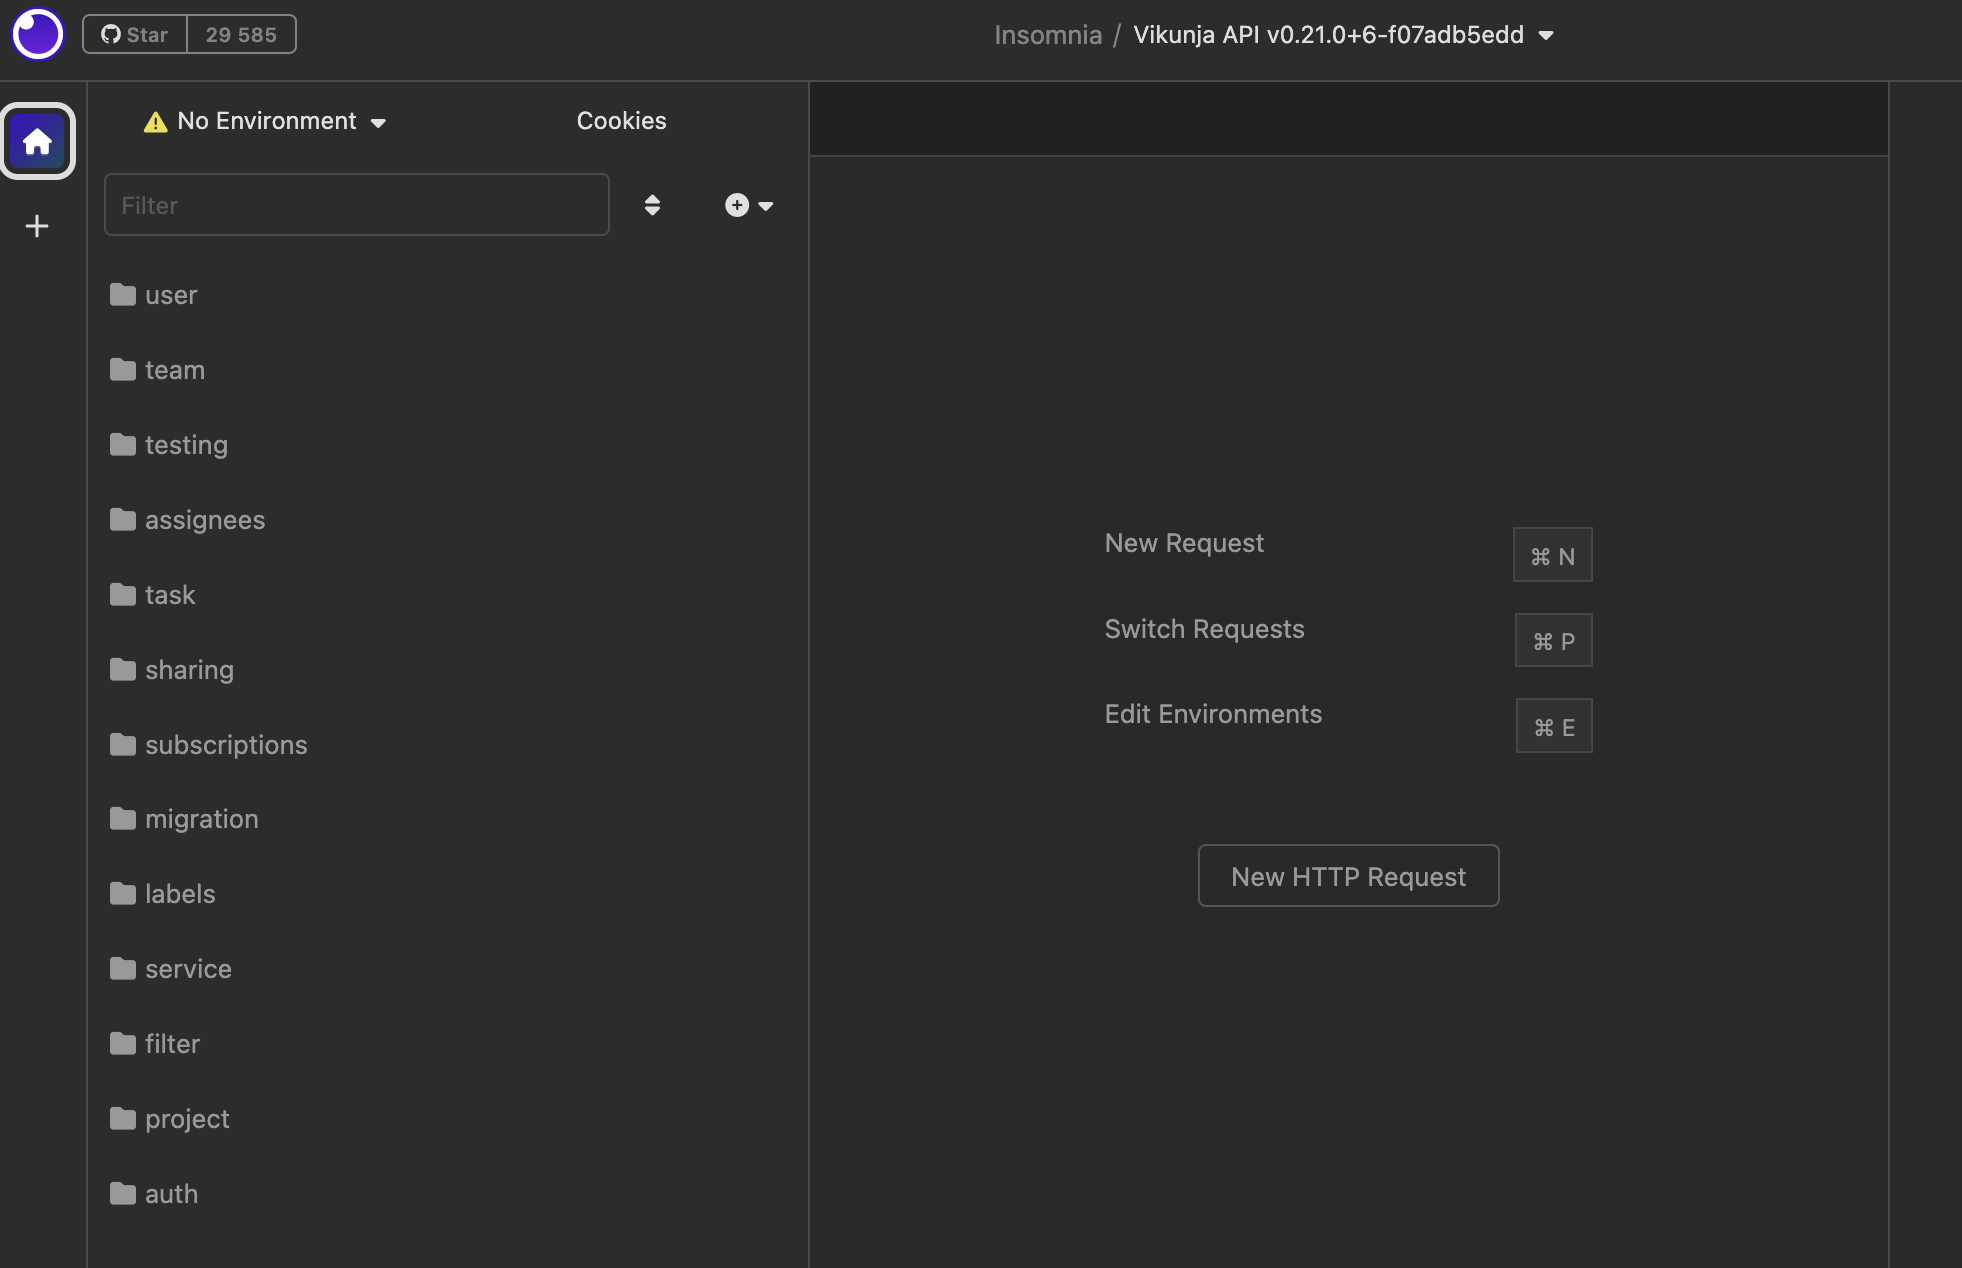
Select a collection, and the contents of the collection are opened:
User creation
I will analyze the very first request, which is related to user registration on the site.
“auth” folder -> POST Register request


Click on “Manage Environments”.
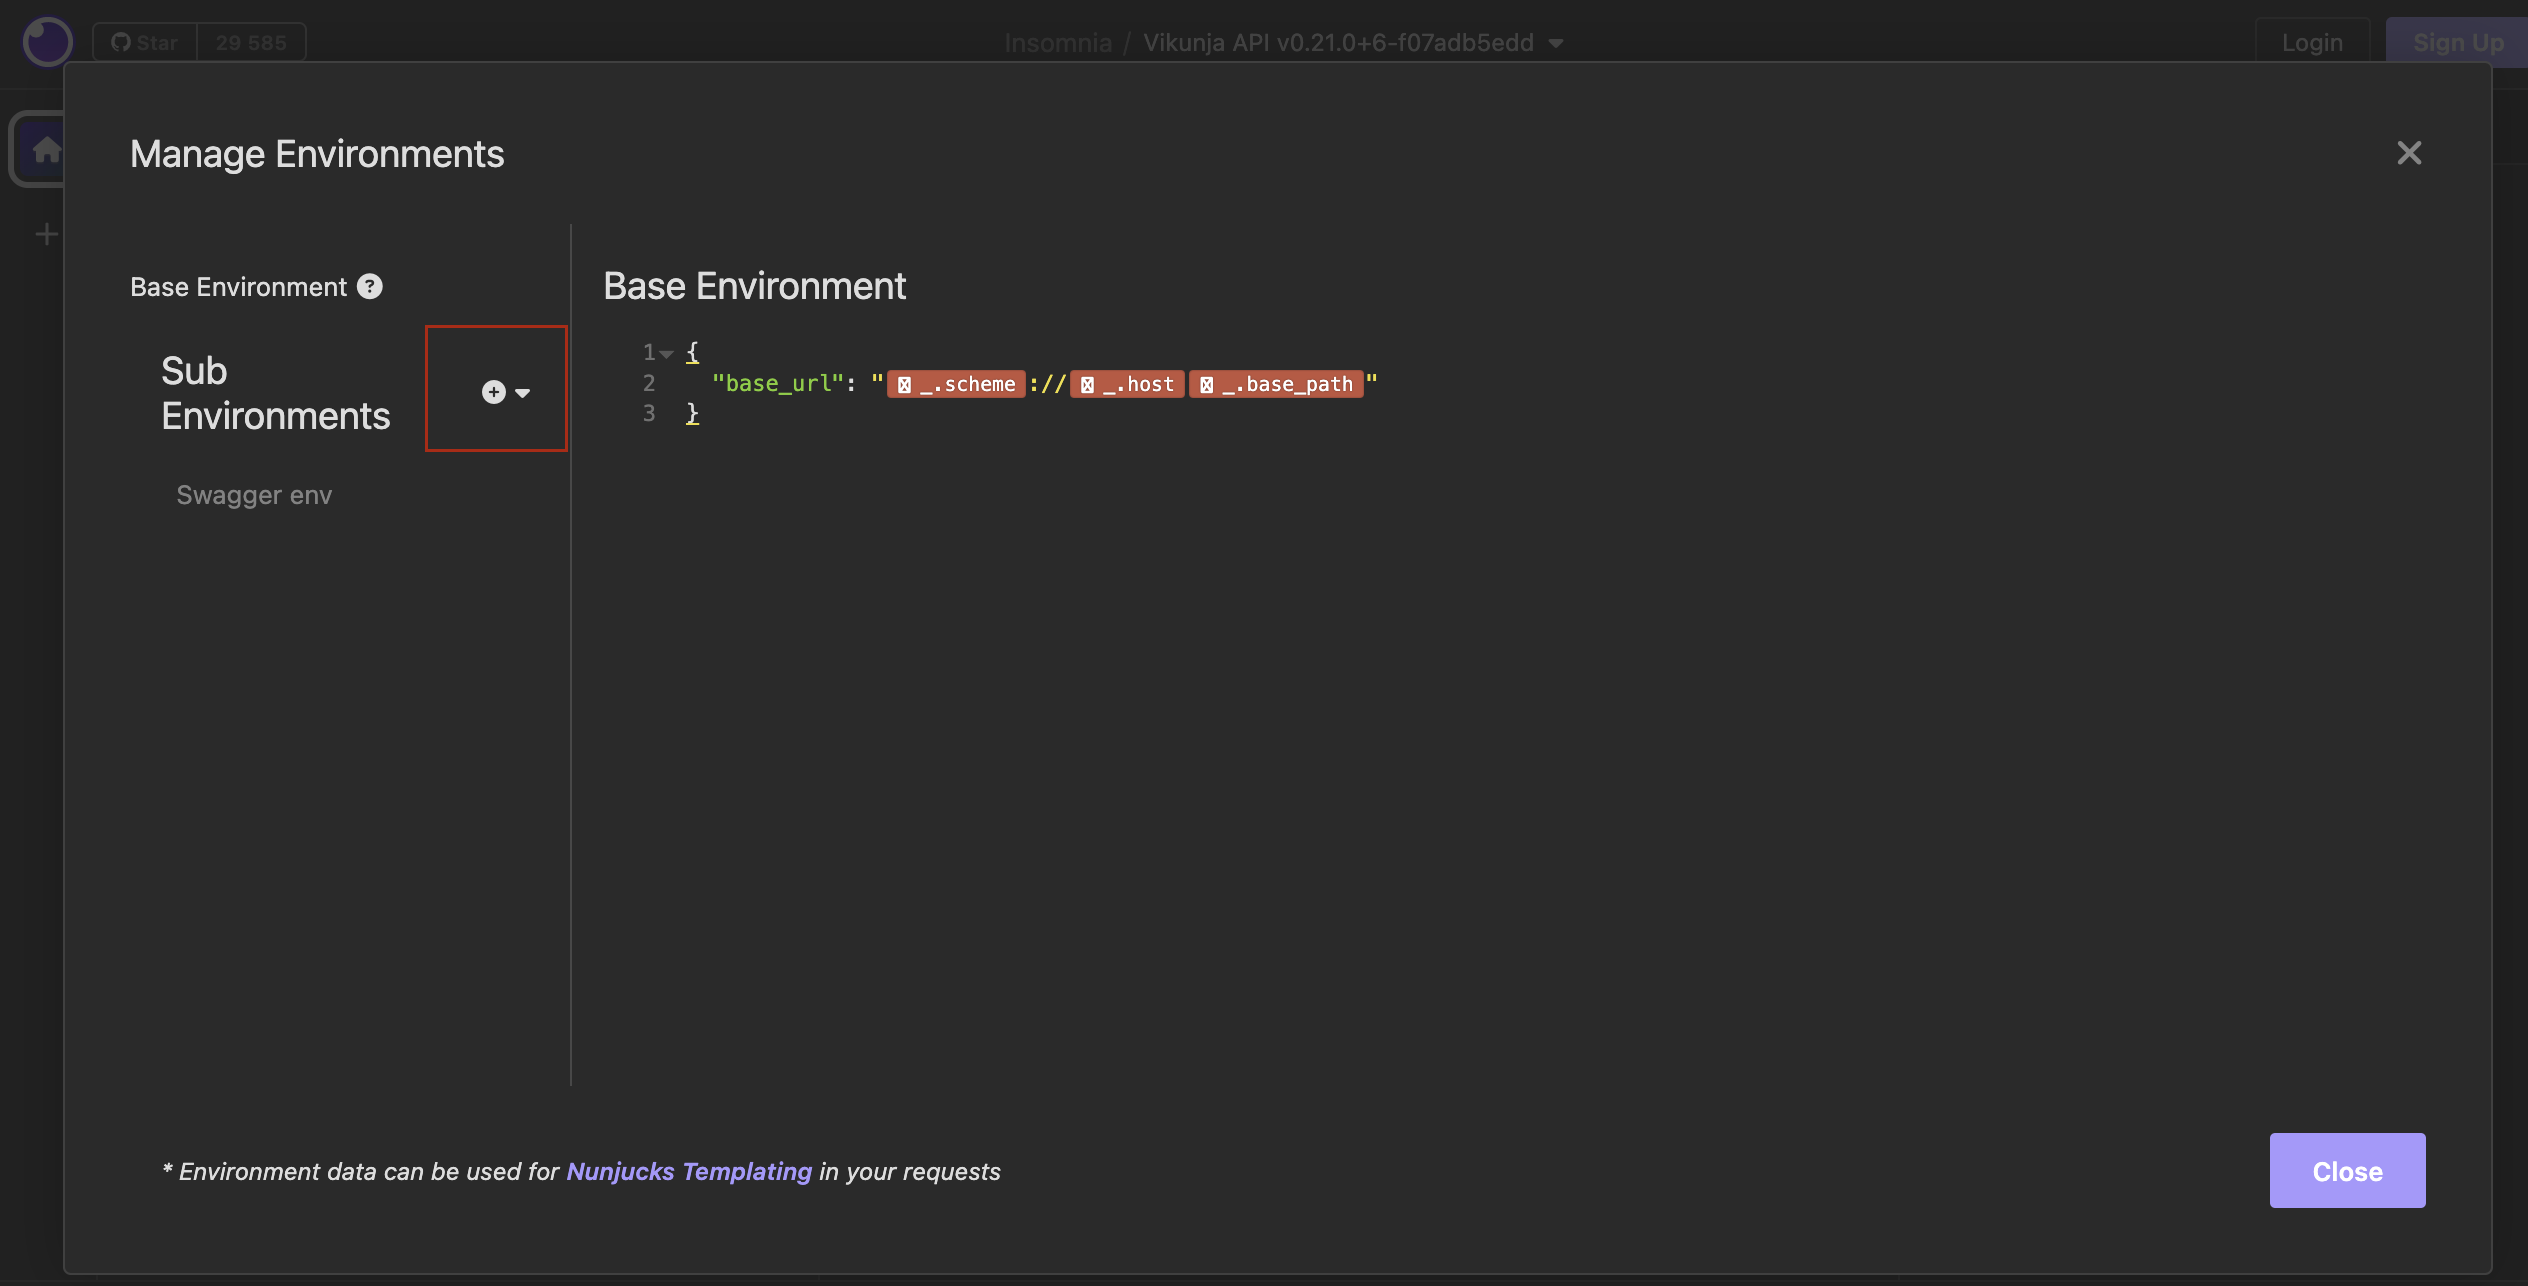
Click on “+”.
Specify the name of the new collection “Vikunja”, create a variable base_url enter data as
{“base_url”: “https://try.vikunja.io/api/v1“}

Click on the button Close.
The environment “Environment” as “Vikunja” is selected immediately by default.
Click on “.base_url” in the address bar -> a pop-up window will open to edit the variable in the environment.
Check that our created value base_url has the following form:

Click on the button “Done“.
Specify the values in the request body on the tab “JSON“, there are also tabs “Auth“, “Query“, ”headers“, “docs“, we will analyze them below.

Click on the button “Send”. A new user has been created in the system. Hooray :)!

User authorization
Next, send the following user authorization request
“auth” folder -> POST Login request
Getting a token
and get the token in the response from the server. According to documentation JWT-Auth is used:
Authorization: Bearer <jwt-token>

Click on the button “send“. The user is authorized in the system. A token has been received. Hooray :)!

Create a project
Now we use the created token in the request to create the project.
Find folder “project“, open it, select a request
Folder “project” -> PUT Creates a new project

There are two ways where you can specify a variable for the token (the life of the token is 30 minutes or the user will be deleted from the system in 30 minutes).
way through the tab “headers“
way through the tab “Auth“
Precondition: Select “Vikunja” environment in the top left corner -> Select “Manage Environments” -> Add new variable with value:
“token”: “eyJhbGciOiJIUzI1NiIsInR5cCI6IkpXVCJ9.eyJlbWFpbCI6IiIsImVtYWlsUmVtaW5kZXJzRW5hYmxlZCI6ZmFsc2UsImV4cCI6MTY5MjYyNTE3NSwiaWQiOjIsImlzTG9jYW xVc2VyIjp0cnVlLCJsb25nIjp0cnVlLCJuYW1lIjoiIiwidHlwZSI6MSwidXNlcm5hbWUiOiJVc2VyTmFtZSJ9.QFcn0BDkmh2bF2fpZocxOrUoVVSra8c1cNE9beROYZA”

Click on the button “close“.
_______________
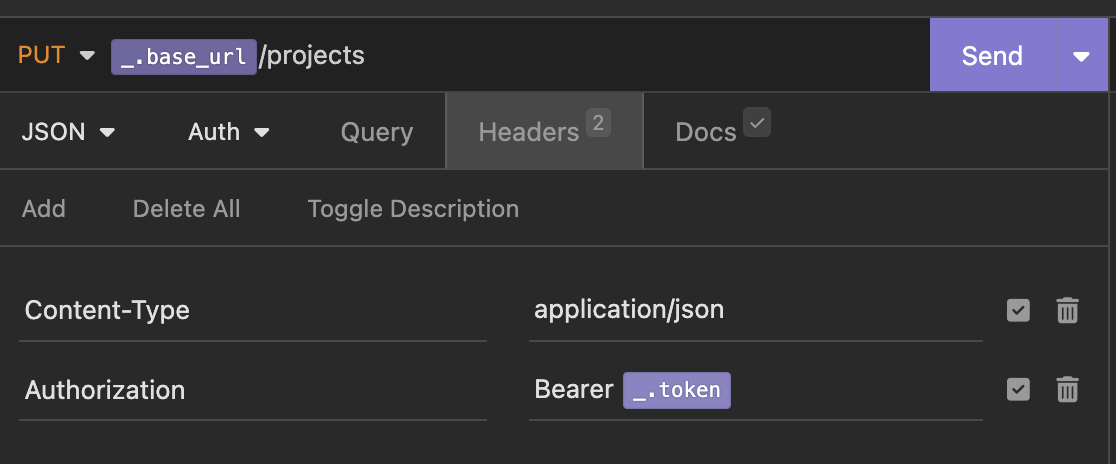
Authentication via “Headers” tab
Let’s analyze 1 way through the tab “headers“.
Select tab “headers“.

Click on “.api_key” -> a pop-up window will open to edit the variable in the environment.
Edit”.api_key” on “.token“and click on the button”Done“

The set variable looks like “.token“, and at the beginning be sure to add the word “Bearer” and a space – it’s important to specify for the “Authorization” header, since the token is bearer.
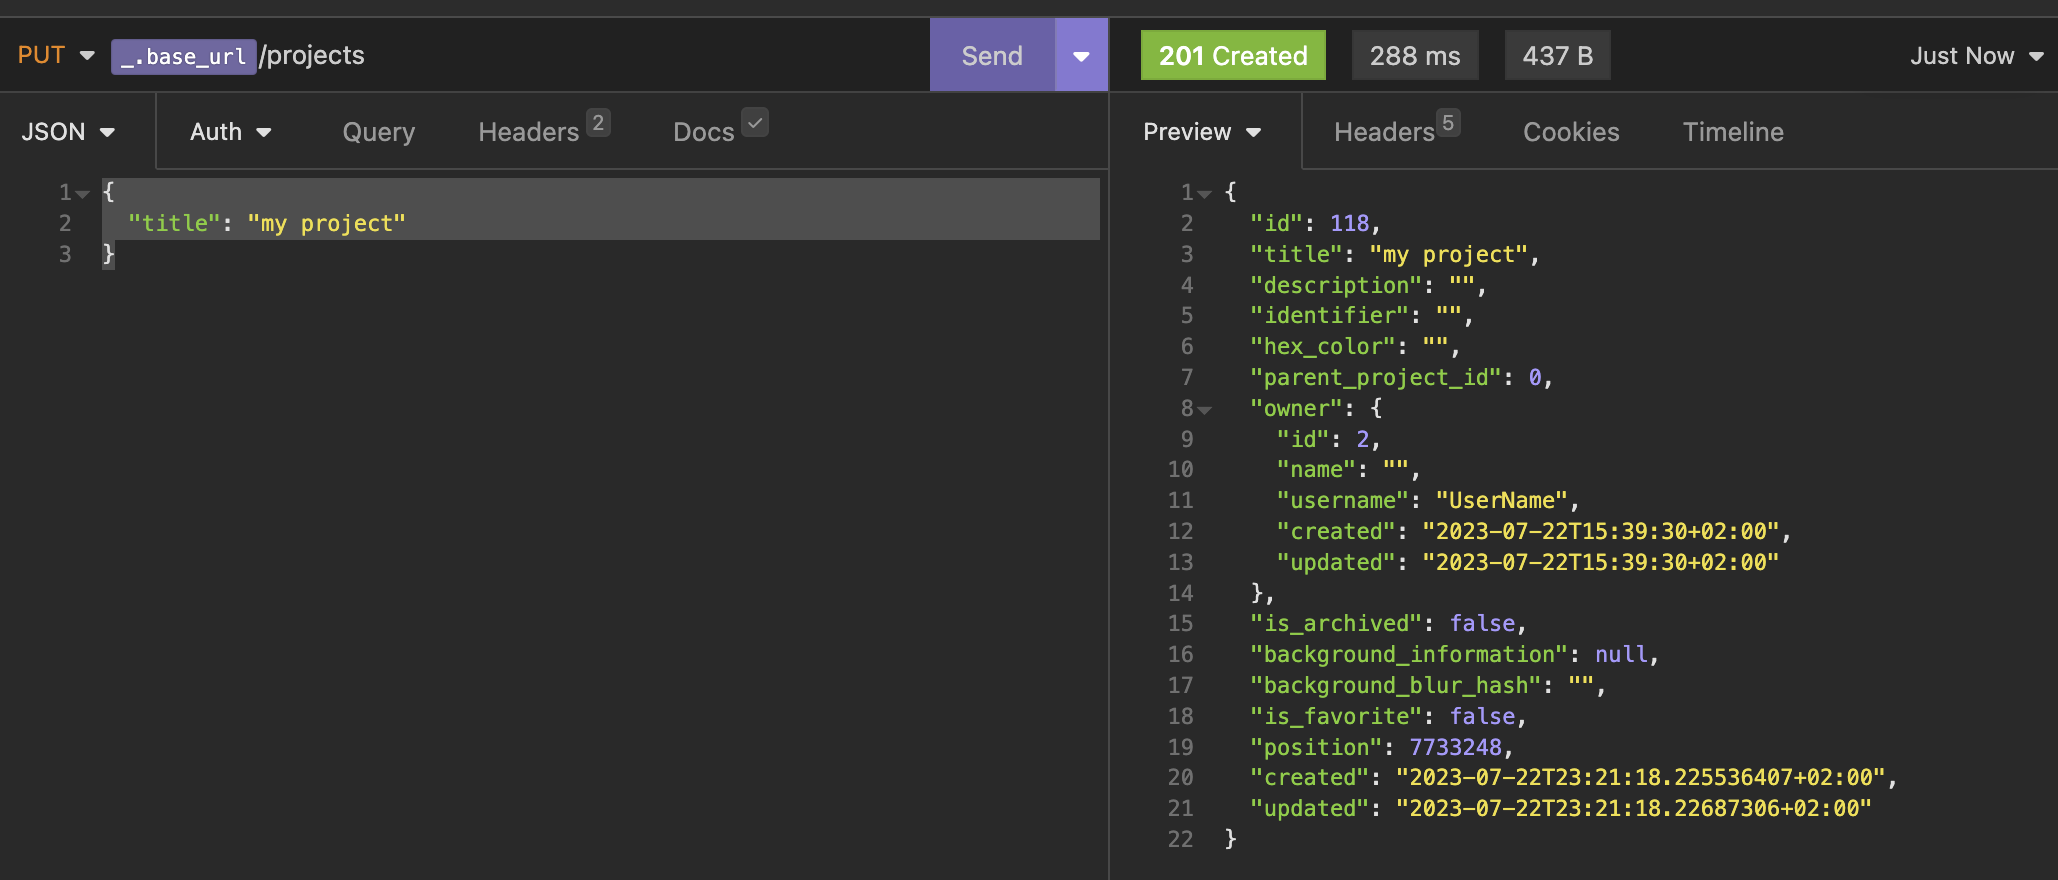
Edit the request body in the “JSON” tab according to requirement and click on the buttonsend“.
In the body of the request, specify only the name of the project:
{ “title”: “my project”}
_______________
Authentication via the “Auth” tab
Let’s analyze the 2nd method through the tab “Auth“.
Select tab “Auth” , click on the down arrow (more precisely, expand) and select the type of authentication Bearer Token

The following view is displayed:

Start typing a value {{_ in the field “TOKEN”
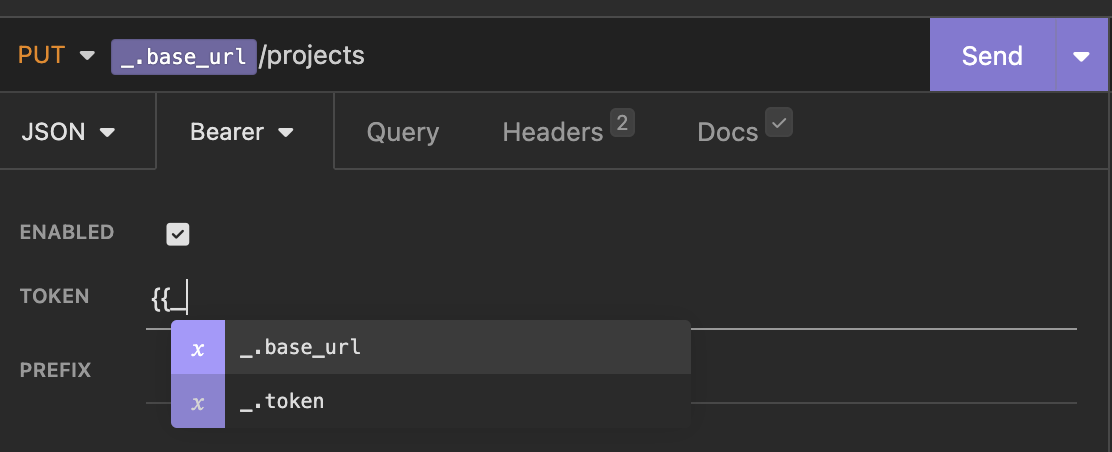
and select variable “.token“. Click on the button “send“.

A new project has been created! Hooray!)

An addendum about automating the receipt of a token for methods that require a bearer token.
Precondition: Select “Vikunja” environment in the top left corner -> Select “Manage Environments” -> Add new variable with value:
Request -> OAuth 2.0 Access Token

After this value is selected, it will look like this:


Next, configure, select “Response – reference values from other request’s responses“

The following window will be displayed, it is important to fill in these fields with the following values:
Attribute – value from the body of the response from the server
Request – user authorization “POST Login“
Specify a specific key, starting with $.namely $.tokenand in “live preview” immediately displays the value of the token.
Trigger Behavior says that when the token fades out, then once again send a request for user authorization
You can click on “Refresh“, the token will be updated
Click on “Done“

The following window will be displayed, IMPORTANT to specify the value of the token in quotes!
“token”: “Response -> Body Attribute”
the command itself looks like this:
“token”: “{% response ‘body’, ‘req_d2e9a976eb4d4e6595011784f232df4a’, ‘b64::JC50b2tlbg==::46b’, ‘when-expired’, 60 %}”


Hooray! Project created! The main thing is not to forget to create a user, log in to the system, and the token will be obtained automatically in this way.
For other queries, you can also “pull” the required values.
General information about Insomnia
Insomnia supports sending requests via HTTP, gRPC, GraphQL, WebSocket.

for HTTP requests:
Tabs”Body” (indicating the request body), “Auth” (indicating the type of authorization), “Query” (specifying parameters), ”headers” (indicating HTTP request headers), “docs” (specifying the OpenApi documentation for the request


For a request, you can do the following:

A particularly important function “Generate code“.
For HTTP response:
Tabs”Preview or Source or Raw” (indicating the body of the response from the server), ”headers” (indicating HTTP response headers), “Cookies“, “Timeline“(information about temporary features)
For example, Timeline when creating a project
Preparing request to https://try.vikunja.io/api/v1/projects
Current time is 2023-07-22T21:30:46.171Z
Enable automatic URL encoding
Using default HTTP version
Enable SSL validation
Too old connection (567 seconds), disconnect it
etc.

Certificate Installation
About installing a certificate (for example, for fintech, this is the very first thing to do before sending a request).

Choose “Collection Settings” -> “Client Certificates“. Click on “New Certificate“.

All necessary files and hosts must be provided by colleagues (admins, ask in the general chat).
Specify “Host“, click on “Choose Cert” And “Choose Key“, add files.

Click on the button “Create Certificate“
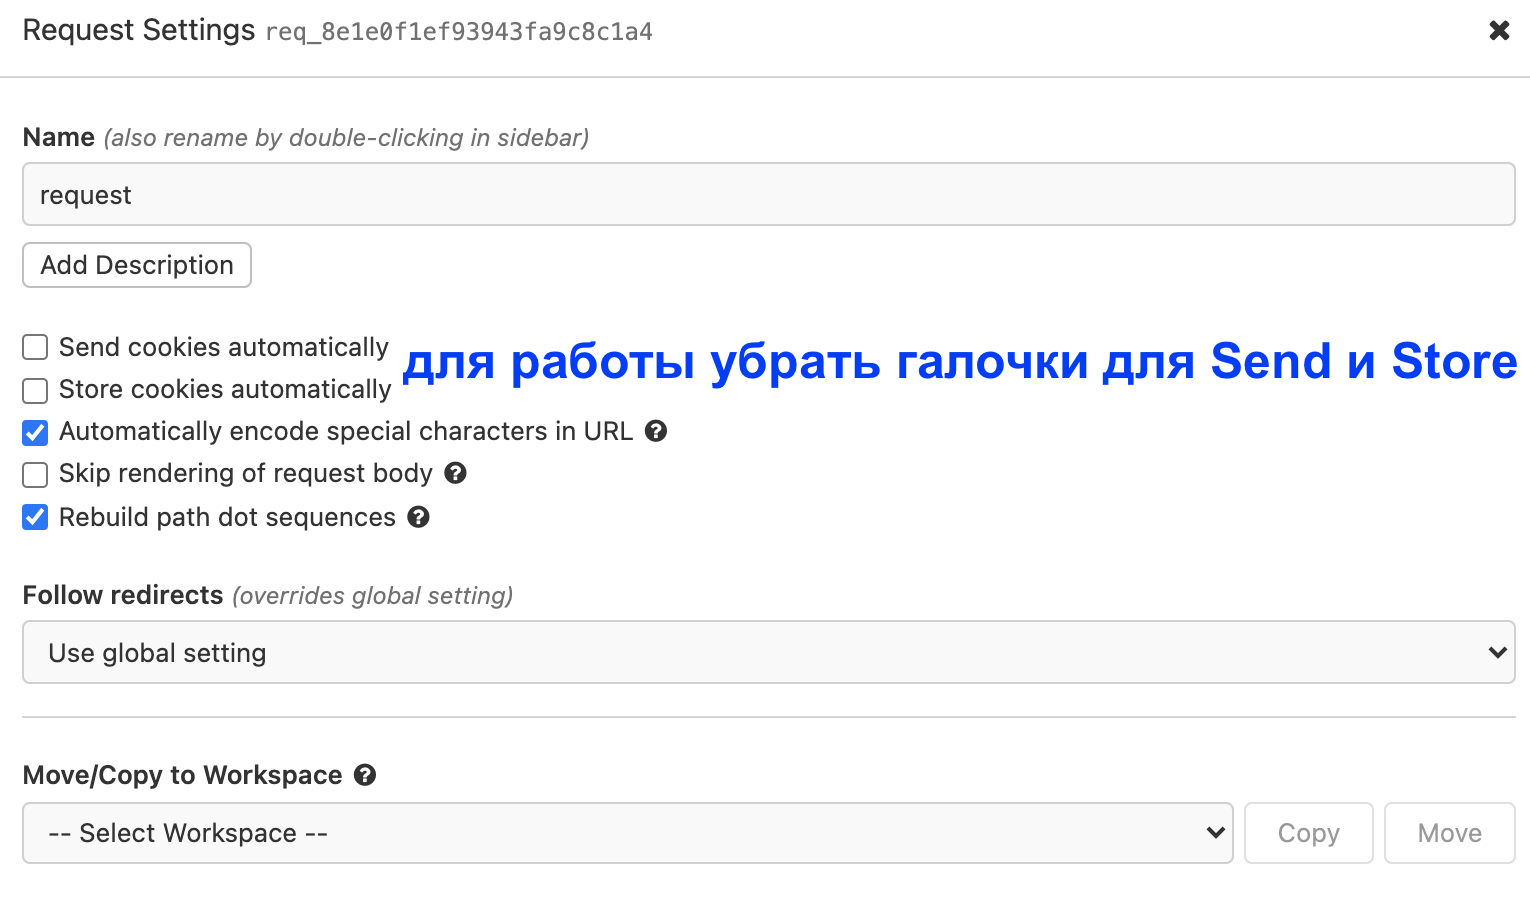
View mode:

For our work in the request settings, uncheck the checkboxes “Send cookies automatically” And “Store cookies automatically“:
___________________
Automation options
The tool allows you to make test scenarios: negative and positive, uses the JS language for automation, allows you to run runs and get a run report and generate CI for autorun from the console.
Importing OpenAPI Documentation
Click on the icon “Homepage” -> Find “All Files” -> “Documents” -> Click to “+”

The system displays a pop-up window “Create New Design Document“, leave “my-spec.yaml“and click on the button”Create“

New Document created. Three tabs displayed “DESIGN”, “DEBUG”, “TEST”.

Click on the button “Import OpenAPI” -> Choose “File“.
Select our docs.json file downloaded from https://try.vikunja.io/api/v1/docs

Displayed “Vikunja API” documentation.
Creating the first autotest when creating a user
Select tab “DEBUG“-> Add a request to create a user ->

I warn you that when you re-create a user, you need to change the mail and username.
Since I have already created a user, for the autotest I will change the mail and username values for the user.
Select tab “TEST“-> Find and click “New Test Suite” ->
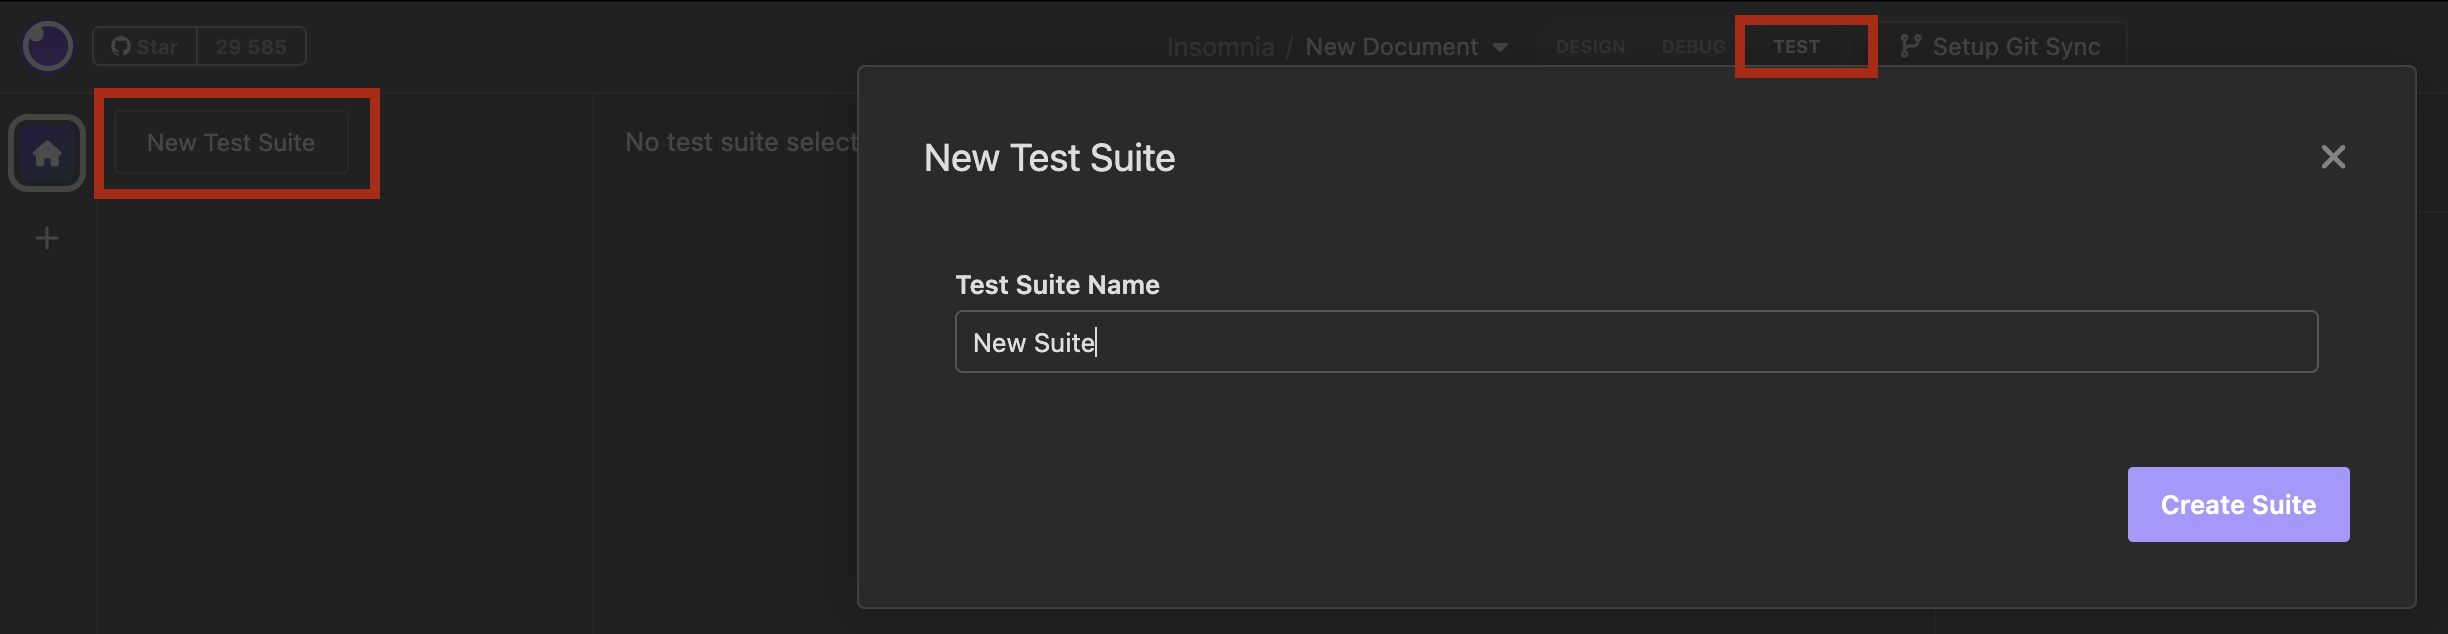
Specify name “Tests” -> Click on the button “Create Suite“

Click on the button “New test” -> Keep default name “Returns 200” (because when creating a user, the status code 200 is returned) -> click on “New Test”

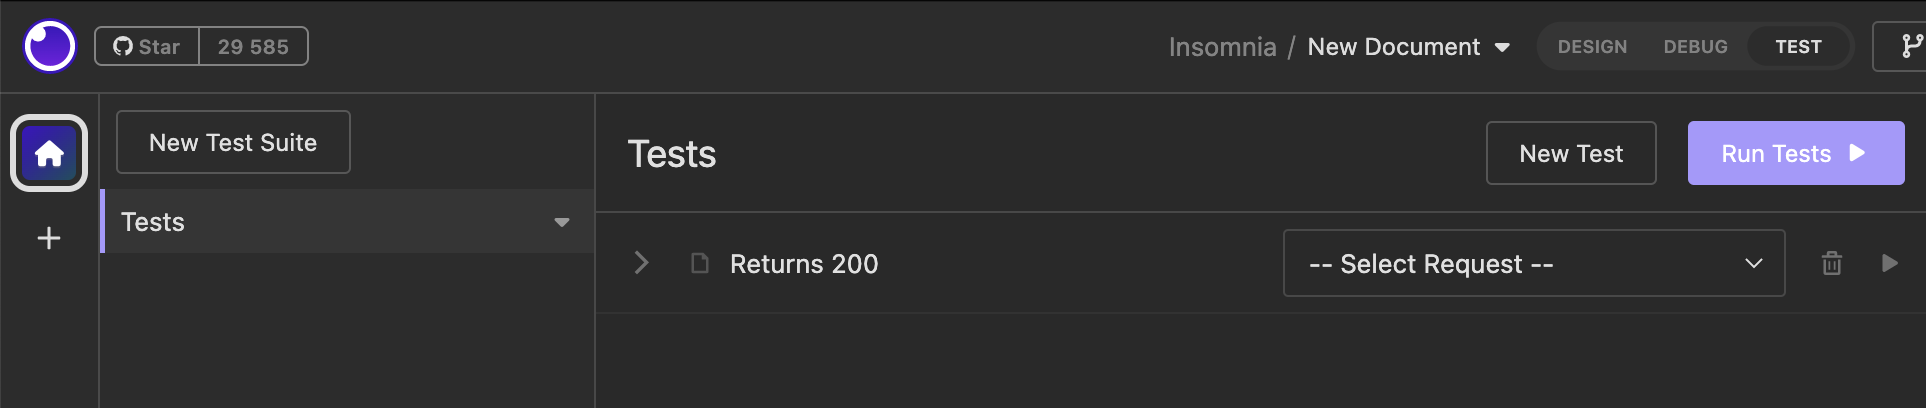
Select dropdown”Select Request” -> Select our request for “User creation (registration)” from the “DEBUG” tab
\" from the tab \"DEBUG\"")
Insomnia offers a default code snippet:
const response1 = await insomnia.send();
expect(response1.status).to.equal(200);

Click on the button “Run Tests“.

Test completed successfully, status is “Passed“.
Press the button againRun Tests“.

Test failed, status indicated “failed“.
Hooray, the simplest autotest is written.
More examples:
Preconditions: changed mail and username on the “DEBUG” tab
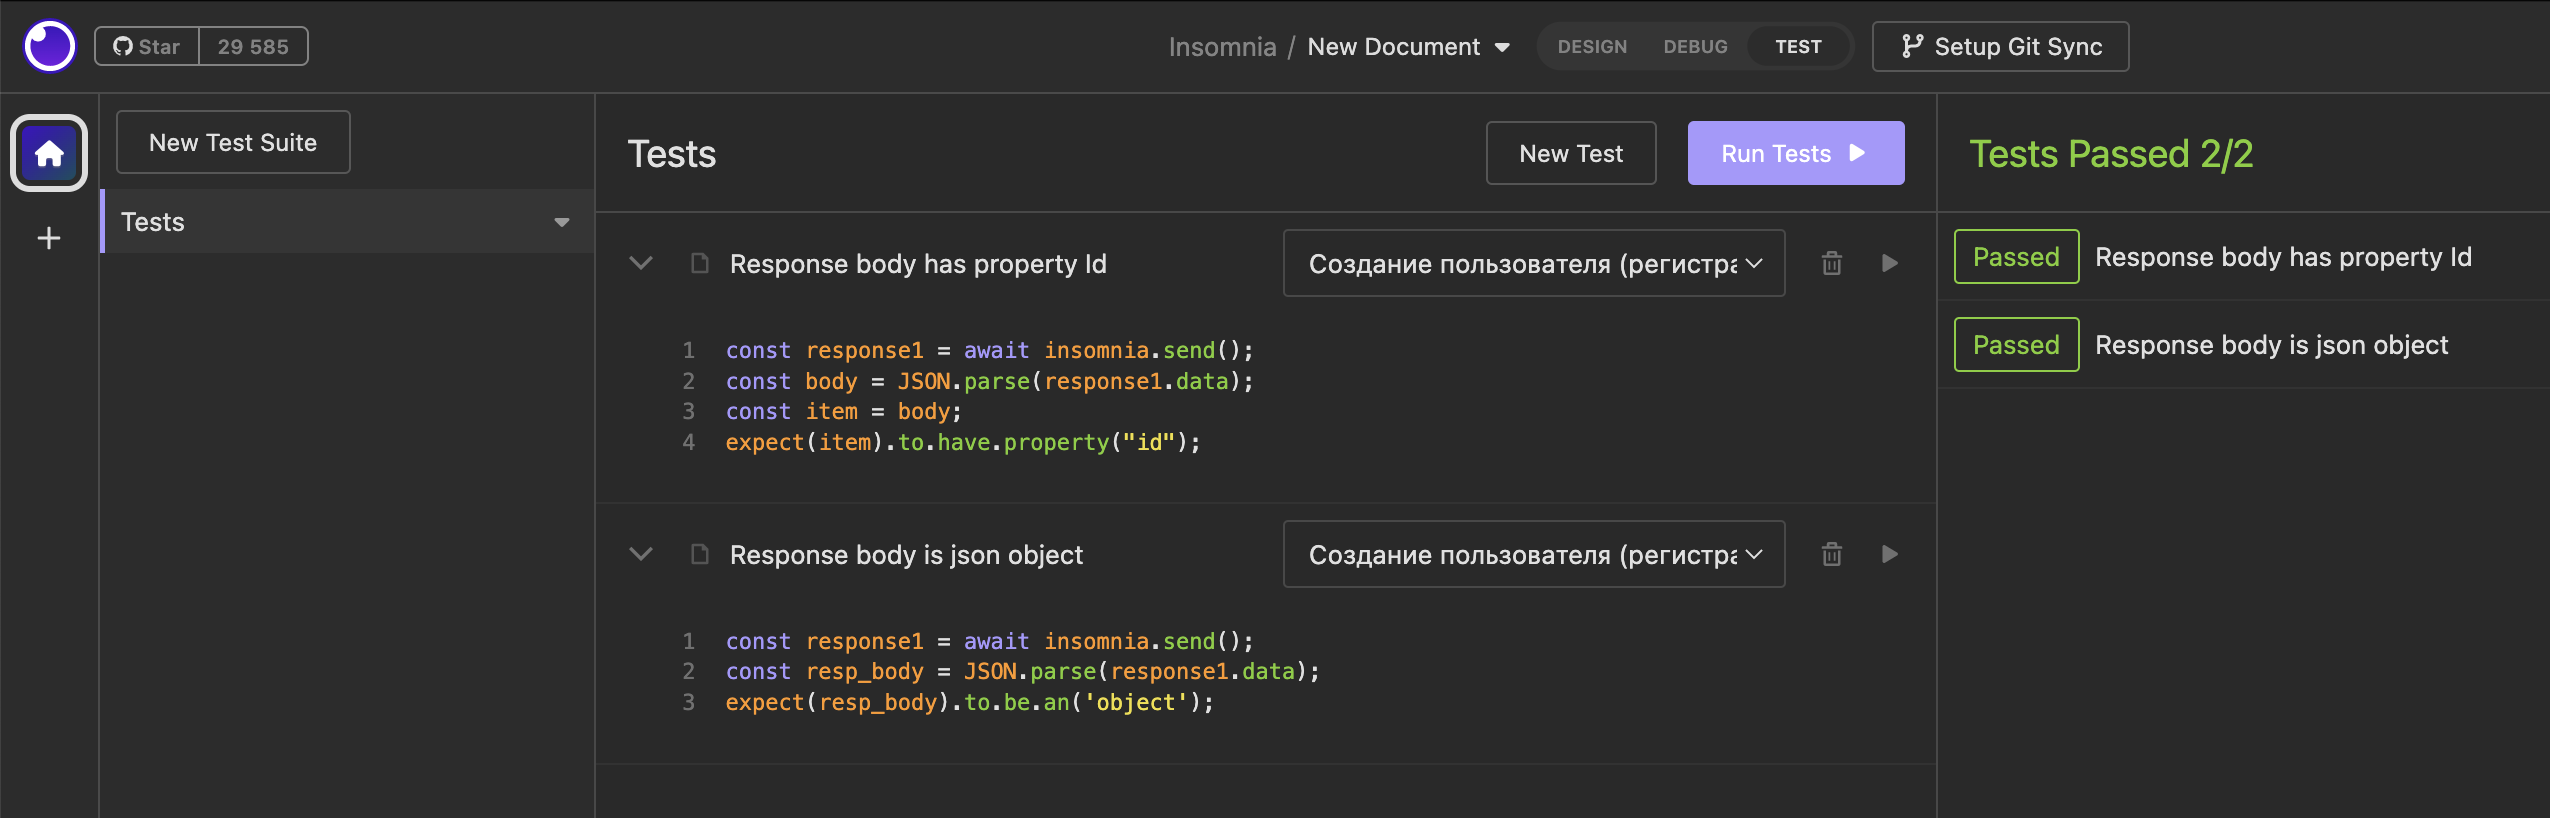
Added two tests to send user registration “Response body has property Id” and ”Response body is json object’. Each time a new test is submitted, so the second test will display an error that such a user exists (a new test will be created for this case” User already exists”.

Code for training:
1 test “Response body has property Id”
const response1 = await insomnia.send();
const body = JSON.parse(response1.data);
const item = body;
expect(item).to.have.property(“id”);
2 test ”Response body is json object’
const response1 = await insomnia.send();
const resp_body = JSON.parse(response1.data);
expect(resp_body).to.be.an(‘object’);
3 test to check that such a user exists (“User already exists”).

const response1 = await insomnia.send();
expect(response1.status).to.equal(400);
const body = JSON.parse(response1.data);
const item = body;
expect(item).to.have.property(“code”);
expect(item).to.have.property(“message”);
More information about scripts in official documentation.
__________________
Conclusion
And there are also such features: built-in DevTools, request conversion into code, JSON|XML – readable view (Beautify JSON), there are hints for validating entered values, request history.
Thanks for reading.
Sincerely, Nadezhda Dudnik (protestinginfo)chief test engineer in fintech and software testing mentor.