How to use gRPC client in a Kotlin Multiplatform Mobile project
Hello! A team of developers from Novosibirsk is in touch.
We have long wanted to tell the community about how we develop features in KMM projects, and now a good non-standard task turned up on one of them. On it, in addition to actually solving the problem, we will demonstrate the way to add a new feature to the project. We also really want to promote the multiplatform specifically among iOS developers, so we put special emphasis on this platform as a bonus.
What is the essence of the task
Usually, in mobile projects, communication with the backend takes place via the REST API and the specification is drawn up in swagger-files. In this scenario, we safely use ktor and our moko-network libraryin which we use plugin to generate request code and response models by Swagger‘at. In very rare cases, it was necessary to use a little extra WebSockets or Sockets.IO. This was decided individually on each platform. Later we made for this moko-sockets-io library.
This time the situation was more interesting: in addition to typing swagger-file mobile API has been introduced by several gRPC servicesand we immediately wanted to make the process of working with them as comfortable as possible and close to working with the REST API.
The article describes the full path of integrating gRPC into a multiplatform project that our team has gone through. It includes both creating a project and setting up a feature in the project. If you are interested in the gRPC-specific part and already have knowledge of multiplatform, then steps 2, 3 and 4 can be skipped.
For integration, we immediately began to look for ready-made libraries. Ideally I would like the following:
be able to generate kotlin classes for message models in common code;
be able to generate kotlin classes for gRPC client in common code;
have out of the box implementations of these classes for iOS and Android;
be able to configure the gRPC client from a common code: substitute the server address, authorization headers.
At that time, there was only one library for working with gRPC, in which the KMM part was implemented and supported – Wire from colleagues from Square. So we took it and figured out what we can really do:
Set up KMM code generation for message classes and for the gRPC client, it should even work on coroutines. Plugin setup example is on the gRPC website.
Out of the box is android client implementation, which under the hood uses OkHttp from the same development team. The client has the ability to set query parameters using OkHttpClient.Builder.addInterceptor.
Out of the box, there is no client implementation for iOS, only stub interface.
Obviously, from the iOS side, the library is not ready. However, we decided to try to use at least some of the tools from it: the task needs to be solved, while everything should already work well from the Android side.
We will demonstrate the main way to solve the problem on the Hello world project, at the same time we will show how to raise a project based on a template from a zero state and add a new feature there. The main focus will be on the iOS platform. Take as a specification finished example from gprc-go. All steps will be followed commits in the repository.
As a result, in the article we will consider:
We will also tell you what to do in the Android application.
Step 1. Prepare the test environment
Everything is simple here – we take from example commands to install server and client:
```

$ go get google.golang.org/grpc/examples/helloworld/greeter_client

$ go get google.golang.org/grpc/examples/helloworld/greeter_server

```
Then we run it in different terminals:
```

$ ~/go/bin/greeter_server

2022/02/13 20:04:13 server listening at 127.0.0.1:50051

2022/02/13 20:04:20 Received: world

```

```

$ ~/go/bin/greeter_client

2022/02/13 20:04:20 Greeting: Hello world

```
Now we don’t need a terminal with a client. We close the client, and leave the server to work: we will return to it towards the end of the article.
Step 2. Starting a new MPP project
We at IceRock have been using for a long time to start multi-platform projects your template and now let’s start with it. We generate a project on GitHub using it, import the entire folder into Android Studio or IDEA and see what is already configured for us.
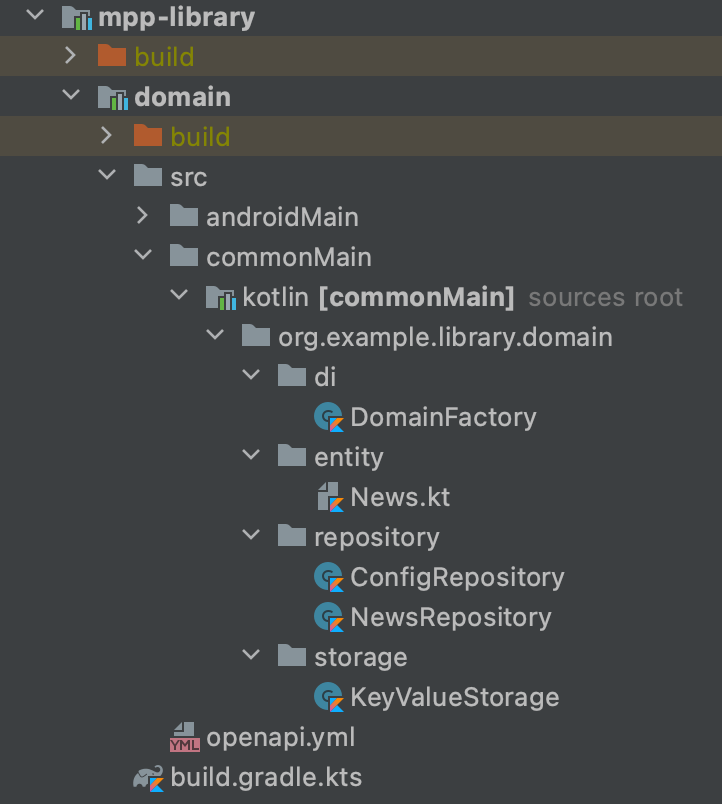
AT mpp-library/feature we see two ready-made features – config and list:

There is also an implementation of domain logic for them in a separate package domain:
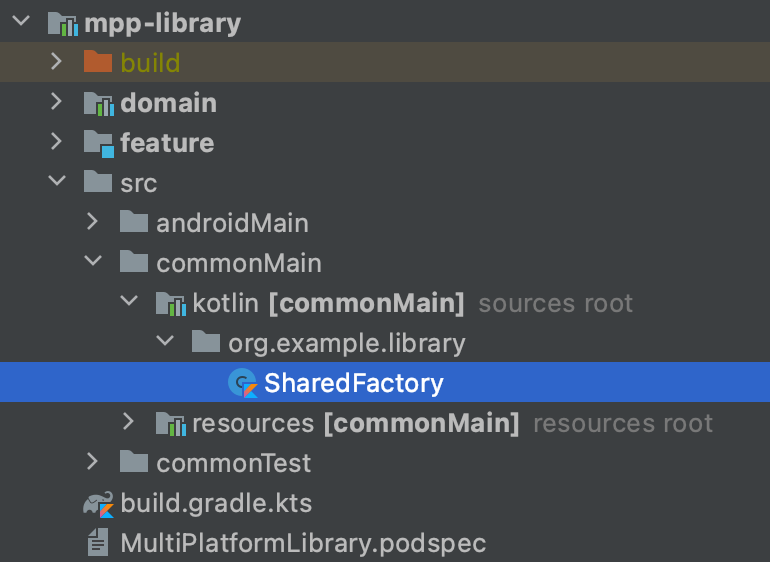
The factory linking them at the root of the package mpp-library:
Step 3. Adding a New Feature Module
To speed up, copy the module config with a new name. For example, grpcTest. Let’s clean up the logic and rename the files:

The contents of the new files (commit):
```

package org.example.library.feature.grpcTest.model

interface GrpcTestRepository {

}

```/presentation/GrpcTestViewModel.kt– an empty view model. It is inherited fromdev.icerock.moko.mvvm.viewmodel.ViewModelso it hascoroutine scopeto make asynchronous calls. Also in it we declare the interface of events that the view model can throw on the platform part and accept the dispatcher of these events (eventsDispatcher) as a parameter:
```

package org.example.library.feature.grpcTest.presentation

import dev.icerock.moko.mvvm.dispatcher.EventsDispatcher

import dev.icerock.moko.mvvm.dispatcher.EventsDispatcherOwner

import dev.icerock.moko.mvvm.viewmodel.ViewModel

import org.example.library.feature.grpcTest.model.GrpcTestRepository

class GrpcTestViewModel(

   override val eventsDispatcher: EventsDispatcher<EventsListener>,

   private val repository: GrpcTestRepository

) : ViewModel(), EventsDispatcherOwner<GrpcTestViewModel.EventsListener> {

   interface EventsListener {

   }

}

```/di/GrpcTestFactory.kt– a view model factory for a feature. Created in the root factory of the projectSharedFactory. It also decides what the implementation of the repository will be. Factory methods are called from the native platform:
```

package org.example.library.feature.grpcTest.di

import dev.icerock.moko.mvvm.dispatcher.EventsDispatcher

import org.example.library.feature.grpcTest.model.GrpcTestRepository

import org.example.library.feature.grpcTest.presentation.GrpcTestViewModel

class GrpcTestFactory(

  private val repository: GrpcTestRepository

) {

    fun createViewModel(

        eventsDispatcher: EventsDispatcher<GrpcTestViewModel.EventsListener>,

    ) = GrpcTestViewModel(

        eventsDispatcher = eventsDispatcher,

        repository = repository

    )

}

```
EventsDispatcher implemented here and is needed to ensure that events are sent to the platform. For iOS, this will happen by default on the main line. For Android – within the main cycle.
Also add the path to the feature module in settings.gradle.kts at the root of the project (commit):
```

include(":mpp-library:feature:grpcTest")

```
Connect the feature module to the module mpp-library in /mpp-library/build.gradle.kts (commit):
```

...

dependencies {

...

commonMainApi(projects.mppLibrary.feature.grpcTest) //Чтобы видеть классы фичи в SharedFactory

...

}

...

framework {

  ...

  export(projects.mppLibrary.feature.grpcTest)  // Чтобы классы фичи попали в фреймворк для iOS

  ...

}

```
And don’t forget to rename the package to AndroidManifest.xml (commit):
```

<?xml version="1.0" encoding="utf-8"?>

<manifest package="org.example.library.feature.grpcTest" />

```
Step 4. Writing the feature logic
Our client functions are very simple: you will need to initiate a request and show the response on the screen. To use the method, declare it in GrpcTestRepository (commit):
```

interface GrpcTestRepository {

    suspend fun helloRequest(word: String): String

}

```
To display the text in the alert (the text of a successful response from the server or the error text), add a new event to EventsListener (commit):
```

interface EventsListener {

    fun showMessage(message: String)

}

```
To send a request, we will make a method in GrpcTestViewModel, which will be called from the native side on some event. At the same time, we will show an error if something goes wrong (commit):
```

fun onMainButtonTap() {

    viewModelScope.launch {

        var message: String = ""

        try {

            message = repository.helloRequest("world")

        } catch (exc: Exception) {

            message = "Error: " + (exc.message ?: "Unknown error")

        }

        eventsDispatcher.dispatchEvent { showMessage(message) }

    }

}

```
The general code of the feature module is ready for this, now we need the implementation of the actual grpc requests and our view model from the native side.
Step 5. We connect the generation of message models by proto-files
First, we take the specification file of our client helloworld.proto and put in a folder /domain/src/proto:
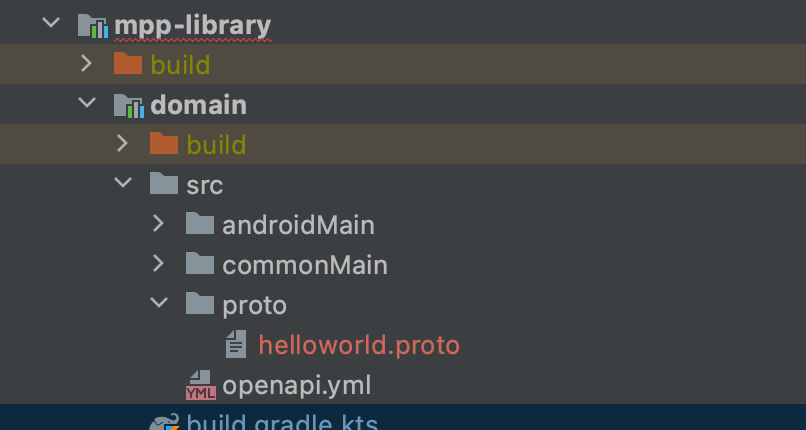
Now you will need to very carefully connect the wire plugin to the domain module. All steps from this block are intentionally collected in one commitso that you don’t get lost during playback.
We use libs.versions.toml for versioning dependencies. We start with it:
Adding a version
wireto the section [versions]:
```
# wire
wireVersion = "4.0.0-alpha.15"
```
Adding Libraries and Plugins to the Section [libraries]:
```
# wire
wireGradle = { module = "com.squareup.wire:wire-gradle-plugin", version.ref = "wireVersion"}
wireRuntime = { module = "com.squareup.wire:wire-runtime", version.ref = "wireVersion"}
wireGrpcClient = { module = "com.squareup.wire:wire-grpc-client", version.ref = "wireVersion"}
```
Then we hook the plugin itself and configure it in /mpp-library/domain/build.gradle.kts:
Because the
Wirehosted onjitpack.iomake sure that all plugins will be downloaded, including from there to/build-logic/build.gradle.kts:
```
repositories {
    mavenCentral()
    google()

    gradlePluginPortal()
    maven("https://jitpack.io")
}
```
And here is the plugin itself
dependencies:
```
dependencies {
  ...
  api("com.squareup.wire:wire-gradle-plugin:4.0.0-alpha.15")
}
```
Next, we work with the domain module, add the plugin to the section
pluginsin/mpp-library/domain/build.gradle.kts:
```
  ...
  id("com.squareup.wire")
}
```
Add to section
dependenciesclient and runtime library:
```
  ...
  commonMainImplementation(libs.wireGrpcClient)
  commonMainImplementation(libs.wireRuntime)
}
Adding a section
wireto the end of the file and synchronize the project:
```
wire {
    sourcePath {
      srcDir("./src/proto")
    }
    kotlin {
        rpcRole = "client"
        rpcCallStyle = "suspending"
    }
}
```
After the project is synchronized, a gradle task appears
generateProtos:

The results of its implementation can be found in
/mpp-library/domain/build/generated/source:
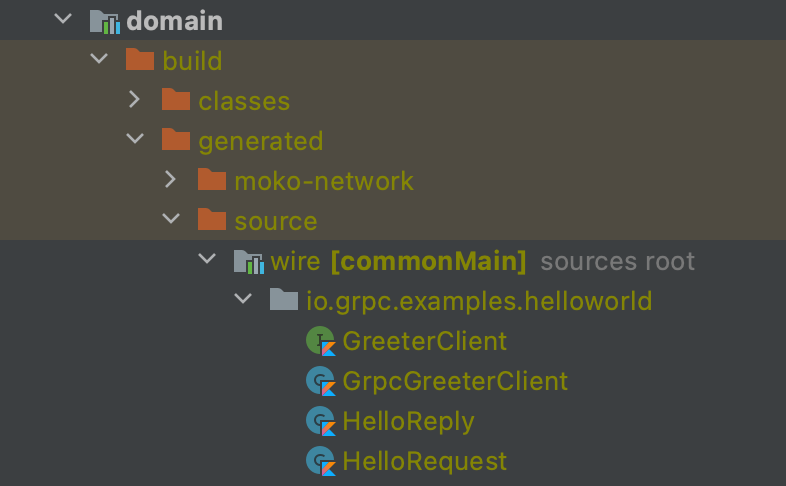
Here we have quite large generated classes for the request (HelloRequest) and response (HelloReply) method, client interface (GreeterClient) and its gRPC implementation (GrpcGreeterClient).
Looking ahead, on Android we use all of these classes, on iOS we use only message classes.
Step 6. Declare the MPP interface for the gRPC client
At the moment we have generated models HelloReply and HelloRequest and an interface for the final feature repository GrpcTestRepository. Since we cannot use the generated ready-made client in the general code, we need to declare its interface and implement it separately on the platforms.
In our case, the gRPC client interface will look like this:
```
interface HelloWorldSuspendClient {
    suspend fun sendHello(message: HelloRequest): HelloReply
}
```
However, for iOS, it will not be possible to implement an interface with suspend methods, so one more interface will be needed on callback‘Oh:
```
interface HelloWorldCallbackClient {
    fun sendHello(message: HelloRequest, callback: (HelloReply?, Exception?) -> Unit)
}
```
And the implementation translating the methods from callback‘ami in suspend-methods:
```
class HelloWorldSuspendClientImpl(
    private val callbackClientCalls: HelloWorldCallbackClient
): HelloWorldSuspendClient {

    //Пока что у нас в интерфейсе всего один метод, но на будущее очень пригодится generic-функция для конвертации, сразу реализуем ее
    private suspend fun <In, Out> convertCallbackCallToSuspend(
        input: In,
        callbackClosure: ((In, ((Out?, Throwable?) -> Unit)) -> Unit),
    ): Out {
        return suspendCoroutine { continuation ->
            callbackClosure(input) { result, error ->
                when {
                    error != null -> {
                        continuation.resumeWith(Result.failure(error))
                    }
                    result != null -> {
                        continuation.resumeWith(Result.success(result))
                    }
                    else -> { //both values are null
                        continuation.resumeWith(Result.failure(IllegalStateException("Incorrect grpc call processing")))
                    }
                }
            }
        }
    }

    override suspend fun sendHello(message: HelloRequest): HelloReply {
        return convertCallbackCallToSuspend(message, callbackClosure = { input, callback ->
            callbackClientCalls.sendHello(input, callback)
        })
    }
}
```
We place all this in the same place where the models were generated, in domain-module (commit):
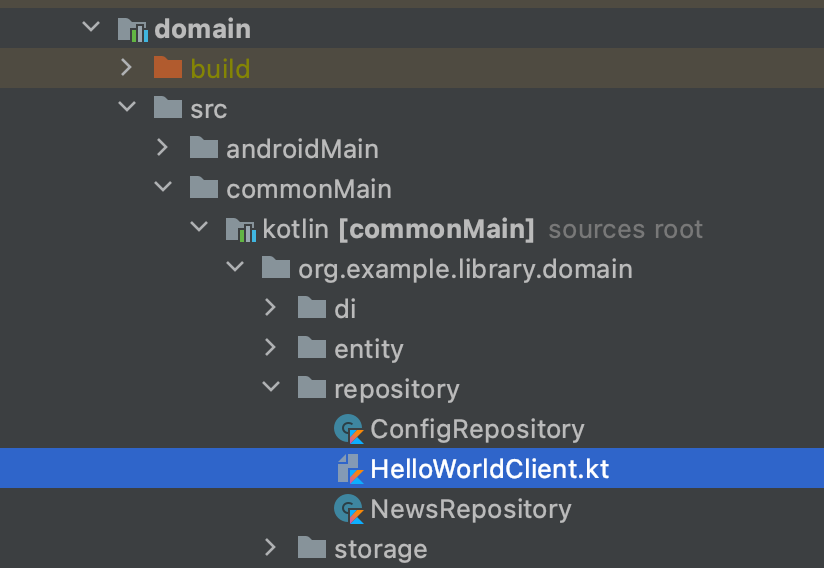
Now in the general code it remains only to accept the input in SharedFactory implementation of this interface and pass it to the input of the feature factory.
Adding the repository as a parameter to the feature factory
GrpcTestFactory.kt(commit):
```
class GrpcTestFactory(
    private val repository: GrpcTestRepository
) {
    fun createViewModel(
        eventsDispatcher: EventsDispatcher<GrpcTestViewModel.EventsListener>,
    ) = GrpcTestViewModel(
        eventsDispatcher = eventsDispatcher,
        repository = repository
    )
}
```
Adding a new field to constructors
SharedFactoryand immediately for the custom constructor we usesuspend-client wrapper:
```
class SharedFactory(
    ...
    helloWorldClient: HelloWorldSuspendClient
) {
  //Специально для вызова со стороны iOS-платформы мы не используем аргумент со значением «по умолчанию»
constructor(
    ...
    helloWorldCallbackClient: HelloWorldCallbackClient
) : this(
    ...
    helloWorldClient = HelloWorldSuspendClientImpl(helloWorldCallbackClient)
)
...
```
We create an instance of this factory, use the gRPC client as a repository (commit):
```
val grpcTestFactory = GrpcTestFactory(
    repository = object : GrpcTestRepository {
        override suspend fun helloRequest(word: String): String {
            return helloWorldClient.sendHello(HelloRequest(word)).message
        }
    }
)
```
In the general code, everything is ready, it remains to implement the gRPC client from the platform side.
Step 7. iOS: Generate gRPC Client Classes
To generate classes, take gRPC-Swift library and generator. First, we put the generator, for example, through Homebrew:
```
brew install swift-protobuf grpc-swift
```
Then we need plugins for it, installed via cocoapods:
```
pod 'gRPC-Swift-Plugins'
```
If everything went well, then both plugins will appear along the way /ios-app/Pods/gRPC-Swift-Plugins/bin/and now they can be used like this:
Make a folder for the generated classes, e.g.
/ios-app/src/generated/proto.Being in the root of the project, call the command to generate message classes:
```
protoc \
--plugin=./ios-app/Pods/gRPC-Swift-Plugins/bin/protoc-gen-swift \
--swift_out=./ios-app/src/generated/proto \
--proto_path=./mpp-library/domain/src/proto \
./mpp-library/domain/src/proto/helloworld.proto
```
From the root of the project, call the command to generate gRPC client methods:
```
protoc \
--plugin=./ios-app/Pods/gRPC-Swift-Plugins/bin/protoc-gen-grpc-swift \
--grpc-swift_out=./ios-app/src/generated/proto \
--grpc-swift_opt=Client=true,Server=false \
--proto_path=./mpp-library/domain/src/proto \
./mpp-library/domain/src/proto/helloworld.proto
```
As a result, we get two files: helloworld.grpc.swift, helloworld.pb.swift. Add them to the project and Podfile the library itself gRPC-Swift (commit):
```
pod 'gRPC-Swift', '~> 1.7.0'
```
Step 8 iOS: HelloWorldClient Implementation
We create a new class that implements HelloWorldCallbackClient. Let’s make it so that when it is initialized, a gRPC channel and a gRPC client are immediately created and saved:
```
class HelloWorldCallbackBridge: HelloWorldCallbackClient {

    private var commonChannel: GRPCChannel?
    private var helloClient: Helloworld_GreeterClient?

    init() {

        //Настраиваем логгер
        var logger = Logger(label: "gRPC", factory: StreamLogHandler.standardOutput(label:))
        logger.logLevel = .debug

        //loopCount — сколько независимых циклов внутри группы работают внутри канала (могут одновременно отправлять/принимать сообщения)
        let eventGroup = PlatformSupport.makeEventLoopGroup(loopCount: 4)

        //Создаем канал, указываем тип защищенности, хост и порт
        let newChannel = ClientConnection
            //Можно вместо .insecure использовать .usingTLS, но к нашему тестовому серверу так подключиться не выйдет, у него нет сертификата
            .insecure(group: eventGroup)
            //Логгируем события самого канала
            .withBackgroundActivityLogger(logger)
            .connect(host: "127.0.0.1", port: 50051)

        //Работаем без дополнительных заголовков, логгируем запросы
        let callOptions = CallOptions(
            customMetadata: HPACKHeaders([]),
            logger: logger
        )

        //Создаем и сохраняем экземпляр клиента
        helloClient = Helloworld_GreeterClient(
            channel: newChannel,
            defaultCallOptions: callOptions,
            interceptors: nil
        )
        //Сохраняем канал
        commonChannel = newChannel
    }
...
```
Implementing the Method sayHello(..):
```
func sendHello(message: HelloRequest, callback: @escaping (HelloReply?, KotlinException?) -> Void) {
    //Проверяем что все идет по плану
    guard let client = helloClient else {
        callback(nil, nil)
        return
    }

    //Создаем SwiftProtobuf.Message из WireMessage
    var request = Helloworld_HelloRequest()
    request.name = message.name

    //Получаем экземпляр вызова
    let responseCall = client.sayHello(request)
    DispatchQueue.global().async {
        do {
            //В фоне дожидаемся результата вызова
            let swiftMessage = try responseCall.response.wait()
            DispatchQueue.main.async {
                //Конвертируем SwiftProtobuf.Message в WireMessage (объект ADAPTER умеет парсить конкретный класс WireMessage из бинарного формата)
                let (wireMessage, mappingError) = swiftMessage.toWireMessage(adapter: HelloReply.companion.ADAPTER)
                //Обязательно вызываем callback на том же потоке на котором фактически создался wireMessage, иначе получим ошибку в KotlinNative-рантайме
                callback(wireMessage, mappingError)
            }
        } catch let err {
            DispatchQueue.main.async {
                callback(nil, KotlinException(message: err.localizedDescription))
            }
        }
    }
}
```
Function toWireMessage(..) pretty simple: she takes the view SwiftMessage in the form of NSData, translates into KotlinByteArray and gives it as input to the adapter:
```
fileprivate extension SwiftProtobuf.Message {
    func toWireMessage<WireMessage, Adapter: Wire_runtimeProtoAdapter<WireMessage>>(adapter: Adapter) -> (WireMessage?, KotlinException?) {
        do {
            let data = try self.serializedData()
            let result = adapter.decode(bytes: data.toKotlinByteArray())

            if let nResult = result {
                return (nResult, nil)
            } else {
                return (nil, KotlinException(message: "Cannot parse message data"))
            }
        } catch let err {
            return (nil, KotlinException(message: err.localizedDescription))
        }
    }
}
```
The most primitive way to convert NSData to KotlinByteArray:
й примитивный вариант конвертации NSData в KotlinByteArray:
```
fileprivate extension Data {
    //Побайтово копируем NSData в KotlinByteArray
    func toKotlinByteArray() -> KotlinByteArray {
        let nsData = NSData(data: self)

        return KotlinByteArray(size: Int32(self.count)) { index -> KotlinByte in
            let byte = nsData.bytes.load(fromByteOffset: Int(truncating: index), as: Int8.self)
            return KotlinByte(value: byte)
        }
    }
}
```
We save everything and try to check directly in AppDelegate (commit):
```
@UIApplicationMain
class AppDelegate: NSObject, UIApplicationDelegate {

    var window: UIWindow?

    let gRPCClient = HelloWorldCallbackBridge()

    func application(_ application: UIApplication, didFinishLaunchingWithOptions launchOptions: [UIApplication.LaunchOptionsKey: Any]? = nil) -> Bool {

        let request = HelloRequest(name: "AppDelegate", unknownFields: OkioByteString.companion.EMPTY)
        gRPCClient.sendHello(message: request) { reply, error in
            print("Reply: \(reply?.message) - Error: \(error?.message)")
        }
        return true
    }
}
```
In the terminal with the server running, we will see the following message:
```
2022/02/17 23:51:28 Received: AppDelegate
```
And in the console output of XCode there are a lot of logs on the state of the channel and our print:
```

2022-02-17T23:51:27+0700 debug gRPC : old_state=idle grpc_connection_id=7E6AA2F6-3F83-4448-BEB1-F0C3C85131AD/0 new_state=connecting connectivity state change

2022-02-17T23:51:27+0700 debug gRPC : grpc_connection_id=7E6AA2F6-3F83-4448-BEB1-F0C3C85131AD/0 connectivity_state=connecting vending multiplexer future

2022-02-17T23:51:27+0700 debug gRPC : grpc_connection_id=7E6AA2F6-3F83-4448-BEB1-F0C3C85131AD/0 making client bootstrap with event loop group of type NIOTSEventLoop

2022-02-17T23:51:27+0700 debug gRPC : grpc_connection_id=7E6AA2F6-3F83-4448-BEB1-F0C3C85131AD/0 Network.framework is available and the EventLoopGroup is compatible with NIOTS, creating a NIOTSConnectionBootstrap

2022-02-17 23:51:28.487194+0700 mokoApp[34306:38235189] [] nw_protocol_get_quic_image_block_invoke dlopen libquic failed

2022-02-17T23:51:28+0700 debug gRPC : connectivity_state=connecting grpc_connection_id=7E6AA2F6-3F83-4448-BEB1-F0C3C85131AD/0 activating connection

2022-02-17T23:51:28+0700 debug gRPC : h2_settings_max_frame_size=16384 grpc.conn.addr_remote=127.0.0.1 grpc_connection_id=7E6AA2F6-3F83-4448-BEB1-F0C3C85131AD/0 grpc.conn.addr_local=127.0.0.1 HTTP2 settings update

2022-02-17T23:51:28+0700 debug gRPC : connectivity_state=active grpc_connection_id=7E6AA2F6-3F83-4448-BEB1-F0C3C85131AD/0 connection ready

2022-02-17T23:51:28+0700 debug gRPC : grpc_connection_id=7E6AA2F6-3F83-4448-BEB1-F0C3C85131AD/0 old_state=connecting new_state=ready connectivity state change

2022-02-17T23:51:28+0700 debug gRPC : grpc.conn.addr_remote=127.0.0.1 grpc_connection_id=7E6AA2F6-3F83-4448-BEB1-F0C3C85131AD/0 grpc_request_id=682A7FB4-4543-4609-A2C0-498B8A1445A3 grpc.conn.addr_local=127.0.0.1 activated stream channel

2022-02-17T23:51:28+0700 debug gRPC : grpc.conn.addr_local=127.0.0.1 grpc_connection_id=7E6AA2F6-3F83-4448-BEB1-F0C3C85131AD/0 grpc.conn.addr_remote=127.0.0.1 h2_stream_id=HTTP2StreamID(1) h2_active_streams=1 HTTP2 stream created

2022-02-17T23:51:28+0700 debug gRPC : h2_active_streams=0 grpc.conn.addr_remote=127.0.0.1 grpc.conn.addr_local=127.0.0.1 grpc_connection_id=7E6AA2F6-3F83-4448-BEB1-F0C3C85131AD/0 h2_stream_id=HTTP2StreamID(1) HTTP2 stream closed

Reply: Optional("Hello AppDelegate") - Error: nil

```
Step 9. iOS: check the operation of the gRPC client inside the feature
Perhaps we will not create a new controller. Let’s add another view model to ConfigViewControllerwe will call its method when the controller appears on the screen and show an alert on an event from EventsListener (commit):
```
override func viewDidLoad() {
  ...
  grpcTestViewModel = AppComponent.factory.grpcTestFactory.createViewModel(eventsDispatcher: EventsDispatcher(listener: self))
  }

override func viewDidAppear(_ animated: Bool) {
    super.viewDidAppear(animated)
    grpcTestViewModel.onMainButtonTap()
}

deinit {
    //Очищаем вью-модель, чтобы сразу же остановить все корутины
    viewModel.onCleared()
    grpcTestViewModel.onCleared()
}
...

extension ConfigViewController: GrpcTestViewModelEventsListener {
    func showMessage(message: String) {
        let alert = UIAlertController(title: "gRPC test", message: message, preferredStyle: .alert)
        present(alert, animated: true, completion: nil)
    }
}
```
As a result, when the application starts, we get:
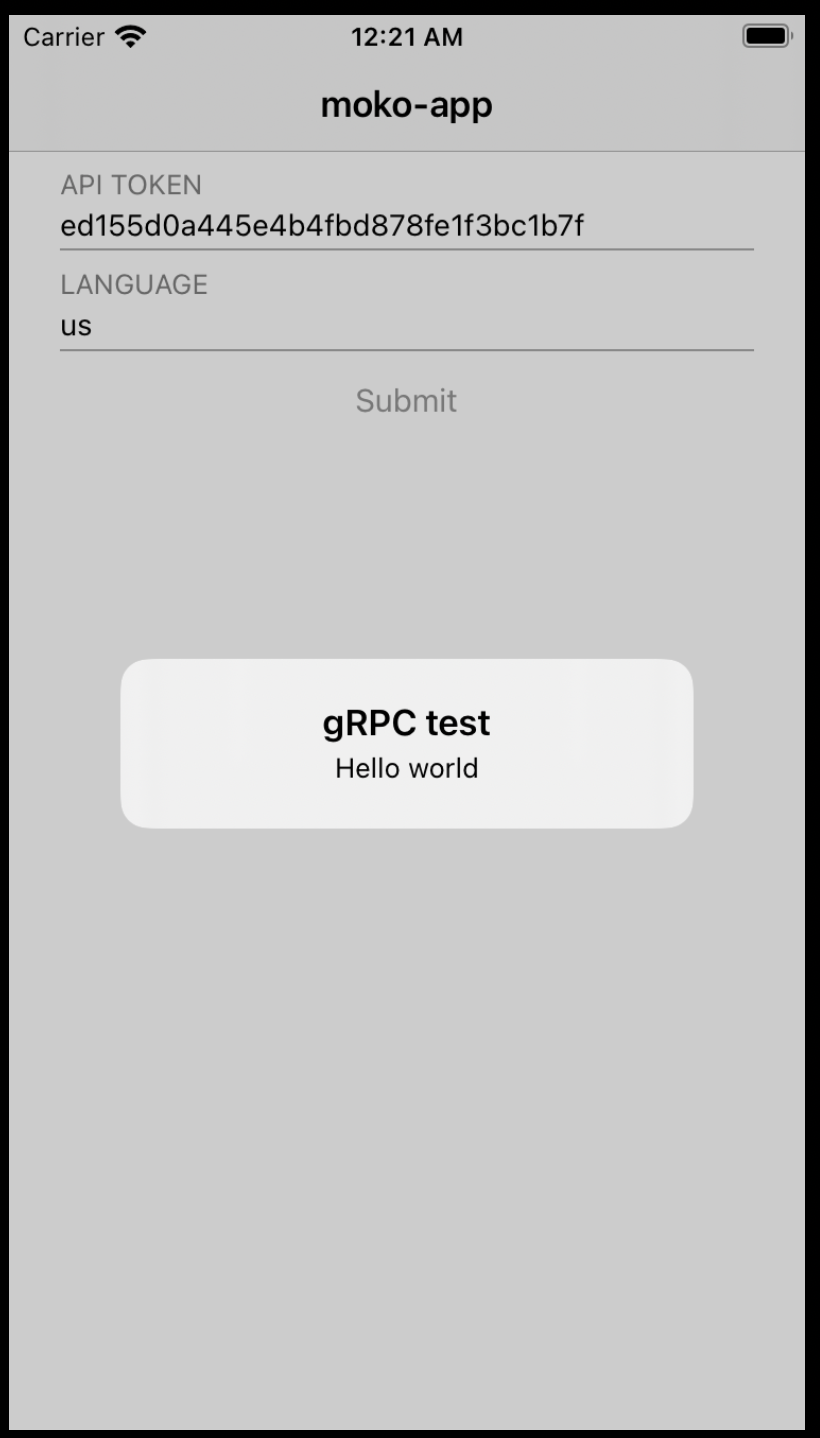
What to do for Android apps
On the Android side, you can use the generated Wire client code by giving it an instance of the platform client. It might look something like this:
```
class WireClientWrapper(grpcClient: GrpcClient): HelloWorldSuspendClient {
    private val greeterClient = GrpcGreeterClient(grpcClient)
    override suspend fun sendHello(message: HelloRequest): HelloReply {
        return greeterClient.SayHello().execute(message)
    }
}
```
```
val grpcOkhttpClient = OkHttpClient().newBuilder()
.protocols(listOf(okhttp3.Protocol.HTTP_2, okhttp3.Protocol.HTTP_1_1))
.build()
val grpcClient = GrpcClient.Builder()
.client(grpcOkhttpClient)
.baseUrl("127.0.0.1:50051")
.build()
val helloClient = WireClientWrapper(grpcClient)
return SharedFactory(
settings = settings,
antilog = antilog,
newsUnitsFactory = newsUnitFactory,
baseUrl = BuildConfig.BASE_URL,
helloWorldClient = helloClient
)
```Results
Of course, there is still a lot of room for improvement in the above solution:
Replace the long implementation of copying NSData in KotlinByteArray with using memcpy.
Add a method to the client interface to set request header values and recreate the channel and clients when it is called.
Implement universal message mapping from
WireMessageinSwiftMessage.
And we will still develop and refine the project template itself. We hope that the goal of the article has been achieved, and everyone who has mastered it will be interested in developing on KMM and especially new non-standard tasks in it.
See you soon!

