Building firmware from sources for Opange PI i96 (Orange PI 2g-iot)
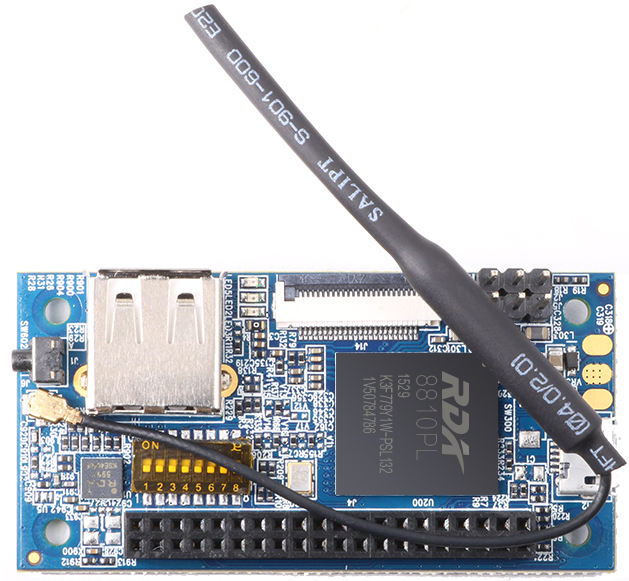
Hello, my name is Dmitry. I once bought an OpangePI i96, but unfortunately the manufacturer has long forgotten about this board; the firmware for it is built on kernel 3.10.62 (the current version at the time of writing article 6.5.1). Therefore, I decided to build my own firmware using the current version of the kernel. The assembly will take place entirely from source code.
To begin with, I would like to note that to build the firmware I used WSL (Windows Subsystem for Linux) version 2, and Ubuntu was installed as a guest system. In principle, everything went together fine, but there were some problems, which will be discussed later. I also want to note that despite the fact that while working on the project, I had to reinstall Windows, I did not lose my files. If for some reason WSL loses the image, the system can be restored from the ext4.vhdx file using the command:
wsl --import-in-place <new_distro_name> <path_to_ext4.vhdx>The main thing is not to lose the ext4.vhdx file and everything will be fine.
Compiling uboot.
First, let’s create a folder in which we will build:
mkdir OrangePI
cd OrangePI
Since the default Uboot runs everything perfectly, there is no point in changing it. Therefore, we will do everything according to the instructions from the authors of OrangePI i96:
wget https://github.com/orangepi-xunlong/toolchain/archive/refs/heads/arm-linux-gnueabi-1.13.1.zip
unzip arm-linux-gnueabi-1.13.1.zip
I would like to note that we will use this toolchain only for compiling uboot.
wget https://github.com/orangepi-xunlong/OrangePiRDA_uboot/archive/refs/heads/master.zip
unzip master.zip
cd OrangePiRDA_uboot-master
We create a config and compile. Your path to the toolchain may be different. The number after j is equal to the number of threads on your processor.
make CROSS_COMPILE=/home/dmitry/OrangePI/toolchain-arm-linux-gnueabi-1.13.1/gcc-linaro-1.13.1-2012.02-x86_64_arm-linux-gnueabi/bin/arm-linux-gnueabi- rda8810_config
make CROSS_COMPILE=/home/dmitry/OrangePI/toolchain-arm-linux-gnueabi-1.13.1/gcc-linaro-1.13.1-2012.02-x86_64_arm-linux-gnueabi/bin/arm-linux-gnueabi- -j16
I got an error during compilation (error while loading shared libraries: libz.so.1). I overcame it with the command:
sudo apt-get install lib32z1After compilation, the file u-boot.rda should appear, remember it, we will need it in the future.
Creating a root directory.
Let’s create a directory rootfs, this will be an image of the file system of our device. For the device to operate correctly, this directory must contain certain folders into which the system directories necessary for operation will subsequently be mounted.
mkdir rootfs
cd rootfs
mkdir -p dev root sys proc run tmp var/run var/log
Kernel compilation.
First you need to decide on the toolchain. The RDA8810PL chip uses the ARMv7 instruction set with hardware support for floating point instructions. I used gcc-linaro-7.5.0-2019.12-x86_64_arm-linux-gnueabihf (hf means hardware floating point support)
wget https://releases.linaro.org/components/toolchain/binaries/7.5-2019.12/arm-linux-gnueabihf/gcc-linaro-7.5.0-2019.12-x86_64_arm-linux-gnueabihf.tar.xz
tar -xvf gcc-linaro-7.5.0-2019.12-x86_64_arm-linux-gnueabihf.tar.xz
Then you need to download the kernel sources from the website kernel.org. At the time of writing the article, the current version is 6.5.1, and we will work with it.
wget https://cdn.kernel.org/pub/linux/kernel/v6.x/linux-6.5.1.tar.xz
tar -xvf linux-6.5.1.tar.xz
cd linux-6.5.1
It should be noted that the Opange PI i96 is built on the RDA8810PL chip, which requires drivers that are not included in the standard kernel. And although we have the sources old kernel from developers . You cannot simply take driver files from the old kernel and put them into the new one, because the kernel architecture has changed since then. The modern kernel uses an architecture called Device Tree.
Previously, the kernel itself initialized devices. And since each single-board had its own set of devices, each had its own kernel. Now the list of devices is specified in the Device Tree file (which has the extension .dts, .dtb after compilation), and the kernel already reads devices from this file. Thanks to this, the kernel of all single-board devices is the same, only the Device Tree file is different.
Fortunately, I corrected the driver files so that they could work with the new kernel. My repository. You need to unpack it into a package with the kernel sources. I would like to note that I first put the original files and then the modified ones, so you can see what I had to correct.
If you suddenly compile something wrong, you can always enter the command:
make distcleanAnd she will return everything to its original form.
Let’s start compiling. Set the default settings. Your path to the toolchain may be different.
make ARCH=arm CROSS_COMPILE=/home/dmitry/OrangePI/gcc-linaro-7.5.0-2019.12-x86_64_arm-linux-gnueabihf/bin/arm-linux-gnueabihf- defconfig
make ARCH=arm CROSS_COMPILE=/home/dmitry/OrangePI/gcc-linaro-7.5.0-2019.12-x86_64_arm-linux-gnueabihf/bin/arm-linux-gnueabihf- menuconfig
Go to the menu and check the options:
System type–>RDA Micro SoCs
Device drivers–>Character devices–>Enable TTY–>Serial Drivers–>RDA Micro serial port support–>Console on RDA Micr serial port
Device drivers–>GPIO Support–>Memory Mapped GPIO drivers–>RDA Micro GPIO controller support
Device drivers–>RDA support
RDA support is not an option but a submenu. You need to enter it and select all the options in it. After that, exit and save.
Compilation j is equal to the number of threads on your processor.
make ARCH=arm CROSS_COMPILE=/home/dmitry/OrangePI/gcc-linaro-7.5.0-2019.12-x86_64_arm-linux-gnueabihf/bin/arm-linux-gnueabihf- -j16You can also compile the kernel in parts:
make ARCH=arm CROSS_COMPILE=/home/dmitry/OrangePI/gcc-linaro-7.5.0-2019.12-x86_64_arm-linux-gnueabihf/bin/arm-linux-gnueabihf- -j16 zImage
make ARCH=arm CROSS_COMPILE=/home/dmitry/OrangePI/gcc-linaro-7.5.0-2019.12-x86_64_arm-linux-gnueabihf/bin/arm-linux-gnueabihf- -j16 dtbs
make ARCH=arm CROSS_COMPILE=/home/dmitry/OrangePI/gcc-linaro-7.5.0-2019.12-x86_64_arm-linux-gnueabihf/bin/arm-linux-gnueabihf- -j16 modules
If you are using WSL and copied the driver files through Windows Explorer, then all folders will be owned by root and you will receive a permission denied error. To avoid this you need to enter the command:
sudo chown -R "имя вашего акаунта":"имя вашего акаунта" drivers/rda After compilation. We install kernel modules in our rootfs folder.
make ARCH=arm CROSS_COMPILE=/home/dmitry/OrangePI/gcc-linaro-7.5.0-2019.12-x86_64_arm-linux-gnueabihf/bin/arm-linux-gnueabihf- modules_install INSTALL_MOD_PATH=../rootfsWe also create the sysroot folder in which the library headers will be stored and install them.
mkdir -p ../sysroot/usr
make ARCH=arm CROSS_COMPILE=/home/dmitry/OrangePI/gcc-linaro-7.5.0-2019.12-x86_64_arm-linux-gnueabihf/bin/arm-linux-gnueabihf- INSTALL_HDR_PATH=../sysroot/usr headers_install
We combine the kernel with the Device tree file with the cat command. Here the question may arise: why is this necessary? After all, we will put the Device tree file in the image. Here I myself do not fully understand (perhaps this is due to the fact that I used different instructions that sometimes contradict each other), but when loading, the file that we attach to the kernel will be used.
cat /home/dmitry/OrangePI/linux-6.5.1/arch/arm/boot/zImage /home/dmitry/OrangePI/linux-6.5.1/arch/arm/boot/dts/unisoc/rda8810pl-orangepi-i96.dtb > zImage+dtbCompiling glibc
glibc is the standard library of the C language. Since all programs in Linux are written in C, nothing will run without this library.
For cross-compilation, you need to set several environment variables. These variables will persist until the console is rebooted.
export PATH=/home/dmitry/OrangePI/gcc-linaro-7.5.0-2019.12-x86_64_arm-linux-gnueabihf/bin:$PATH
export CHOST=arm-linux-gnueabihf
export CC=arm-linux-gnueabihf-gcc
export AR=arm-linux-gnueabihf-ar
export CXX=arm-linux-gnueabihf-g++
So let’s get started:
wget https://ftp.gnu.org/gnu/glibc/glibc-2.38.tar.gz
tar -xzf glibc-2.38.tar.gz
cd glibc-2.38
mkdir build
cd build
../configure --prefix=/usr --host=arm-linux-gnueabihf CFLAGS="--sysroot=/home/dmitry/OrangePI/sysroot -O2" CC=arm-linux-gnueabihf-gcc AR=arm-linux-gnueabihf-ar CXX=arm-linux-gnueabihf-g++
make CC=arm-linux-gnueabihf-gcc AR=arm-linux-gnueabihf-ar CXX=arm-linux-gnueabihf-g++ -j16
make DESTDIR=`pwd`/glibcBuild install
Just in case, I pass the variables to CC AR CXX, although this may not be necessary.
There were also errors during compilation.
fatal error: gmp.h: No such file or directorysolution:
sudo apt-get install libgmp3-dev libmpfr-devfatal error: mpc.h: No such file or directorysolution:
sudo apt-get install libmpc-devNow you can go to the glibcBuild folder and sort the resulting files.
To the rootfs folder:
etc
lib
sbin
usr/bin
usr/lib/*.so
usr/libexec
usr/sbin
usr/share
Hereinafter, we will only put *.so files in the rootfs folder; these are dynamic libraries; files with *.o *.a extensions do not interest us.
To the sysroot folder:
lib
usr/include
usr/lib
We put everything in sysroot; we will use this folder to compile programs.
Busybox compilations
Busybox is a lightweight set of utilities for embedded electronics. Just the thing for a single-payer.
wget https://busybox.net/downloads/busybox-1.36.1.tar.bz2
tar -xvjf busybox-1.36.1.tar.bz2
cd busybox-1.36.1
make CROSS_COMPILE=/home/dmitry/OrangePI/gcc-linaro-7.5.0-2019.12-x86_64_arm-linux-gnueabihf/bin/arm-linux-gnueabihf- defconfig
make CROSS_COMPILE=/home/dmitry/OrangePI/gcc-linaro-7.5.0-2019.12-x86_64_arm-linux-gnueabihf/bin/arm-linux-gnueabihf- -j16
Busybox is installed in the _install folder. All contents of this folder must be transferred to rootfs.
Compiling the libxcrypt library
wget https://github.com/besser82/libxcrypt/releases/download/v4.4.36/libxcrypt-4.4.36.tar.xz
tar -xvf libxcrypt-4.4.36.tar.xz
cd libxcrypt-4.4.36
mkdir build
./configure --prefix=/home/dmitry/OrangePI/libxcrypt-4.4.36/build --host=arm-linux-gnueabihf
make CC=arm-linux-gnueabihf-gcc AR=arm-linux-gnueabihf-ar CXX=arm-linux-gnueabihf-g++ -j16
make install
The contents of the build/lib/*.so folder in rootfs, everything else is in sysroot.
DropBear Compilation
Since the Orange PI i96 does not have any image output methods, the only way to interact with it is through the terminal. Therefore, we will install the DropBear ssh server.
wget https://matt.ucc.asn.au/dropbear/releases/dropbear-2022.83.tar.bz2
tar -xjf dropbear-2022.83.tar.bz2
cd dropbear-2022.83
./configure --prefix=/home/dmitry/OrangePI/rootfs --disable-zlib --host=arm-linux-gnueabihf CC=arm-linux-gnueabihf-gcc LD=arm-linux-gnueabihf-ld
make install
For DropBear to work correctly, you need to generate keys.
cd ../rootfs
mkdir etc/dropbear
dropbearkey -t dss -f etc/dropbear/dropbear_dss_host_key
dropbearkey -t rsa -f etc/dropbear/dropbear_rsa_host_key
Compiling the libnl-3 library.
wget http://www.infradead.org/~tgr/libnl/files/libnl-3.2.25.tar.gz
tar -xzf libnl-3.2.25.tar.gz
cd libnl-3.2.25
mkdir build
./configure --host=arm-linux-gnueabihf --prefix=/home/dmitry/OrangePI/libnl-3.2.25/build
make -j16 CC=arm-linux-gnueabihf-gcc AR=arm-linux-gnueabihf-ar CXX=arm-linux-gnueabihf-g++
make install
cd include
make install
From the build folder we copy everything except include into rootfs. And in sysroot all the folders.
iw compilation
To use the terminal we need a network, iw is a utility for setting up a wi-fi connection.
Before we begin, we need to set the PKG_CONFIG_PATH variable and install the pkg-config package if it does not exist.
export PKG_CONFIG_PATH=/home/dmitry/OrangePI/sysroot/lib/pkgconfig
sudo apt-get install -y pkg-config

wget https://www.kernel.org/pub/software/network/iw/iw-3.15.tar.gz
tar -xzf iw-3.15.tar.gz
cd iw-3.15
make -j16 CC=arm-linux-gnueabihf-gcc AR=arm-linux-gnueabihf-ar CXX=arm-linux-gnueabihf-g++
cp iw ../rootfs/sbin/
Compiling the OpenSSL library
export ARCH=arm
export CROSS_COMPILE=arm-linux-gnueabihf-

wget https://www.openssl.org/source/openssl-1.1.1h.tar.gz
tar -xzf openssl-1.1.1h.tar.gz
cd openssl-1.1.1h
mkdir build
./Configure linux-generic32 --prefix=/home/dmitry/OrangePI/openssl-1.1.1h/build
make -j16 CC=arm-linux-gnueabihf-gcc AR=arm-linux-gnueabihf-ar CXX=arm-linux-gnueabihf-g++
make install
As always, the lib\ folder is in rootfslibcrypto.so and lib\libssl.so. Everything else is in sysroot.
Compiling wpa_supplicant
Using iw, we can only establish a connection with access points that do not use encryption. To establish an encrypted connection, you will need the wpa_supplicant package.
wget https://w1.fi/releases/wpa_supplicant-2.10.tar.gz
tar -xzf wpa_supplicant-2.10.tar.gz
cd wpa_supplicant-2.10/wpa_supplicant
cp defconfig .config
I had to make some changes to the .config file. First, I uncommented the lines with the paths to OpenSSL and corrected these paths:
CFLAGS += -I/home/dmitry/OrangePI/sysroot/include
CFLAGS += -I/home/dmitry/OrangePI/sysroot/include/libnl3
LIBS += -L/home/dmitry/OrangePI/sysroot/lib
Then I commented out the following lines:
#CONFIG_DRIVER_MACSEC_LINUX=y
#CONFIG_MACSEC=y
#CONFIG_CTRL_IFACE_DBUS_INTRO=y
#CONFIG_CTRL_IFACE_DBUS_NEW=y
Compilation:
make CC=arm-linux-gnueabihf-gcc AR=arm-linux-gnueabihf-ar CXX=arm-linux-gnueabihf-g++ -j16
make install DESTDIR=/home/dmitry/OrangePI/rootfs
Creating configuration files
We create a file with the root user whose home folder is /. That is, when we log in, we will see the root directory.
cd rootfs/etc
cat >> passwd
root:x:0:0:root:/:/bin/sh
^D
The ^D symbol means you need to press CTRL+D to finish editing.
The shadow file contains encrypted passwords. The root password is encrypted here.
cat >> shadow
root:LlNBpbQmj8p7g:1:0:99999:7:::
^D
We will also create a file group. The wheel group is needed for wpa_supplicant.
cat >> group
root:x:0:root
wheel:x:10:root
^D
The wpa_supplicant.conf file stores information about which network we will connect to. The password is also stored as a hexadecimal number. To get this number you need to install wpa_supplicant on your computer and use the wpa_passphrase utility:
wpa_passphrase i96 123456789Here network name i96 password 123456789
cat >> wpa_supplicant.conf
ctrl_interface=DIR=/var/run/wpa_supplicant GROUP=wheel
network={
       ssid="i96"
        psk=c96a7f97cfee8b9f9ce9aae88c4cc6c5f1962f6dca48ea7444d80a70a300b5b1
}
^D
The resolv.conf file contains the DNS server addresses:
cat >> resolv.conf
nameserver 1.1.1.1
nameserver 1.0.0.1
^D
Let’s add a few more files for the network configuration.
cat >> hosts
127.0.0.1	localhost
^D
cat >> hostname
OrangePI
^Dcat >> host.conf
order hosts, bind
multi on
^Dcat >> networks
loopback 127.0.0.0
localnet 127.0.0.0
^DNext will be files that are too large to be entered using cat. A link to these files will be provided at the end of the article.
The profile file contains the initial value of the PATH variable. This is useful, for example wap_suplicant is installed not in /usr/sbin but in /usr/local/sbin. I also added paths to the opt directory.
System initialization scripts.
The inittab file is responsible for things like booting, shutting down, and pressing AltCtrlDel. Reference.
cat >> inittab
::sysinit:/etc/rc.d/rc.S
::respawn:-/bin/sh -l
::ctrlaltdel:/sbin/reboot
::shutdown:/etc/rc.d/rc.0
^D
Let’s create a folder for scripts:
mkdir rc.d
cd rc.d
The rc.0 script unmounts disks upon shutdown.
cat >> rc.0
#!/bin/sh
sync
/sbin/umount -a -r > /dev/null 2>&1
^D
Next is the rc.S file that is executed upon loading:
Hidden text
#!/bin/sh
# Первым делом смонтируем procfs. Без нее ничего не полетит
/bin/mount -v proc /proc -t proc 1> /dev/null

/bin/mkdir /dev/pts
/bin/mount -t devpts -o noexec,nosuid,gid=5,mode=0620 devpts /dev/pts

PATH=/bin:/usr/bin:/sbin:/usr/sbin
# Мы не будем насиловать карточку временным файлами, будем держать их в пямяти
/bin/mount -t tmpfs none -o size=150M,nodev,nosuid,noatime /tmp
/bin/mount -t tmpfs none -o size=10M,nodev,nosuid,noatime /var/log
/bin/mount -t tmpfs none -o size=5M,nodev,nosuid,noatime /var/run
/bin/mount -t tmpfs none -o size=5M,nodev,nosuid,noatime /run

# Удалим (если он был) файл о смонтированных ранее ФС и создадим пустой
/bin/rm -f /etc/mtab{,~,.tmp} && /bin/touch /etc/mtab

# Смонтируем sysfs и запустим ldconfig для обновления информации о библиотеках
/bin/mount -v sysfs /sys -t sysfs 1> /dev/null
if [ -x /sbin/ldconfig ]; then
  /sbin/ldconfig 1> /dev/null
fi

# Запустим системный логгер и логгер ядра
/sbin/syslogd 2> /dev/null
sleep 1
/sbin/klogd -c 3 1> /dev/null

modprobe loop 1> /dev/null 2> /dev/null

if [ -x /etc/rc.d/rc.modules ]; then
. /etc/rc.d/rc.modules
fi

if [ -x /etc/rc.d/rc.network ]; then
. /etc/rc.d/rc.network start
fi

# Очистим экран
/bin/setterm -blank 0 2>/dev/null

# Создадим файл приглашений
echo > /etc/motd
echo "`/bin/uname -a | /usr/bin/cut -d\  -f1,3`." >> /etc/motd
echo >> /etc/motd

# Выдадим прилашение для входа в консоль
echo "Press <Enter>..."
Network initialization script rc.network:
Hidden text
#!/bin/sh

PATH=/bin:/sbin:/usr/bin:/usr/sbin:/usr/local/sbin

net_start() {

    ifconfig wlan0 up
	iw dev wlan0 scan > /dev/null
	wpa_supplicant -B -D nl80211 -i wlan0 -c /etc/wpa_supplicant.conf
	sleep 2
	ifconfig lo up 127.0.0.1
    route add -net 127.0.0.0 netmask 255.255.255.0 lo
	ifconfig wlan0 192.168.1.252 netmask 255.255.255.0
	route add default gw 192.168.1.1 wlan0
	dropbear
	route
}

net_stop() {
    if [ -f /var/run/udhcpc.pid ]; then
      kill -9 `cat /var/run/udhcpc.pid`
      rm /var/run/udhcpc.pid
    fi
    ip set link wlan0 down
}

case "$1" in
'start')
    net_start
    ;;
'stop')
    net_stop
    ;;
'restart')
    net_stop
    net_start
    ;;
*)
    echo "Usage $0 start|stop|restart"
esac
The script scans access points and connects to an access point whose parameters are written in the wpa_supplicant.conf file. After this, an IP address is assigned. If you want to connect to an unsecured access point (although I would not recommend creating such access points), then instead of the line wap_suplicant you need to enter the line iw dev wlan0 connect “name of the unsecured access point”. And if you just want to know the connection status, you can use the iw dev wlan0 link command. ifconfig -a command lists network interfaces
We need to clarify here. My script is designed so that the IP address is always selected 192.168.1.252. And the IP address of the router with which the single-board connects is 192.168.1.1. But if you want the system to find the router’s address during initialization and also assign itself an unoccupied IP. Need lines:
ifconfig wlan0 192.168.1.252 netmask 255.255.255.0
route add default gw 192.168.1.1 wlan0
Replaced by:
udhcpc -i wlan0 -p /var/run/udhcpc.pid -s /etc/scripts/udhcp.sh And add the script to the /etc/scripts folder udhcp.sh
Hidden text
#!/bin/sh

ACTION="$1"

case "${ACTION}" in
"renew"|"bound")
    /sbin/ifconfig ${interface} ${ip} netmask ${subnet}
    /sbin/route del default > /dev/null 2>&1
    for i in "${router}"; do
        /sbin/route add default gw $i dev ${interface}
    done
    ;;
esac
Don’t forget to allow all scripts to run.
chmod u+x rc.0
chmod u+x rc.S
chmod u+x rc.network
Creating the uInitrd file.
So that the system boot is considered successful. The kernel must do two things. This is to mount the root directory and execute the initialization script. But in order to mount the root directory on an SD card partition, for example, you need to load the SD card drivers, but in order to load them you need to already have a root directory from which we will load the drivers. This raises a dilemma: to mount the root directory we need to already have a root directory. To break this vicious circle, a uInitrd image is created, which contains drivers for further work. This image unfolds in RAM.
By the way, if you put a boot script in the uInitrd image, for example the following init file
Hidden text
#! /bin/sh
mount -t sysfs sysfs /sys
mount -t proc proc /proc
mount -t devtmpfs udev /dev
mkdir /dev/pts
mount -t devpts -o noexec,nosuid,gid=5,mode=0620 devpts /dev/pts
/sbin/syslogd
sleep 1
/sbin/klogd -c 3
. /etc/rc.d/rc.network start
dropbear
sysctl -w kernel.printk="2 4 1 7"
/bin/sh
poweroff -f
Then the system will execute it and stop there, and we will get Linux with a root system mounted in RAM, any changes in which will disappear after a reboot.
So let’s start creating uInitrd. First we archive the rootfs folder and then compress it with the gzip utility.
cd rootfs
find . | cpio -H newc -ov --owner root:root > ../initramfs.cpio
cd ..
gzip initramfs.cpio
The mkimage utility adds the header needed by u-boot.
mkimage -A arm -T ramdisk -n uInitrd -d initramfs.cpio.gz uInitrdCreating the boot.scr file.
boot.scr is the system boot script. This script is for u-boot.
Create the boot.cmd file
setenv bootargs "earlycon initcall_debug console=ttyRDA2,921600n8 root="/dev/mmcblk0p2" rootfstype="ext4" rootwait rw"
ext2load mmc 0:1 ${kernel_addr} zImage+dtb
ext2load mmc 0:1 ${script_addr} rda8810pl-orangepi-i96.dtb
ext2load mmc 0:1 ${initrd_addr} uInitrd
ext2load mmc 0:1 ${modem_addr} modem.bin
mdcom_loadm ${modem_addr}
mdcom_check 1
bootz ${kernel_addr} ${initrd_addr}:${filesize} ${script_addr}
And compile it using the mkimage utility:
mkimage -C none -A arm -T script -d boot.cmd boot.scrThe modem.bin file is required; without it, the kernel will not start. In addition, it is needed if you want to transfer a file via UART to u-boot. For example, when I edited driver files, I constantly had to download new kernels, but rewriting them to the SD card took a very long time. Therefore, I created an image without the system kernel. As a result, u-boot loaded but could not load the kernel and the loading stopped. After that, I entered the loady command into the u-boot console, this switched u-boot into file receiving mode (this command does not work without modem.bin) and in the TerTetm menu File->Transfert->YMODEM->send, after sending the kernel, I loaded by his command:
0x82000000 ${initrd_addr}:${filesize} ${script_addr}Link to modem.bin at the end of the article.
Build the image
Well, actually all the preparations are over, it will be faster.
First, let’s create a 2 megabyte header:
dd if=/dev/zero bs=1M count=2 of="NewImg.img"We copy u-boot at offset 256. 256 is not 256 bytes but 256 blocks (dd is a block copy utility) by default one block is 512 bytes.
dd if=OrangePiRDA_uboot-master/u-boot.rda conv=notrunc seek=256 of="NewImg.img"Let’s create a download section. And the partition for the root directory here I set the size to 300MB but you can increase it if you wish:
dd if=/dev/zero bs=1M count=50 of="NewImg.img"1
dd if=/dev/zero bs=1M count=300 of="NewImg.img"2
We create file systems on these partitions.
mkfs.ext2 -L BOOT "NewImg.img"1
mkfs.ext4 -O ^metadata_csum -F -b 4096 -E stride=2,stripe-width=1024 -L rootfs "NewImg.img"2
We mount the boot directory and copy the device tree system kernel file and boot script into it:
mkdir -p /tmp/tmp
sudo mount "NewImg.img"1 /tmp/tmp
sudo cp -rf linux-6.5.1/zImage+dtb /tmp/tmp
sudo cp -rf linux-6.5.1/arch/arm/boot/dts/unisoc/rda8810pl-orangepi-i96.dtb /tmp/tmp
sudo cp -rf uInitrd /tmp/tmp
sudo cp -rf boot.cmd /tmp/tmp
sudo cp -rf boot.scr /tmp/tmp
sync
sudo umount /tmp/tmp
Mount the second directory and copy the contents of the rootfs folder into it:
sudo mount "NewImg.img"2 /tmp/tmp
sudo cp -rT rootfs /tmp/tmp
sync
sudo umount /tmp/tmp
Let’s combine all the parts into one:
dd if="NewImg.img"1 conv=notrunc oflag=append bs=1M seek=2 of="NewImg.img"
dd if="NewImg.img"2 conv=notrunc oflag=append bs=1M seek=52 of="NewImg.img
Creating a partition table.
So far the image is not working because there is no partition table. The partition table is created using the fdisk program.
fdisk "NewImg.img"
o
n
p
1
4096
+50M

n
p
2
106496

w
After starting editing, we enter the “o” command to create an empty MBR partition table. Then use the “n” command to create a new partition. Select the type number and the first sector. The fact is that the sector size is 512 bytes, that is, one kilobyte is equal to two sectors. The header size is 2 megabytes, that is, 2048 kilobytes or 4096 sectors. The partition size can be specified in megabytes. We do the same with the second section, the only difference being that the program will automatically suggest the last sector and all you have to do is agree with it. Exit with w command.
The partition table can be viewed with the command:
sudo parted NewImg.img unit s printYou can also mount these partitions, only the offset must be specified not in sectors but in bytes (2097152 = 4096 * 512) and (54525952 = 106496 * 512).
sudo mount -o loop,offset=2097152 NewImg.img /tmp/tmp
sudo mount -o loop,offset=54525952 NewImg.img /tmp/tmp
All that remains is to write the image to an SD card, for example using Win32DiskImager.
Launch
As I already said, you need to configure an access point on the router with the name i96 and the password 123456789, the router’s IP should be 192.168.1.1. Network parameters are configured in the /etc/wpa_supplicant.conf file and IP in the /etc/rc.d/rc.network file. After turning it on, you need to wait a while. i96 is not the fastest single-board device. Login root root.
Of course, busybox provides a wide selection of applications, but there are not always enough of them. Where can you get applications from? Well, firstly, they can be compiled from source, but this takes a very long time, so there are projects on the network that provide already compiled packages: Entware and Optware. Here forum page Here you need to select the instruction set of our chip. Let’s install Entware as an example.
Go to the root folder and download the installation script.
cd /root
wget http://bin.entware.net/armv7sf-k3.2/installer/generic.sh
chmod u+x generic.sh
./generic.sh
After this we will get a whole root directory in the opt folder. We will also have a package manager called opkg. For example, let’s install an sftp server; it will allow you to transfer files to a single-board platform using the WinSCP application:
opkg update
opkg install openssh-sftp-server
There is a small point here. The fact is that we compiled DropBear from sources and it is located in the root directory, so it looks for an sftp server in the /usr/libexec/sftp-server directory. And the sftp server is installed in the opt directory. So that they can find each other, you need to create a symbolic link with a command.
ln -s /opt/lib/sftp-server /usr/libexec/sftp-serverAfter rebooting, the sftp server will start working. You can also install the nano text editor. I tried to install Midnight commander, but the arrows and function keys did not work, so I could not even exit it. That’s all.
Files modem.bin, profile, protocols, services, termcap. (If the link does not work, then the files can be obtained from the finished image)
My repository with kernel files.
Collected image. (In principle, it should work on Orange PI 2g-iot, but I don’t have this board, I can’t check.)