Browser game development using Phaser3, React, Typescript
I think it’s no secret that every self-respecting software developer should have at least one pet project in his portfolio, or better yet a full-fledged product that provides additional permanent income. There are a great many subject areas and application topics, but among them there is one that deserves special attention – developing your own game.
Benefits of Game Development
First of all, you should understand that game development is a rather labor-intensive process. As a rule, it includes both knowledge of the features of the front-end and back-end and all related server technologies, especially when it comes to multiplayer games. In addition, it is often necessary to think about performance, resources used, architecture and algorithms. You will need to improve your knowledge of mathematics, geometry, and physics. The skills of an artist, albeit to a minimal extent, will also be very useful. And if the game has a commercial goal, then marketing and market analysis will come in handy. As a result, game development allows you to improve your skills so much that any interview or work in a commercial company on various web services will seem like a cakewalk. Moreover, with the game in your portfolio you will stand out among other candidates for vacancies. Being a game developer is fun and cool.
Where to begin?

A browser game is a worthy idea, but you need to keep up with the times and use the latest technology. In this article I will use and try to reveal the link:
Typescript
React
Webpack
HTML/CSS
Phaser3
Of course, in addition to technical skills, you should remember the basic concepts:
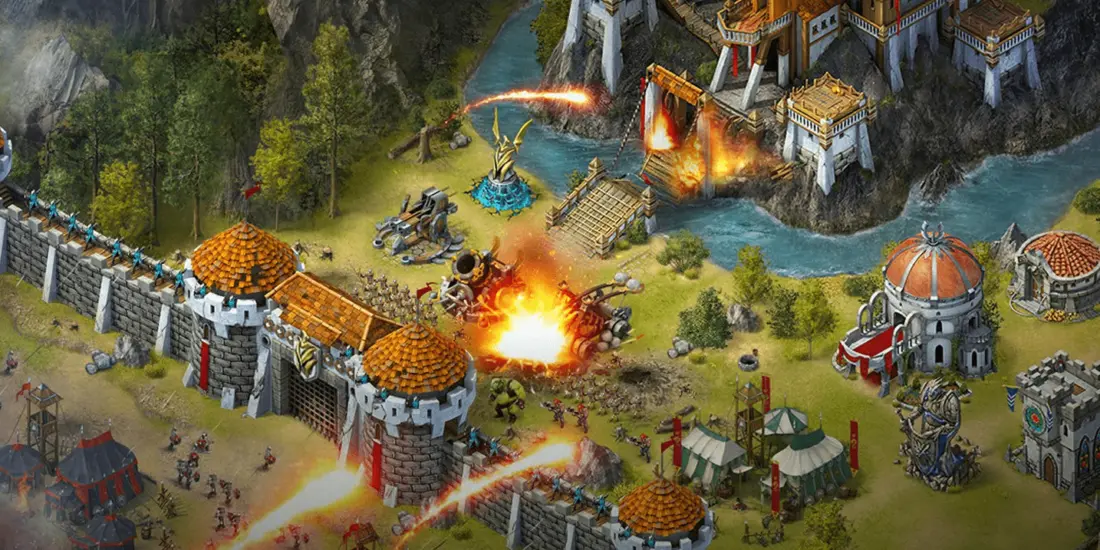
A school-level understanding of these subjects is quite sufficient. As art materials, you can take ready-made resources, sprites, models from other games in the public domain, for example Warcraft 2. All materials from the article are not used for commercial purposes.

Why Phaser3?

Because at the moment it is the most frequently used and actively developing open-source framework for developing browser games and interactive applications in JavaScript/TypeScript
What will your evidence be?

On the official Phaser resources you can find countless code examples, games and best practices. Also among the advantages: regular updates and new features, a huge community of developers, open and complete documentation, books are available from the creator of the framework, Richard Davey @photonstorm
Practice
https://github.com/tfkfan/phaser3-game-demo
Above is a link to a demo of the project. Now, in order.
Requirements: NodeJS >= v20, NPM >= v10
First, let’s upload the project. Install dependencies and run:
npm install
npm start
The demo contains 2 related, but initially not particularly good with each other, technologies – React and Phaser. In order for them to work together without problems, in Index.html different containers are declared, each of them binds its own framework accordingly:
<div id="root" class="app-container">
....

<div id="game-root">
Please note that the React container with id = “root” is located first; all UI of the project will be built on it, a block with a z-index different from zero (for rendering the UI on top of game scenes), non-static and positioned, which adds convenience to the layout. The id=”game-root” block uses only the canvas, so you can sacrifice its positioning, we stick it to the right left edge with absolute positioning.
Any Phaser game starts with a framework configuration.
phaser-game.ts :
const config = {
  type: Phaser.WEBGL, // Тип приложения - WEBGL/CANVAS
  parent: 'game-root',
  canvas: document.getElementById('game-canvas') as HTMLCanvasElement,
  width: window.innerWidth ,
  height: window.innerHeight,
  pixelArt: true,
  scene: [BootstrapScene, GameScene],
  physics: {  // подключение физического движка
    default: 'arcade',
    arcade: {
      debug: false
    }
  }
}
All parameters, in principle, should be intuitive, but the most important of them is the set of scenes:
scene: [BootstrapScene, GameScene]
Scenes are the main object for rendering game content; all resources, events and processes in the game pass through it. The first of them is used as a preloader. All resources loaded in the first scene will be available in others. Resources can be different, these are sprite sheets, animation atlases, sound files, Tilemap files, shaders, etc.
Any scene has 4 important functions, changing which you can control the game logic:
preload – loads resources, and that’s all.
init – starts next. Allows you to receive data when transitioning from the previous scene, initializes game logic.
create – allows you to create objects and bind them to the scene.
Most game objects are easy enough to declare in this method.
Under the hood, they update themselves in the game loop.update – game cycle. Here you can add additional logic when the basic functionality of the method create is no longer enough.
The constructor passes the string key of this scene.
export default class BootstrapScene extends Phaser.Scene {
    constructor() {
        super('bootstrap')
    }

    init() {
        store.dispatch(setLoading(true))
    }

    preload() {
        this.load.on(Phaser.Loader.Events.PROGRESS, (value: number) => {
            CONTROLS.setProgress(100 * value);
        });
        this.load.tilemapTiledJSON('worldmap', './assets/maps/new/map01merged.json');
        this.load.image('tiles', './assets/maps/new/tiles.png');
        this.load.atlas('mage', './assets/playersheets/mage.png', './assets/playersheets/mage.json');
        this.load.image('fireball', './assets/skillsheets/fire_002.png');
        this.load.spritesheet('buff', './assets/skillsheets/cast_001.png', {frameWidth: 192, frameHeight: 192});
        this.load.image('face', './assets/images/face.png');
        this.load.spritesheet('fireballBlast', './assets/skillsheets/s001.png', {frameWidth: 192, frameHeight: 192});
        this.load.audio('intro', ['./assets/music/phaser-quest-intro.ogg']);
        this.load.glsl('fireball_shader', './assets/shaders/fireball_shader.frag');
    }

    create() {
        CONTROLS.setProgress(100);
        store.dispatch(setLoading(false))

        this.sound.add('intro').play({
            seek: 2.550
        });

        this.add.shader('fireball_shader', window.innerWidth/2, window.innerHeight/2, window.innerWidth ,window.innerHeight);
    }
}
The scene of this preloader also has functionality that allows you to show the loading progress of all registered resources, displaying data using the global control object of React components CONTROLS, but more on that later. We also write instructions for playing music at the start:
this.sound.add('intro').play({
            seek: 2.550
});
The main stage on which all gameplay will be built is GameScene.
Consider the method create:
create() {
        CONTROLS.setVersion(`Phaser v${Phaser.VERSION}`)
        this.input.keyboard.on(Phaser.Input.Keyboard.Events.ANY_KEY_DOWN, (evt: { key: string; }) => {
            this.player.setSkillIndex(this.skillIndexMap[evt.key])
            const direction = this.keymap[evt.key]
            if (direction)
                this.player.walk(direction, true)
        });
        this.input.keyboard.on(Phaser.Input.Keyboard.Events.ANY_KEY_UP, (evt: { key: string; }) => {
            const direction = this.keymap[evt.key]
            if (direction)
                this.player.walk(direction, false)
        });

        this.input.on(Phaser.Input.Events.POINTER_DOWN, (evt: {
            worldX: number;
            worldY: number;
        }) => this.player.attack(new Vector2(evt.worldX, evt.worldY)));

        this.createAnimations()
        this.displayMap()
        this.createPlayer()
        this.cameras.main.startFollow(this.player)

        // examples

        // Animation/Sprite
        this.anims.create({
            key: 'explosion',
            frames: this.anims.generateFrameNumbers('fireballBlast', {start: 0, end: 19, first: 0}),
            frameRate: 20,
            repeat: -1
        })

        this.add.sprite(2500, 1100, "").play('explosion')

        // Arcade Physics / collision

        const items = this.add.group([this.createItem()])
        this.physics.add.collider(this.player, items, (object1: Phaser.Tilemaps.Tile | Phaser.GameObjects.GameObject, object2: Phaser.Tilemaps.Tile | Phaser.GameObjects.GameObject) => {
            object2.destroy(true)
            setTimeout(() => {
                items.add(this.createItem(), true)
            }, 3000)
        })

  }
To draw animations, characters and many other game objects, sprites are used in most cases.
A sprite is a miniature game “container” of textures and animations with various parameters: position coordinates on the playing field, speed, acceleration of movement, etc. For example:
export default class Face extends Phaser.Physics.Arcade.Sprite {
    constructor(scene: Scene, x: number, y: number) {
        // Сцена, координаты, ключ текстуры
        super(scene, x, y, 'face');
        // Привязка к физике
        this.scene.physics.add.existing(this)
        // Привязка к сцене
        this.scene.add.existing(this)
    }
}
To create an animation, after loading the resources, you must also specify a sequence of frames and associate it with a unique key.

Let’s create an explosion animation from 20 texture frames sliced from top to bottom, from left to right fireballBlast:
this.anims.create({
            key: 'explosion',
            frames: this.anims.generateFrameNumbers('fireballBlast', {start: 0, end: 19, first: 0}),
            frameRate: 20,
            repeat: -1
})
The frame width and height, as well as the texture key, are taken from the load in the previous scene:
this.load.spritesheet('fireballBlast', './assets/skillsheets/s001.png', {frameWidth: 192, frameHeight: 192});Next, create a sprite at point (2500, 1100) and start the animation “explosion” using the function play
this.add.sprite(2500, 1100, "").play('explosion')
To create a character we use the function this.createPlayer()
createPlayer(): Mage {
        return this.player = new Mage(this, 2100, 1000, store.getState().application.nickname)
}
Where the character is an object of the Mage class
export default class Mage extends Player {
    private skillFactory: SkillFactory = new SkillFactory(); // Factory объект создания умений
    private skills = ["Fireball", "Buff"] // Всего 2 умения
    private currentSkillIndex = 0 // Индекс текущего умения

    constructor(scene: Scene, x: number, y: number, name:string) {
        super(scene, x, y, "mage", name);
        //Сцена, позиция игрока, ключ текстуры, имя
    }
    // Измений текущее умение
    public setSkillIndex(index: number) {
        if (index === undefined || index < 0 || index > 1)
            return
        CONTROLS.setSkill(index)
        this.currentSkillIndex = index
    }
    // Кастовать умение по цели
    override attack(target: Vector2) {
        this.skillFactory.create(this.scene, this.x, this.y, target, this.skills[this.currentSkillIndex])
        super.attack(target)
    }
}
In turn, it inherits from the Player class with animation logic
moving and attacking character in 8 directions (depending on
key pressed)
//Phaser.Physics.Arcade.Sprite - класс спрайта, используемый в физическом движке и имеющий расширенный функционал
export default abstract class Player extends Phaser.Physics.Arcade.Sprite {
    private animationKey: string;
    private attackAnimationKey: string;
    public isMoving: boolean;
    public isAttack: boolean;
    public name: string;
    public target: Vector2;
    private nameHolder: Phaser.GameObjects.Text;
    private directionState: Map<Direction, boolean> = new Map([
        [Direction.RIGHT, false],
        [Direction.UP, false],
        [Direction.DOWN, false],
        [Direction.LEFT, false]
    ]);
    private directionVerticalVelocity: Map<Direction, number> = new Map([
        [Direction.UP, -GameConfig.playerAbsVelocity],
        [Direction.DOWN, GameConfig.playerAbsVelocity]
    ])
    private directionHorizontalVelocity: Map<Direction, number> = new Map([
        [Direction.RIGHT, GameConfig.playerAbsVelocity],
        [Direction.LEFT, -GameConfig.playerAbsVelocity]
    ])

    protected constructor(scene: Scene, x: number, y: number, textureKey: string, name: string) {
        super(scene, x, y, textureKey);
        this.name = name;
        this.init();
    }

    private init() {
        this.isMoving = false;
        this.isAttack = false;
        this.animationKey = Direction.UP;
        this.scene.physics.add.existing(this)
        this.scene.add.existing(this);

        this.nameHolder = this.scene.add.text(0, 0, this.name, {
            font: '14px pixel',
            stroke: "#ffffff",
            strokeThickness: 2
        }).setOrigin(0.5);
    }

    attack(target: Vector2) {
        this.isAttack = true
        this.target = target
        this.attackAnimationKey = `${this.animationKey}attack`

        this.play(this.attackAnimationKey);
        this.on(Phaser.Animations.Events.ANIMATION_COMPLETE, () => {
            this.isAttack = false;
            this.handleMovingAnimation()
        }, this);
    }

    walk(direction: Direction, state: boolean) {
        if (this.directionState.get(direction) === state)
            return;

        this.directionState.set(direction, state)
        const vec = [0, 0]
        const activeState = Array.from(this.directionState.entries())
            .filter(value => value[1])
            .map(value => {
                if (this.directionVerticalVelocity.has(value[0])) {
                    vec[1] = this.directionVerticalVelocity.get(value[0])
                } else if (this.directionHorizontalVelocity.has(value[0]))
                    vec[0] = this.directionHorizontalVelocity.get(value[0])
                return value[0]
            })
        this.isMoving = activeState.length > 0

        if (activeState.length === 1)
            this.animationKey = activeState[0]
        else if (activeState.length === 2)
            this.animationKey = activeState[1] + activeState[0]

        this.setVelocity(vec[0], vec[1])

        this.handleMovingAnimation()
    }

    private handleMovingAnimation() {
        if (this.isAttack)
            return;
        if (this.isMoving)
            this.play(this.animationKey);
        else {
            this.play(this.animationKey);
            this.stop()
        }
    }

    override preUpdate(time, delta): void {
        super.preUpdate(time, delta);
        this.nameHolder.setPosition(this.x, this.y - 30);
    }
}
To create animations of character movement in all directions and skills using sprites:
createAnimations() {
        GameConfig.playerAnims.map((key) => ({
            key,
            frames: this.anims.generateFrameNames("mage", {
                prefix: key,
                start: 0,
                end: 4
            }),
            frameRate: 8,
            repeat: !key.includes("attack") && !key.includes("death") ? -1 : 0
        })).concat([
            {
                key: 'fireballBlast',
                frames: this.anims.generateFrameNumbers('fireballBlast', {start: 0, end: 19, first: 0}),
                frameRate: 20,
                repeat: 0
            },
            {
                key: 'buff',
                frames: this.anims.generateFrameNumbers('buff', {start: 0, end: 19, first: 0}),
                frameRate: 20,
                repeat: 0
            }
        ]).forEach((config) => this.anims.create(config));
    }
Including using the atlas of magician animations mage.json indicating the coordinates and dimensions of a specific frame:
"frames": {
    "up0": {
      "frame": {
        "x": 0,
        "y": 0,
        "w": 75,
        "h": 61
      }
    },
    "up1": {
      "frame": {
        "x": 0,
        "y": 61,
        "w": 75,
        "h": 61
      }
    },
    "up2": {
      "frame": {
        "x": 0,
        "y": 122,
        "w": 75,
        "h": 61
      }
    },
    "up3": {
      "frame": {
        "x": 0,
        "y": 183,
        "w": 75,
        "h": 61
      }
    },
    "up4": {
      "frame": {
        "x": 0,
        "y": 244,
        "w": 75,
        "h": 61
      }
    },
....
Phaser has rich functionality, including convenient manipulation of input devices. This line allows you to attach a handler for pressing any keyboard button:
this.input.keyboard.on(Phaser.Input.Keyboard.Events.ANY_KEY_DOWN, (evt: { key: string; }) => {
            this.player.setSkillIndex(this.skillIndexMap[evt.key])
            const direction = this.keymap[evt.key]
            if (direction)
                this.player.walk(direction, true)
});
Similarly with the mouse, add click processing:
this.input.on(Phaser.Input.Events.POINTER_DOWN, (evt: {
            worldX: number;
            worldY: number;
 }) => this.player.attack(new Vector2(evt.worldX, evt.worldY)));
The skill, or shot, is an important part of the game. This is an abstract class that itself is also a sprite and contains animation rendering functions. The number of textures doesn’t matter. Method play one way or another will launch the desired animation.
export abstract class Skill extends Phaser.Physics.Arcade.Sprite {
    protected target: Vector2;
    protected initialPosition: Vector2;

    private finallyAnimated = false;

    protected constructor(scene: Phaser.Scene, x: number, y: number, image: string, target: Vector2) {
        super(scene, x, y, image, 0);
        this.scene.add.existing(this);
        this.scene.physics.add.existing(this)
        this.target = target;
        this.initialPosition = new Vector2(x, y)
        this.init()
    }

    protected preUpdate(time: number, delta: number) {
        super.preUpdate(time, delta);
        if (!this.finallyAnimated && new Vector2(this.x, this.y).distance(this.target) < GameConfig.skillCollisionDistance) {
            this.finallyAnimated = true
            this.setVelocity(0, 0)
            this.animateFinally().then(sprite => this.destroy(true))
                .catch(e => this.destroy(true))
        }
    }

    protected abstract playFinalAnimation(): void

    animateFinally(): Promise<Skill> {
        return new Promise((resolve, reject) => {
            try {
                this.on(Phaser.Animations.Events.ANIMATION_COMPLETE, (animation: Phaser.Animations.Animation) => {
                    try {
                        resolve(this)
                    } catch (e) {
                        reject(e)
                    }
                }, this);
                this.playFinalAnimation()
            } catch (e) {
                reject(e)
            }
        })
    }

    init(): void {
        const vel = new Vector2(this.target.x - this.initialPosition.x, this.target.y - this.initialPosition.y).normalize()
        this.setPosition(this.initialPosition.x, this.initialPosition.y)
        this.setVelocity(vel.x * GameConfig.skillAbsVelocity, vel.y * GameConfig.skillAbsVelocity)
    }
}
Fire ball
export class Fireball extends Skill {
    constructor(scene: Phaser.Scene, x: number, y: number, target: Vector2) {
        super(scene, x, y, "fireball", target);
    }

    override init() {
        super.init();
        this.setScale(0.02, 0.02);
    }

    override playFinalAnimation() {
        this.play("fireballBlast");
        this.setScale(1, 1)
    }
}
Buff
export class Buff extends Skill {
    constructor(scene: Phaser.Scene, x: number, y: number, target: Vector2) {
        super(scene, x, y, "buff", target);
    }

    override playFinalAnimation() {
        this.play("buff");
    }

    override init(): void {
        this.setPosition(this.initialPosition.x, this.initialPosition.y)
    }
}
It’s also worth mentioning the game’s collision handling mechanics. For this, the functionality of the arcade physics engine is used.
Let’s create an object – a face, as a group of objects, for its subsequent
respawn after 3 seconds after the character collides with him.
createItem(): Face {
        return new Face(this, 2500, 1100)
}
// Arcade Physics / collision
const items = this.add.group([this.createItem()])
this.physics.add.collider(this.player, items, (object1: Phaser.Tilemaps.Tile | Phaser.GameObjects.GameObject, object2: Phaser.Tilemaps.Tile | Phaser.GameObjects.GameObject) => {
object2.destroy(true) // Уничтожение объекта со сцены при столкновении
setTimeout(() => {
items.add(this.createItem(), true) // пересоздание
}, 3000)
})
Drawing the playing field
The game card is a set of files: map01merged.json, tiles.png, tiles.tsx ( not to be confused with typescript tsx file).
Used as a level editor – Tileddesigned for building any, including isometric levels, maps based on tiles and tilesets.
Rich Tiled support in Phaser allows you to flexibly operate with the map tiles themselves – the cells. They can be replaced, deleted, applied effects and handling collisions of game objects with them.

Map rendering is very simple
displayMap() {-------------------------------------------------------------------------------------------------------------------------------------------------------------------------------------------------------------------------------------------------
        this.map = this.add.tilemap('worldmap');
        const tileset = this.map.addTilesetImage('tiles', 'tiles');
        for (let i = 0; i < this.map.layers.length; i++)
            this.map.createLayer(0, tileset, 0, 0).setVisible(true);
    }
User interface
As I already said, the player’s interaction occurs through input devices and the user interface, which are ordinary React components.

To display debugging information in the upper left corner of the screen:
Declare a component with debugging information
const DebugPanel = () => {
    const [fps, setFps] = useState(0);
    const [version, setVersion] = useState('');
    const [skill, setSkill] = useState(0);
    CONTROLS.registerGameDebugControls({
        setVersion,
        setFps,
        setSkill-----------------------------------------------------------------------------------------
    })

    return (
        <>
            <div>
                <span >
                    Fps: {fps}
                </span>
                <br></br>
                <span >
                    Version: {version}
                </span>
                <br></br>
                <span >
                    Current skill: {skill+1}
                </span>
            </div>
        </>
    );
};

export default DebugPanel;
Bind component hooks to the global CONTROLS object by registering them
CONTROLS.registerGameDebugControls({
        setVersion,
        setFps,
        setSkill
    })
Declare the required logger in the file controls.ts
export type ValueSetter<T> = (T) => void;

// Create your own react controls interface
interface GameDebugControls {
    setVersion: ValueSetter<string>
    setFps: ValueSetter<number>
    setSkill: ValueSetter<number>
}

interface GameLoaderControls {
    setProgress: ValueSetter<number>
}

// Add your own react controls
interface GameControlsMap {
    debug?: GameDebugControls
    loader?: GameLoaderControls
}

class GameControls {
    private controls: GameControlsMap = {}

    // Create your own register controls method
    public registerGameDebugControls(controls: GameDebugControls) {
        this.controls.debug = controls
    }

    public registerGameLoaderControls(controls: GameLoaderControls) {
        this.controls.loader = controls
    }

    // Create your own valueSetter method
    public setFps(fps: number) {
        if (checkExists(this.controls.debug))
            this.controls.debug.setFps(fps)
    }

    public setSkill(skill: number) {
        if (checkExists(this.controls.debug))
            this.controls.debug.setSkill(skill)
    }

    public setVersion(version: string) {
        if (checkExists(this.controls.debug))
            this.controls.debug.setVersion(version)
    }

    public setProgress(progress: number) {
        if (checkExists(this.controls.loader))
            this.controls.loader.setProgress(progress)
    }
}

export const CONTROLS: GameControls = new GameControls()
And calmly call from the game scene
CONTROLS.setVersion(`Phaser v${Phaser.VERSION}`)
CONTROLS.setFps(Math.trunc(this.sys.game.loop.actualFps));
The game login form is exactly the same component:
export const Login = () => {
    const dispatch = useAppDispatch()

    const onStart = (evt) => {
        evt.preventDefault()
        const data = new FormData(evt.target)
        if(!data.get("name")) {
            alert("Name is required")
            return;
        }
        CONTROLS.setProgress(50)
        dispatch(setLoading(true))
        dispatch(setNickname(data.get("name").toString()))
        setTimeout(() => {
            dispatch(setLoading(false))
            dispatch(setCurrentPage(Page.GAME))
            launchGame()
        }, 3000)
    };
    return (
        <div className="center-extended">
            <div className="fade-in">
                <Card className="game-form">
                    <Form onSubmit={onStart} initialValues={{name: "name"}}>
                        <Input type="text" placeholder="Input your name" name="name"/>

                        <Button type="submit" color="success">Start game!</Button>
                    </Form>
                </Card>
            </div>
        </div>
    );
};

export default Login;
To disable click events on a block of React components, just adjust the “pointer-events” property:
document.getElementById("root").style.pointerEvents="none"The value of this CSS property can be changed in specific places where click processing is necessary (buttons, forms, etc.).
Websockets
This demo also includes support for working with websockets. There is a file for working with them network.ts
class Network {
    private socket: any;
    private events: Map<number, [any, OnMessageHandler]> = new Map<number, [any, OnMessageHandler]>()

    constructor() {
        if (!window.WebSocket) {
            // @ts-ignore
            window.WebSocket = window.MozWebSocket;
        }
        if (window.WebSocket) {
            this.socket = new WebSocket("ws://localhost:8085/websocket");
        } else {
            alert("Your browser does not support Web Socket.");
        }

        this.socket.addEventListener('open', (event) => {
            console.log("Connection established");
        });

        this.socket.addEventListener('error', (event) => {
            console.log(event.message);
        });

        this.socket.addEventListener('close', (event) => {
            console.log("Web Socket closed");
        });

        this.socket.addEventListener('message', (evt) => {
            const eventData = JSON.parse(evt.data);
            if (this.events.has(eventData.type)) {
                const arr = this.events.get(eventData.type)
                arr[1].call(arr[0], eventData.data);
            }
        });
    }

    public on(type: number, handler: OnMessageHandler, thisArg:any) {
        this.events.set(type, [thisArg, handler]);
    }

    public send(type: number, data: any = null) {
        if (this.socket.readyState !== WebSocket.OPEN) {
            console.log("Socket is not ready");
            return;
        }

        this.socket.send(this.createEvent(type, data));
    }

    private createEvent = (eventType: number, payload: any = null) => {
        const obj: any = {
            type: eventType,
            data: null
        };
        if (payload) {
            obj.data = payload
        }
        return JSON.stringify(obj);
    }
}

export const network = new Network();
To send a message to the server, just call the send method from anywhere in the application:
network.send(TYPE, JSON_OBJECT)To process an incoming message, it is enough to declare a handler somewhere like this:
network.on(TYPE, (data)=> {}, this)Bottom line
The demo of the game turned out to be quite lively. The skills acquired during the development of even such a small demo are priceless. Now you can easily create your own version of the game, gradually expanding its functionality.

An article will be released soon revealing the backend of multiplayer
Share the material with colleagues, write comments on what topic you would like to see the material