Autoscaling an application under load deployed in Yandex Managed Service for Kubernetes
Introduction
Hi all! I work as a Dev-Ops engineer in a small team and we have been using Yandex Cloud for our services for the 4th month. It so happened that I encountered Kubernetes and cloud computing for the first time, so I have to learn a lot on the go, sometimes on a “bitter” experience. At the moment, our microservices are deployed in a zoned Kubernetes cluster with one worker node, one replica per Deployment. This means that there is no fault tolerance and scalability, and applications will crash at the slightest load.
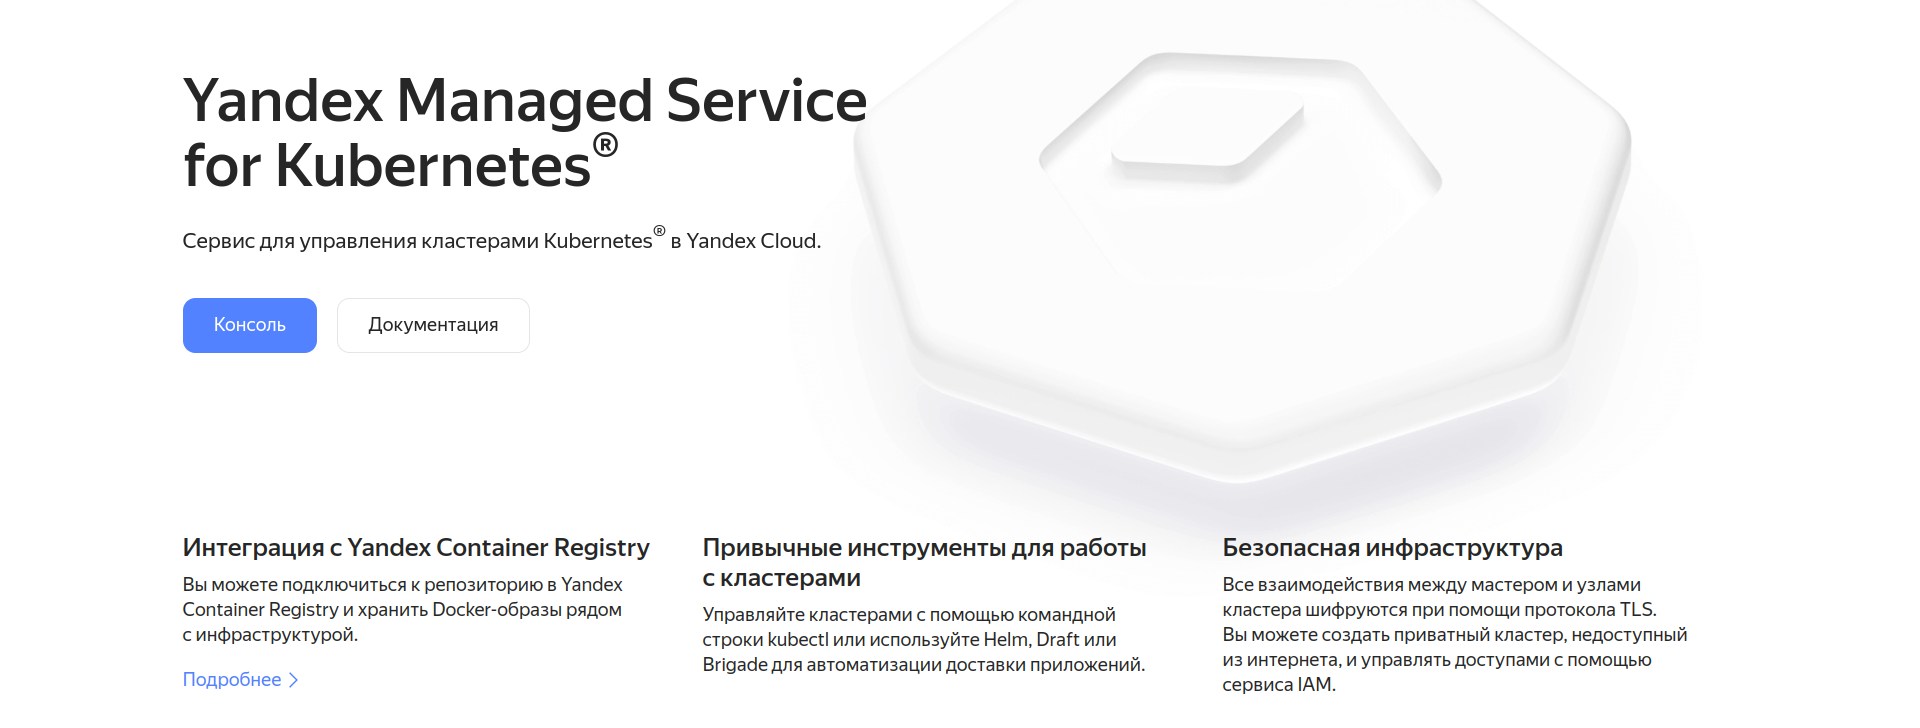
Therefore, while the load comes only from the development team, I decided to take care of the fault tolerance of our services deployed in Yandex Managed Service for Kubernetes in advance. Today I will deploy a cluster on my Kubernetes cloud and show how an autoscaling application will behave under load. To manage the infrastructure, we will use Terraform, to simulate the load by the Yandex Load Testing service (at the Preview stage) from Yandex Cloud.
Before the beginning
You must have your own cloud set up in Yandex Cloud and a billing account added.
Also make sure you have:
yc
kubectl
terraform with customized ~/.terraformrc
a convenient text editor for YAML and HCL, such as Visual Studio Code
Creating a service account and authentication in yc
To use terraform to manage infrastructure, you first need to create a service account, on behalf of which resources will be created.
Let’s go to the directory in the cloud -> Service accounts -> Create a service account. Let’s enter an arbitrary name, a description as desired, and also assign the admin role so that terraform has the ability to create any resources, as well as assign roles.

After creating a service account, you need to create an authorized key for authentication in yc (Yandex Cloud CLI). Select the created service account in the list -> Create an authorized key -> Leave the encryption algorithm as RSA_2048:

Click create and download the JSON file.
Let’s go to the terminal and set up access to the cloud in yc. First, let’s create a profile. Profiles are used to store configuration for accessing different clouds if you have more than one:
$ yc config profiles create yc-k8s-scale
Profile 'yc-k8s-scale' created and activated
Let’s assign the service-account-key (the path to the authorized-key.json we set earlier), cloud-id and folder-id:
$ yc config set cloud-id <your_cloud_id>
$ yc config set folder-id <your_folder_id>
$ yc config set service-account-key <your_path_to_authorized_key>
Make sure you set up cloud access in yc correctly. Let’s try to get a list of all service accounts:
$ yc iam service-account list
+----------------------+--------------+
|          ID          |     NAME     |
+----------------------+--------------+
| ajevk652eetmf0dn96eo | terraform-sa |
+----------------------+--------------+
Terraform
As mentioned earlier, we will deploy the infrastructure not through the GUI cloud console, but through Terraform (Infrastructure as Code tool for infrastructure management). The source code for creating the necessary resources can be viewed on GitHub, we will immediately touch only one file: set_env.sh. It will activate our profile, assign the environment variables needed for Terraform to work with the Yandex Cloud provider (YC_TOKEN, YC_CLOUD_ID, YC_FOLDER_ID):
echo "You are using yc-k8s-scale profile!"
yc config profiles activate yc-k8s-scale

export YC_TOKEN=$(yc iam create-token)
export YC_CLOUD_ID=$(yc config get cloud-id)
export YC_FOLDER_ID=$(yc config get folder-id)
For authentication, an IAM token will be created, the lifetime of which is 12 hours.
Let’s execute terraform plan to find out what resources will be created:
$ terraform plan
Terraform used the selected providers to generate the following execution plan. Resource actions are indicated with the following symbols:
  + create

...

Plan: 10 to add, 0 to change, 0 to destroy.
Let’s accept the changes using the terraform apply command and confirm the action by writing ‘yes’:
$ terraform apply

Plan: 10 to add, 0 to change, 0 to destroy.

Do you want to perform these actions?
  Terraform will perform the actions described above.
  Only 'yes' will be accepted to approve.

  Enter a value: yes
Wait until all resources are created, this may take 15 to 30 minutes.
Overview of created resources
After the command completes, the following resources will be created: one network with 4 subnets, two of which are for cloud resources in the ru-central1-a and ru-central1-b availability zones, the remaining two are for the pods and Kubernetes services of the cluster.
A cluster will also be created in Managed Service for PostgreSQL with database db1 and user user1 with password password12345
One cluster will be created in Managed Service for Kubernetes with two nodegroups:
yc-scale-node-group-1 (default-ru-central1-a subnet, initial number of nodes 1, maximum number of nodes 3)
yc-scale-node-group-2 (default-ru-central1-b subnet, initial number of nodes 0, maximum number of nodes 3)
The nodes use the cheapest configuration to avoid high costs.
Automatic scaling
Yandex Managed service For Kubernetes supports three types of autoscaling:
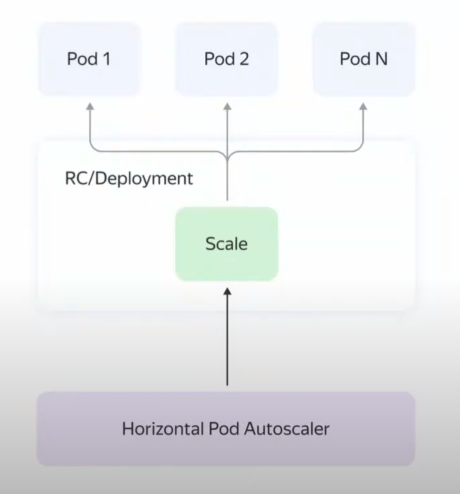
Kubernetes supports two types of scaling: horizontal and vertical. Horizontal scaling creates a resource HPA (HorizatalPodAutoscaler), which monitors one of the metrics (usually CPU or number of requests) and increases / decreases the number of pods, while you can set the minimum and maximum number of pods.
In the case of vertical scaling, a resource is created VPA (VerticalPodAutoscaler), which automatically assigns (or recommends) resources to a pod.
Cloud providers, including Yandex Cloud, offer automatic scaling of work nodes (Cluster Autoscale). In case the scheduler (kube-scheduler) cannot assign a node to a pod due to lack of resources, Managed Service for Kubernetes will create an additional node in one of the node groups and deploy the pod there. In the event that pods can be placed on fewer nodes, Cluster Autoscale will evict the pods from the node and subsequently delete it. The availability zone, initial, minimum, and maximum number of nodes are specified when the node group is created. In our case, terraform will create two nodegroups in two availability zones. In the ru-central1-a availability zone host group, one worker node will initially be created with the ability to scale up to 3. In the ru-central1-b availability zone host group, the initial number of nodes is 0, the maximum number of nodes is the same as the first one node groups – 3.
Creating Resources with kubectl
Let’s set up access to our cluster from kubectl. To do this, you need to get the configuration file using yc:
$ yc managed-kubernetes cluster get-credentials --name yc-scale --external

Context 'yc-yc-scale' was added as default to kubeconfig '/home/azamat/.kube/config'.
Check connection to cluster using 'kubectl cluster-info --kubeconfig /home/azamat/.kube/config'.

Note, that authentication depends on 'yc' and its config profile 'yc-k8s-scale'.
To access clusters using the Kubernetes API, please use Kubernetes Service Account.
Let’s check the number of worker nodes:
$ kubectl get nodes
NAME                        STATUS   ROLES    AGE     VERSION
cl1a9h5asplrhnjmkn5g-unaq   Ready    <none>   6m57s   v1.26.2
Initially, one worker node is used.
Find out the host of the created Managed Service for PostgreSQL cluster:
$ yc postgres hosts list --cluster-name postcreator-psql
+-------------------------------------------+
|                   NAME                    |
+-------------------------------------------+
| rc1a-0cwboiqngq4xea8z.mdb.yandexcloud.net |
+-------------------------------------------+
This host will be used by the application to connect to the database. Complete connection details:
host: rc1a-0cwboiqngq4xea8z.mdb.yandexcloud.net
database: db1
user: user1
password: password12345
Let’s create a Secret, where the data for connecting to the database will be stored. In the future, the data from this secret will be inserted into the container as environment variables:
$ kubectl create secret generic postcreator-db-creds \
    --from-literal=username=user1 \
    --from-literal=password=password12345 \
    --from-literal=jdbc_url="jdbc:postgresql://rc1a-0cwboiqngq4xea8z.mdb.yandexcloud.net:6432/db1"
Before creating a Deployment, it is necessary to create an internal load balancer through which our pods can be accessed inside the cloud network. Find out the subnet id in the ru-central1-a availability zone:
$ yc vpc subnet get --name default-ru-central1-a
id: e9bg1u4mljgn5rdvs2bt
...
Let’s create an internal load balancer with an internal IP address of 10.128.0.100. Replace $SUBNET_ID with the subnet id we got above:
$ kubectl apply -f - <<EOF
apiVersion: v1
kind: Service
metadata:
  name: postcreator-service
  annotations:
    yandex.cloud/load-balancer-type: internal
    yandex.cloud/subnet-id: $SUBNET_ID
spec:
  selector:
    app: postcreator
  ports:
    - protocol: TCP
      port: 80
      targetPort: 8080
  type: LoadBalancer
  loadBalancerIP: 10.128.0.100
EOF

service/postcreator-service created
LoadBalancer will allow you to access pods within the cloud network at an internal address. Verify that the load balancer has been created with the specified IP address:
$ kubectl get svc/postcreator-service
NAME                  TYPE           CLUSTER-IP    EXTERNAL-IP    PORT(S)        AGE
postcreator-service   LoadBalancer   10.96.212.0   10.128.0.100   80:30671/TCP   5m9s
We will use this address to send many requests.
As an application that will be under load, we will use a regular CRUD server application written in Java using Spring 3. Source And docker image published.
Let’s deploy Deployment without specifying the number of replicas, and don’t forget to assign requests and limits.
$ kubectl apply -f - <<EOF
apiVersion: apps/v1
kind: Deployment
metadata:
  name: postcreator-deployment
spec:
  selector:
    matchLabels:
      app: postcreator
  template:
    metadata:
      labels:
        app: postcreator
    spec:
      containers:
      - name: postcreator-app
        image: azamatkomaev/postcreator:0.0.6
        resources:
          requests:
            memory: "256Mi"
            cpu: "250m"
          limits:
            memory: "512Mi"
            cpu: "500m"
        env:
        - name: DATABASE_URL
          valueFrom:
            secretKeyRef:
              name: postcreator-db-creds
              key: jdbc_url
        - name: DATABASE_USERNAME
          valueFrom:
            secretKeyRef:
              name: postcreator-db-creds
              key: username
        - name: DATABASE_PASSWORD
          valueFrom:
            secretKeyRef:
              name: postcreator-db-creds
              key: password
EOF

deployment.apps/postcreator-deployment created
Let’s wait a while for Deployment to deploy and see a list of all pods:
$ kubectl get pods -o wide
NAME                                      READY   STATUS    RESTARTS   AGE   IP             NODE                        NOMINATED NODE   READINESS GATES
postcreator-deployment-5975fcb7f9-445p8   1/1     Running   0          30s   10.112.128.7   cl16f30cle1m0sg9583f-awij   <none>           <none>
By passing the -o wide option, you can see detailed information about the pod. As you can see, the only application replica has been assigned to our single node.
Creating a Load Testing Agent
For load testing, we will use the service Yandex Load Testing. Let’s create an agent for Load Testing with the following parameters:
Name: agent112
Availability Zone: ru-central1-a (the agent must be on the same subnet as the load balancer)
Agent: Small
Subnet: default/default-ru-central1-a
Service account: terraform-sa
Login: admin
SSH key: generate a key using the ssh-keygen command and paste the public key into the text box

After clicking “Create”, you should wait until the cloud allocates resources for the selected agent. Since Load Testing is in the Preview stage, it is free of charge. Agents are charged at Compute Cloud rates. Let’s go to Compute Cloud and if the VM has switched to the “Running” status, assign it a public address. This is required for the agent to have access to the Load Testing service.

The agent status in the Load Testing tab should change from “Initializing connection” to “Ready for test” Let’s create test data in HTTP_JSON format and save it to payload.json file:


{"host": "10.128.0.100", "method": "POST", "uri": "/api/v1/posts", "tag": "url1", "headers": {"Connection": "close", "Content-Type": "application/json"}, "body":"{\"title\": \"Hello!\", \"description\": \"I am not waiting for heaven\", \"author_name\": \"Azamat Komaev\"}"}
Let’s go to the page with the agent and click “Create test”.
Specify the following values:
Let’s continue the test configuration:
Load Testing supports two load generators: Pandora and Phantom, you can read more about them here. I will be using Pandora Load Generator with step load.
Target address: 10.128.0.100
Target port: 80
Test threads: 2500
Load type: + Load profile:
Request type: HTTP_JSON
The generator will increase the load from 500 to 2500 requests per second for 1 minute in increments of 500 requests. The total duration of the load testing will be 5 minutes.
Configuration data in particular I took from practical guide Yandex Cloudsee the link for details.
We start loading
In our case, it would be redundant to use Grafana + Prometheus to monitor the consumption of CPU and Memory containers, so we will use the kubectl top command:
$ kubectl top pod postcreator-deployment-5975fcb7f9-7mvb5
NAME                                      CPU(cores)   MEMORY(bytes)
postcreator-deployment-5975fcb7f9-7mvb5   14m          171Mi
So! Let’s run the test and see how the pod and cluster will behave under load.
Let’s wait a minute and see the number of consumed resources:
$ kubectl top pod postcreator-deployment-5975fcb7f9-7mvb5
NAME                                      CPU(cores)   MEMORY(bytes)
postcreator-deployment-5975fcb7f9-7mvb5   499m         318Mi
Let’s stop the test. CPU utilization will not rise above 500m, since we previously set a limit for it at this level.
Let’s see the number of nodes and pods:
$ kubectl get nodes
NAME                        STATUS   ROLES    AGE   VERSION
cl1a9h5asplrhnjmkn5g-unaq   Ready    <none>   18m   v1.26.2
$ kubectl get pods
NAME                                      READY   STATUS    RESTARTS   AGE
postcreator-deployment-5975fcb7f9-7mvb5   1/1     Running   0          13m
– “Well, where is your autoscaling?!” you want to ask me. He is not! Because in addition to setting up Cluster Autoscale in Yandex Managed service for Kubernetes, you need to set up HPA.
$ kubectl autoscale deployment/postcreator-deployment --cpu-percent=70 --min=1 --max=20
horizontalpodautoscaler.autoscaling/postcreator-deployment autoscaled
The –cpu-percent parameter specifies at what percentage of the load-to-requests ratio to increase the number of pods. For example, we have a CPU request of 256m, if the CPU load exceeds 180m, then HPA will deploy an additional pod.
Let’s check that HPA has deployed:
$ kubectl get hpa
NAME                     REFERENCE                           TARGETS   MINPODS   MAXPODS   REPLICAS   AGE
postcreator-deployment   Deployment/postcreator-deployment   2%/70%    1         10        1          27s
Let’s restart the test and monitor the state of the HPA in real time
$ kubectl get hpa --watch
NAME                     REFERENCE                           TARGETS   MINPODS   MAXPODS   REPLICAS   AGE
postcreator-deployment   Deployment/postcreator-deployment   90%/70%   1         20        1          2m15s
postcreator-deployment   Deployment/postcreator-deployment   200%/70%   1         20        2          2m46s
postcreator-deployment   Deployment/postcreator-deployment   198%/70%   1         20        3          3m16s
postcreator-deployment   Deployment/postcreator-deployment   198%/70%   1         20        6          3m32s
postcreator-deployment   Deployment/postcreator-deployment   199%/70%   1         20        9          4m2s
postcreator-deployment   Deployment/postcreator-deployment   197%/70%   1         20        15         4m48s
postcreator-deployment   Deployment/postcreator-deployment   167%/70%   1         20        15         6m48s
postcreator-deployment   Deployment/postcreator-deployment   167%/70%   1         20        17         7m3s
postcreator-deployment   Deployment/postcreator-deployment   142%/70%   1         20        17         7m18s
postcreator-deployment   Deployment/postcreator-deployment   142%/70%   1         20        20         7m33s
postcreator-deployment   Deployment/postcreator-deployment   56%/70%    1         20        20         7m48s
postcreator-deployment   Deployment/postcreator-deployment   36%/70%    1         20        20         8m34s
postcreator-deployment   Deployment/postcreator-deployment   50%/70%    1         20        20         9m20s
postcreator-deployment   Deployment/postcreator-deployment   38%/70%    1         20        20         9m50s
Let’s stop the test. As you can see from the output to the terminal, HPA gradually raised the number of pods to 20. In the end, the CPU load dropped by one pod, which indicates that autoscaling and load balancing are configured correctly.
Let’s see the list of all nodes through the Yandex Cloud console:
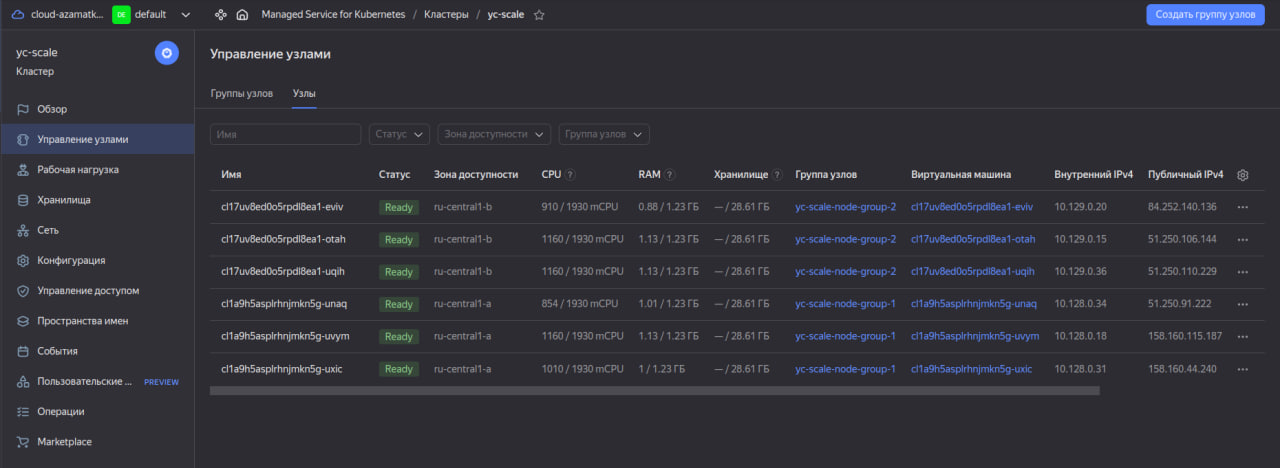
Because the newly created pods ran out of space on the existing nodes, the Managed Service for Kubernetes cluster deployed additional nodes. Please note that he himself distributed the nodes into availability zones (groups of nodes). After the load drops, HPA will gradually remove the pods in the same way as the creation. In turn, the Kubernetes cluster will reduce the number of nodes.
After testing
Don’t forget to delete the created resources if you don’t need them anymore:
$ terraform destroy
Plan: 0 to add, 0 to change, 13 to destroy.

Do you really want to destroy all resources?
  Terraform will destroy all your managed infrastructure, as shown above.
  There is no undo. Only 'yes' will be accepted to confirm.

  Enter a value: yes
You should also remove the agent separately in Load Testing as it is not managed by terraform.
Results of Yandex Load Testing
Initially, I did not plan to use Load Testing for load testing. The main purpose of the article was to show how an application deployed in Yandex Managed Service for Kubernetes will scale under load. Therefore, I will not analyze the analysis of load tests.
Conclusion
Yandex Managed Service for Kubernetes offers an excellent solution for deploying autoscaling applications in a cluster. But it makes no sense to use only Cluster Autoscale without HPA built into Kubernetes, they work well together!