Angular without CLI Tutorial
The Angular framework is used to create the SPA and offers a large number of tools for creating, directly, interface elements, and CLI for creating and managing the structure of files related to the application.
To create a project using the Angular library, the official site suggests that we install the angular-cli package and then run certain commands from the console that will download the necessary packages, create the necessary files, and all that remains is to run the application, but if we do not want to use a boxed solution, we we want to create the folder structure ourselves, fill it with files, connect the necessary libraries and compile, in general, fully control the process of creating the application.
I asked myself such a question, and after studying this issue, I compiled it into a tutorial.
When writing this article, I used the following technologies:
-
webpack v5
-
Angular v13
-
NodeJS v14
-
NPM v8
What you need to know to understand this tutorial:
-
javascript, typescript
-
webpack, webpack-cli
-
html, css
Peculiarities:
-
Application is developed for the browser
-
In order not to get lost, which setting to add where, in some files with code, the path to the target file will be signed
So let’s get started.
-
Let’s start by creating a directory with our application
mkdir angular-no-cli-
Add package.json and typescript
cd ./angular-no-cli
npm init
npm i -D typescript
npx tsc --init-
Let’s create an angular-like directory structure and add the main application files
mkdir src/app
mkdir src/assets
touch webpack.config.js
touch src/index.css
touch src/index.html
touch src/main.ts
touch src/app/app.component.css
touch src/app/app.component.html
touch src/app/app.component.ts
touch src/app/app.module.ts-
Add the necessary libraries
npm i -D webpack webpack-cli webpack-dev-server
npm i @angular/platform-browser @angular/platform-browser-dynamic @angular/common @angular/core rxjs zone.jse.js
npm i -D ts-loader
What are these libraries for?
|
webpack |
main faucet |
|
webpack-cli |
CLI commands for webpack |
|
webpack-dev-server |
development server for incremental development |
|
@angular/platform-browser |
library for running Angular applications in the browser |
|
@angular/platform-browser-dynamic |
library for running Angular applications in a browser with support for JIT compilation |
|
@angular/common |
a library with the main elements for the application: http-client, routing, localization, components, pipes, directives, etc. |
|
@angular/core |
a library of functions that implements the main functionality of the application: rendering, event interception, DI, etc. |
|
rxjs |
a library that implements the Subscriber-Observer behavior is actively used by the angular packages |
|
zone.js |
a library that creates a function execution context that is saved in asynchronous tasks |
|
ts-loader |
library for building .ts files |
-
Add a basic configuration for webpack
//webpack.config.js
const path = require("path");
module.exports = {
    mode: "development",
    devtool: false,
    context: path.resolve(__dirname),
    entry: {
        app: path.resolve(__dirname, "src/main.ts"),
    },
    stats: 'normal',
    output: {
        clean: true,
        path: path.resolve(__dirname, "dist"),
        filename: "[name].js"
    },
    resolve: {
        extensions: [".ts", ".js"]
    },
    // пока будем собирать только ts файлы
    module: {
        rules: [
            {
                test: /\.(js|ts)$/,
                loader: "ts-loader",
                exclude: /node_modules/
            },
        ]
    }
}-
Add base configuration for tsconfig.json
{
    "compilerOptions": {
        "target": "es2016",
        "lib": ["es2020", "dom"],
        "experimentalDecorators": true,
        "emitDecoratorMetadata": true,
        "module": "ES2020",
        "moduleResolution": "node",
        "esModuleInterop": true,
        "forceConsistentCasingInFileNames": true,
        "strict": true,
        "skipLibCheck": true
    }
}-
Add code to application files
// src/main.ts
import "zone.js/dist/zone";
import {platformBrowserDynamic} from '@angular/platform-browser-dynamic';
import {AppModule} from './app/app.module';

platformBrowserDynamic()
    .bootstrapModule(AppModule)
    .catch(err => console.error(err));
<!--src/index.html-->
<html lang="ru">
<head>
<base href="https://habr.com/">
<title>Angular no cli</title>
<meta charset="utf-8">
<meta name="viewport" content="width=device-width, initial-scale=1">
</head>
<body>
<app-root></app-root>
</body>
</html><!--src/app/app.component.html-->
<main>Angular no CLI</main>// src/app/app.component.ts
import {Component} from "@angular/core";
@Component({
selector: "app-root",
templateUrl: "./app.component.html",
styleUrls: ["app.component.css"]
})
export class AppComponent {
}// src/main.ts
import {NgModule} from "@angular/core";
import {AppComponent} from "./app.component";
import {BrowserModule} from "@angular/platform-browser";
@NgModule({
declarations: [AppComponent],
imports: [BrowserModule],
providers: [],
bootstrap: [AppComponent]
})
export class AppModule {}-
Let’s try to collect
npx webpackWe see the assembly file along the path dist/app.js
-
Now let’s set up the dev-server, for this we add the following to the webpack configuration
//webpack.config.js
devServer: {
    static: {
        directory: path.resolve(__dirname, "dist")
    },
    port: 4200,
    hot: true,
    open: false
}-
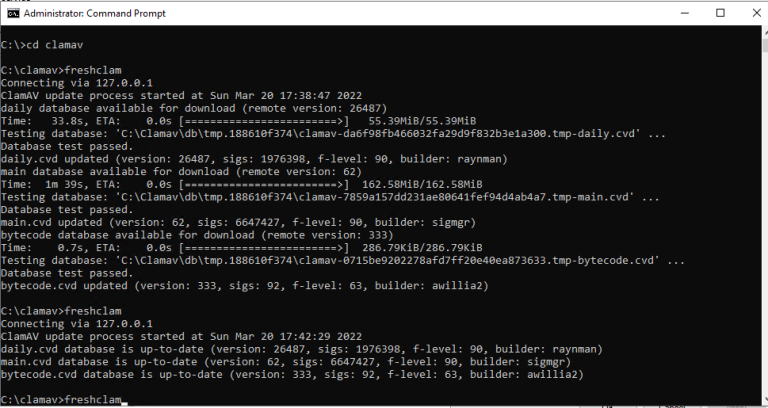
Great, let’s check the work of the dev-server, start it
npx webpack serveInstead of our inscription, we will only see a link to view our assembly file, it seems we forgot about index.html, we need to add it
-
We will take our src/index.html as a basis so that it gets into the dist directory, we will use the html-webpack-plugin, install it and add it to the webpack configuration
npm i -D html-webpack-plugin//webpack.config.js
const HtmlWebpackPlugin = require('html-webpack-plugin');
plugins: [
new HtmlWebpackPlugin({
filename: path.resolve(__dirname, "dist", "index.html"),
template: path.resolve(__dirname, "src/index.html")
})
]-
Run the build again, this time index.html will be added to dist, which will load app.js.
-
Let’s run dev-server again and see the result.
-
We see a white page background, an error has occurred, let’s open the console and see what’s there
GET http://localhost:4200/app.component.html 404 (Not Found)
-
This error is explained by the fact that in app.component.ts we specified the templateUrl parameter: “./app.component.html”. Accordingly, @angular/core tries to load this template via a normal HTTP request and does not find such a file.
A question may arise here, but with the use of the CLI, we do not see any html files in the output directory at all, after ng build. Indeed, this is one of the features of angular, we will analyze this issue in more detail below.
-
Let’s just copy the template file to dist. We can copy the file by hand, but it is better to give this opportunity to the assembler. To do this, we need another plugin.
npm i -D copy-webpack-plugin//webpack.config.js
const CopyPlugin = require("copy-webpack-plugin");
new CopyPlugin({
patterns: [
{
from: "**/*.html",
to: path.resolve(__dirname, "dist", "[name].html"),
context: "src/app/"
}
]
})Here we will ask the plugin to copy all the html files in the src/app repository and place it with the current name in dist.
-
Again the same error, only now for the app.component.css file, we do not process css files yet, let’s just comment it out.
// src/app/app.component.ts
//styleUrls: ["app.component.css"]-
Now let’s try to achieve a similar file structure in the build directory, which we usually see in projects created using the Angular CLI, the list of files there is as follows
-
3rdpartylicenses.txt – third party licenses
-
favicon.ico – icon
-
index.html – main html file
-
main.js – the code of all the necessary libraries for running and executing the code, including our code
-
polyfills.js – polyfills
-
runtime.js – module loading functions
-
To begin with, we will select runtime.js, for this we will add a new setting to our webpack.config
//webpack.config.js
optimization: {
    runtimeChunk: 'single'
}-
Let’s split the main app.js script into main and venod parts
//webpack.config.js
optimization: {
    runtimeChunk: 'single',
    splitChunks: {
        chunks: "all",
        maxAsyncRequests: Infinity,
        minSize: 0,
        name: "vendor"
    }
}-
So, in the build directory we see several javascript files and index.html where they are all connected, at this point we can build and run again to make sure everything works
-
Now let’s get rid of copying templates, let’s make sure that they are added to the javascript code, for this, let’s take a little look at the webpack configuration that is created when we build the project using the Angular CLI. We are interested in what loaders are used to process the code, as well as how it is optimized, along the way we will analyze the small features of the work of Angular itself.
-
In order to see the sequence of script execution, you can simply run the ng build command in debug mode from the angular-cli package. As part of this tutorial, you don’t need to do this, here I will briefly describe how everything works.
npm install -g @angular/cli ng new my-first-project cd my-first-project node --inspect-brk .\node_modules\@angular\cli\bin\ng build -
Starts by checking versions of dependent packages, creating loggers
-
Then the configuration file angular.json is read and checked
-
Next, the command with the eloquent name validateAndRun is launched.
const command = new description.impl(context, description, logger); const result = await command.validateAndRun(parsedOptions);-
The next step is to start the build task, here @angular/cli delegates its work to another @angular-devkit package, which starts building webpack.config
buildWebpackBrowser(options, context); //options - это объект с настройками angular.json //context - объект с утилитными функциями angular -
The configuration object is created in several steps
-
First asking for configuration for tsconfig
-
Then a list of browsers is compiled in which our code can be executed.
-
Then checks are performed for the correctness of the versions, the correctness of the settings and much more, each check in case of an error will describe in detail to the user what went wrong.
-
This is how the method call looks like, which will return the configuration
//config - объект конфигурации webpack const { config, projectRoot, projectSourceRoot, i18n } = await webpack_browser_config_1.generateI18nBrowserWebpackConfigFromContext(adjustedOptions, context, (wco) => [ configs_1.getCommonConfig(wco), configs_1.getBrowserConfig(wco), configs_1.getStylesConfig(wco), configs_1.getTypeScriptConfig(wco), wco.buildOptions.webWorkerTsConfig ? configs_1.getWorkerConfig(wco) : {}, ], { differentialLoadingNeeded }); -
There we are interested in loaders, plugins and code optimization, let’s gradually add them to our configuration
-
-
Find in module.rules the rules for loading html, javascript or typescript files
module: {
	rules: [
  	{//*1
  	  	test: /\.?(svg|html)$/,
  	  	resourceQuery: /\?ngResource/,
  	  	type: "asset/source"
    },
    {//*2
        test: "/\.[cm]?[tj]sx?$/",
        resolve: {
            fullySpecified": false
        },
        exclude: ["/[/\\](?:core-js|@babel|tslib|web-animations-js|web-streams-polyfill)[/\\]/"],
        use: [{
            loader: ".../@angular-devkit/build-angular/src/babel/webpack-loader.js",
            options: {
                cacheDirectory: ".../angular/cache/babel-webpack",
                scriptTarget: 4,
                aot: true,
                optimize: true
            }
        }]
    },
    {//*3
        test: "/\.[cm]?tsx?$/",
        loader: "../@ngtools/webpack/src/ivy/index.js",
        exclude: ["/[/\\](?:css-loader|mini-css-extract-plugin|webpack-dev-server|webpack)[/\\]/"]
    }
  ]
}
Found some bootloaders:
1 – will process files matching “.html?ngResource” expression. Raw-loader acts as a loader
2 and 3 – will process javascript and typescript files. The loader is @angular-devkit/build-angular and @ngtools/webpack. This is what we need, but before we add them to our configuration, let’s learn more about them
-
Let’s try to find the repositories of our loaders on github
npm repo @ngtools/webpack
npm repo @angular-devkit/build-angular
Both lead to the angular-cli root turnip, where they can be found in the packages subdirectory.
build-angular – contains files with a loader and plugins for webpack, in the comments in the code you can find the following description: “This package contains Architect builders used to build and test Angular applications and libraries.”
ngtools/webpack – we also see the loader and plugins, but more importantly, there is a README file that tells us that this is a loader that can be used if we want to build a project based on the Angular framework, which is exactly our case. The description also says that you will need to include babel-loader with Linker Ivy plugin and AngularWebpackPlugin.
-
Let’s install the necessary packages that are advised in the README
# При установке может возникнуть ошибка с peerDependency, который хочет
# определенную версию typescript, можем проигнорировать это и
# добавить флаг --legacy-peer-deps
npm i -D @ngtools/webpack babel-loader @angular/compiler-cli @angular/compiler @angular-devkit/build-angular

# можно сразу удалить, т.к. мы будем использовать другой загрузчик
npm rm ts-loader -
So after installation, let’s change the module.rules and plugins fields in the webpack config
const AngularWebpackPlugin = require('@ngtools/webpack').AngularWebpackPlugin;

module: {
    rules: [
        {
            test: /\.?(svg|html)$/,
            resourceQuery: /\?ngResource/,
            type: "asset/source"
        },
        {
            test: /\.[cm]?[tj]sx?$/,
            exclude: /\/node_modules\//,
            use: [
                {
                    loader: 'babel-loader',
                    options: {
                        cacheDirectory: true,
                        compact: true,
                        plugins: ["@angular/compiler-cli/linker/babel"],
                    },
                },
                {
                    loader: "@angular-devkit/build-angular/src/babel/webpack-loader",
                    options: {
                        aot: true,
                        optimize: true,
                        scriptTarget: 7
                    }
                },
                {
                    loader: '@ngtools/webpack',
                },
            ],
        },
    }],
    plugins: [
        new AngularWebpackPlugin({
            tsconfig: path.resolve(__dirname, "tsconfig.json"),
            jitMode: false,
            directTemplateLoading: true
        })
]-
We can comment out copying html templates, we still need the plugin itself, but there are no templates,
/* new CopyPlugin({
    patterns: [
        {
            from: "**!/!*.html",
            to: path.resolve(__dirname, "dist", "[name].html"),
            context: "src/app/"
        }
    ]
}),*/-
At this point, we can start the dev-server to make sure everything is going as it should
-
Let’s add styles now, we have css files, add rules to them
/*файл app.component.css*/
main {
    color: red;
}

/* файл index.css */
html {
    background: lightcyan;
}-
Great, now let’s install the necessary loaders and plugins for working with styles
npm i -D css-loader mini-css-extract-plugin postcss-loader-
Let’s uncomment the link to our styles in app.component.ts
//файл app.component.ts
styleUrls: ["app.component.css"]-
Let’s change the webback configuration a little more, add a mini-css-extract-plugin to export our styles to a separate file, and change entry to include the styles assembly
const MiniCssExtractPlugin = require('mini-css-extract-plugin');

entry: {
    index: ["./src/main.ts", "./src/index.css"]
},
module: [
    rules: {
        test: /\.(css)$/,
        exclude: /\/node_modules\//,
        oneOf: [
            {
                resourceQuery: {
                    not: [/\?ngResource/]
                },
                use: [MiniCssExtractPlugin.loader, "css-loader", "postcss-loader"]
            },
            {
                type: "asset/source",
                loader: "postcss-loader"
            }
        ]
    }
],
plugins: [
    new MiniCssExtractPlugin({
        filename: '[name].css',
    }),
]-
Let’s start the dev-server again, we will see that our inscription has become red, and the background is blue, we will continue
-
Let’s add any picture, add the code in our template
<!-- app.component.html-->
<!-- У меня это waiter.svg, положил я его в src/assets/waiter.svg -->
<img src="https://habr.com/assets/waiter.svg" alt="waiter">-
Uncomment CopyPlugin and change its configuration so that it adds our assets to dist
new CopyPlugin({
    patterns: [
        {
            context: "src/assets/",
            from: "**/*",
            to: "assets/",
        }
    ]
})-
Let’s check the dev-server again, now we see the picture, everything works
-
Now let’s take a look at the code optimization part of the webpack configuration and start by just looking at the weight of the production builds of the vendor part, ng-cli and our
Assembly ng cli – 100 KB (main.js + polifills.js)
Our build is 357 KB (app.js + vendor.js)
-
A noticeable difference, but since we use the same loaders, it will be a matter of minifying the code, let’s see what Angular CLI uses as an optimization and copy it to ourselves
optimization: {
    minimize: true,
    minimizer: [
        new JavaScriptOptimizerPlugin({
            advanced: true,
            define: {ngDevMode: false, ngI18nClosureMode: false, ngJitMode: false},
            keepNames: false,
            removeLicenses: true,
            sourcemap: false,
            target: 7
        }),
        new TransferSizePlugin(),
        new CssOptimizerPlugin({
            esbuild: {
                alwaysUseWasm: false,
                initialized: false
            }
        })
    ]
JavaScriptOptimizerPlugin – override the work of the standard terser-plugin
TransferSizePlugin – records the weight of an asset
CssOptimizerPlugin – remove spaces from css
-
At this point, the weight of the assembly should decrease, for me it was reduced to 150 KB
-
Now we will split our vendor into separate pieces with the code of the libraries used, add the following to the webpack config
optimization: {
    minimize: true,
    runtimeChunk: 'single',
    splitChunks: {
        chunks: "all",
        maxAsyncRequests: Infinity,
        minSize: 0,
        cacheGroups: {
            defaultVendors: {
                test: /[\\/]node_modules[\\/]/,
                name(module) {
                    const name = module.context.match(/[\\/]node_modules[\\/](.*?)([\\/]|$)/)[1];
                    return `${name.replace('@', '')}`;
                }
            },
        }
    }
}-
Now in the build directory you can see all the scripts that we use to run our application, start the dev-server and see that everything works successfully
-
Add an environment variable to separate the prod and dev configs, replace the webpack config object export with a function export, and change some config fields accordingly
module.exports = (env) => {}
mode: env.production ? "production" : "development",
devtool: env.production ? false : "eval",
output: {
    clean: true,
    path: path.resolve(__dirname, "dist"),
    filename: env.production ? "[name].[chunkhash].js" : "[name].js"
},-
Add launch scripts to package.json
"start": "webpack serve --env development ",
"build": "webpack --progress --env production",
"build:dev": "webpack --progress"-
Great, we have done everything we need, now we can develop our application
Conclusions:
-
Creating such an assembly with your own hands is a long time, but at the same time you have complete control over the process and in the future you can simply copy the configuration
-
Control over the process gives an understanding of why we install a particular package
-
We have lost the ability to use ng update to update the angular version
What else can you do with such an application:
You can go wide and create in this way not only SPA, but also a separate library or module, which can then be imported into the application. Roughly speaking, to create something like a personal account with lazy-loading and using third-party APIs, you can also use webpack.externals and other webpack features
What is not included in this tutorial:
While studying Angular, I delved into the very process of its work, learned how the Ivy compiler works, what AOT mode is and what exactly it affects, how templates are processed, what ngcc, ngtsc are, what certain libraries are for. The amount of information turned out to be quite large, so I did not include this part in this article, but I could include it in the next one if this one is useful.
I also have plans for an article in which I will create a more complete application based on this base.
Thanks for attention.
Sources:
Deep Dive into the Angular Compiler
Exploring Ivy, the new Angular compiler