Selenium + AutoIT. Windows Test Automation Windows
My task was to develop auto-tests for one of our projects using the Selenium WebDriver tool in Java. You can read more about this in my last article.
Selenium Is a tool for automating web applications in various browsers. During the development of auto-tests, I came across a scenario in which you need to interact with the Windows window to download files. Unfortunately, Selenium is not able to work with Windows windows, so an alternative solution had to be found.

During the search, the choice fell on AutoIT. This tool is designed to automate tasks in Microsoft Windows, which was necessary. In this article, I will describe working with AutoIT to solve a task. It is assumed that you already have a development environment with Selenium WebDriver connected. As an example, a window for uploading photos to one of the photo editing sites will be used. So let’s get started.
1. Download and install AutoIT
2. We go to one of the services for downloading photos, for example, here. Here you need to click the “Upload Photos” button to get such a Windows window

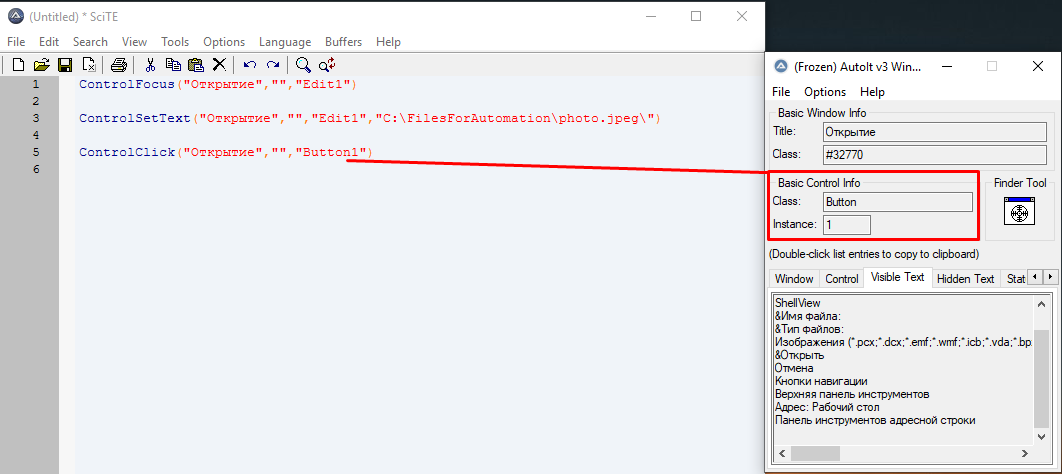
3. Now go to the AutoIT3 folder and select Au3Info.exe
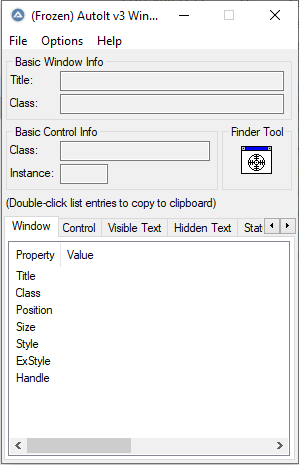
4. Au3Info is a tool that allows you to get information about the required window for automation. To get information about a specific element, simply drag from the Finder Tool block onto the window element. We get the attribute values of the input field of the element “File Name”
To use the AutoIT script, we need the attributes Title = ‘Open’ and Class = ‘Edit’
5. Go to the AutoIt3 SciTE folder and select SciTE, here we will write such a simple script
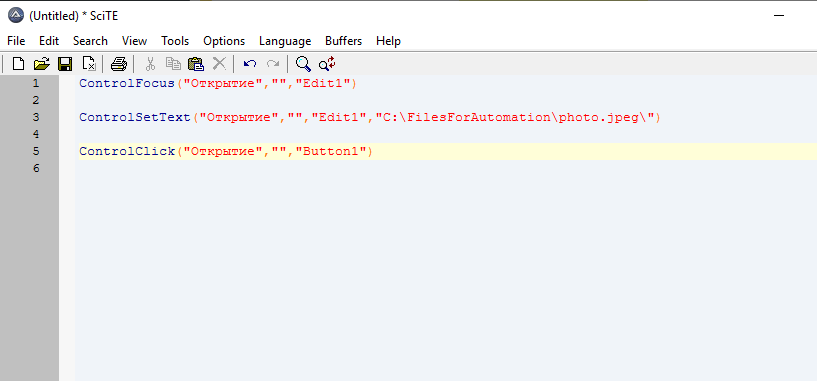
Here Control focus – a method that sets focus on the window element “File Name”
– The first parameter is the Title value of the desired window, in our case it is ‘Open’
– The second parameter is optional
– The third parameter is the combination of the values of the attribute Class and Instance, i.e. it turns out Edit1

Controlsettext – the method by which the text is entered into the input of the element “File Name”
– The first parameter is the value of Title
– The second parameter is optional
– The third parameter is the combination of the values of the attribute Class and Instance, i.e. it turns out Edit1
– The fourth parameter is the text that will be entered in input, here we write the path to the file that we will attach
Controlclick – clicks on the “Open” button
– The first parameter is the value of Title
– The second parameter is optional
– The third parameter is the combination of the values of the attribute Class and Instance, i.e. it turns Button1
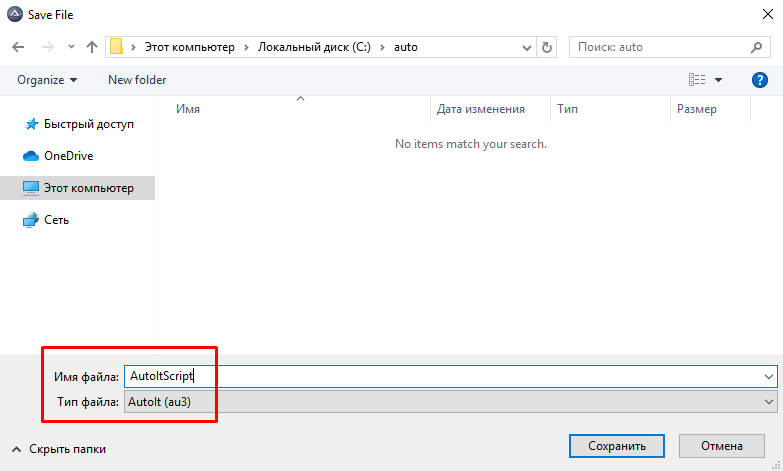
6. Save the script as Autoit
7. Now, to run the script, you need to compile it. To compile a script, there are two options – either for a 64-bit system or for 86. Choose the appropriate one for your operating system.

8. We got a compiled AutoItScript.exe file. We’ll check its performance – go to <www.iloveimg.com/en/photo-editor“> photo editing service and click” Select Image. “Now run AutoItScript.exe
9. Now this script can be added to Selenium. For example, for Java, such an addition would look like this:
Runtime.getRuntime().exec("С:\auto\AutoItScript.exe");
This solution is highly stable. If during the automation of the web browser the values of the attributes of the elements can change, then in the case of windows windows this does not happen. Also, due to the fact that we end up with an executable file, this solution can be used with different programming languages. The disadvantage is that such a script cannot be used in the headless mode – a mode in which the browser does not start.
I hope this article helps you in testing automation!