Sawing the Meduza Web Questionnaire: A Step-by-Step Guide for Beginners

All the details are under the cut.
After an hour of looking at the brickwork (sticky lesson, however) the first result appeared in the form of ready-made models, which were described in Dzhang ten minutes later.
If you are a beginner, then I advise you to go Djnago tutorial, it describes the step-by-step creation of the survey. And after DRF tutorialto completely immerse yourself in the topic.
So, in the project, I used:
- Django 3.0.3. For the backend;
- django-rest-framework. To create rest-api;
- Python
- PostgreSQL as a database;
- Front-end – Nuxt.js, Axios, Element-UI.
Now the steps
pip install Django – install the library.
django-admin startproject core – create a djang project.
cd core – go to the directory with the project.
python manage.py startapp pools – add a polling application.
Next, we describe the models in models.py in polls and create a serializer for DRF.
class Question(models.Model):
    title = models.CharField(max_length=4096)
    visible = models.BooleanField(default=False)
    max_points = models.FloatField()

    def __str__(self):
           return self.title

class Choice(models.Model):
    question = models.ForeignKey(Question, on_delete=models.DO_NOTHING)
    title = models.CharField(max_length=4096)
    points = models.FloatField()
    lock_other = models.BooleanField(default=False)

    def __str__(self):
        return self.title

class Answer(models.Model):
    user = models.ForeignKey(settings.AUTH_USER_MODEL, on_delete=models.DO_NOTHING)
    question = models.ForeignKey(Question, on_delete=models.DO_NOTHING)
    choice = models.ForeignKey(Choice, on_delete=models.DO_NOTHING)
    created = models.DateTimeField(auto_now_add=True)

    def __str__(self):
        return self.choice.title

from rest_framework import serializers
from .models import Answer, Question, Choice


class ChoiceSerializer(serializers.ModelSerializer):
    percent = serializers.SerializerMethodField()

    class Meta:
        model = Choice
        fields = ['pk', 'title', 'points', 'percent', 'lock_other', ]

    def get_percent(self, obj):
        total = Answer.objects.filter(question=obj.question).count()
        current = Answer.objects.filter(question=obj.question, choice=obj).count()
        if total != 0:
            return float(current * 100 / total)
        else:
            return float(0)


class QuestionSerializer(serializers.ModelSerializer):
    choices = ChoiceSerializer(many=True, source='choice_set', )

    class Meta:
        model = Question
        fields = ['pk', 'title', 'choices', 'max_points', ]


class AnswerSerializer(serializers.Serializer):
    answers = serializers.JSONField()

    def validate_answers(self, answers):
        if not answers:
            raise serializers.Validationerror("Answers must be not null.")
        return answers

    def save(self):
        answers = self.data['answers']
        user = self.context.user
        for question_id, in answers:  # тут наверное лишняя запятая , ошибка в оригинальном коде
            question = Question.objects.get(pk=question_id)
            choices = answers[question_id]
            for choice_id in choices:
                choice = Choice.objects.get(pk=choice_id)
                Answer(user=user, question=question, choice=choice).save()
                user.is_answer = True
                user.save()
Then we write two DRF views in views.py, which give all questions with options and accept all answers from the user.
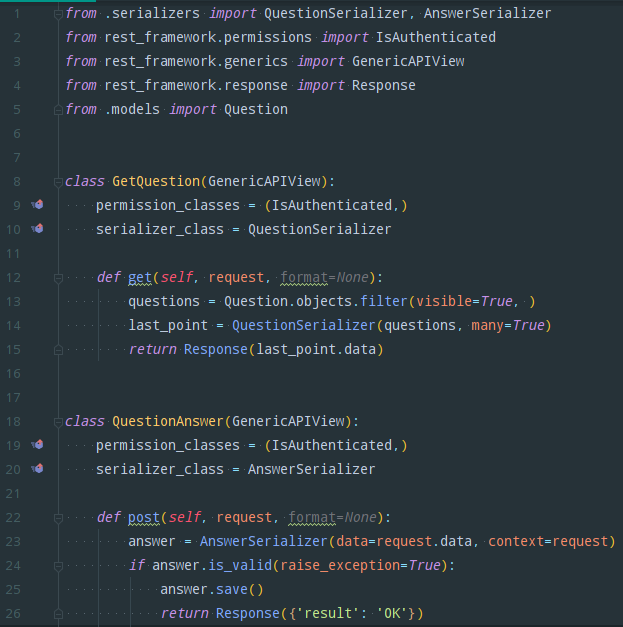
from .serializers import QuestionSerializer, AnswerSerializer
from rest_framework.permissions import IsAuthenticated
from rest_framework.generics import GenericAPIView
from rest_framework.response import Response
from .models import Question


class GetQuestion(GenericAPIView):
    permission_classes = (IsAuthenticated,)
    serializer_class = QuestionSerializer

    def get(self, request, format=None):
        questions = Question.objects.filter(visible=True, )
        last_point = QuestionSerializer(questions, many=True)
        return Response(last_point.data)


class QuestionAnswer(GenericAPIView):
    permission_classes = (IsAuthenticated,)
    serializer_class = AnswerSerializer

    def post(self, request, format=None):
        answer = AnswerSerializer(data=request.data, context=request)
        if answer.is_valid(raise_exception=True):
            answer.save()
            return Response({'result': 'OK'})
Now we describe the links in urls.py:
urlpatterns = [
    path('', GetQuestion.as_view()),
    path('answer/', QuestionAnswer.as_view()),
]
Add models to admin.py:
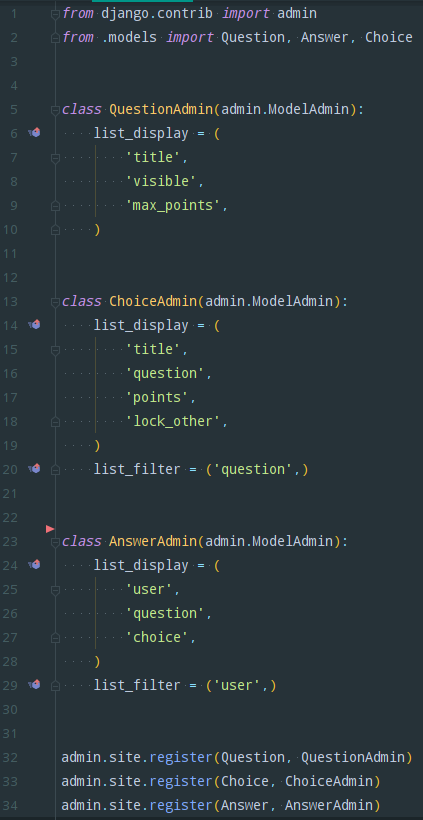
from django.contrib import admin
from .models import Question, Answer, Choice


class QuestionAdmin(admin.ModelAdmin):
    list_display = (
        'title',
        'visible',
        'max_points',
    )


class ChoiceAdmin(admin.ModelAdmin):
    list_display = (
        'title',
        'question',
        'points',
        'lock_other',
    )
    list_filter = ('question',)


class AnswerAdmin(admin.ModelAdmin):
    list_display = (
        'user',
        'question',
        'choice',
    )
    list_filter = ('user',)


admin.site.register(Question, QuestionAdmin)
admin.site.register(Choice, ChoiceAdmin)
admin.site.register(Answer, AnswerAdmin)
The next step is to add our polls application to settings.py (in the core directory) in INSTALLED_APPS. And execute the launch command:
- python manage.py makemigrations – create a migration for the created models
- python manage.py migrate – perform a migration to the database
- python manage.py createsuperuser – create a superuser (admin)
- python manage.py runserver – start the server
To calculate the total score for questions, we add to the method a simple calculation function, according to which points are calculated. I will not post the function code, because it can be used to crack our questionnaire. Now each answer has its own “weight”.
We go to the admin panel through the browser using the link that is listed in the console (http://127.0.0.1:8000/ admin by default), and create questions and answers to them, put down points.

It was important for me to give our partners lists of people who completed the survey and their answers. But for this, it’s not enough to simply link the answers to the questions. Therefore, I added another table – “Options”. So a connection was formed between the user’s answers to questions with several answer options. This allows us to upload data in the form in which partners can easily interpret it.
As a result, the database structure turned out like this:

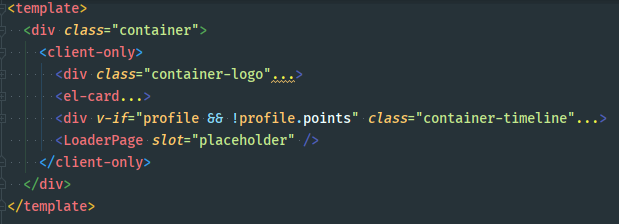
Now connect the front.
In it we take away the list of questions and answers, we go through each element to the last. Depending on the type of question, we change the component with its own logic and style. Accordingly, when there are no questions left in the list, we send the result to the back and get an answer with the number of points. After receiving the number of points, we open the result page, if there are points, we no longer show questions.
At this stage, we already have a questionnaire ready that can do everything it needs to: ask questions, receive and collect answers, give results in the form of points and comments.
Add buns
Firstly, I needed to periodically upload the data. For this, I just added management command.
Secondly, it would be nice to implement sharing of survey results in social networks. OK. Sawing functionality that will allow you to share a picture with VKontakte and Facebook points.
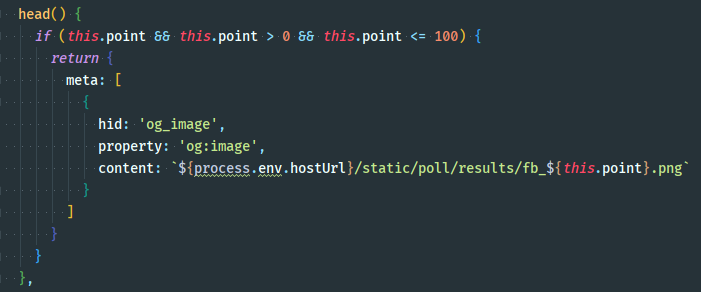
We generate one hundred variants of pictures reflecting points for VK and Facebook separately (different resolutions). Now we connect the transfer of the link to the picture in the social component of the front-end part. With VKontakte, everything turned out to be simple: we pass the image parameter with the direct URL to the desired one. But I had to tinker with Facebook. It turned out that they do not accept media by API, and if I transferred image or picture from the URL of the picture, then a large empty field was shown in the post. As it turned out later, he takes a picture from the metainf (og: image) of the site itself, which he shared (we pass the parameter u in the link). And her, among other things, had to be changed dynamically. I didn’t want to do extra redirects and a mechanic on the back, and I decided to convert SPA (single page app) to SSR (server-side render) at the front, so that depending on the request, the url of the image with a score in head-meta would change before running JavaScript in browser Fortunately, the Nuxt.js framework taken as a basis allows this to be done simply by switching modes. Now it remains to sketch client-only tags and add the logic for changing the head from the presence of a query score.
Additionally, on the server, it was necessary to start the daemon service to give the generated pages, and leave the statics to nginx as well. All profit!

We revive the questionnaire
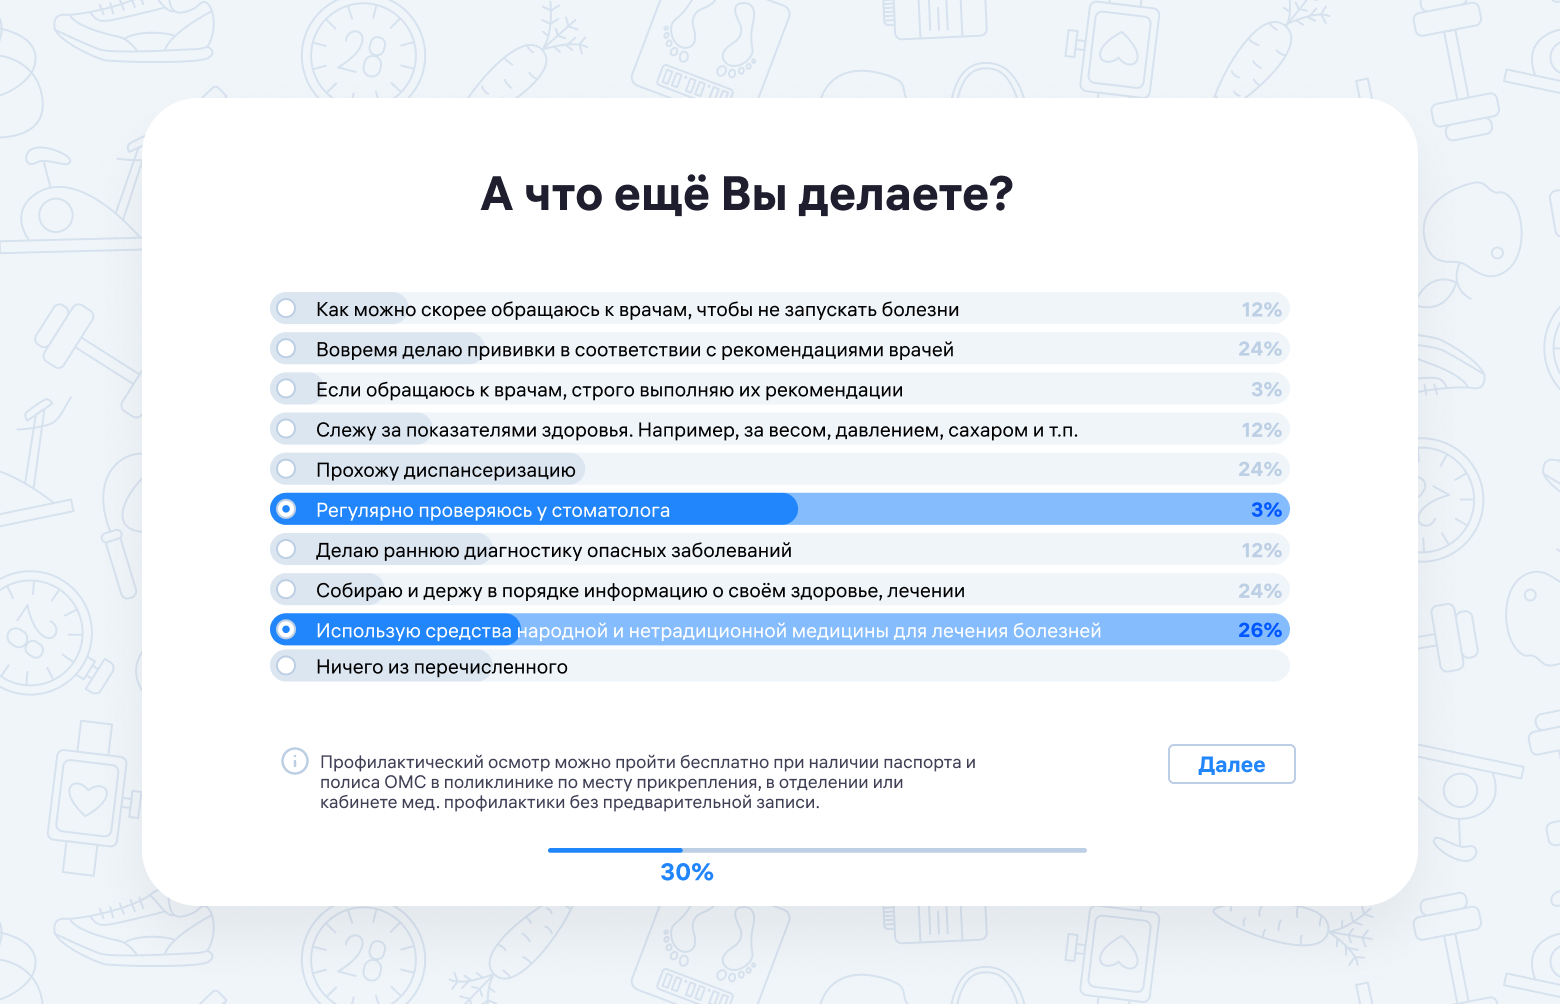
In order to maintain the level of interest of the participants in the process of filling out the survey, I added a dynamic display of statistics to each individual question. After answering the question, the user sees how others answered. Sometimes it is not clear to a person why they are asked these questions. Therefore, I supplemented each question with funny explanations. Well, the most important trick to revitalize my questionnaire was performed by the designers of our company.
Summary
Such media surveys are quite simple to implement and, most importantly, users really like them. They can be used both in the tail and in the mane: for sociological research, informing / testing knowledge or creating interactive elements on sites and services. I tried to describe in detail the process of their creation, but if you have any questions, welcome to comment. Examples of polls implementation on this engine can be viewed at these two links: healthcare.leader-id.ru and covid.leader-id.ru.