SAML Integration in Zimbra OSE
SAML SSO in Zimbra OSE is only available to Zextras Suite Pro users.
Preparing for integration
First of all, to enable SAML integration, you need to patch NGINX. To do this, in the / opt / zimbra / conf / nginx / templates / folder, edit the files one by one:
- nginx.conf.web.http.default.template
- nginx.conf.web.http.template
- nginx.conf.web.https.default.template
- nginx.conf.web.https.template
In all files in the section location ^ ~ / zx / replace content with
location ^~ /zx/
{
proxy_set_header X-Forwarded-For $proxy_add_x_forwarded_for;
proxy_set_header Host $http_host;
proxy_set_header X-Forwarded-Proto $scheme;
proxy_set_header X-Forwarded-Port $server_port;
proxy_pass ${web.upstream.zx};
}
These changes are necessary in order to compose full Protocol X and X-Port URLs.
It is also necessary to activate the Zextras authentication engine at the domain level. This can be done by the server administrator by entering the command at the command line zmprov modifyDomain example.ru zimbraAuthMech custom: zx…
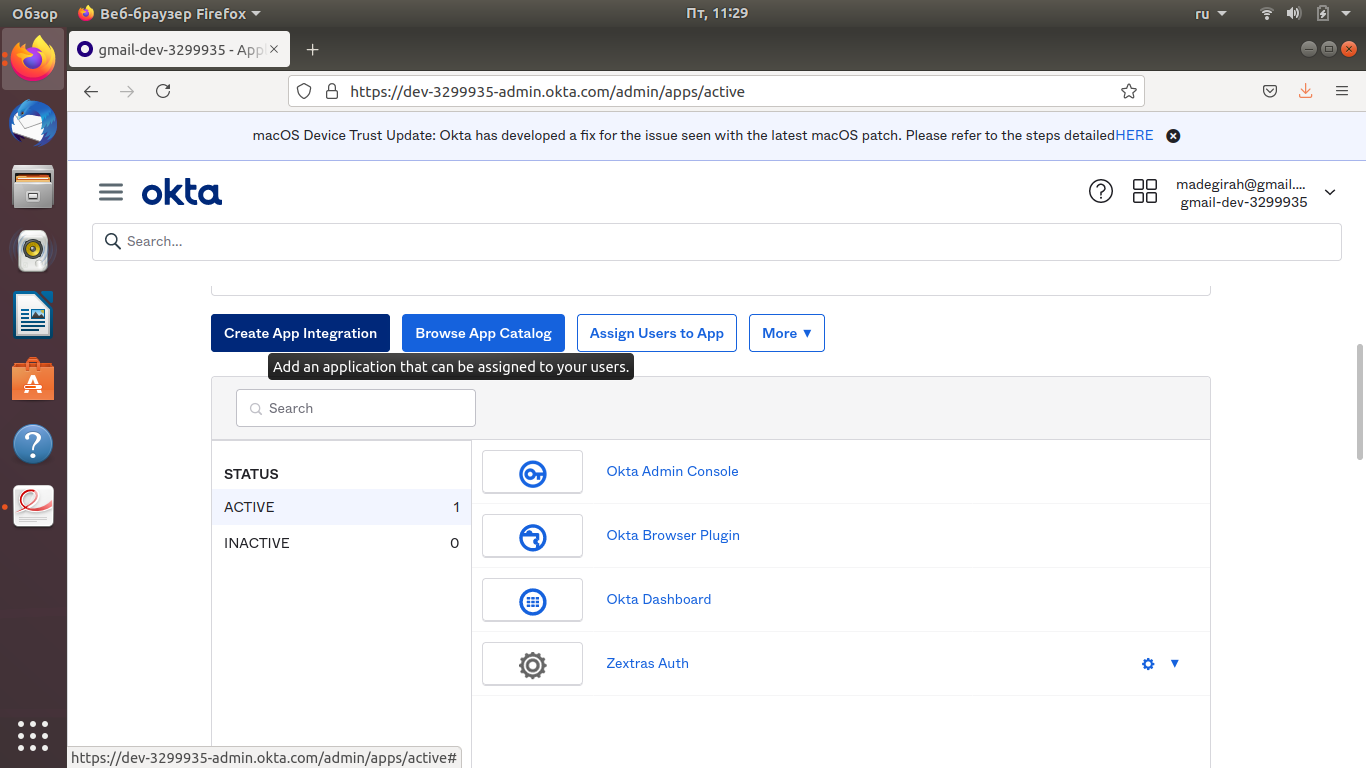
Building an app in Okta
In the event that you have not previously used SAML to access company resources, you will have to create your own application for user authentication. To create such an application in Okta:
1. Register as a developer on the site okta.com
2. In your personal account, click on the “Create App Integration” button
3. In the list that opens, select SAML 2.0 and click Next

4. In the next window, specify the name of your application, select an icon and configure its visibility and click Next when everything is ready

5. In the next window:
- Specify the address of your server with appendix / zx / auth / saml as the SSO URL
- For the Audiend URI, specify the address of your server with the appendix / zx / auth / samlMetadata
- Set the Name ID Format to EmailAddress
- Click Next

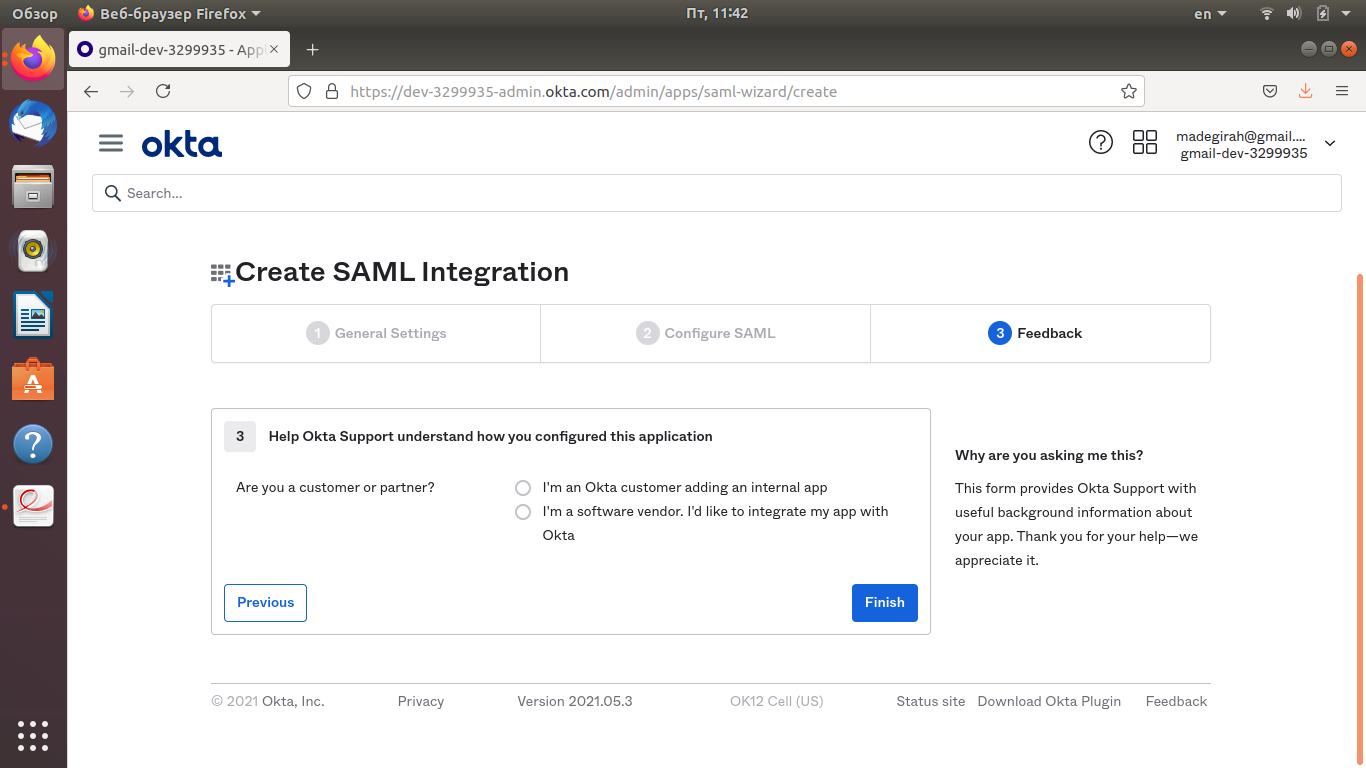
6. In the mini-survey, select the first answer option and click Finish
7. Download the metadata for your SAML application
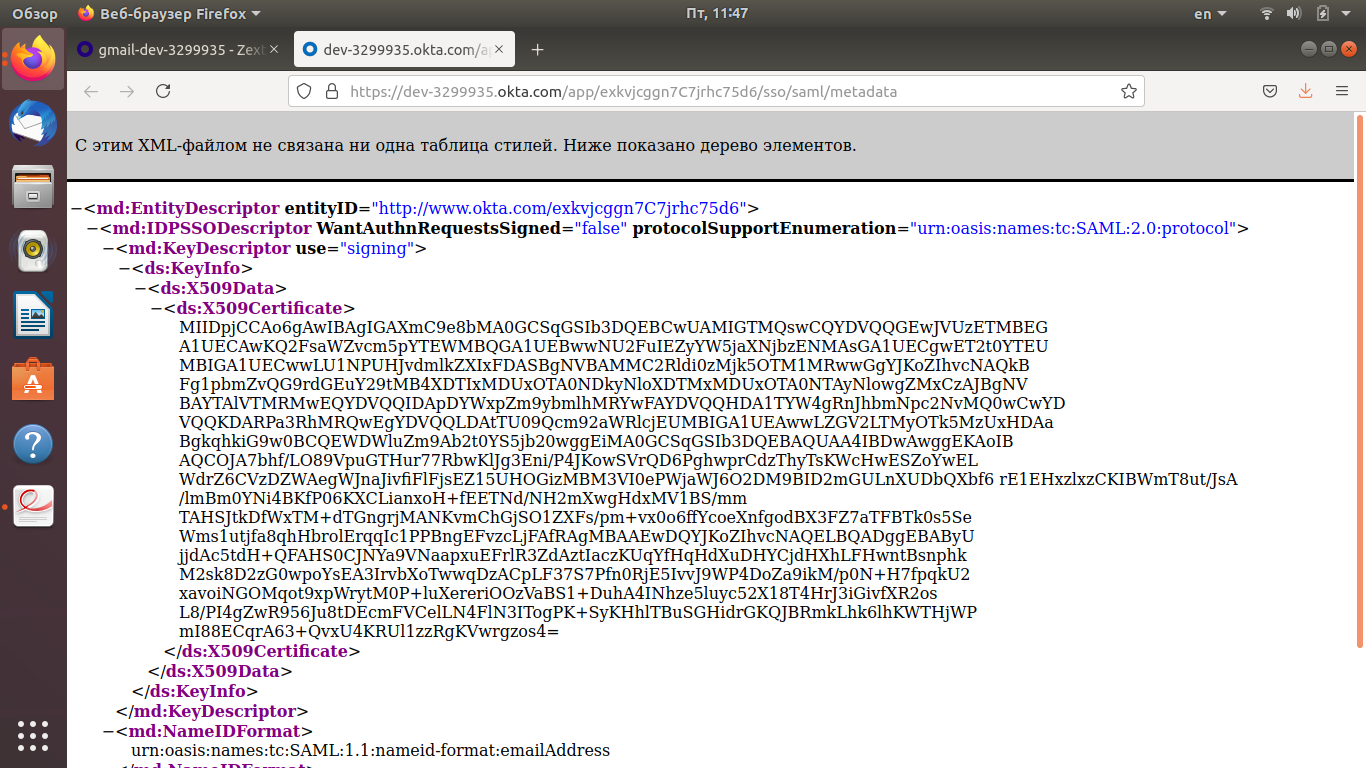
If you already have your app in Okta, just download your app’s metadata file.
Exporting accounts from a Zimbra OSE domain
The SAML app supports both creating new accounts and importing existing ones from Zimbra. In order to import accounts, you must first export them from Zimbra in .csv format.
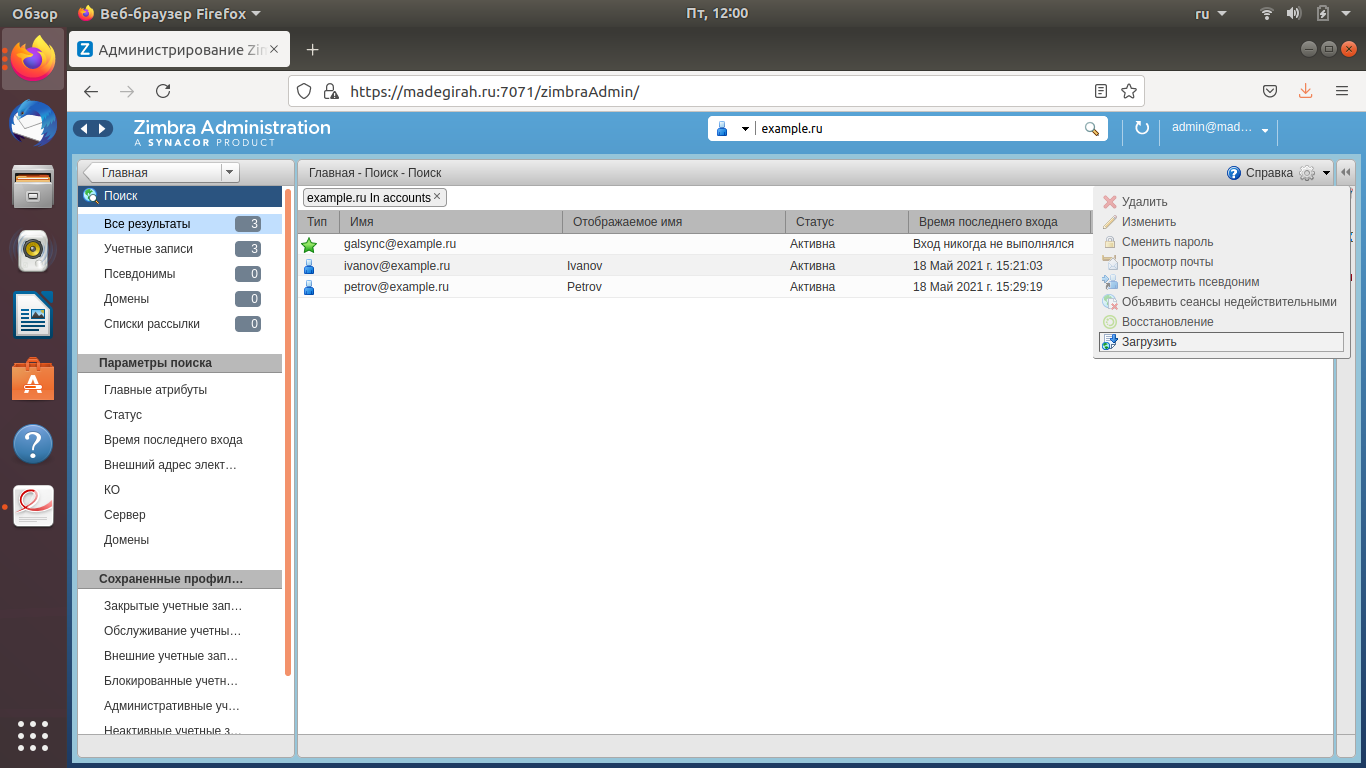
To export accounts, go to the Zimbra admin console, go to the Search tab and search for users with the domain name in the search query. The search result will be a complete list of domain users, which can be downloaded in CSV format by clicking on the “Additional settings” icon in the upper right corner and selecting the “Download” section
Import the received CSV into the SAML application using the appropriate tool in the developer’s personal account.
Integration of the application into Zimbra OSE
To integrate a SAML application into Zimbra OSE, you need the data from the previously downloaded application metadata file.
Integration can be carried out automatically by simply specifying the location of the metadata file in the settings, or manually by adding all the necessary data to the configuration file.
In order to perform the integration in automatic mode, enter the command zxsuite auth saml import example.com url dev-3299935.okta.com/app/exkvjcggn7C7jrhc75d6/sso/saml/metadata… If you are using your own SAML server with self-signed certificates, use the option allow_insecure true to skip SSL certificate authentication.
For manual integration, export the default SAML settings using the command zxsuite auth saml get example.ru export_to /tmp/saml.json… Open the resulting file /tmp/saml.json in any editor and add the following data to it, replacing the lines marked with signs >> << data from a file with metadata. In our case, the added lines will look like this:
“Sp.nameidformat”: “urn: oasis: names: tc: SAML: 1.1: nameid-format: emailAddress”,
“Sp.entityid”: >>example.com/zx/auth/samlMetadata?domain=example.ru<<,
“Sp.assertion_consumer_service.url”: >>example.com/zx/auth/saml<<,
“Idp.single_sign_on_service.url”: >>dev-3299935.okta.com/app/dev-3299935_zextrassamlintegration_1/exkvjcggn7C7jrhc75d6/sso/saml<<,
“Idp.entityid”: >>www.okta.com/exkvjcggn7C7jrhc75d6<<,
“Idp.x509cert”: >>MIIDpjCCAo6gAwIBAgIGAXmC9e8bMA0GCSqGSIb3DQEBCwUAMIGTMQswCQYDVQQGEwJVUzETMBEG A1UECAwKQ2FsaWZvcm5pYTEWMBQGA1UEBwwNU2FuIEZyYW5jaXNjbzENMAsGA1UECgwET2t0YTEU MBIGA1UECwwLU1NPUHJvdmlkZXIxFDASBgNVBAMMC2Rldi0zMjk5OTM1MRwwGgYJKoZIhvcNAQkB Fg1pbmZvQG9rdGEuY29tMB4XDTIxMDUxOTA0NDkyNloXDTMxMDUxOTA0NTAyNlowgZMxCzAJBgNV BAYTAlVTMRMwEQYDVQQIDApDYWxpZm9ybmlhMRYwFAYDVQQHDA1TYW4gRnJhbmNpc2NvMQ0wCwYD VQQKDARPa3RhMRQwEgYDVQQLDAtTU09Qcm92aWRlcjEUMBIGA1UEAwwLZGV2LTMyOTk5MzUxHDAa BgkqhkiG9w0BCQEWDWluZm9Ab2t0YS5jb20wggEiMA0GCSqGSIb3DQEBAQUAA4IBDwAwggEKAoIB AQCOJA7bhf / LO89VpuGTHur77RbwKlJg3Eni / P4JKowSVrQD6PghwprCdzThyTsKWcHwESZoYwEL WdrZ6CVzDZWAegWJnaJivfiFlFjsEZ15UHOGizMBM3VI0ePWjaWJ6O2DM9BID2mGULnXUDbQXbf6 rE1EHxzlxzCKIBWmT8ut / JsA / lmBm0YNi4BKfP06KXCLianxoH + fEETNd / NH2mXwgHdxMV1BS / mm TAHSJtkDfWxTM + dTGngrjMANKvmChGjSO1ZXFs / pm + vx0o6ffYcoeXnfgodBX3FZ7aTFBTk0s5Se Wms1utjfa8qhHbrolErqqIc1PPBngEFvzcLjFAfRAgMBAAEwDQYJKoZIhvcNAQELBQADggEBAByU jjdAc5tdH + QFAHS0CJNYa9VNaapxuEFrlR3ZdAztIaczKUqYfHqHdXuDHYCjdHXhLFHwntBsnphk M2sk8D2zG0wpoYsEA3IrvbXoTwwqDzACpLF37S7Pfn0RjE5IvvJ9WP4DoZa9ikM / p0N + H7fpqkU2 xavoiNGOMqot9xpWrytM0P + luXereriOOzVaBS1 + DuhA4INhze5luyc52X18T4HrJ3iGivfXR2os L8 / PI4gZwR956Ju8tDEcmFVCelLN4FlN3ITogPK + SyKHhlTBuSGHidrGKQJBRmkLhk6lhKWTHjWP mI88ECqrA63 + QvxU4KRUl1zzRgKVwrgzos4 =<<
Save the changes made to the file and import it into Zimbra OSE using the command zxsuite auth saml import example.ru /tmp/saml.json

After completing all the described actions, the “SAML Login” button will appear on the login page of the Zimbra OSE web client. When you click on it, the server will contact the SAML application with a request for user authentication. If the application confirms the authenticity of the login, the user will be logged into his account without entering any authentication data. This leaves the opportunity for the user to log in by login and password.
For all questions related to Zextras Suite Pro and Team Pro, you can contact the Representative of Zextras Technology Ekaterina Triandafilidi by e-mail ekaterina.triandafilidi@zextras.com