Rocket from Amperka, part 5: Debriefing, repair
Another week of work on the rocket.

In this issue we will deal with finding out the reasons for the nozzle breakdown, finding solutions and repairing.
Repairs
In the previous issue, during testing, a jet tore the nozzle off the engine with a jet stream and the stand was damaged. More details can be found here. We just have to go home, review the material and try to figure out what went wrong.
But first of all, we decided to restore the performance of our main meter. We ordered new round guides and inserted them instead of the broken one. We also replaced the faulty strain gauges and restored the geometry of the rocker arm, re-calibrated.
Debriefing
The stand is ready to work again, now we need to understand where we miscalculated. In the previous post and in PM, many asked to look at the thrust graph closer. Please! I specially made screenshots with the values:


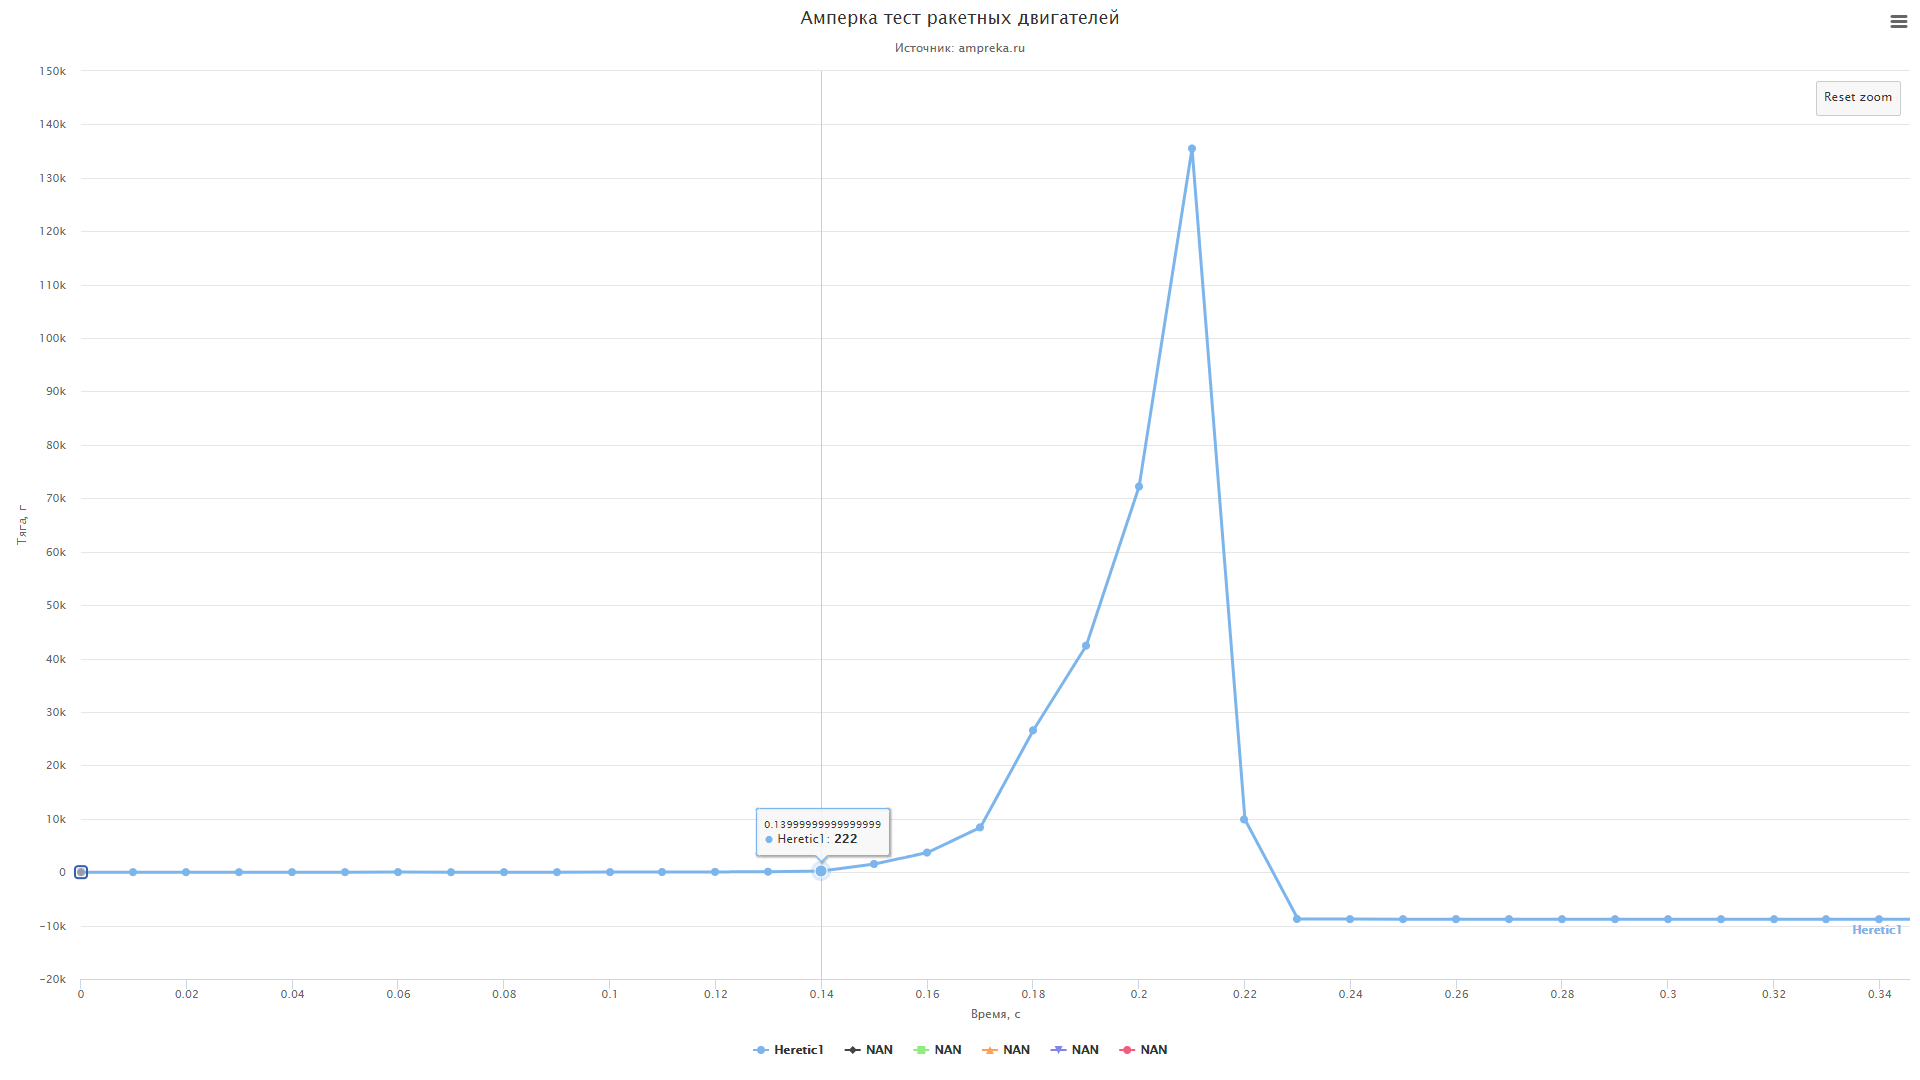
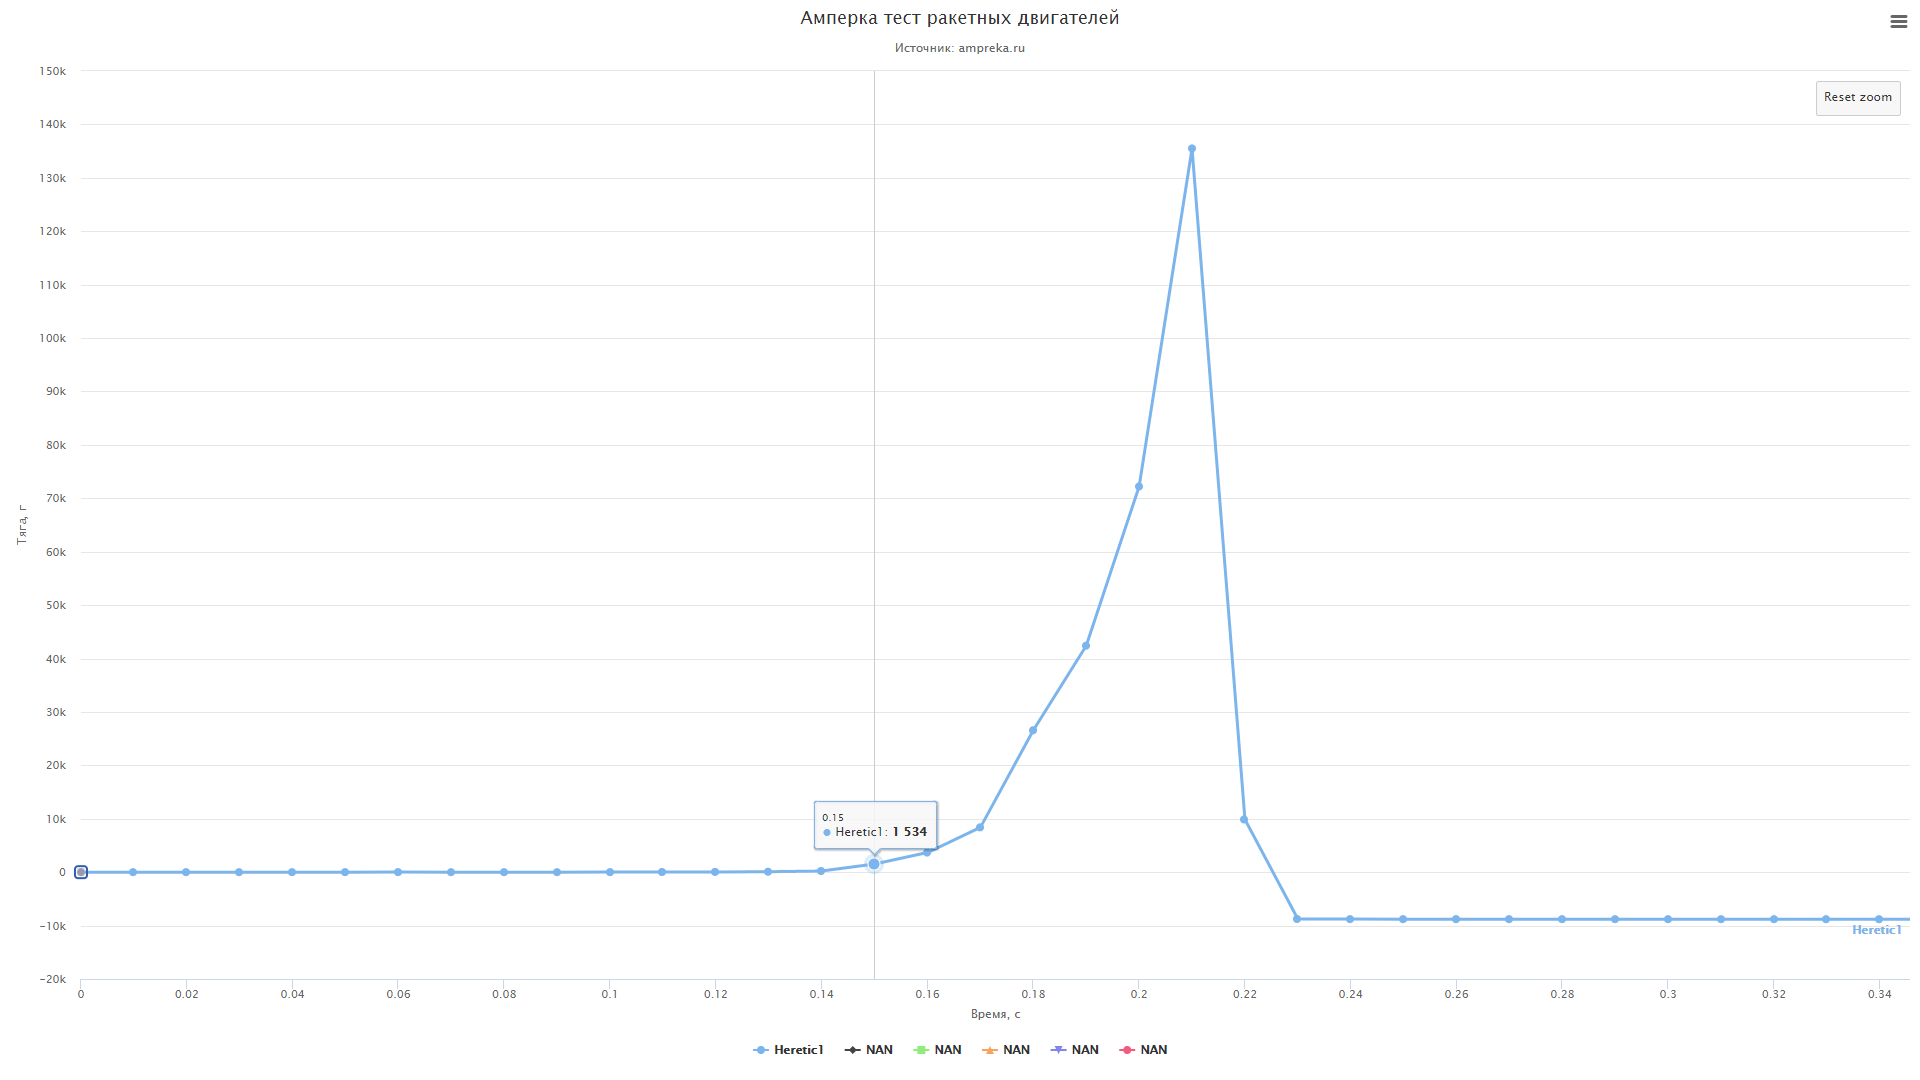
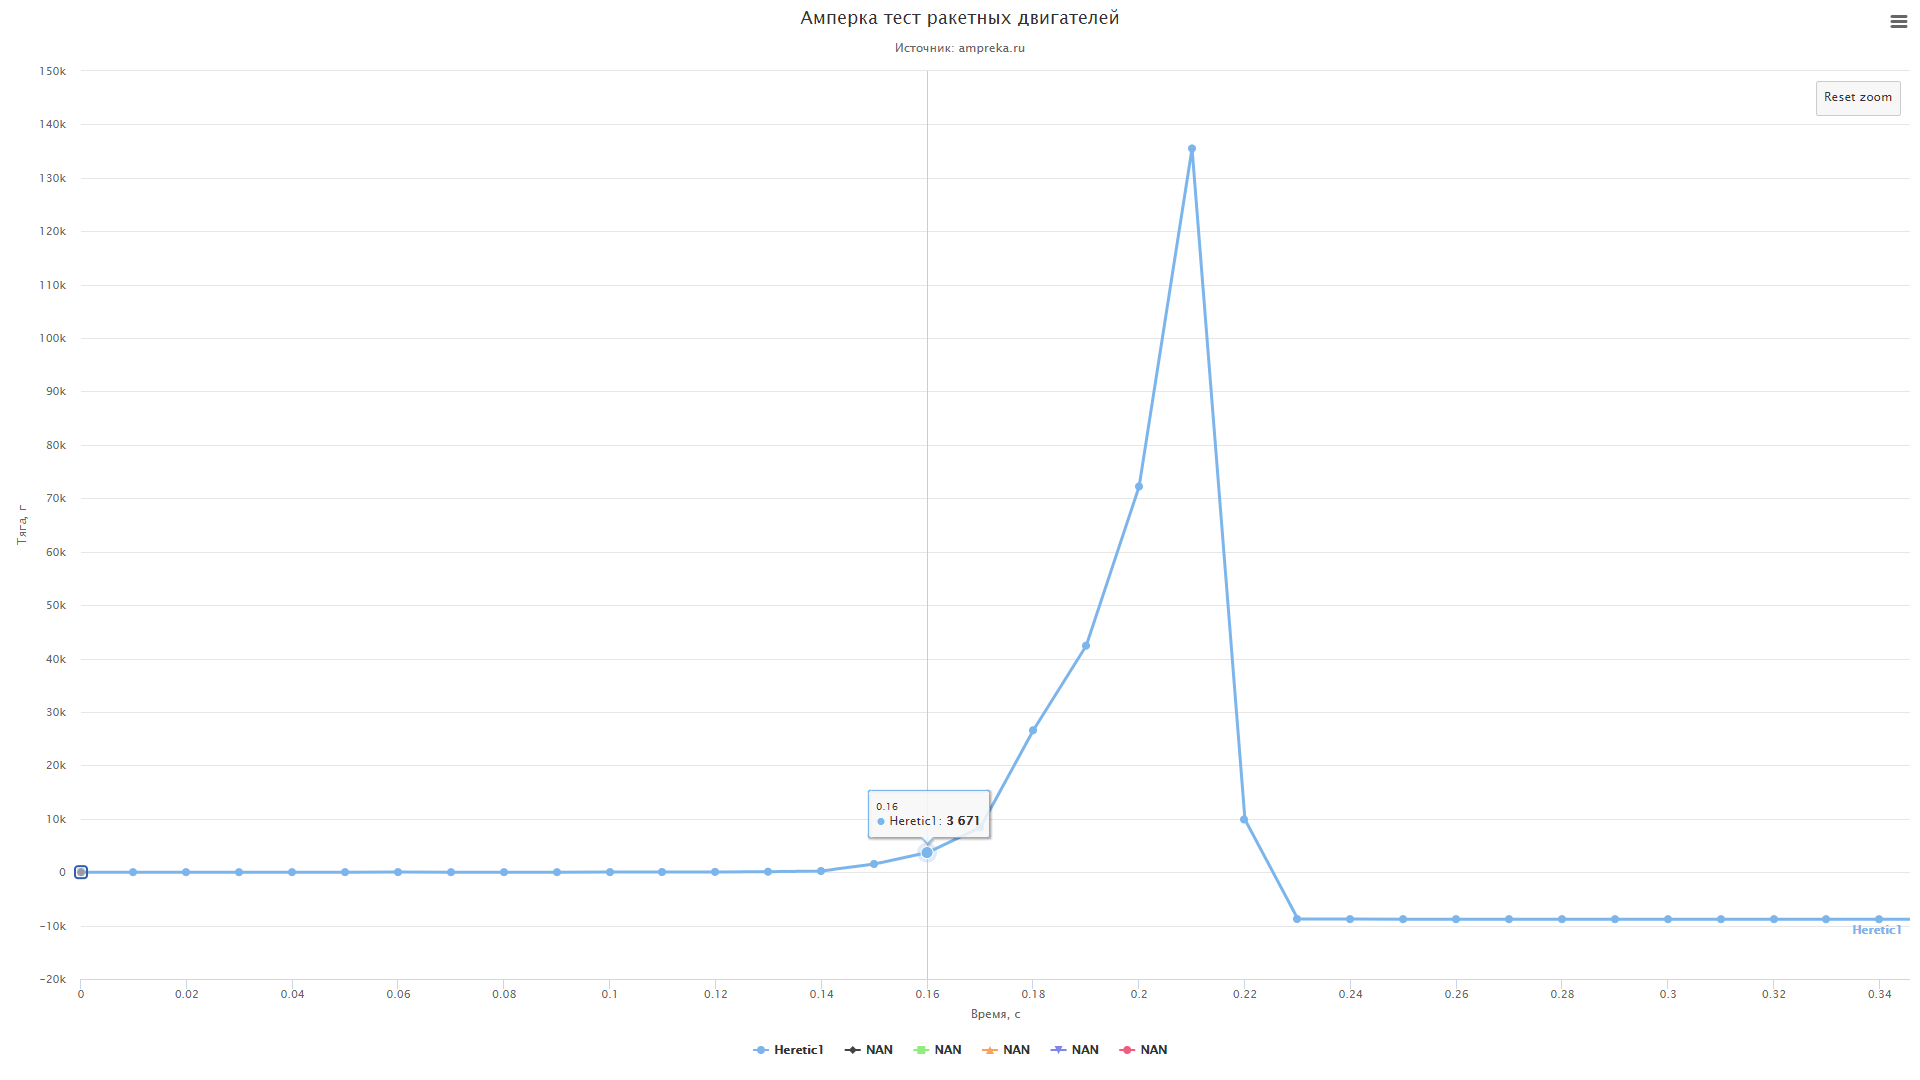
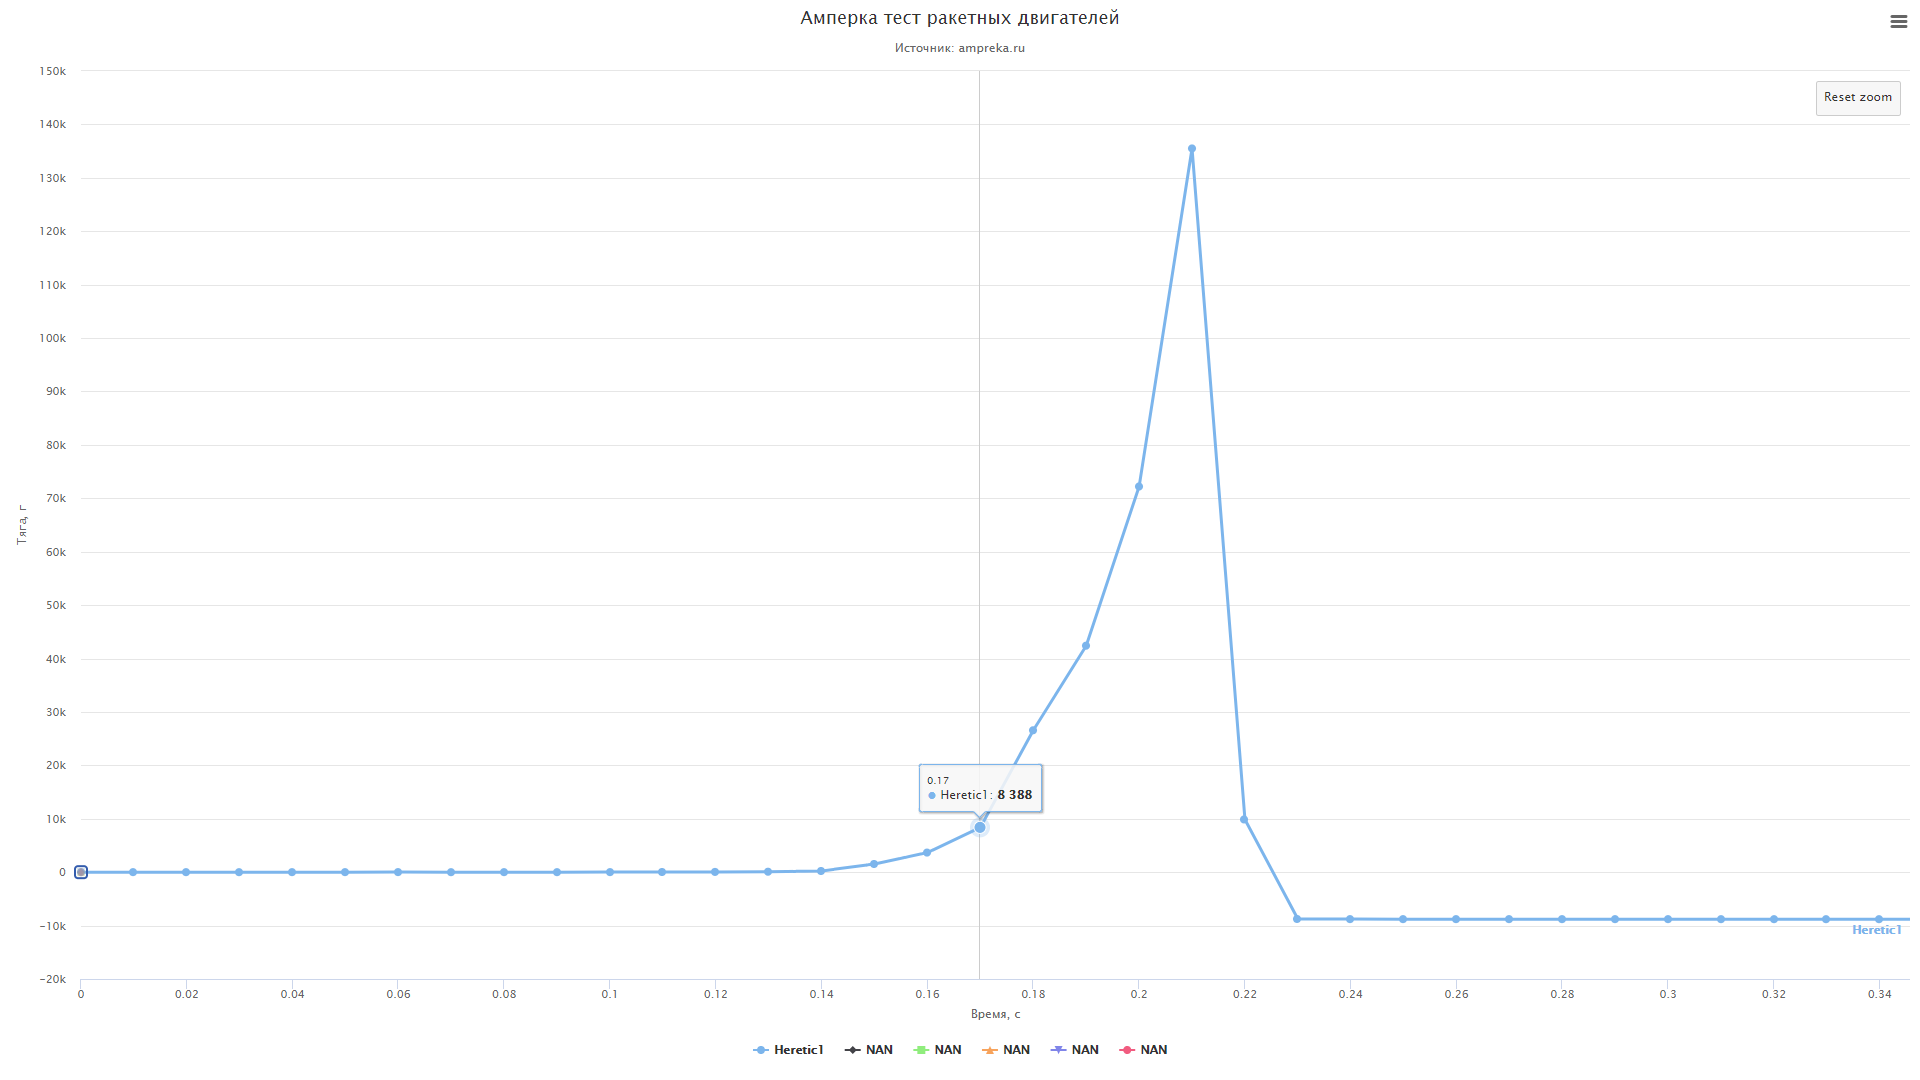
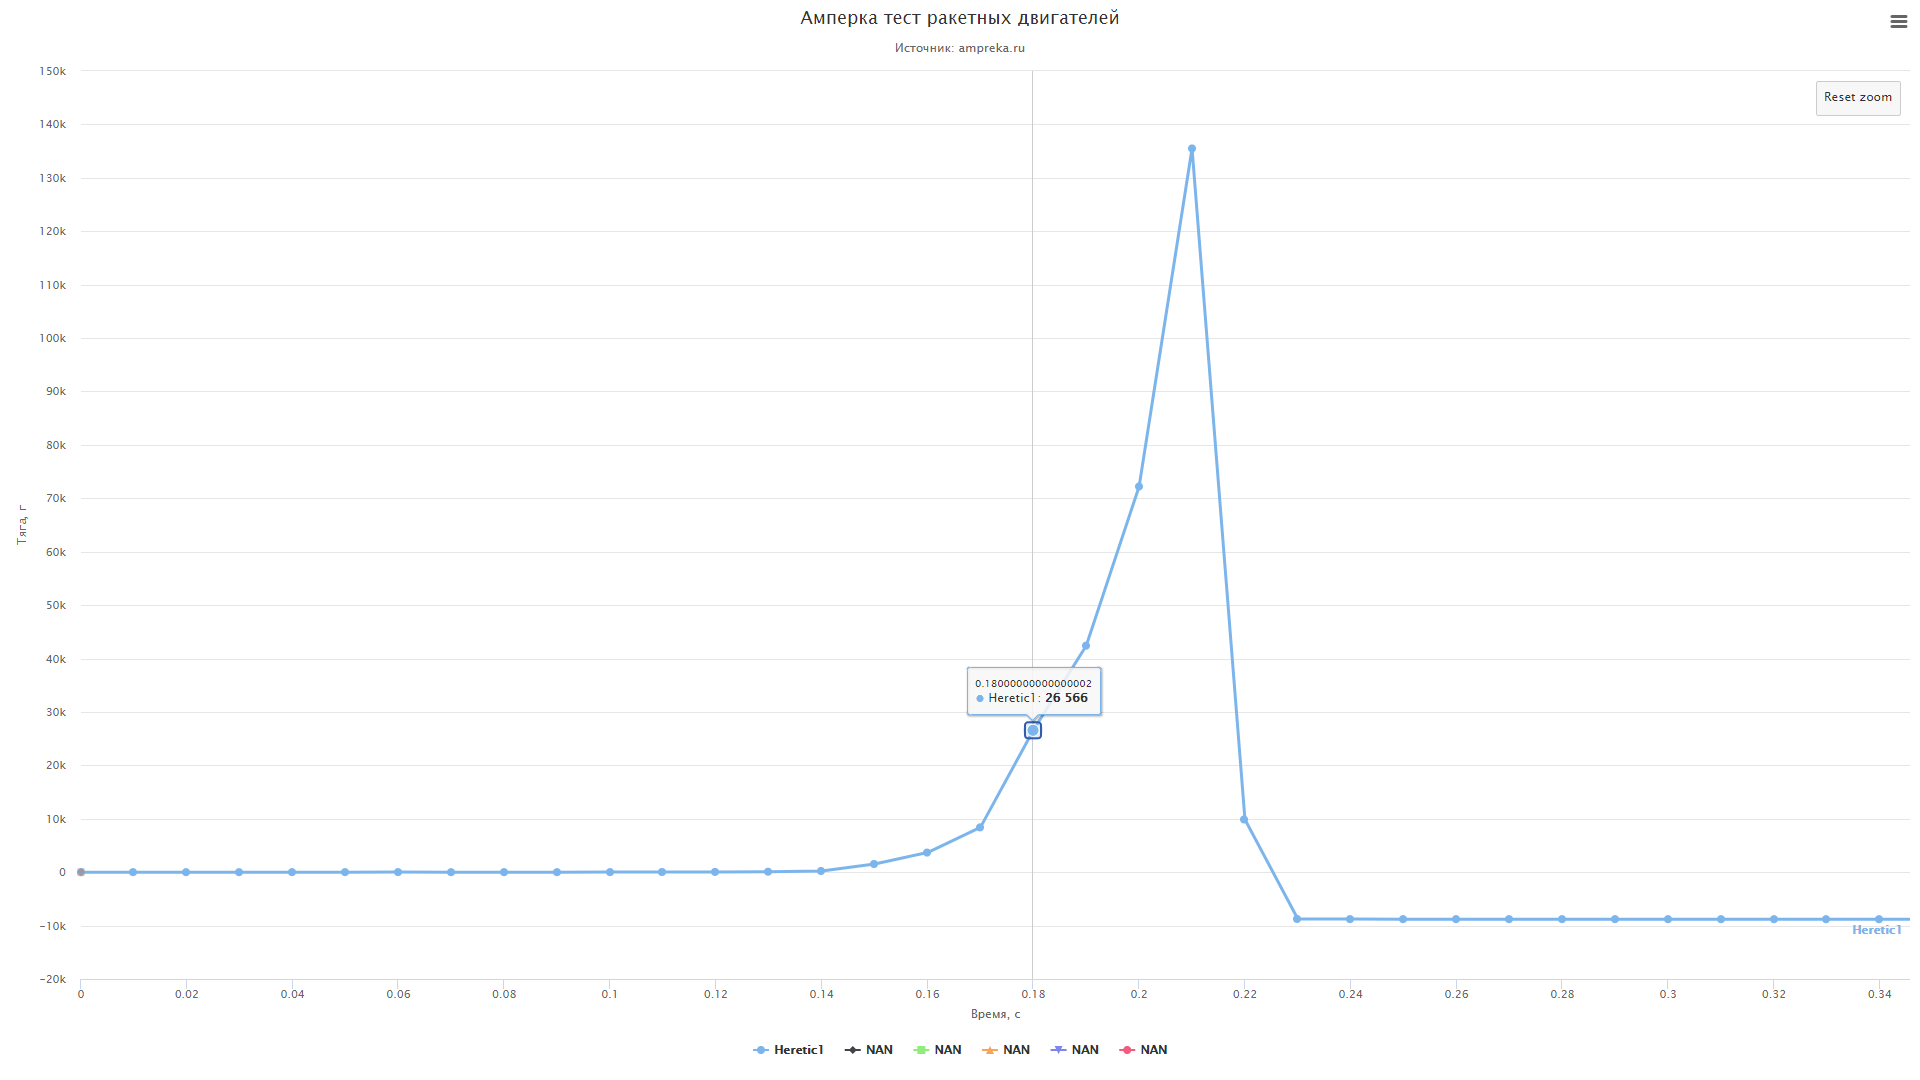
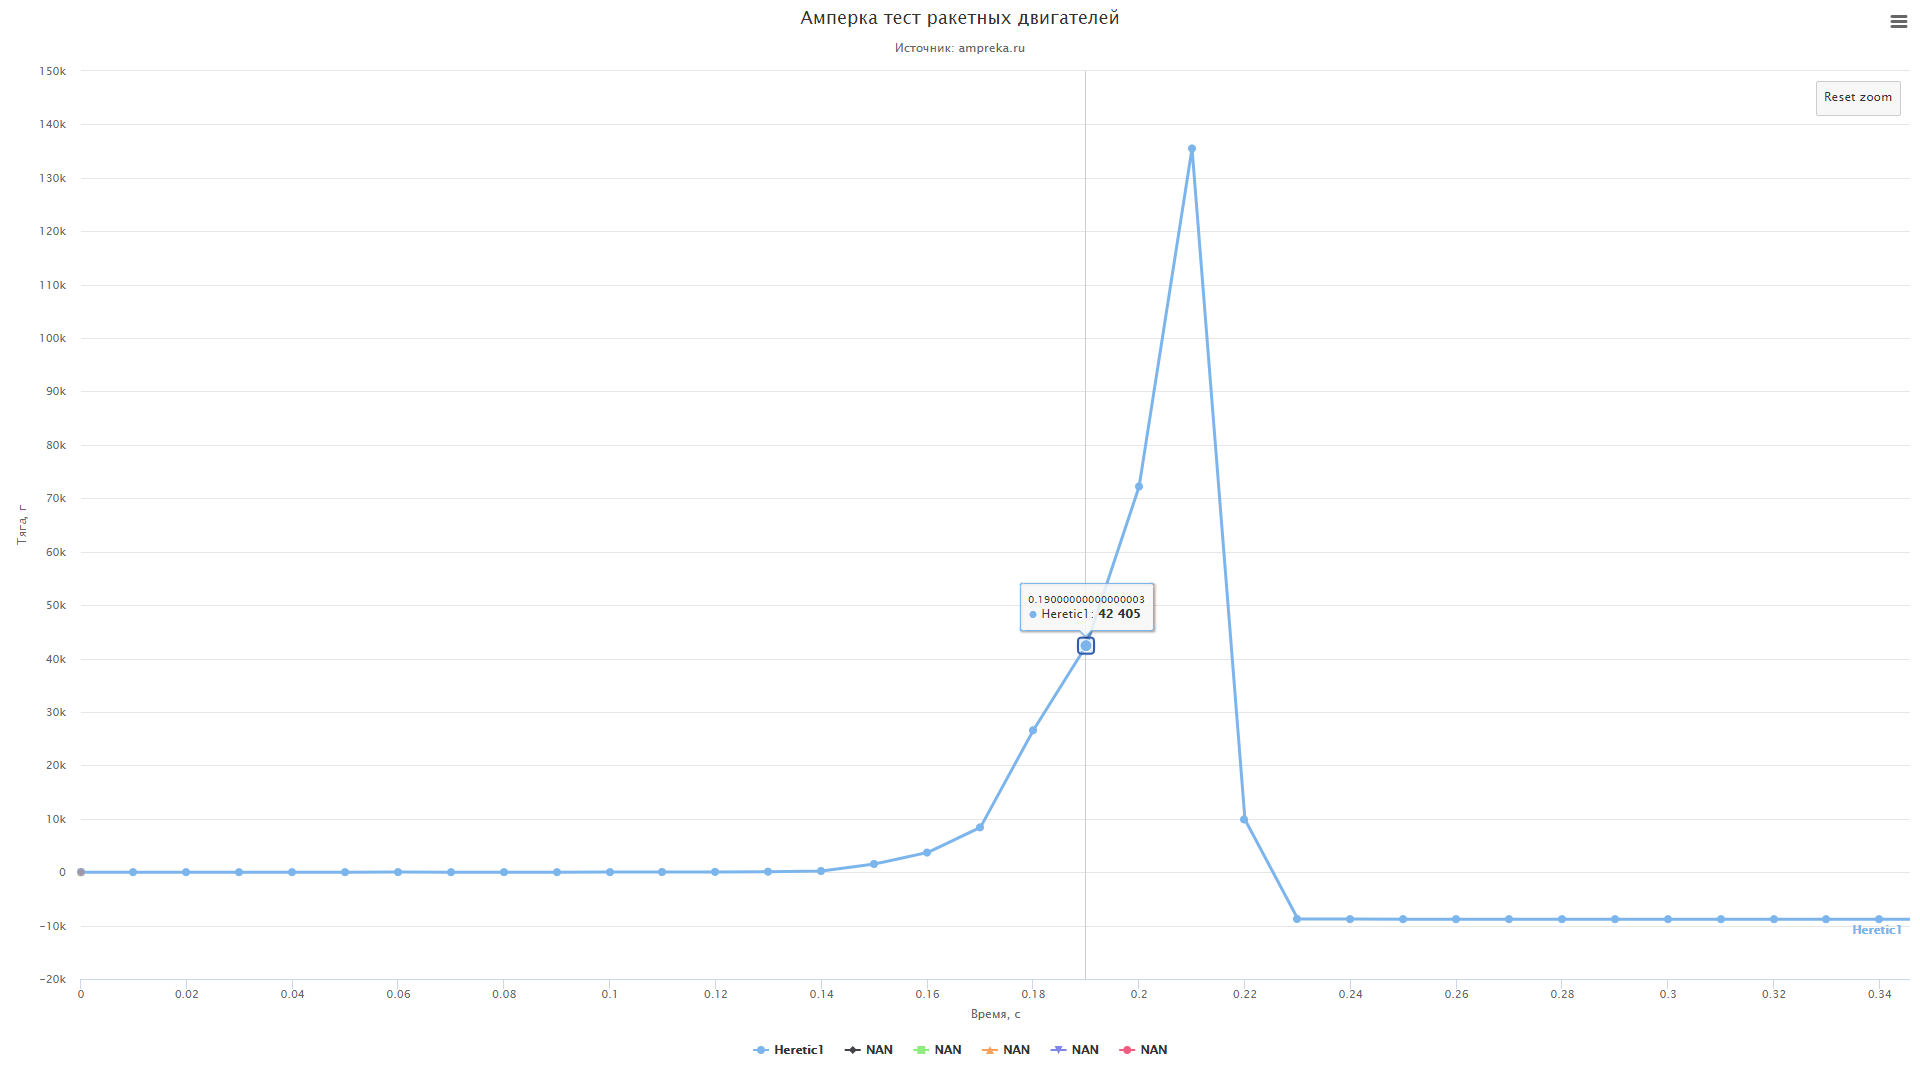
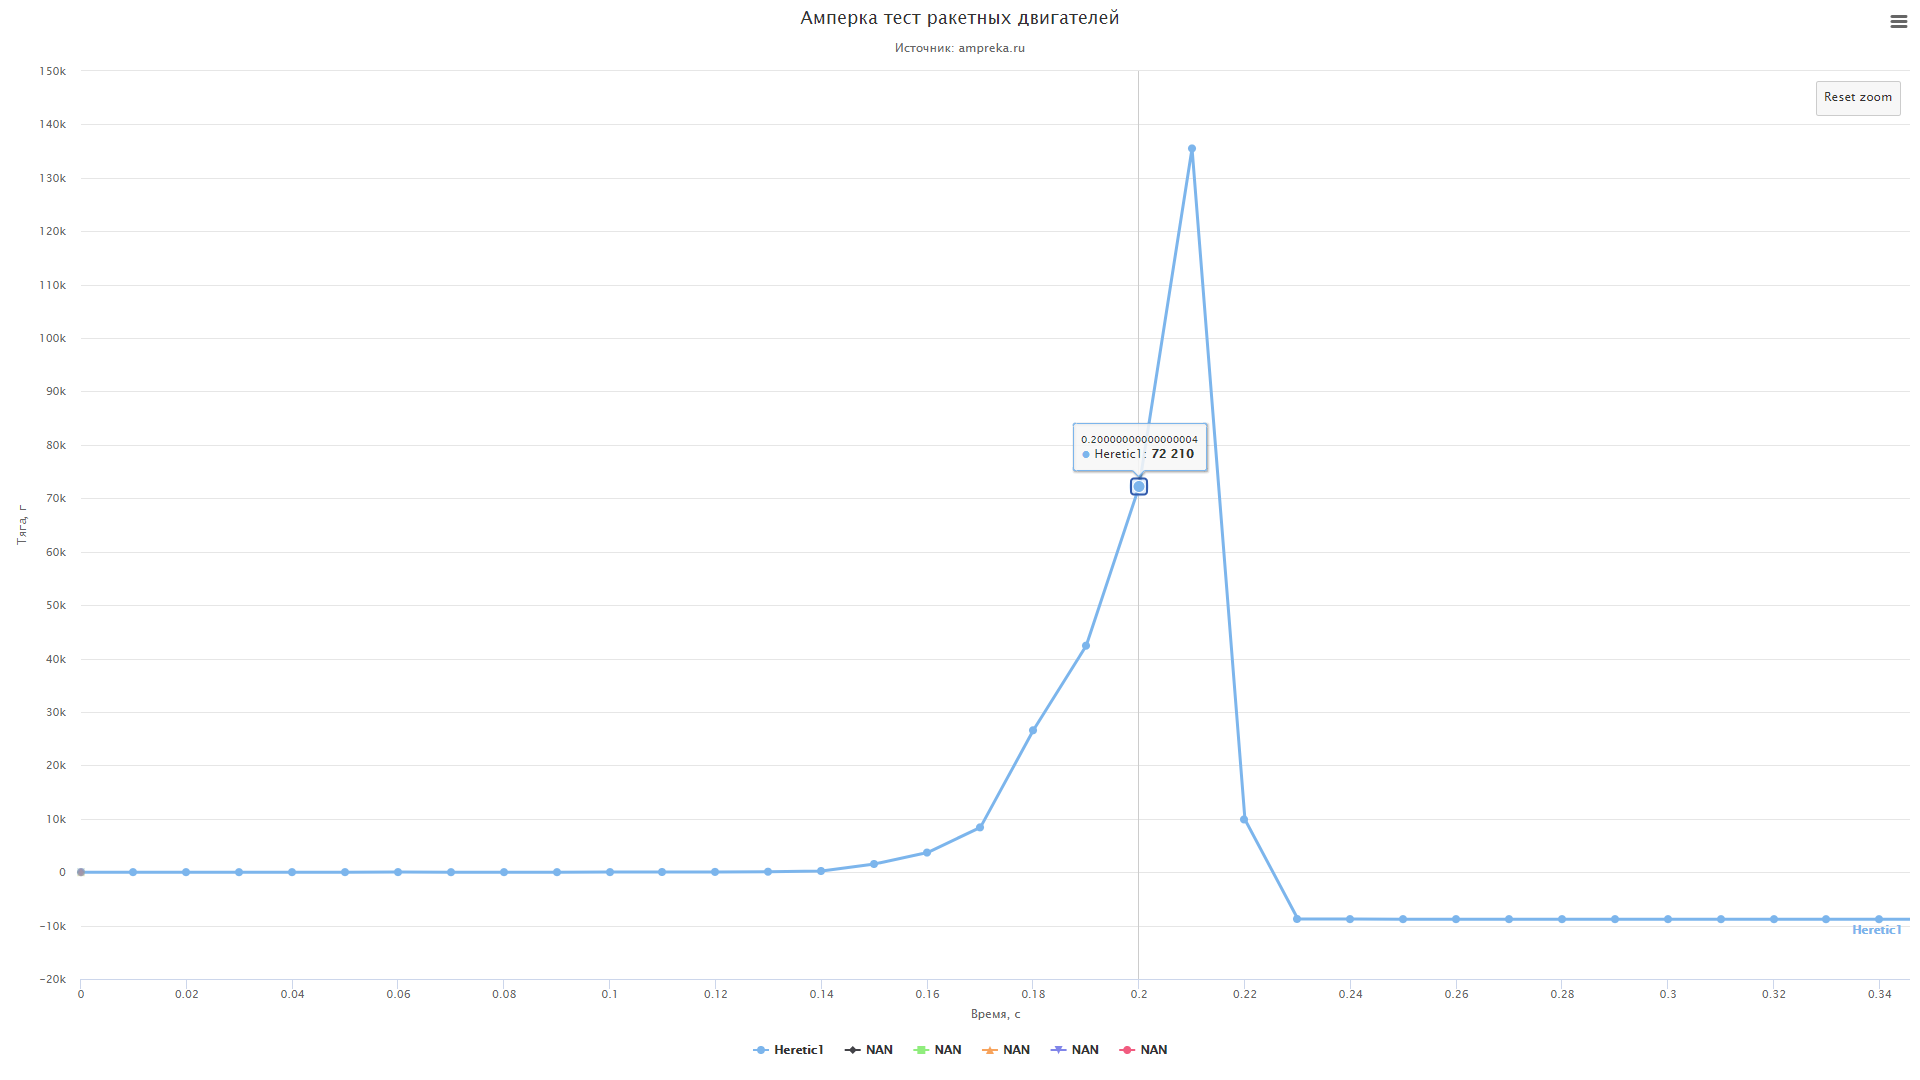
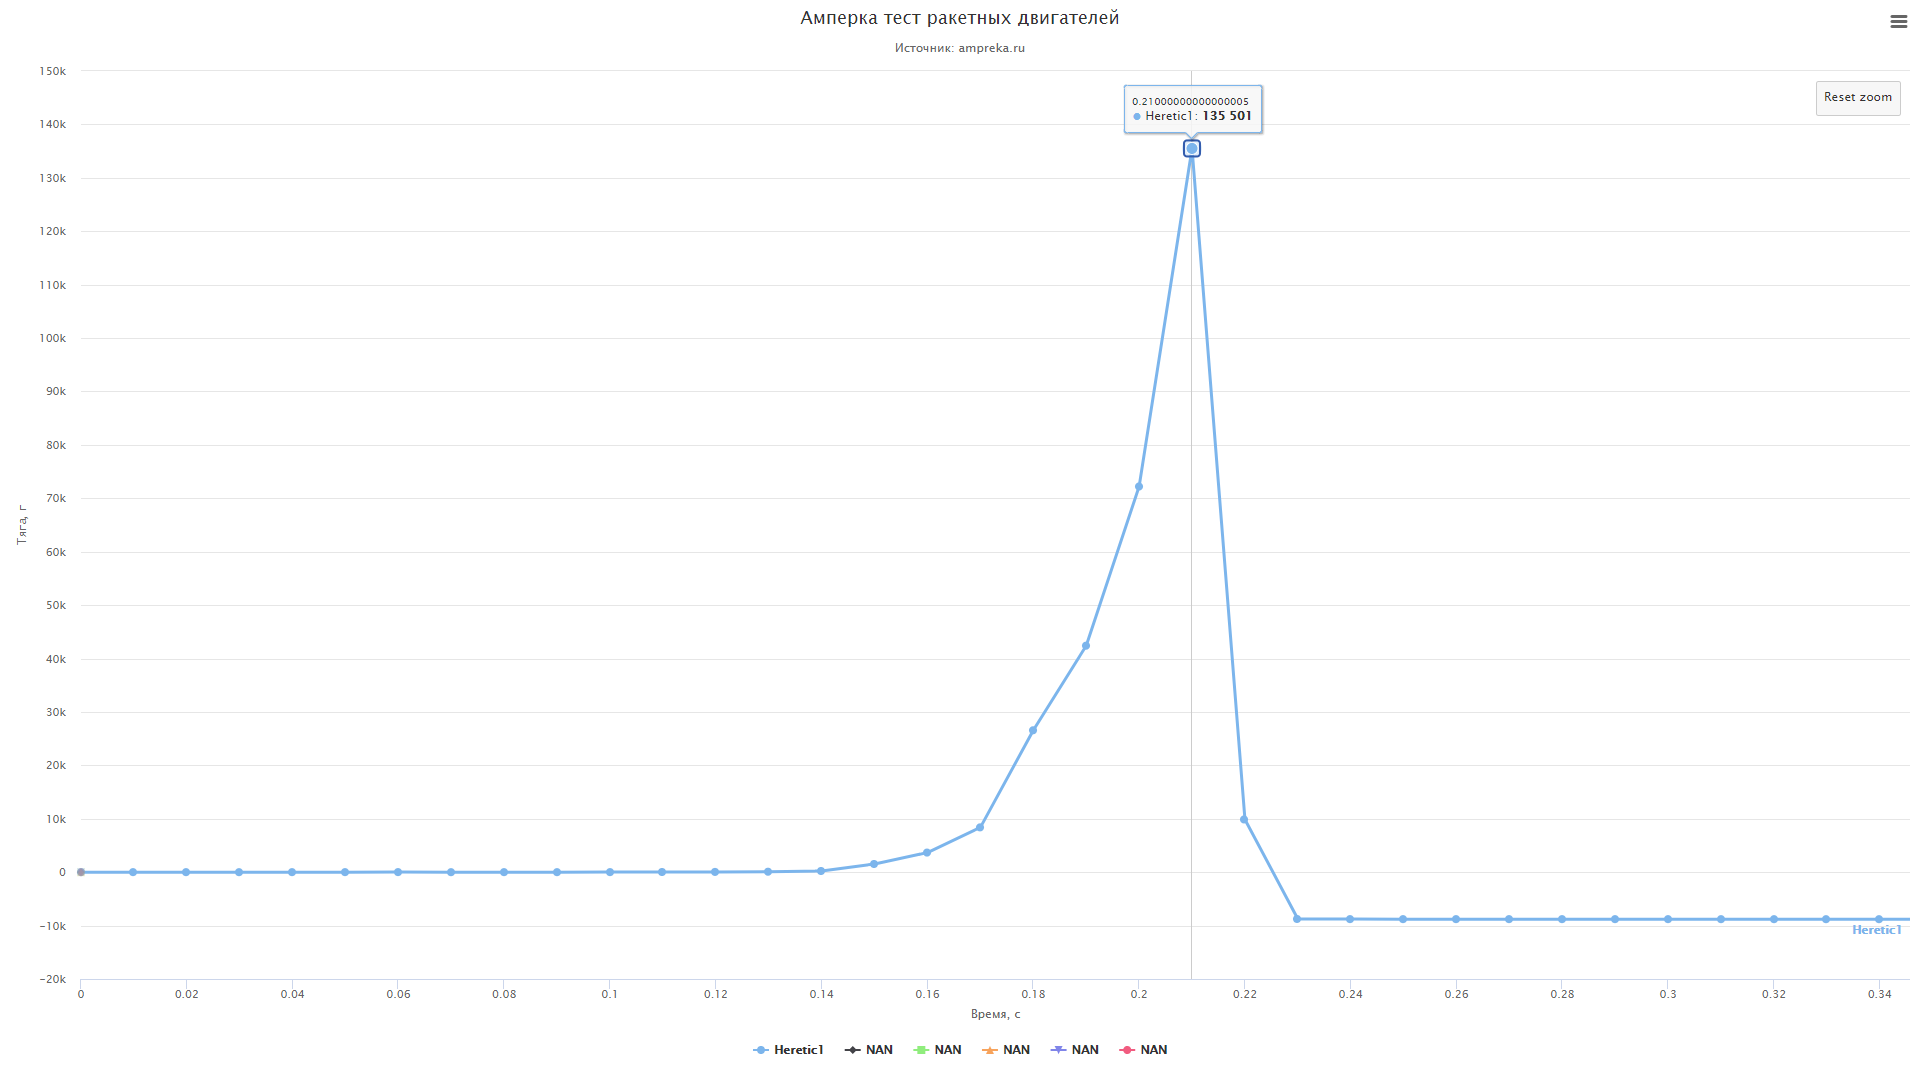
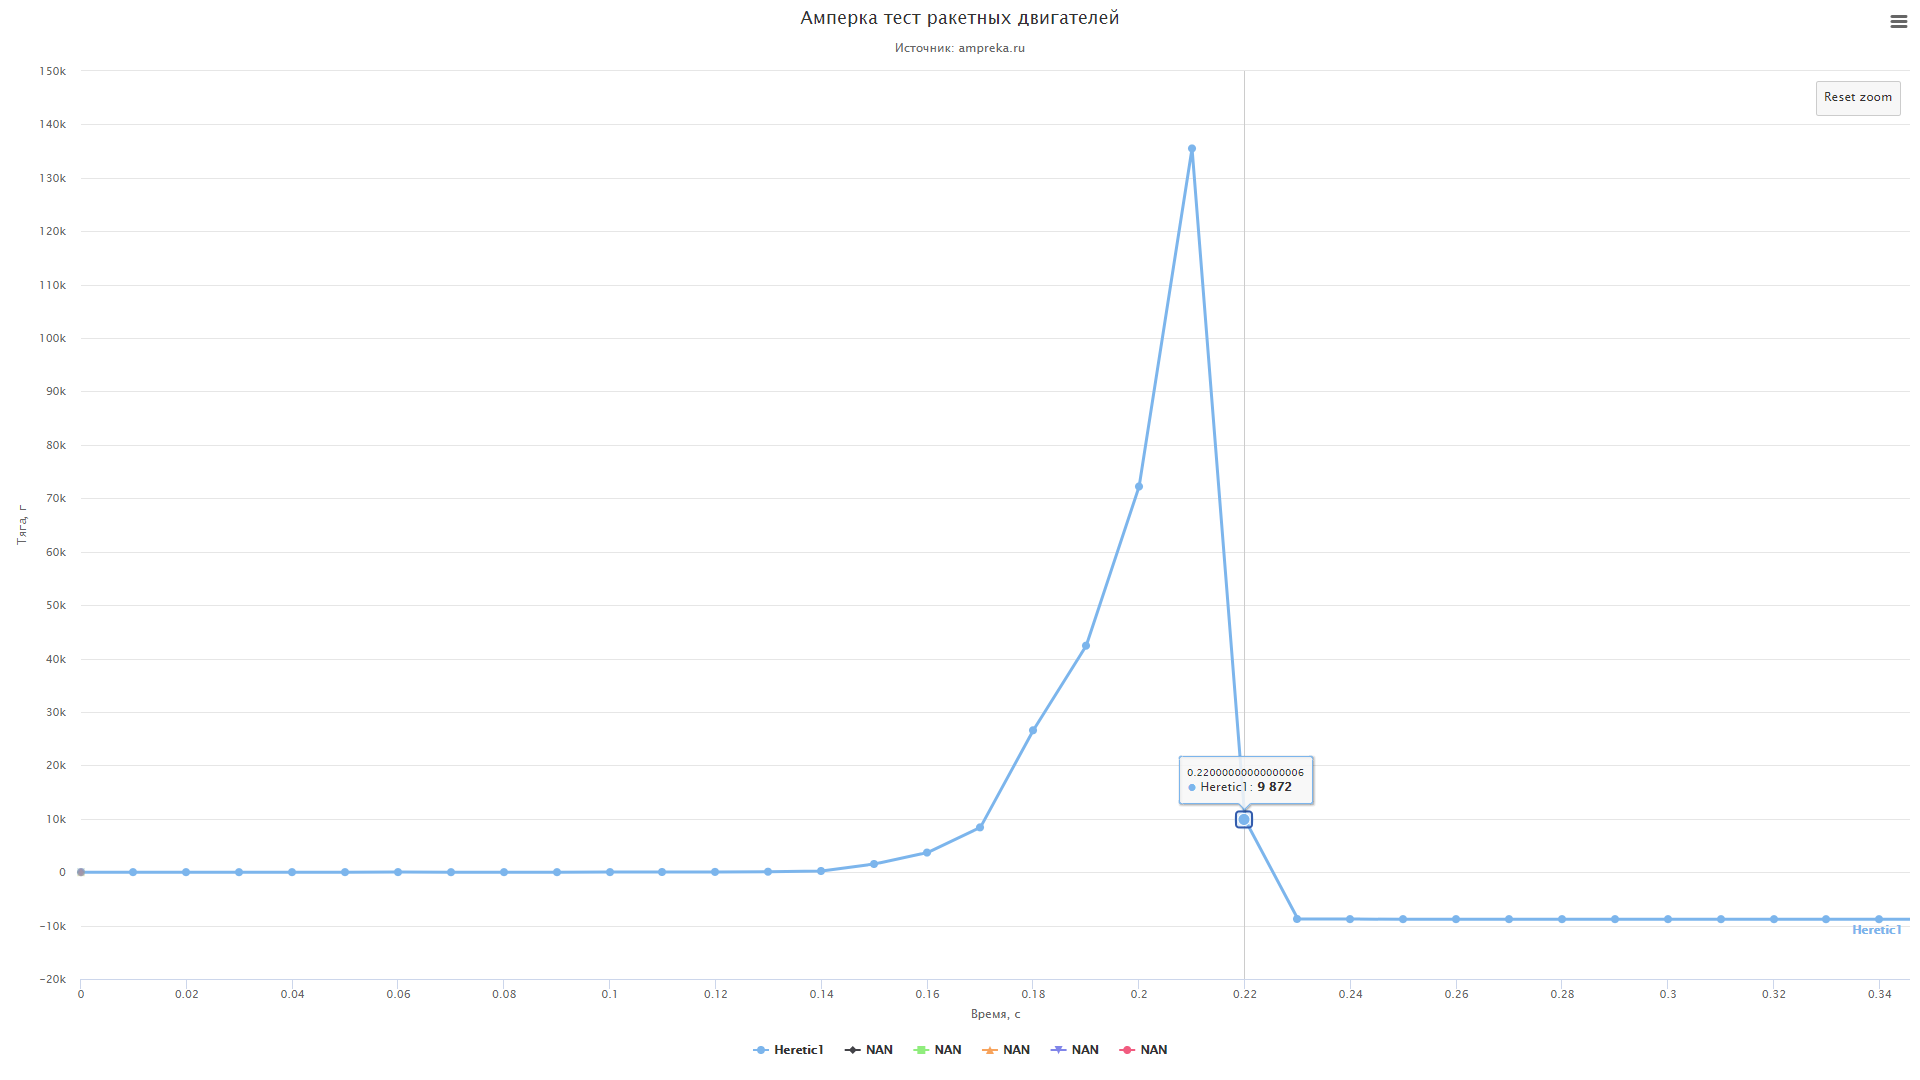
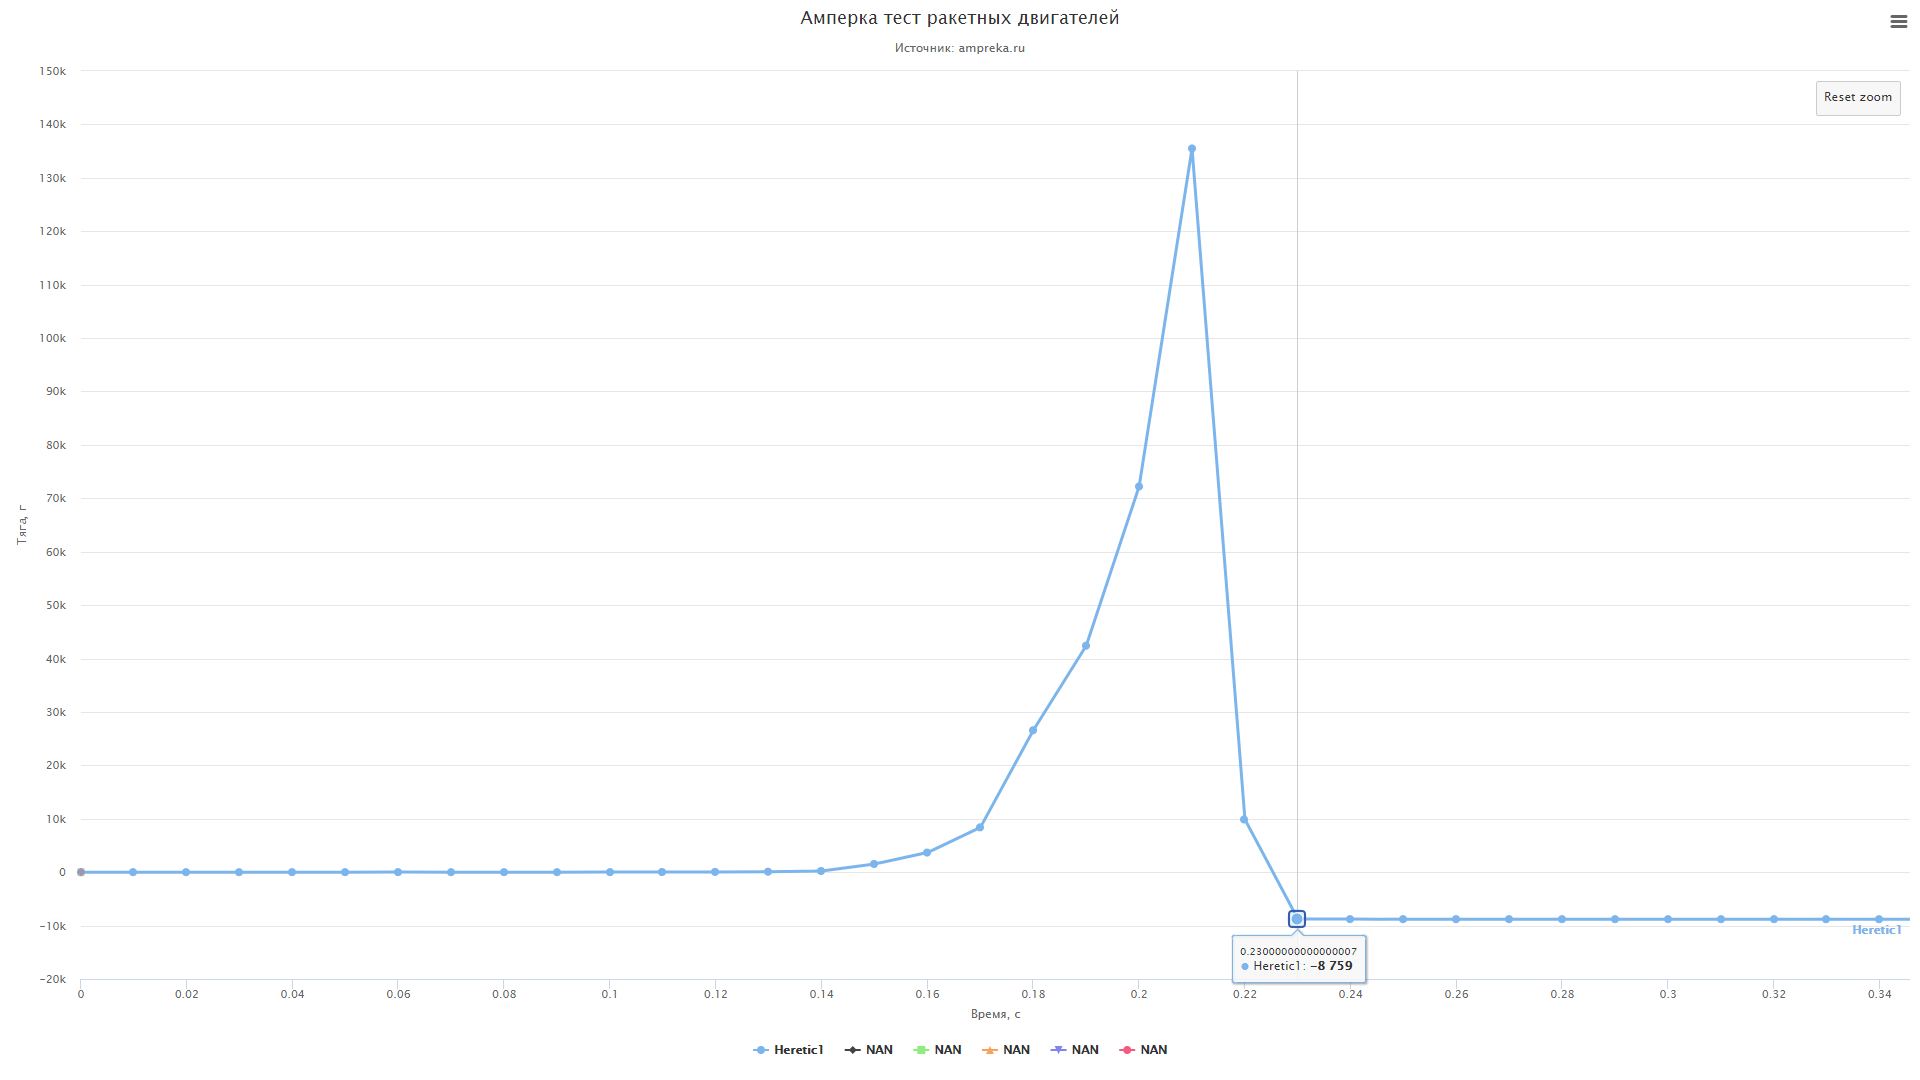
The 10th photo shows the moment of development of the effort of 135 kg. We cannot say that the thrust at that moment was exactly the same, since after that, most likely, the strain gauges failed. We can only say for sure that it is not less than this indicator. Logically, this indicator was also influenced by the recoil effect – the engine threw away part of its mass in the form of a nozzle, which is why our stand turned into an artillery gun carriage, and the guide could not stand it.
Even in slow motion, it was possible to see that immediately after starting the engine goes well into a mode in which it operates stably for a short period of time, after which the pressure of the jet at the nozzle outlet begins to grow (and should be approximately equal to atmospheric, according to our calculations), which is a consequence increasing the pressure in the combustion chamber. There can be several reasons for the increase in the amount of combustible gases (as well as their combination is possible):
- Crater fuel combustion
- Fuel detonation
- Splitting the fuel charge
- Choke of the throat
- Combustion on off-design surface
- Incorrect nozzle calculation
- Incorrect calculation of the fuel profile and checkers
We will follow from the opposite. The option with the nozzle clogging by the starter was discarded immediately, since the video clearly shows how it is thrown out of the nozzle even before the engine reaches the mode. Splitting of the checkers is also unlikely – they were not only glued together with fuel, but also glued to the pipe walls with epoxy. Crater burning is extremely unlikely, since during the fuel tests in the first series, we burned the most defective stick with obvious signs of craters, and uneven burning was not observed. The detonation version is also inoperative: the pressure would rise so sharply that the pipe would burst without even having time to rip off the nozzle, and the video shows how the fuel continues to burn out after the breakdown. And caramel fuel is not prone to detonation – it’s not ammonal.
Now about the more likely reasons. Comrades from MCA advised to look towards the transition of combustion from the inner surface of the checker to the outer one, which led to a sharp increase in the amount of combustible gases. And the reason for this was the lack of armor on the fuel charge. The fuel burned out from the channel to the very edge, and then the combustion moved to the outer layer, greatly increasing the area. Next time we’ll be smarter and make a reservation.
An incorrect nozzle calculation is likely, however, it depends on how correctly the fuel was calculated. More precisely, his law of combustion. In our calculations, we used the values taken from the Meteor program, but this does not mean at all that the characteristics of the fuel we welded fully correspond to the tabulated ones.
Combustion law calculation
The fuel burning rate is directly proportional to the pressure inside the combustion chamber and is measured in mm / s. To carry out such tests, the method is used Crawford bombs, which consists in creating an installation similar to the following:
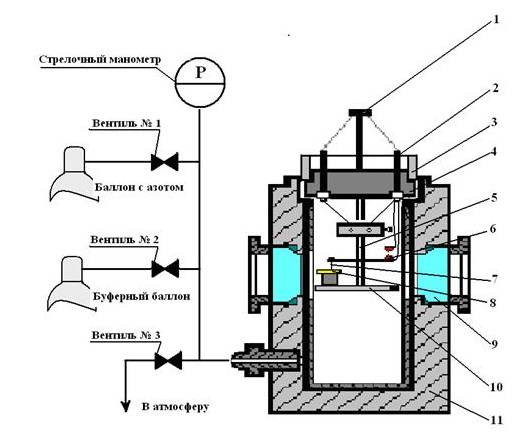
(source)
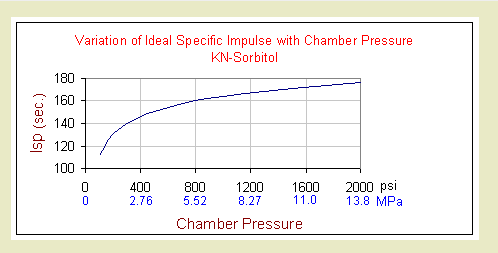
The essence of the tests consists in burning a small-volume fuel checker in a chamber, inside which pressure is injected and measuring the combustion rate at different pressures. The result of measurements will be approximately such a graph, according to which it will be possible to calculate the combustion law for each individual fuel, taking into account its features: purity of reagents, humidity, quality of pressing / casting, etc.
(source)
We decided to conduct such tests and compare how the characteristics of our fuel correspond to the tabulated ones. For this we will build a new stand. We took the OU-7 carbon dioxide fire extinguisher as its basis and blew off the charge from it. We will put small checkers in it, inject nitrogen (by the way, we have already bought a nitrogen cylinder too) and test how quickly the fuel will burn at different pressures. At the moment, we are selecting suitable fittings and control and measuring equipment, along the way, a program is being written for carrying out measurements. When we’re done debugging, we’ll provide the code.
Series video: