Reopening of the Norwegian terminal Tandberg 2215 S, 1983 release
I present to your attention a note on the restoration of the Tandberg TDV 2215 S terminal (it is also, according to the nameplate on the back of the case, TDV 2200 S)
Interest in such a terminal flared up after a long memory of the Hungarian Videoton 52100 terminal. Unfortunately, such a terminal could not be purchased, but when I saw the Norwegian Tandberg terminal for sale, I immediately purchased it. I was lucky with the purchase, the terminal turned out to be NEW, completely unused since 1983 (I focus on the nameplate on the back of the monitor).
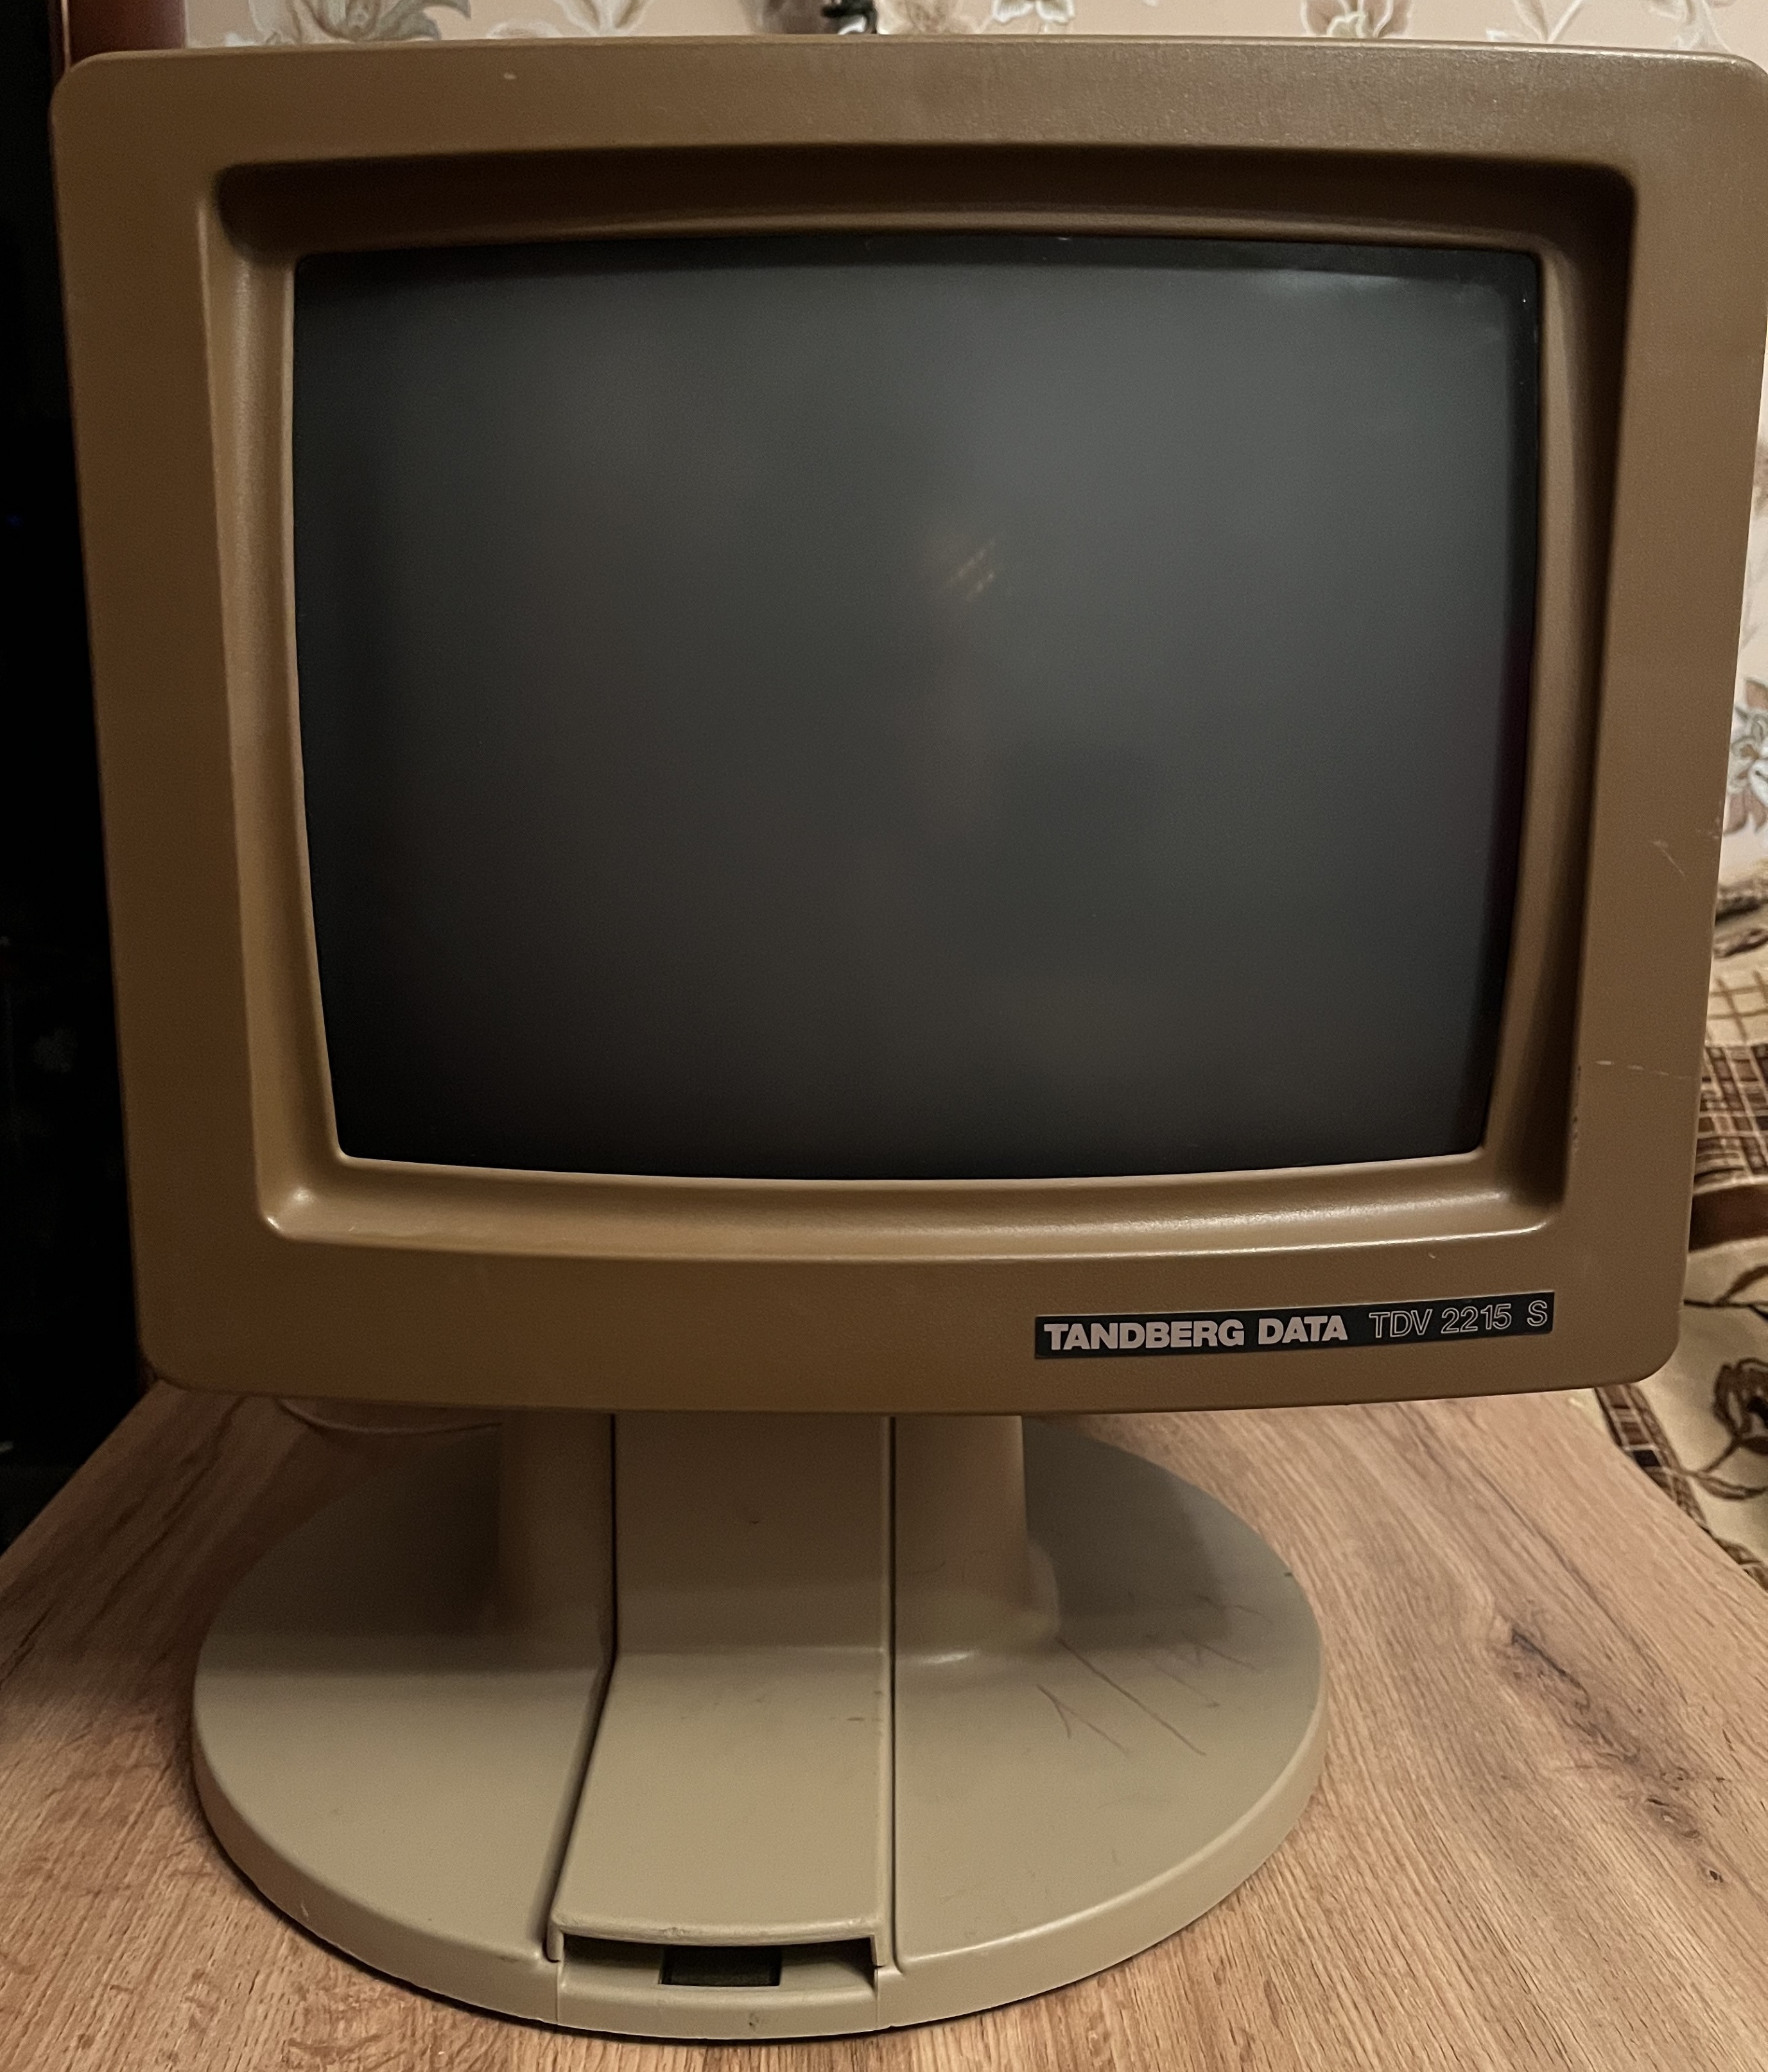
front part
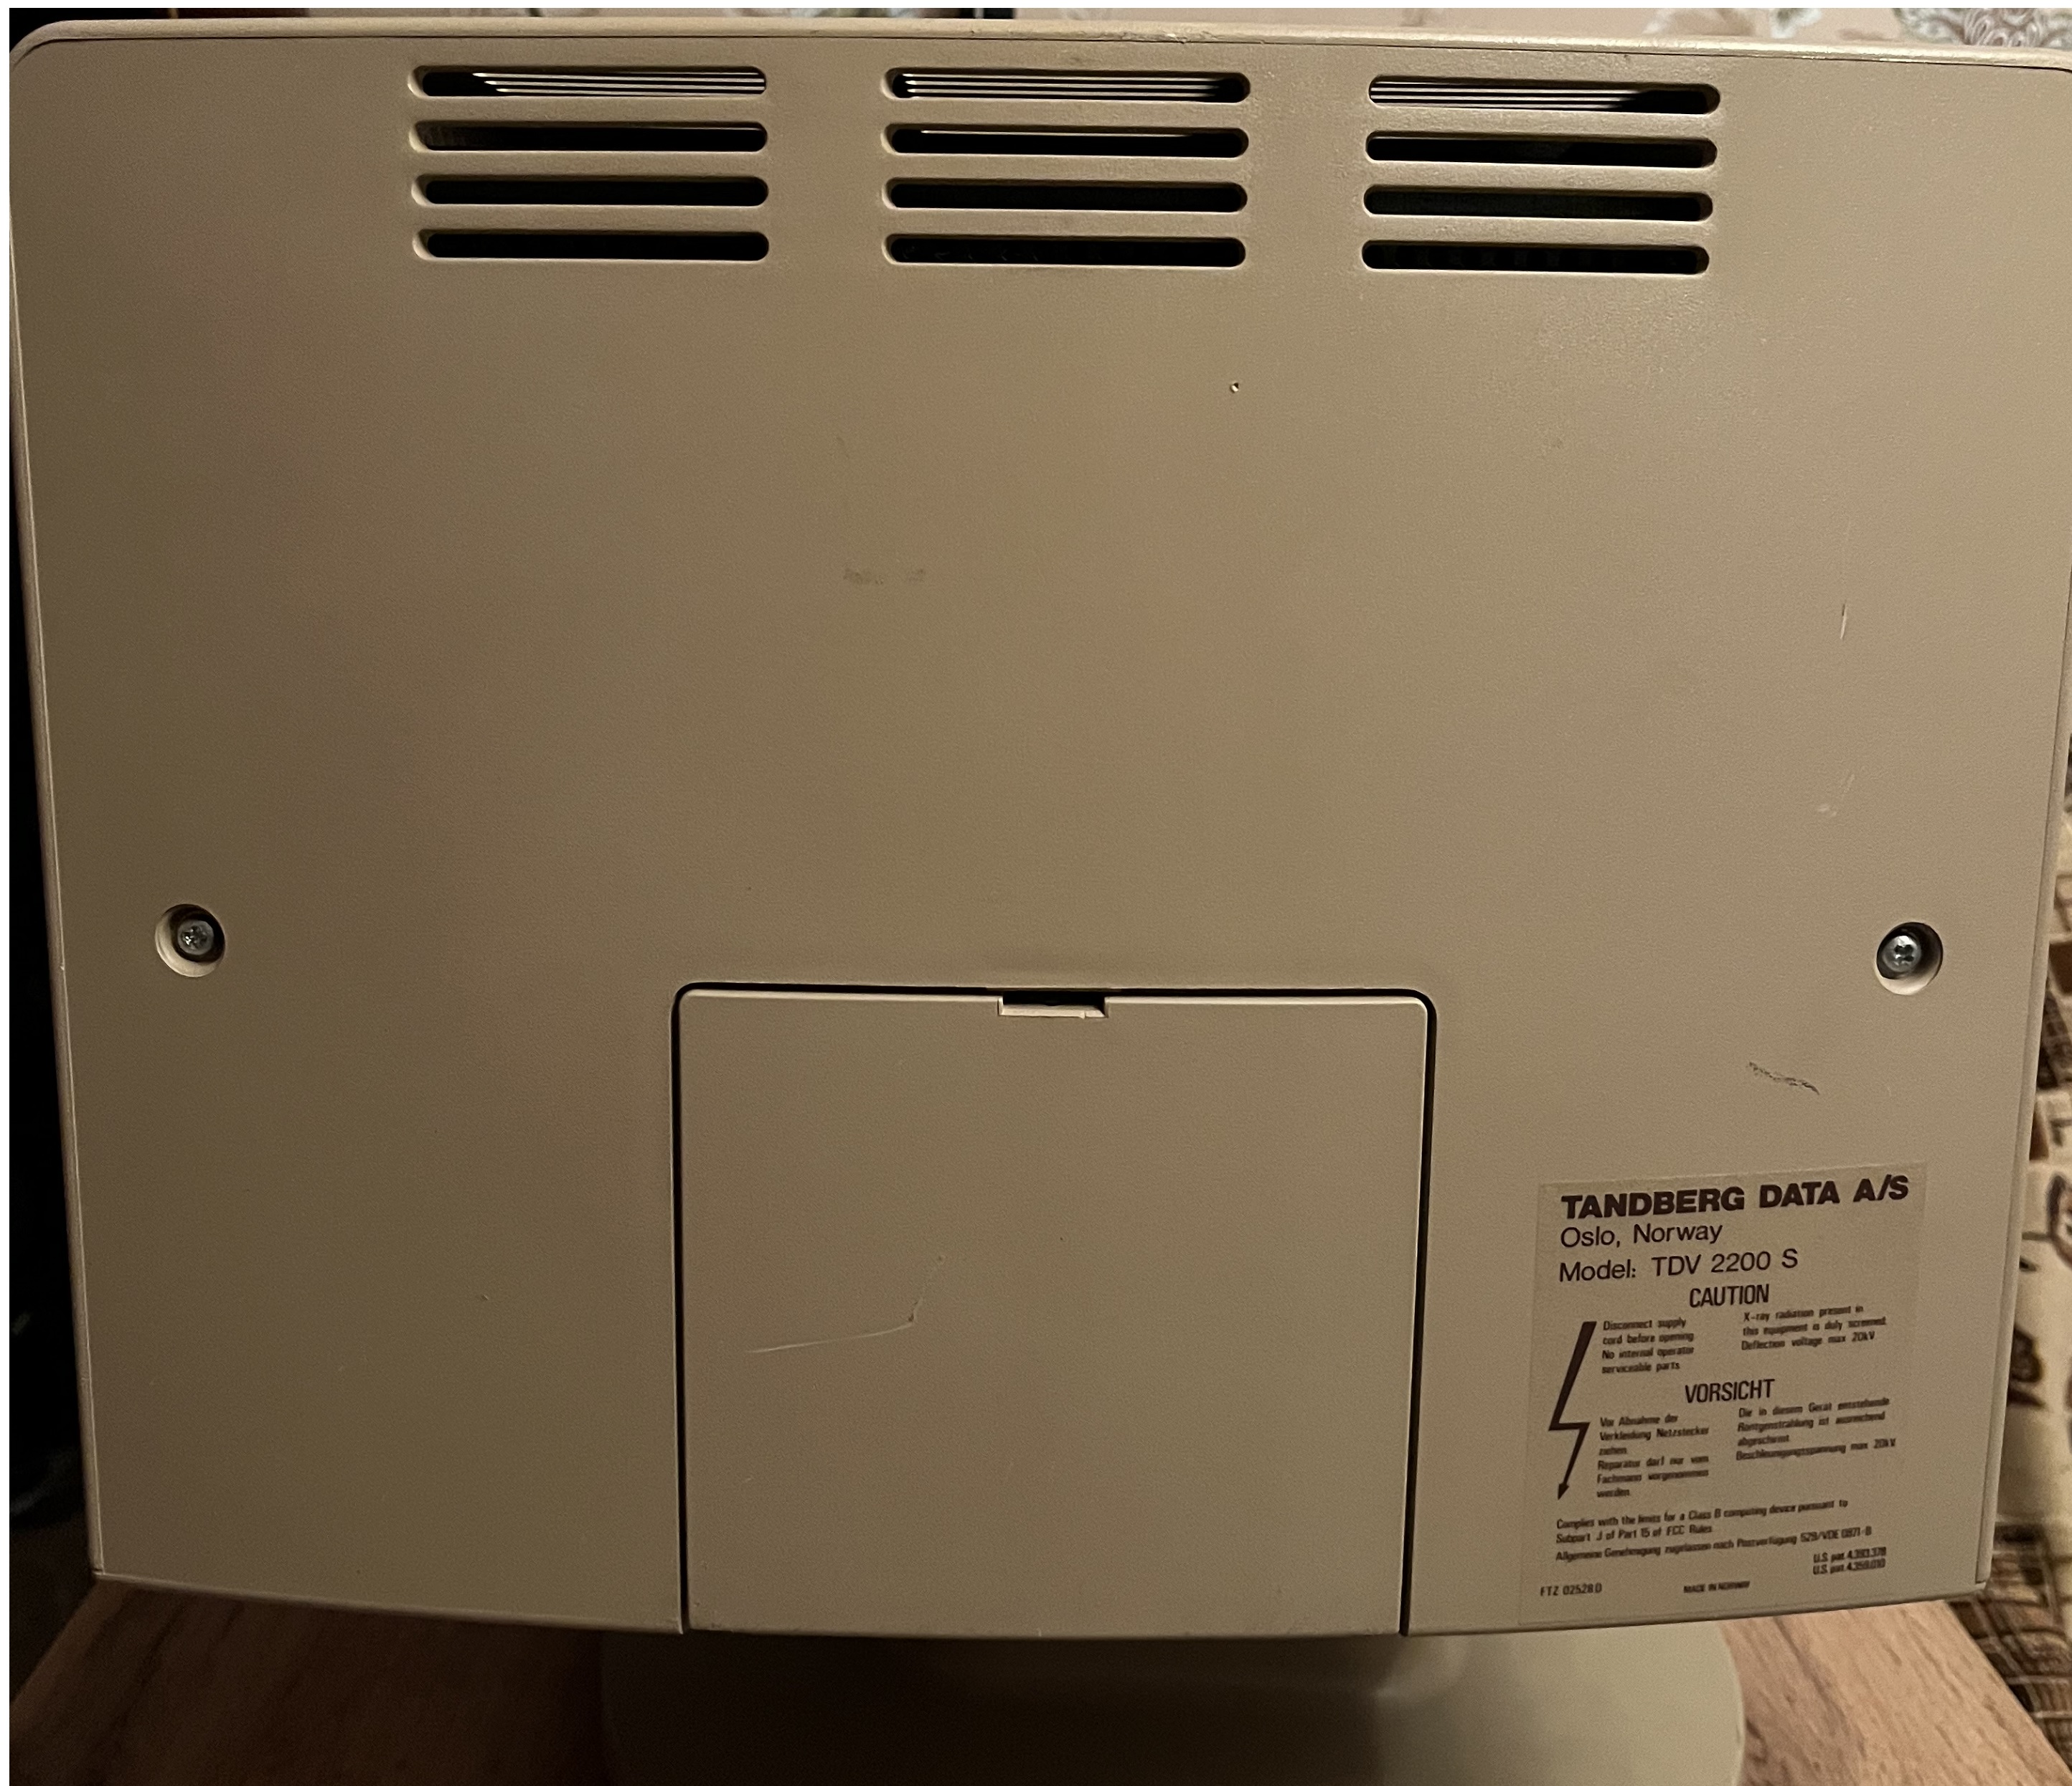
Rear end
Behind a large plastic plug, a number of interfaces were found, including the standard V.24 (RS-232) in the db25 connector format.
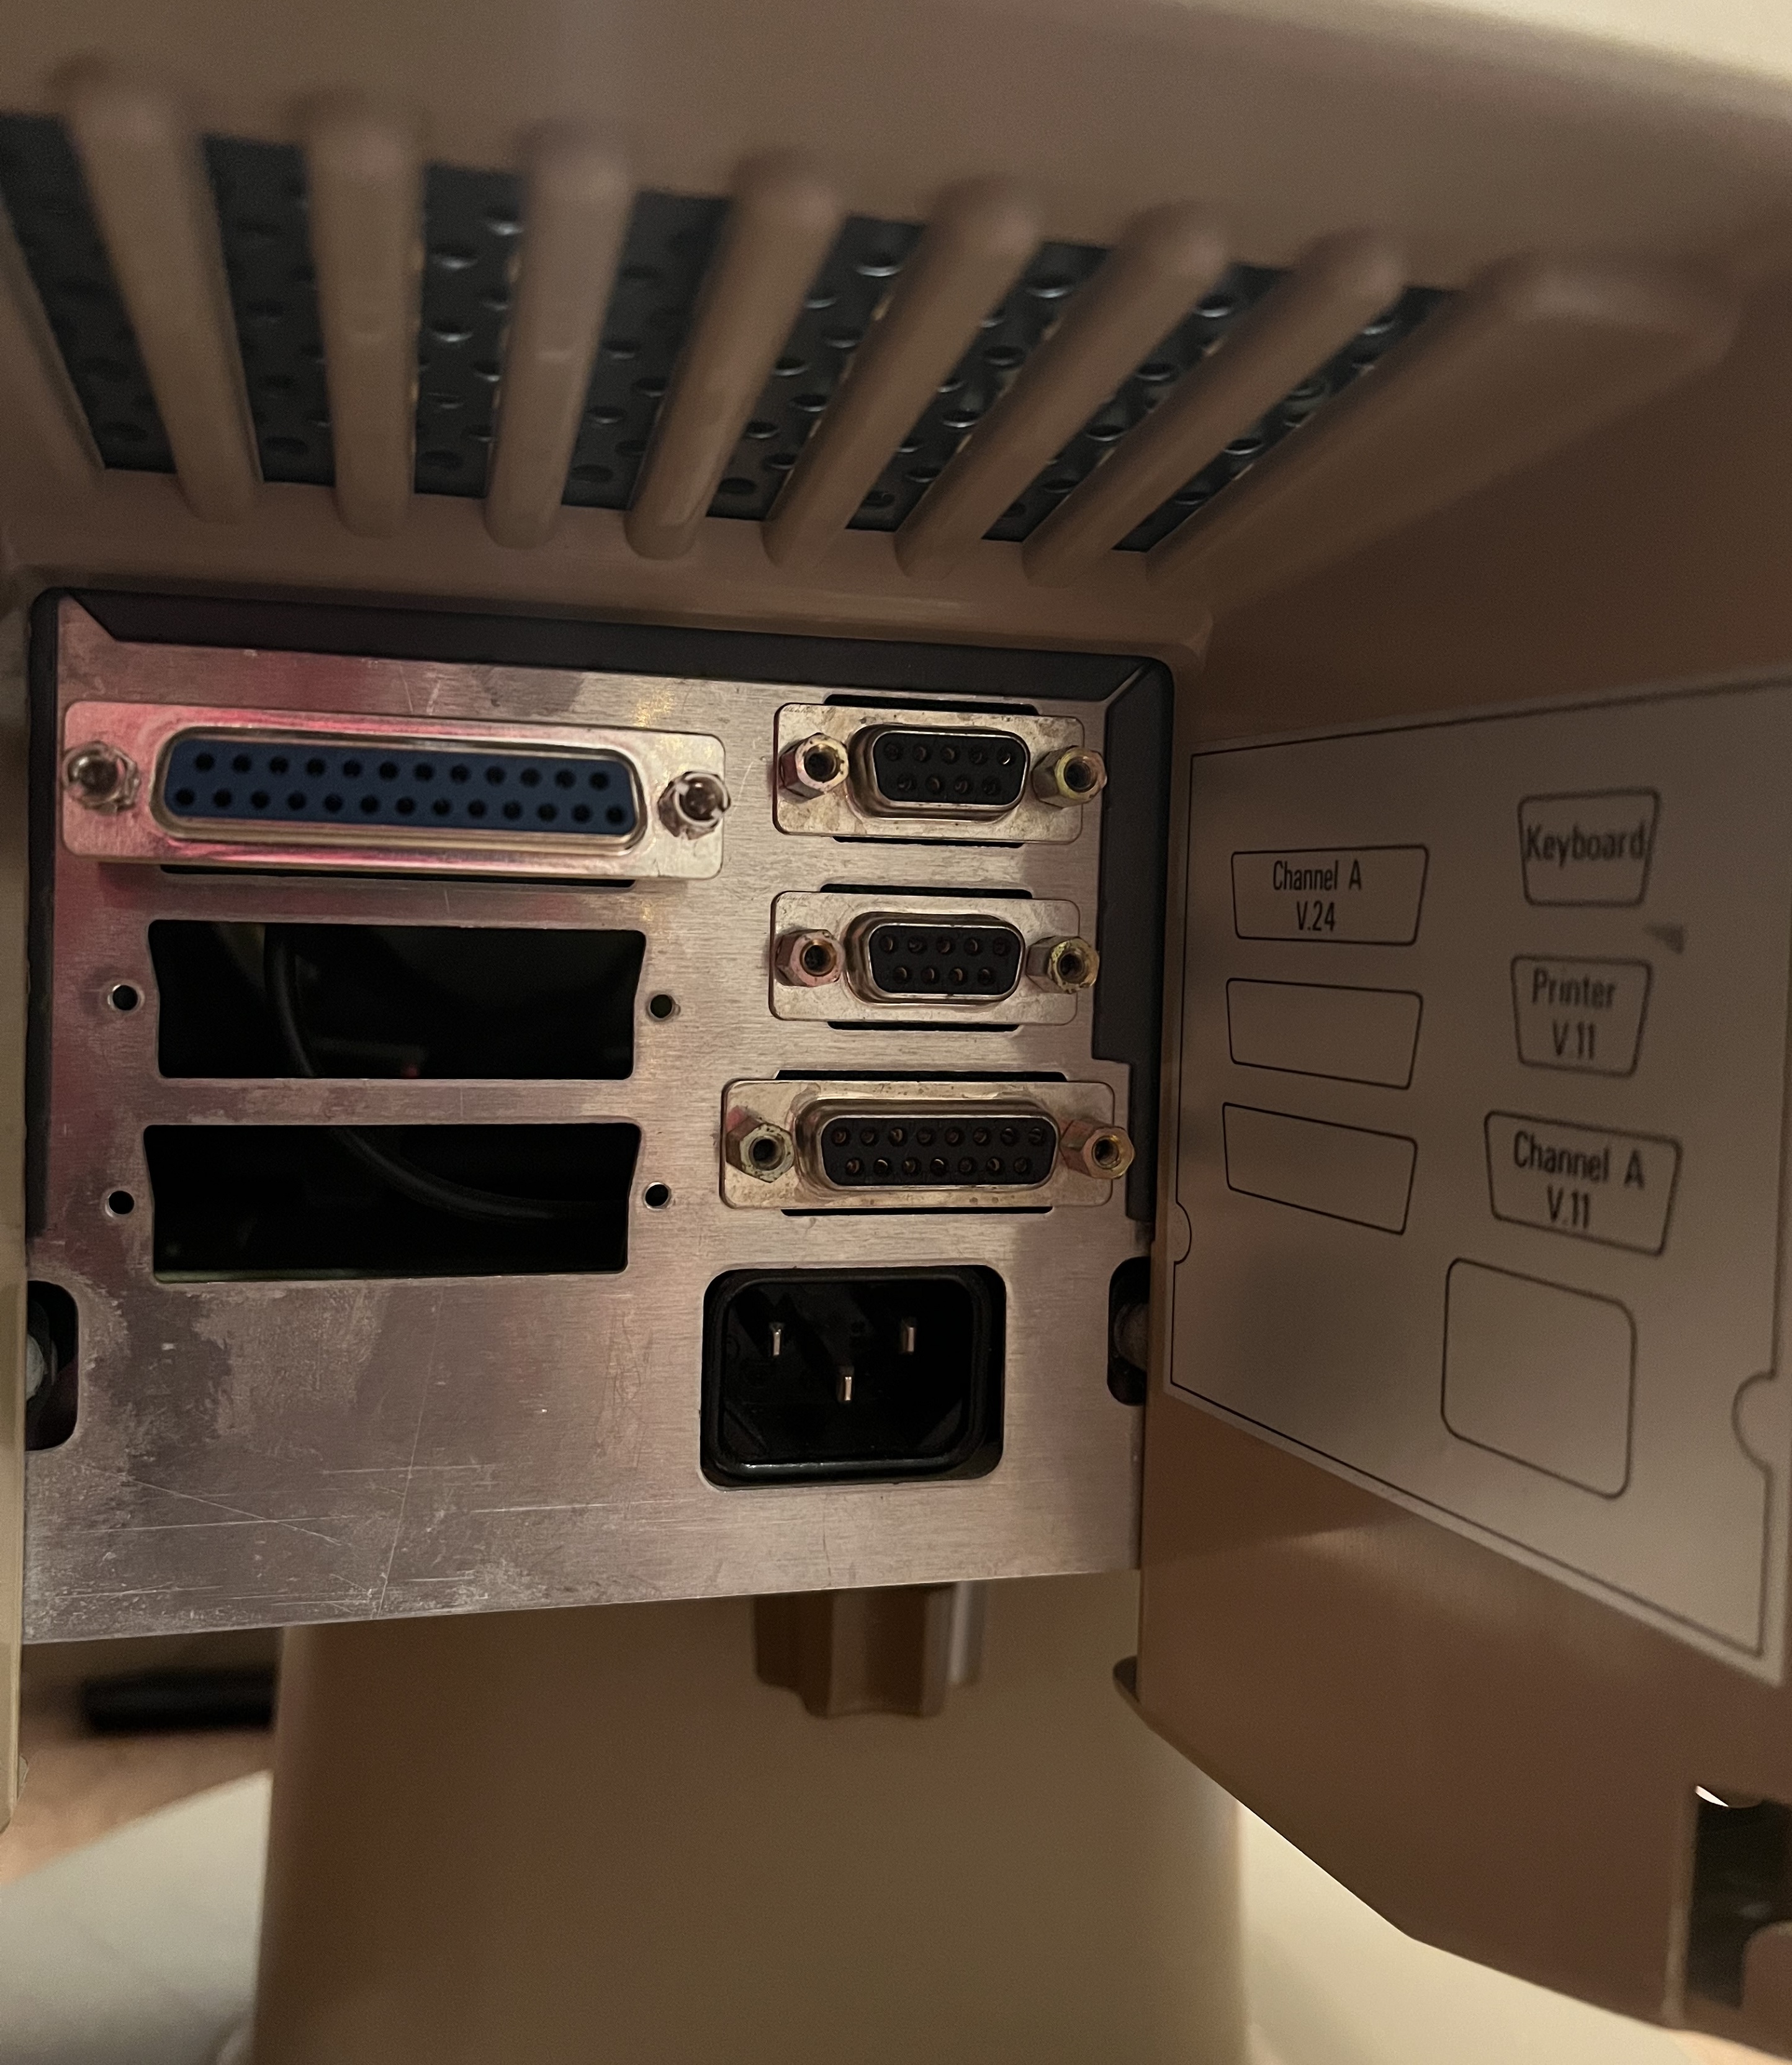
I found confirmation of the presence and description of other interfaces on the Internet.

Retrieved from https://terminals-wiki.org/wiki/index.php/Tandberg_TDV_2220
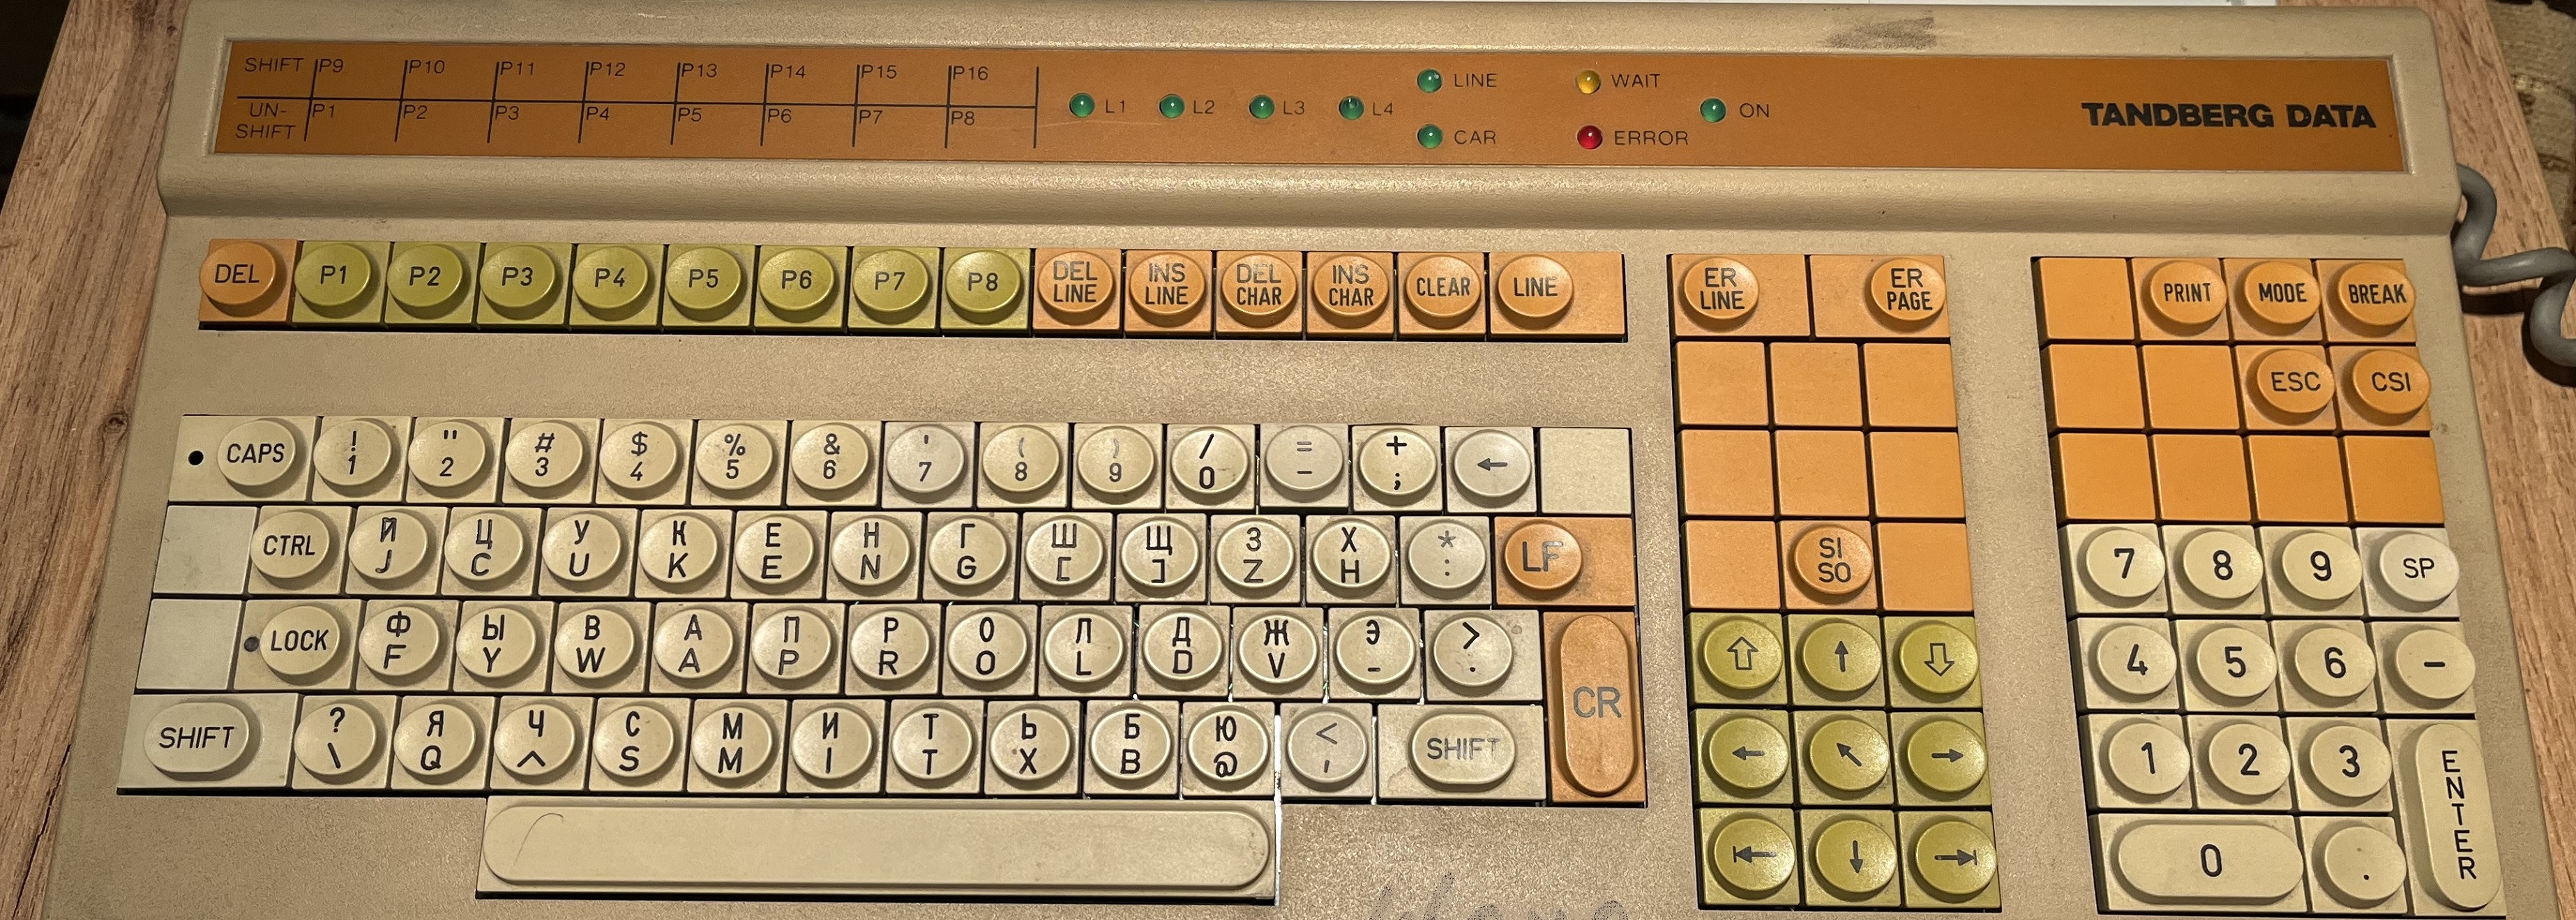
The terminal was equipped with the following keyboard, which was connected with a db9 connector.
After turning on the screen, in a beautiful green color, an error was displayed that changed its code as the keyboard was connected and disconnected.
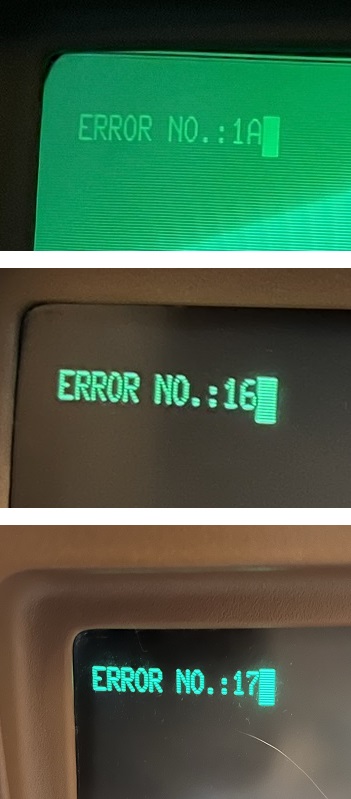
The codes of these errors required decoding, searching, I found on the Internet, detailed documentation, in scanned form, including a manual for use and an electrical circuit diagram.
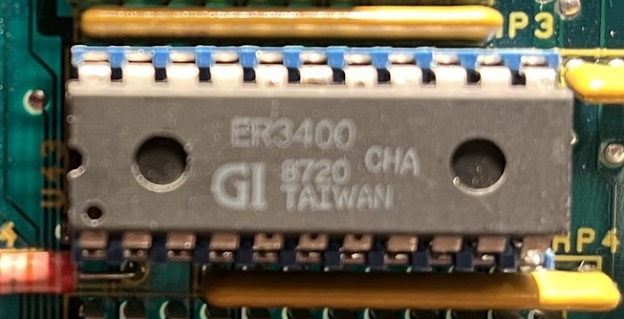
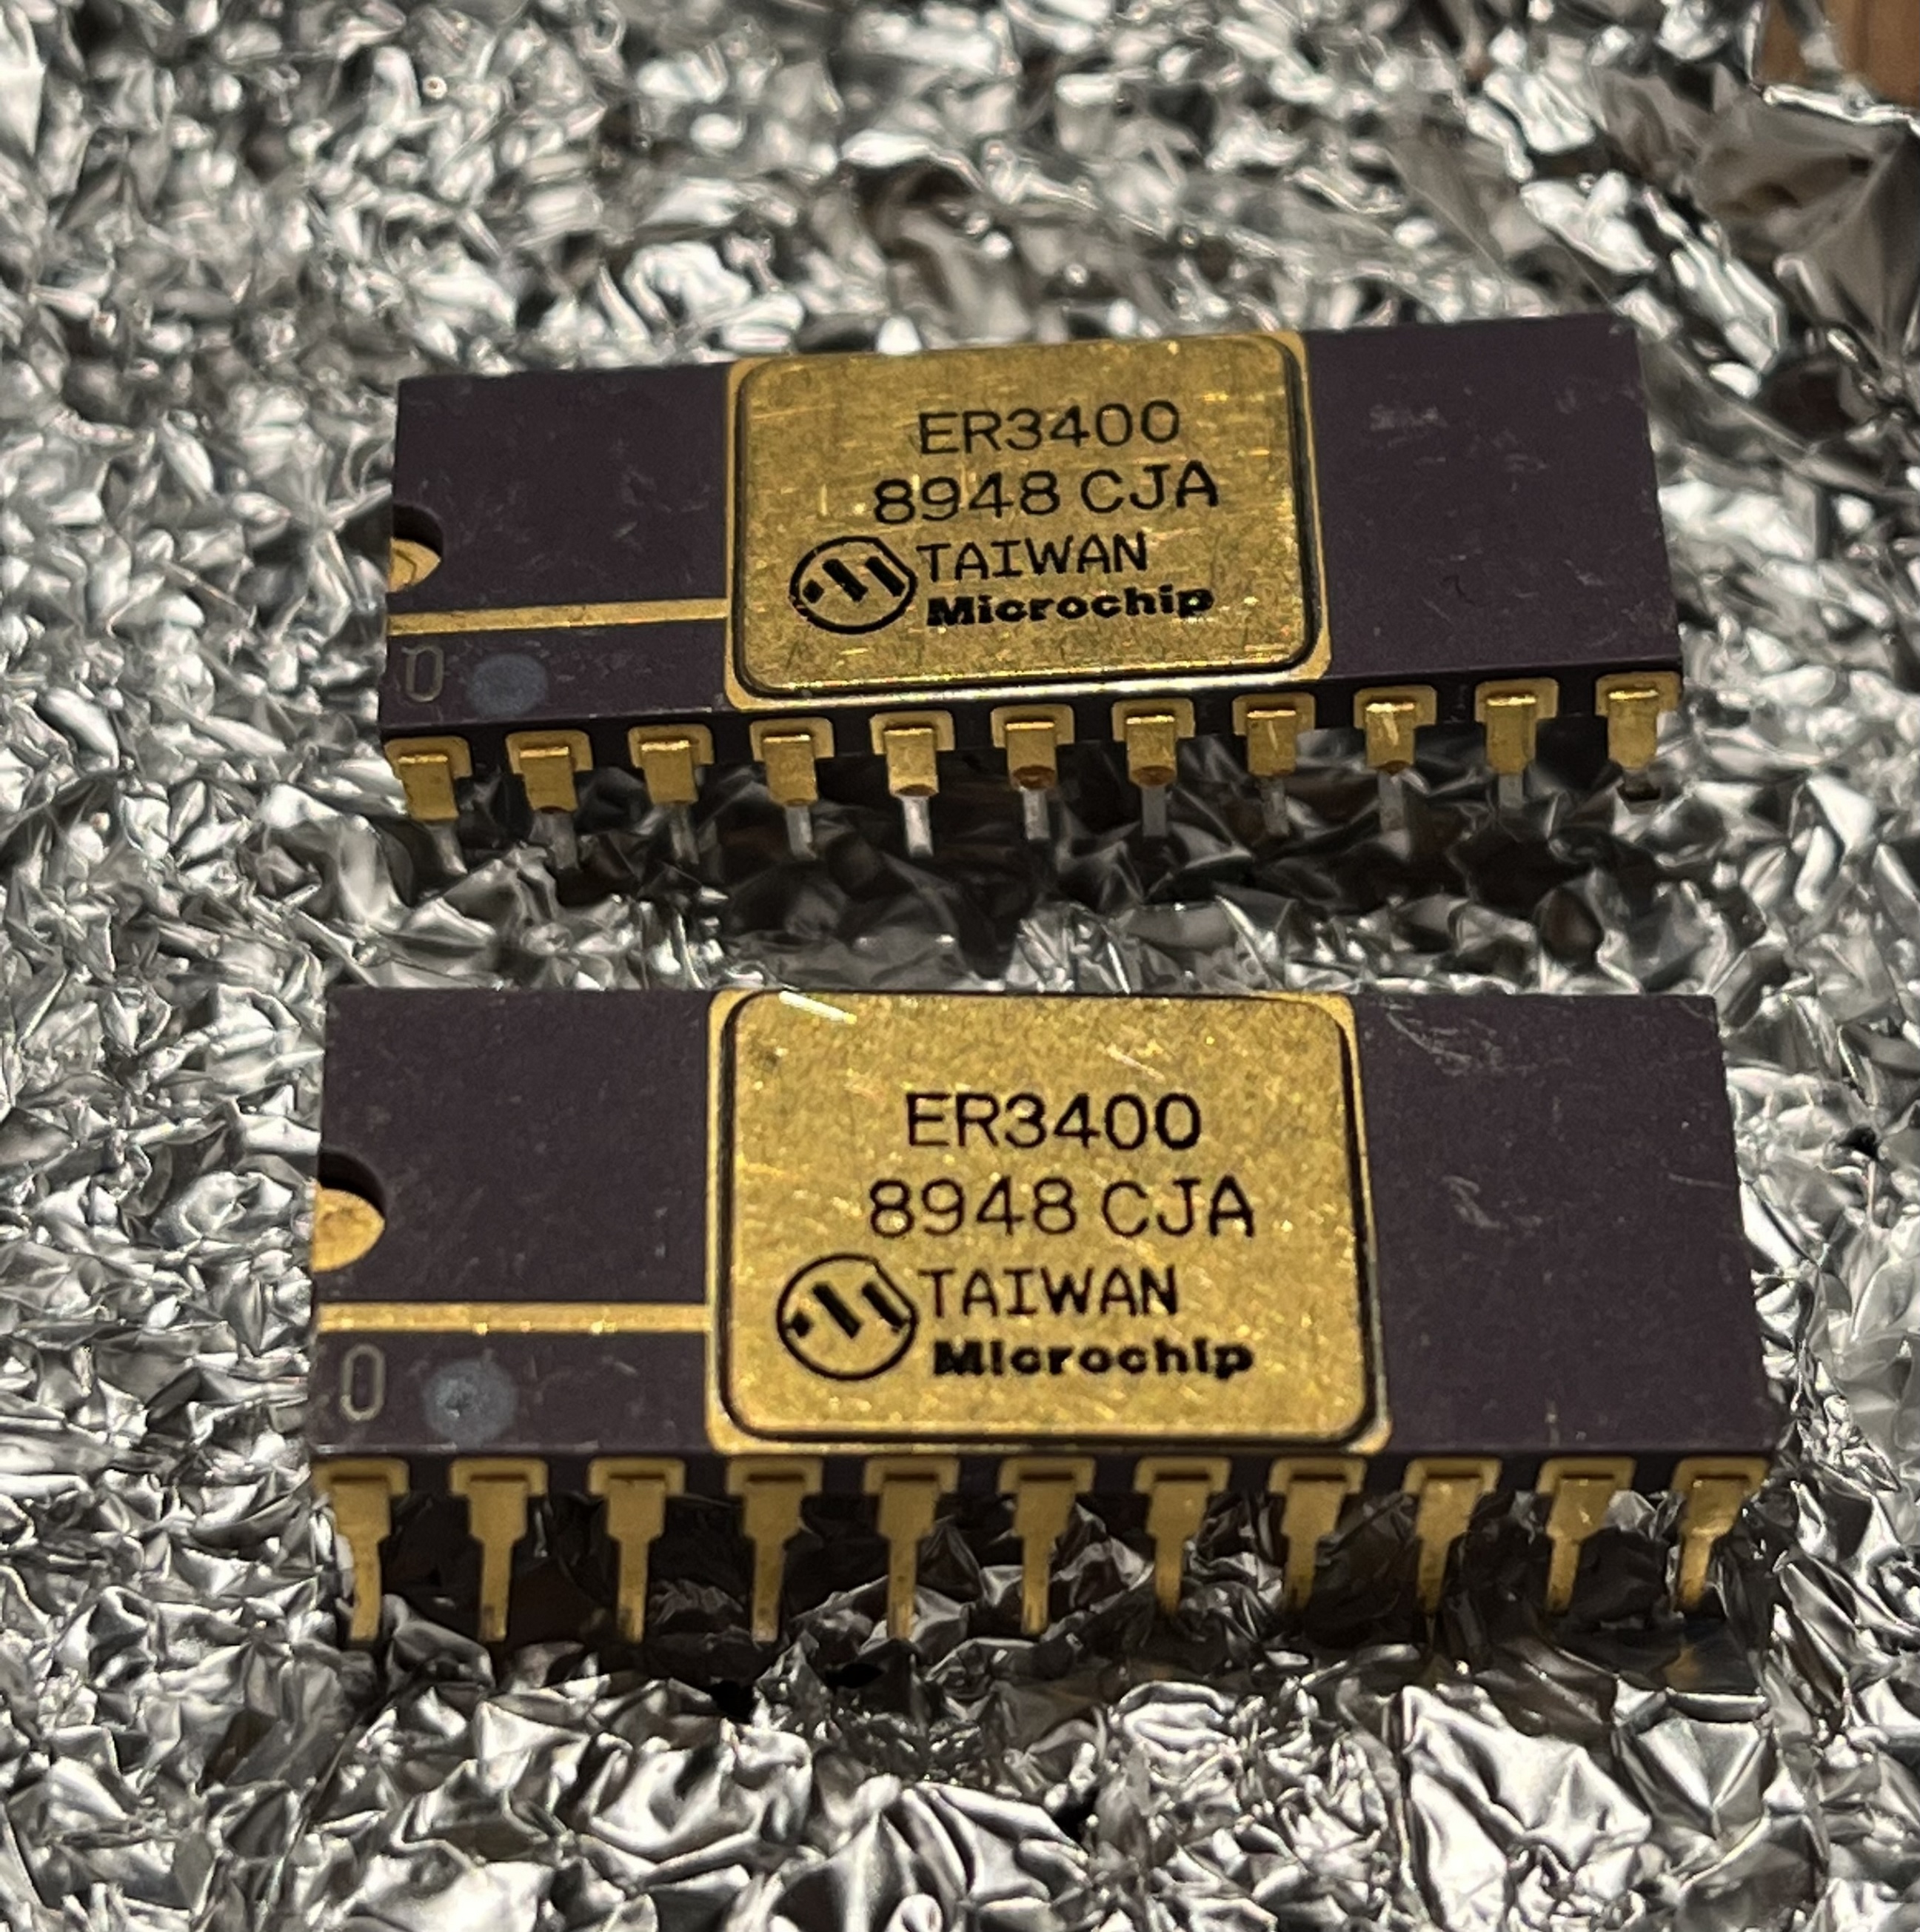
The error led to the ER3400 non-volatile memory chip.
Having studied the properties and purpose of the microcircuit, I found out that this is a non-volatile memory in which the terminal settings are stored after it is turned off. According to the specification, I found out that the information storage period is 10 years. The decision was made to replace the chip.

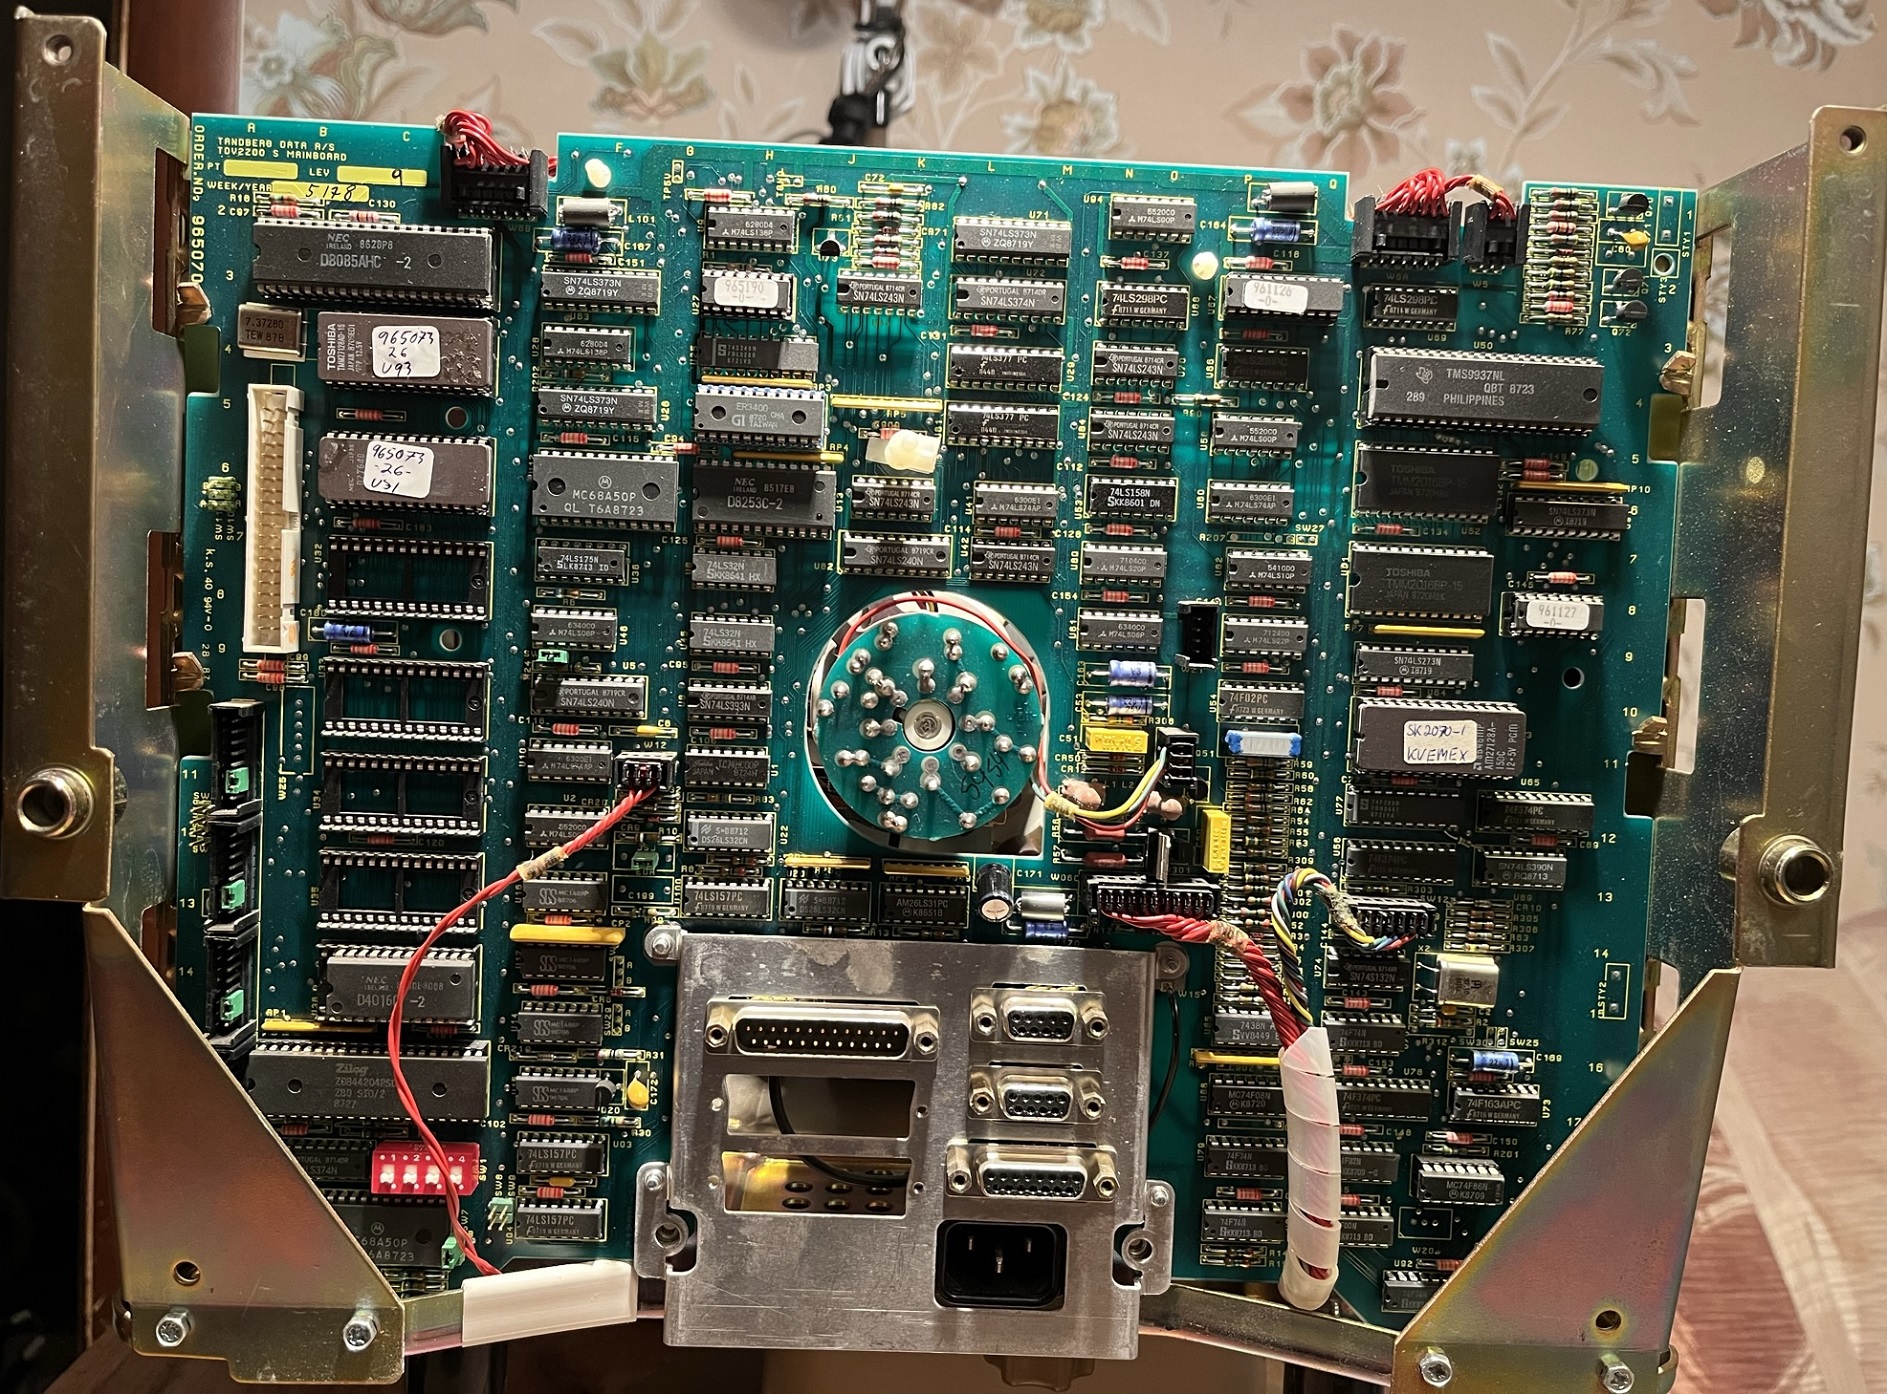
Having found nothing of the kind on Aliexpress, I found a lot on an online auction and placed an order. At the same time, I carefully opened the case and found the components in perfect condition.
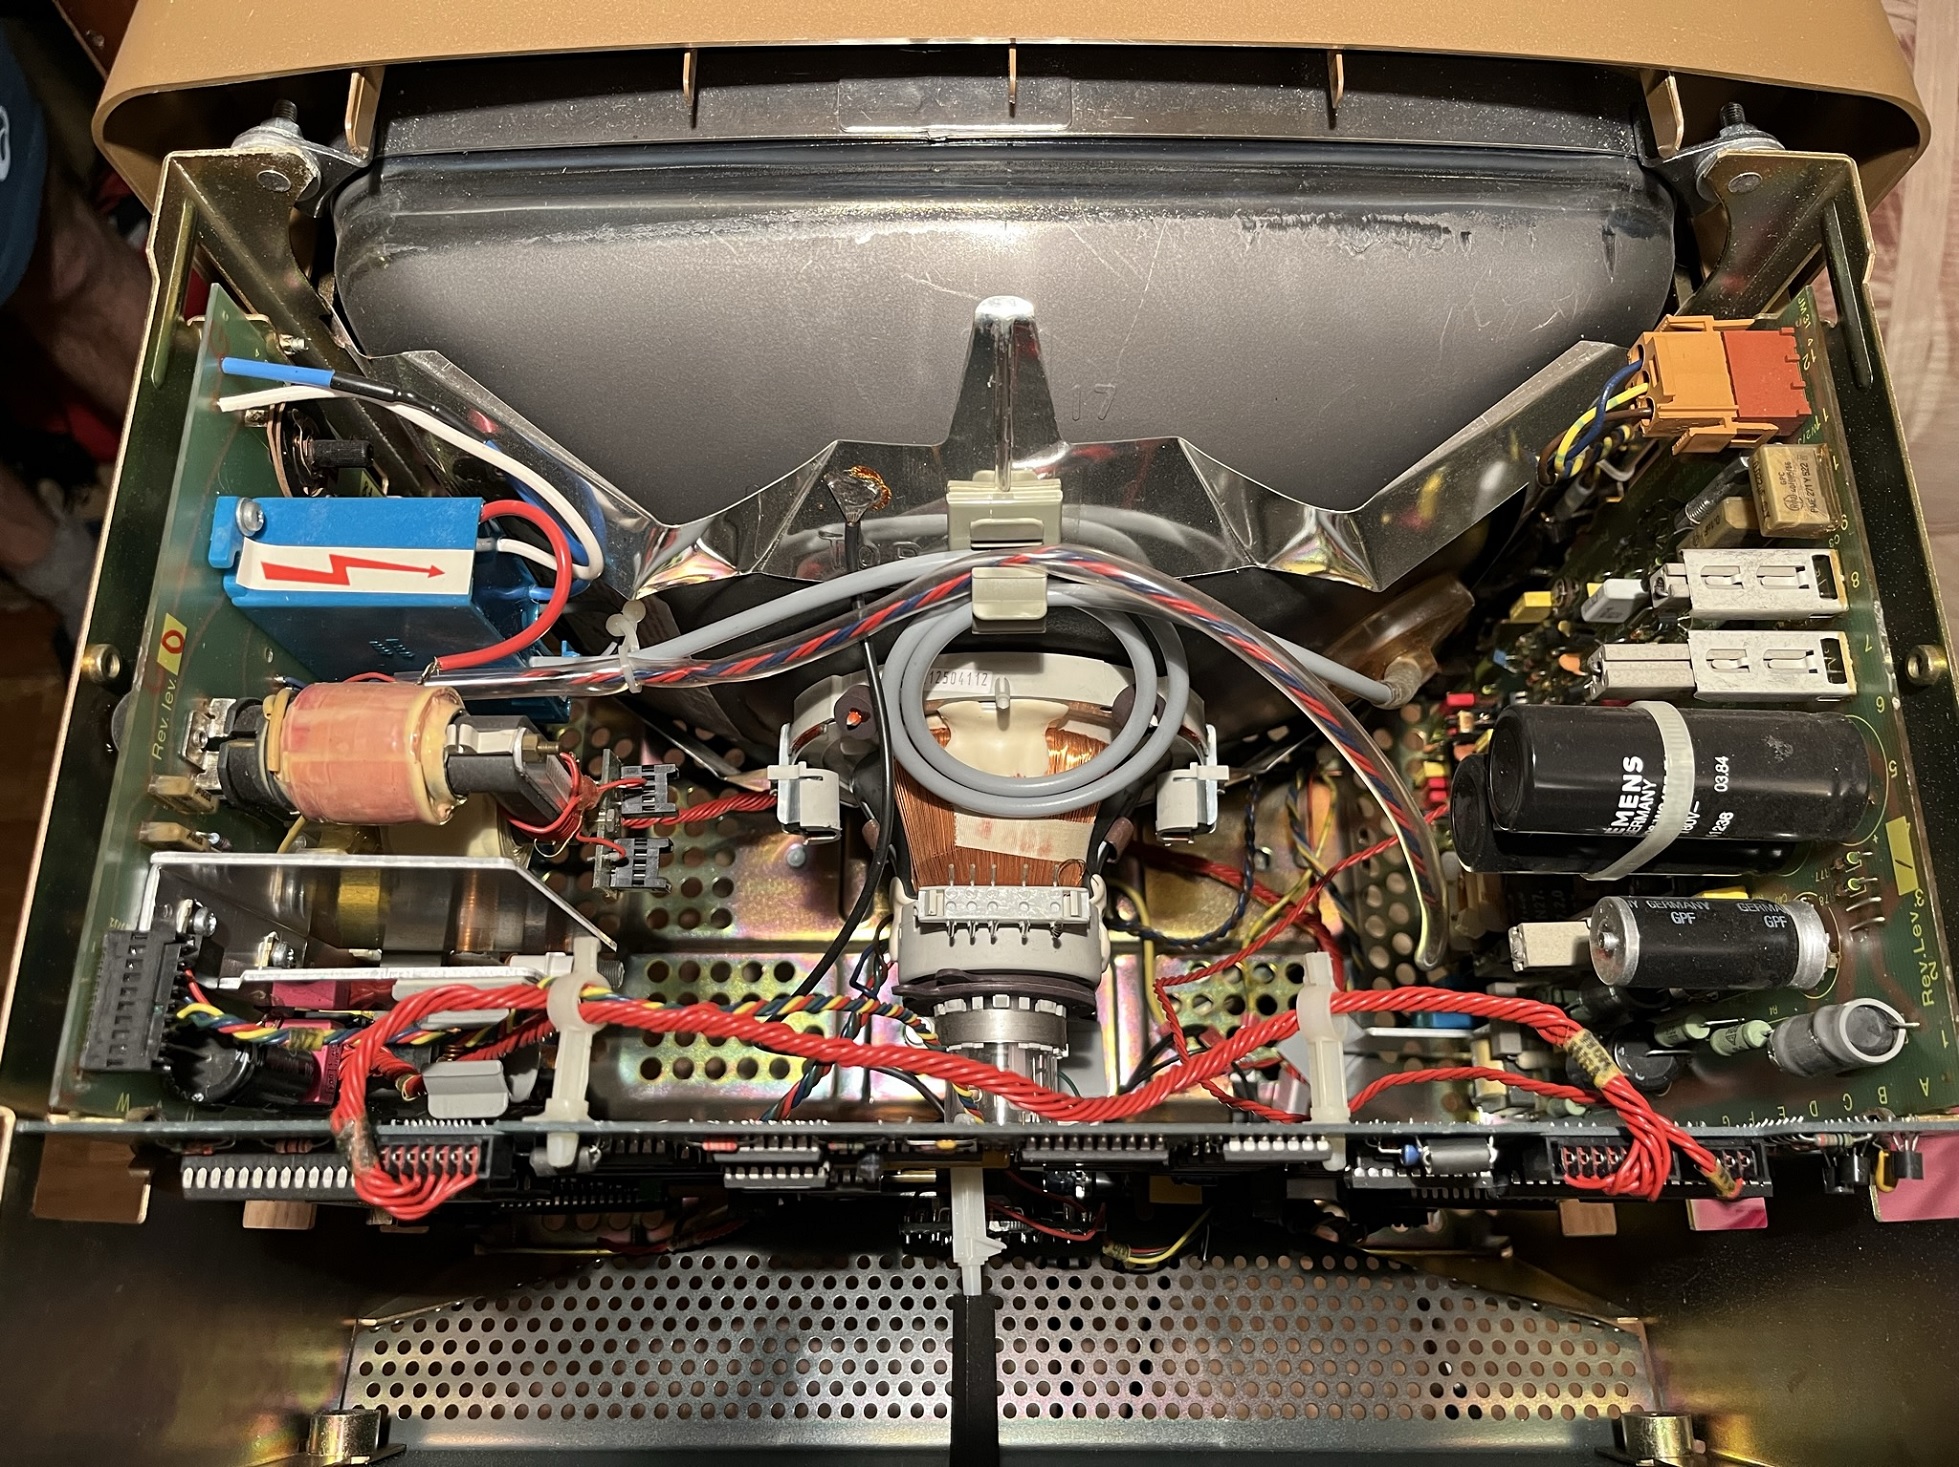
Back view:
View from above:
For completeness, I also looked into the keyboard.

The production of the keyboard dates back to 1978.

The required chip turned out to be carefully installed in the “crib”, which further facilitated the replacement.
The microcircuits arrived in time from the auction looked like a refiner’s dream, well, beauty, isn’t it?
After replacing the chip and reading the documentation, I found the “RESET” button. The button is located on the bottom of the terminal and was invisible at first glance.
After turning on the terminal and pressing the “RESET” button, the error disappeared and inspiration came, everything is going right.
It’s time to find the configuration menu. According to the manual, it was supposed to appear when you press the combination of CTRL and HELP buttons twice, but the problem was that both the HELP button and a hint of it were missing on the keyboard. Using the “scientific poke” method, I managed to enter the setup menu with a completely different combination of SHIFT and MODE twice.
This is what the setup menu screens look like.
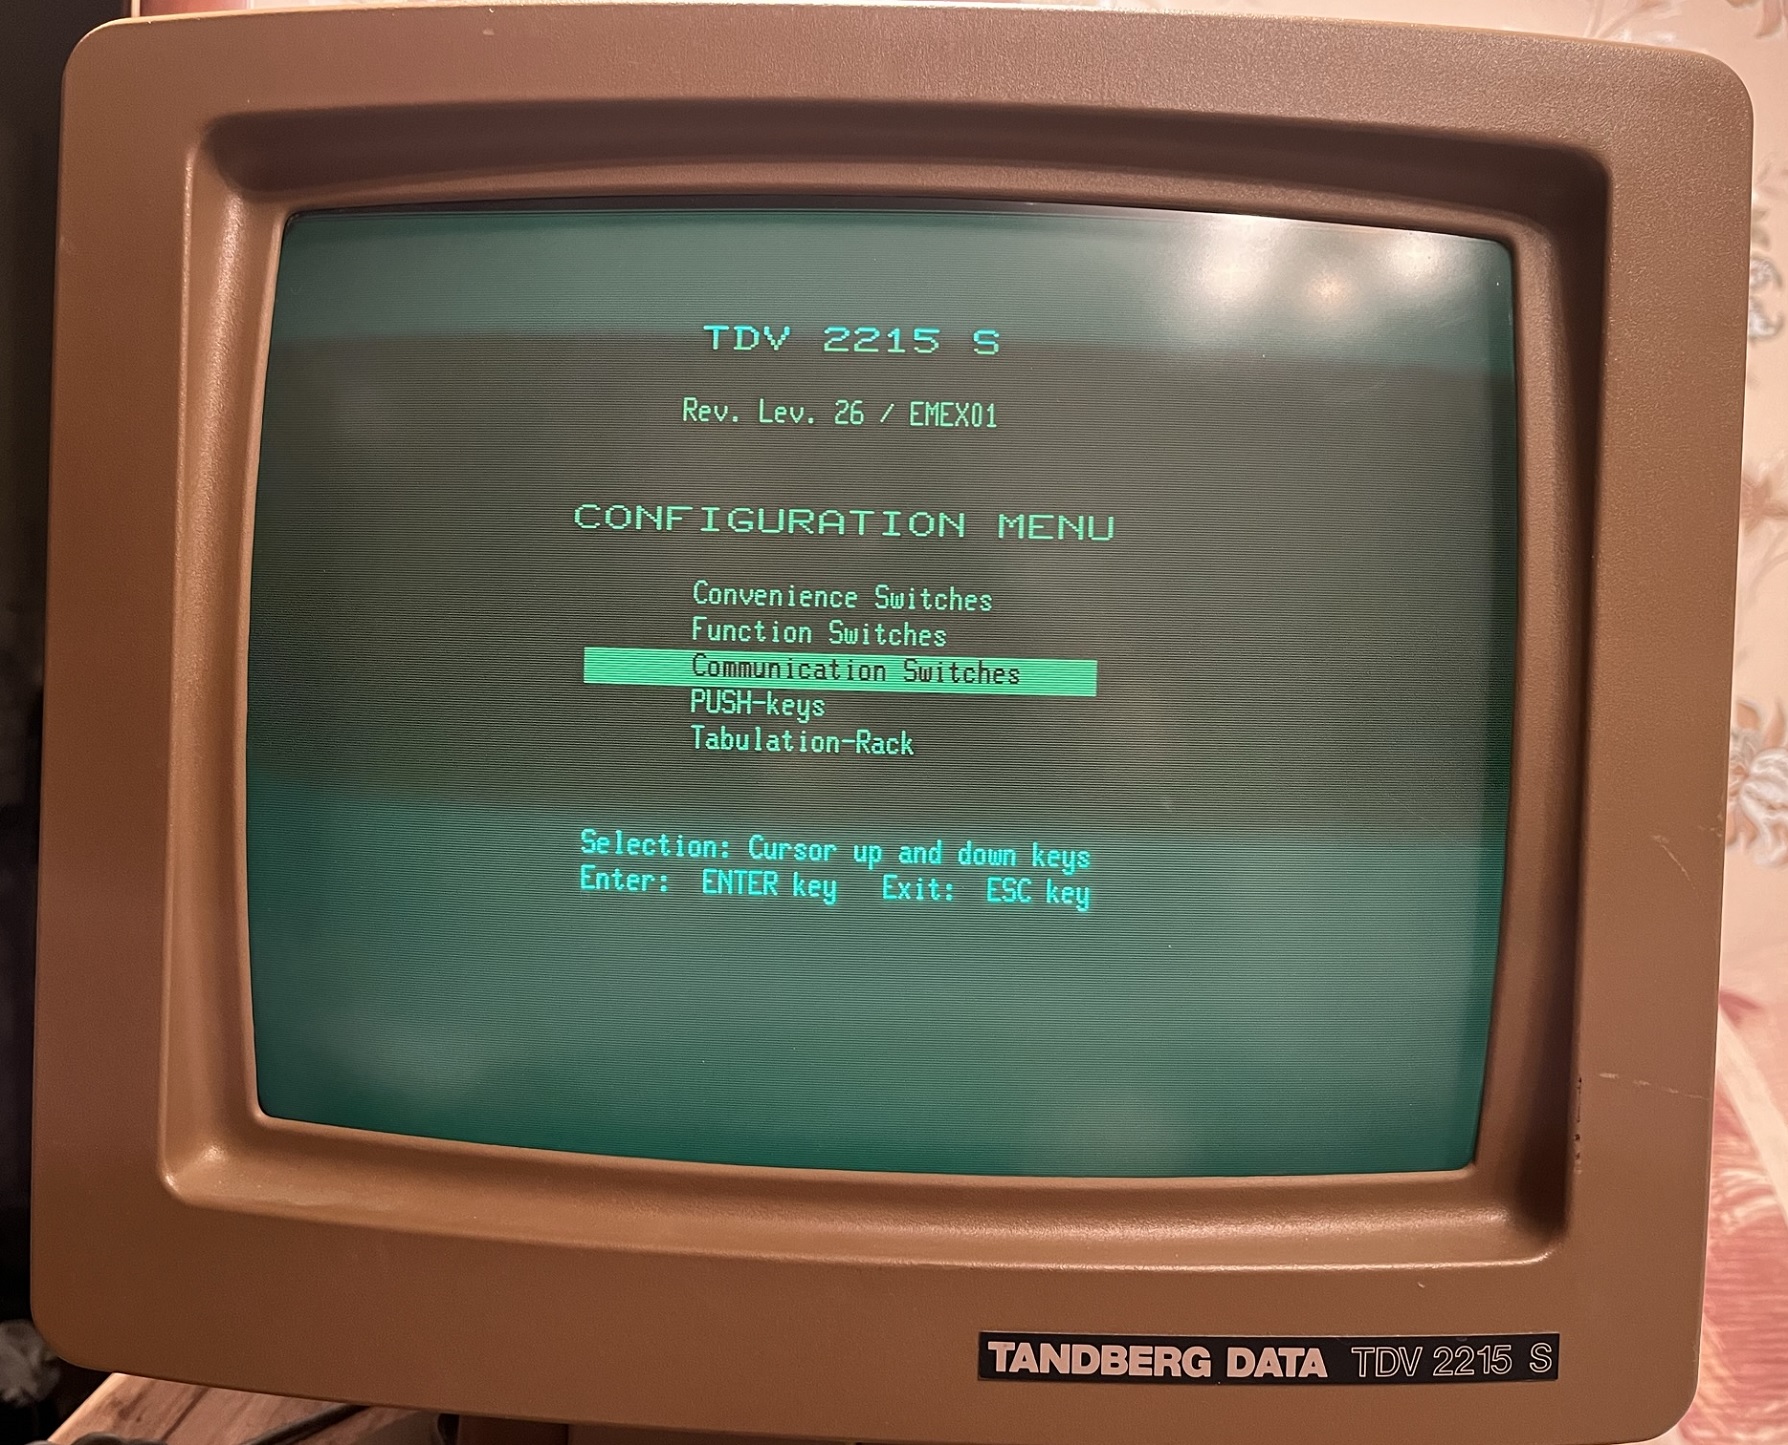
General settings related to cursor format, flicker frequency, bell (beep) and screen type: green characters on a black background (as in the Matrix), or mono color inversion.

This menu contains specific settings with which you will have to experiment in detail and the most interesting, within the framework of the goal: setting up interfaces to communicate with the outside world.

For communication with the outside world, a COM port, V.24, aka RS-232, was chosen. Default settings are 8 bit, no parity and one stop bit (8N1). The printer and modem settings are also present, but due to the lack of this equipment, they are left unchanged.

Setup menu for setting presets, hardware keyboard buttons.

What was it really for? I was interested in getting to use a real hardware console, connect to a semblance of a server and control it, the feeling of 1983.
OpenBSD 3.6 was chosen as the server OS, but instead of it, there can be any OS, whether it be: Windows, Linux, or xBSD – the family.
The OpenBSD shell was configured to be controlled via a hardware COM port, with the corresponding 8N1 settings, exactly the same were set in the Tandberg terminal settings. A db9 to db25 null modem cable was used for the connection. And it turned out what he wanted.
The screenshots show the steps to boot OpenBSD.
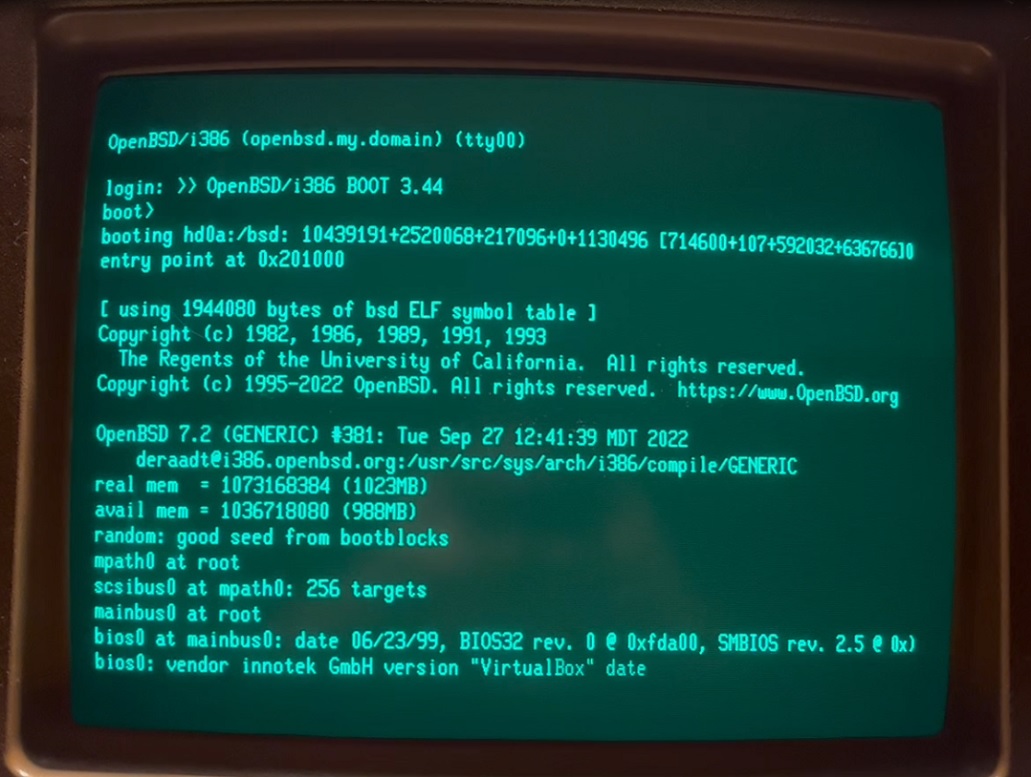
The result was an authorization prompt… Then you can administer, manage a modern server, as if from the distant 1983.

This is how the printed “time capsule” turned out. If you have ideas for further interesting applications of the terminal, please write.
Thanks for your attention 🙂