RAID 5 with LVM under Linux and how to recover information from it

LVM (stands for Logical Volume Manager) is a Linux feature that allows you to combine multiple partitions of one or more drives into a single contiguous logical partition (volume). And “LVM RAID” is a separate method of collecting “LV” partitions, which combines several physical media, but they receive additional data protection as a “RAID” array.
The DM drivers will be used to control the physical LVM devices, and the MD drivers will be used to place information on media. LVM manages hidden logical volumes (DM) that sit between visible partitions (LV) and media.
In our case, we will be creating “RAID 5”. How it differs from other types of arrays, you will learn by watching this video tutorial.
We mark the physical disks, create an LV RAID group.
In the Linux terminal, enter the command: lvcreate, and create an LV RAID.

If the LVM component is not installed in the system, then write the command: sudo apt install lvm2.

All commands must be executed as “root”, so we enter: sudo -i, so as not to enter the password “root” all the time.

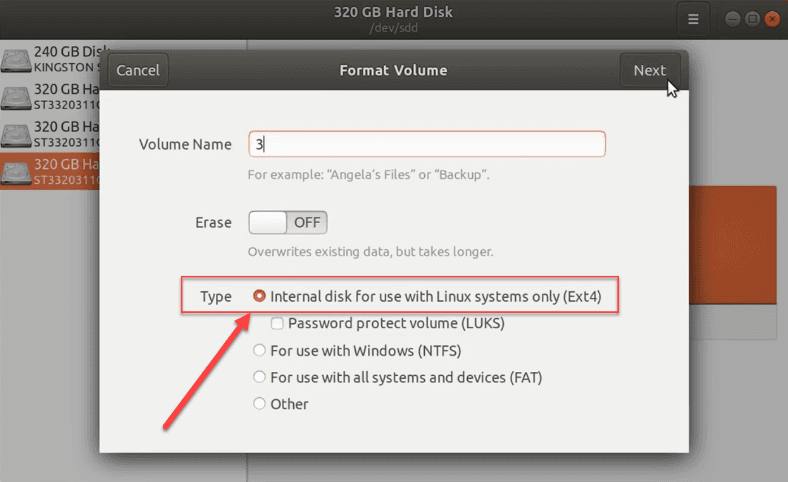
Now partitioning disks through the standard Linux disk utility, select the file system type and format.
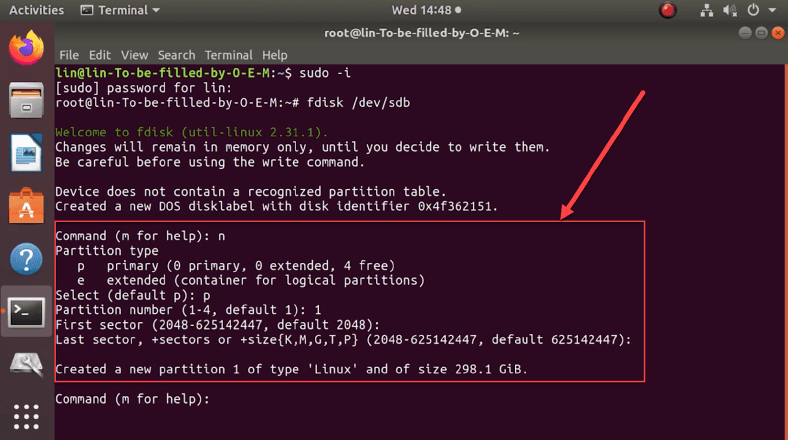
Or we execute through the terminal: fdisk / dev / sdb.

We specify the parameters:
- n – creates a new section,
- p – sets the partition to “primary”,
- 1 – assigns a number.
Press “Enter” twice, agreeing with the value of the first and last sectors.
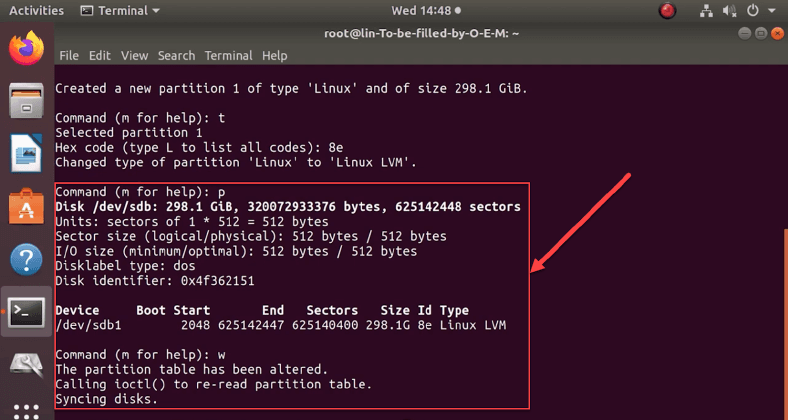
Next, you need to configure LVM settings. Each in its own line we apply the attributes:
- t – starts the process of changing the type of the new partition,
- 8e – sets the value to LVM.

Let’s make sure that the new section is of the correct type. Type the “p” attribute on the command line. The system will process the request and present the summary in tabular form. The searched device will be marked with the value “sdb1” with the system type “Linux LVM”. Then we write down the installed changes using the “w” attribute. Now repeat for each disk that will go into LVM.
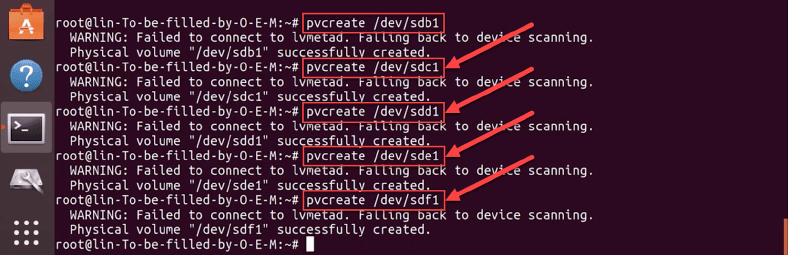
Then we enter: pvcreate / dev / sdb1.

We repeat the command for each disk, replacing “Sdb1” to another name, in our case “Sdc1”, “sdd1”, “sde1”, “sdf1”…
Now we collect into a single group: vgcreate and list all incoming media:
“vgcreate vg1 / dev / sdb1 dev / sdc1 dev / sdd1 dev / sde1 dev / sdf1“. Where “vg1»Is the name of the group.

Building a software LVM RAID 5
We enter the command: “lvcreate -n lvr5 –type raid5 -L 10G -i 4 vg1“

Where attributes mean:
- -n – assigns a name to that.
- –Type raid5 – sets the type of the array.
- -L – sets the size limit for the logical volume (our size is 10 GB).
- -i – indicates the number of devices that will be involved in storing user data. This does not include the optional parity storage device. The number must be 2 or more, as the minimum number of disks for this type is three.
- vg1 – explains to the system where it should get the required amount of disk space (specifying a specific volume or a whole group).
Once done, a new RAID 5 array will be created on the LVM virtual group. Now you need to format the array to mount. Let’s format the RAID 5 to “ext4”: “mkfs -t ext4 / dev / vg1 / lvr5“

Where, the file system “ext4“, Group name”vg1“, Volume name”lvr5“.
Mount the RAID 5 array into the system, enter the command: “mkdir / mnt / lvr5“, And the second:”mount -t ext4 / dev / vg1 / lvr5 / mnt / lvr5“.

The array is now mounted and ready to go.

Checking LVM RAID Status
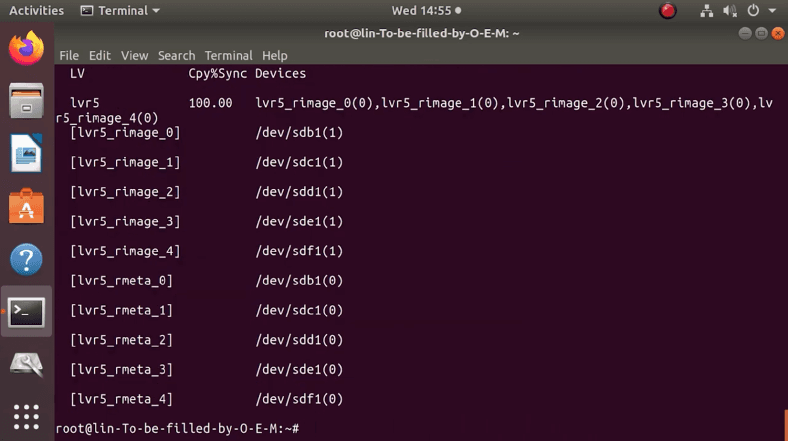
We execute the command: “lvs -a -o name, copy_percent, devices vg1“
![]()
The terminal will display all available information about the mounted physical media and volume groups.
How to recover data from an LVM RAID array
In our case, we created LVM RAID 5, this type of array stores additional redundant information, which has a good effect on data safety. That is, if one or even two physical disks break, most of the files can still be recovered intact.
NAS manufacturers provide their own software for recovering data from their array to their devices. But since we used software RAID, we need software from third-party developers. The main criteria for choosing this: support for the desired file systems, low-level disk reading, as well as the presence of an automatic and manual RAID constructor. The program must rebuild the array again and allow it to be mounted into the system, and then all that remains is to analyze and save all the “live data”.
LVM is one of the many Linux technologies that allows for great flexibility in managing disk space. This feature, combined with RAID, provides good data loss protection and provides an easy way to store, manage and share user files in storage.
For the full version of the article with all additional video tutorials, see source…