Qovery is an easy way to deploy on AWS

You dream of deploying applications in the cloud without any problems, logging in with your AWS credentials and so that all the cloud configuration is done automatically, did you have access to functions out of the box that are not available anywhere else?
Qovery not only allows you to deploy infrastructure and applications in the application, logged in with an AWS account, but also provides interesting functions, material about one of which we share before the start of the course on Fullstack Python Development…
Preview environments
Imagine: you are engaged in complex application development – front-end, back-end, database – and make changes to the server side. How do I test all this? It would be great to deploy everything on a special service, and then quickly and in isolation test the changes with all the components. Qovery preview environments – just such a service…
With its help, not only the application with changes is deployed in the cloud, but also all other related applications and databases. This way you can test new features and collaborate with those who view your code.

The previews feature is available on other platforms as well. Vercel and Netlify allow you to test changes before merging code branches and pushing them to production. This is ideal for single client applications, but the concept of Qovery previews is much broader.
With Qovery, you can create a preview environment not only for the frontend, but also for the backend and databases – end-to-end development is supported. What about running a set of microservices on the server side? It’s not a problem. All services will be played in the new environment.
Benefits of preview environments
Saving time. You don’t need to set up a new environment to test your changes in isolation. Qovery will set up the environment.
Performance. Faster revisions and previews, and improved feedback loops result in dramatic increases in application performance and quality.
Tests. It is best to test applications in isolation, but in complex development this is nearly impossible if you have to manually prepare your test environment. Qovery prepares the test environment automatically.
Independence. Each environment is completely isolated, which means more people can safely work on the project, testing changes in parallel and not blocking each other.
Rapid development and release. Faster feedback loops, independent developers, and fewer bugs mean the product is being developed and released faster.
Less annoyance. Waiting for others to test changes … it’s annoying. But thanks to preview environments, each has its own test environment.
Demo
AWS infrastructure
Before you start deploying, you need to prepare and deploy the AWS infrastructure itself. It’s as easy as entering your cloud credentials. To learn how to set up AWS see this article.

After 15 minutes of initial configuration, the cluster is ready to host applications.
Complex application development
For this example, we’ll use the Next.js frontend, Node.js backend, and MongoDB database. The application shows a collection of images from the backend. Using the preview environment, we will make a change to the backend, moving from a hard-coded list of images to a list from the database.
Frontend
A simple collection of images looks like this:
To generate the application, I used the command npx create-next-app@latestand its source code is hereAnd here are the main changes to the generated scaffolding code:
Adding Dockerfile:
FROM node:alpine

RUN mkdir -p /usr/src
WORKDIR /usr/src

COPY . /usr/src
RUN npm install
RUN npm run build

EXPOSE 3000
CMD npm run start
Adding a request to the backend to get a list of images. We will create the backend itself later.
function useImages() {
  return useQuery("images", async () => {
    const { data } = await axios.get(
      `${apiRoot}/api/v1/images`
    );
    return data;
  });
}
Changing the HTML and styling to display a demo list of images.
Backend
The backend is the main star of the demo. The first version shows a hard-coded list of images. Let’s expand its capabilities, that is, we will connect to the database to get a list from MongoDB. To make sure that the changes are correct, use the function Preview Environment(preview environment).
Backend generated with Express npx express-generator --no-view, the source code is located here… Changes to the generated scaffolding code:
Adding Dockerfile:
FROM node:16

WORKDIR /usr/src/app

COPY package*.json ./
RUN npm install
COPY . .

EXPOSE 8080
CMD [ "node", "src/index.js" ]
End point creation /api/v1/imageswhich returns a given array of images:
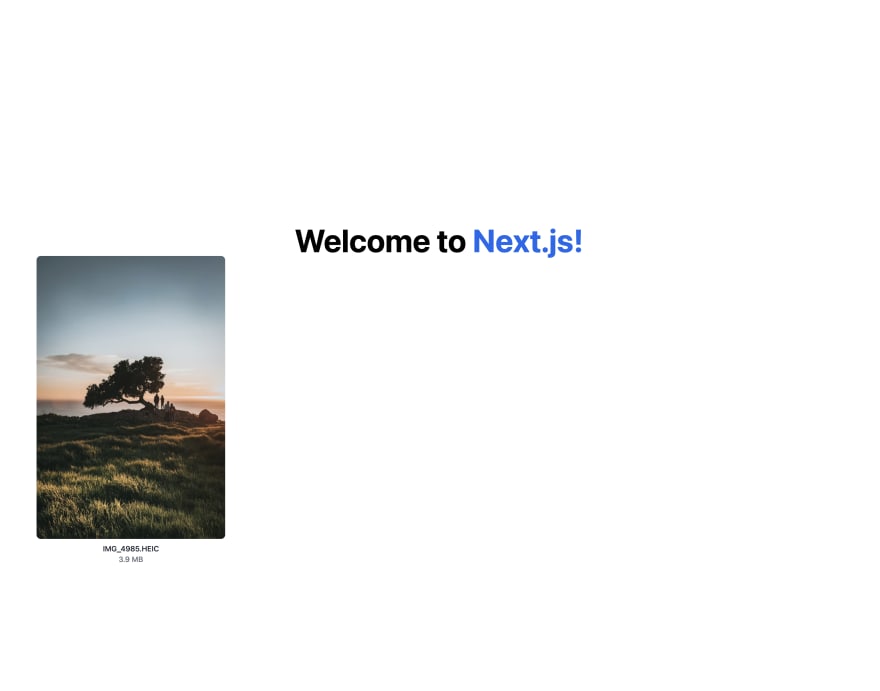
router.get ('/ images', (req, res) => {res.json ([
      {
        title: 'IMG_4985.HEIC',
        size: '3.9 MB',
        source:
            'https://images.unsplash.com/photo-1582053433976-25c00369fc93?ixid=MXwxMjA3fDB8MHxwaG90by1wYWdlfHx8fGVufDB8fHw%3D&ixlib=rb-1.2.1&auto=format&fit=crop&w=512&q=80',
      }
  });
});
На следующем этапе изменим функцию так, чтобы использовать Mongo.
Развёртывание
Создав новый проект, настроим производственную среду.
Развёртываем фронтенд. Для этого нажимаем
Add my first application(«Добавить моё первое приложение»), выбираем правильный репозиторий, режим сборкиDockerи указываем порт3000.. Корневой путь приложения —/frontend.Добавляем
MongoDBдля бэкенда. Нажимаем кнопкуAdd(«Добавить») на консоли среды Qovery.Развёртываем бэкенд. Для этого нажимаем
Add→Application(«Приложение»), выбираем корневой путь приложения/backend, порт8080и режим сборкиDocker.
Для подключения к БД добавим в настройках Environment Variable («Переменной среды») DATABASE_URL — это будет внутренний адрес Mongo:
Также в клиентской части приложения создадим алиас API_ROOT, который будет указывать на внешний URL бэкенда:

Вот и всё. Теперь развёртываем эксплуатационную среду. Через несколько минут переходим в клиентскую часть приложения, нажимаем Open («Открыть») и перенаправляемся в коллекцию изображений:

Включение сред предварительного просмотра
Включим жту функцию для серверной части приложения. Для этого переходим в Environment («Среда») → Settings («Настройки») → Preview Env («Среда предварительного просмотра») и отмечаем чекбокс backend:

Функция включена. Чтобы увидеть её в действии, отредактируем код в серверной части.
Тестирование сред предварительного просмотра
Подключаемся к MongoDB:
const databaseUrl = process.env.DATABASE_URL
    || 'mongodb://localhost:27017/test';

const imageSchema = new mongoose.Schema({
  title: String,
  size: String,
  source: String
});

mongoose.connect(databaseUrl);

router.get('/', (req, res) => {
  imageSchema.find().then((data) => {
    res.json(
      data
    )
  });
});
Создадим новую ветку в репозитории и пул-реквест для ветки master. Чтобы безопасно протестировать только что сделанные изменения. С помощью функции сред предварительного просмотра будет развёрнута новая среда:

Теперь при отображении сред в проекте мы увидим, что для пул-реквеста развёртывается новая среда:

Причём со всеми необходимыми ресурсами: базой данных, бэкендом и фронтендом. Теперь можно тестировать изменения в полной изоляции от производственной среды, избегая ручной настройки:
Что такое «Cреда предварительного просмотра»?
Функцию среды предварительного просмотра можно включить (или отключить) для каждого приложения. Чтобы изолированно тестировать новые изменения из пул-реквеста создаётся полная копия среды, чтобы вы могли протестировать изменения в PR отдельно. После открытия пул-реквеста серверная часть, клиентская часть и базы данных развёртываются в совершенно новой среде. При обновлении пул-реквеста все новые изменения также отображаются в этой среде — во время просмотра их можно протестировать и устранить проблемы.
В Qovery управление всеми переменными среды и создание новых алиасов происходит так, как будто вы работаете в производственной среде. Всё тестируется изолированно и автоматически. После принятия пул-реквеста Qovery автоматически очищает среду предварительного просмотра.
Тестирование сред предварительного просмотра. Часть вторая
Через несколько минут среда предварительного просмотра должна быть запущена и готова к работе. Переходим в клиентскую часть приложения и нажимаем Open. В коллекции изображений будет пустой список, так как в базе данных ещё нет информации об изображениях. Добавим её, подключившись к экземпляру Mongo через интерфейс командной строки. Учётные данные найдёте в Database Overview:

После подключения добавляем данные об изображениях, выполнив этот код:
db.createCollection("images")

db.images.insert([
       {
         title: 'IMG_4985.HEIC',
         size: '3.9 MB',
         source:
             'https://images.unsplash.com/photo-1582053433976-25c00369fc93?ixid=MXwxMjA3fDB8MHxwaG90by1wYWdlfHx8fGVufDB8fHw%3D&ixlib=rb-1.2.1&auto=format&fit=crop&w=512&q=80',
       },
       {
         title: 'IMG_4985.HEIC',
         size: '3.9 MB',
         source:
             'https://images.unsplash.com/photo-1582053433976-25c00369fc93?ixid=MXwxMjA3fDB8MHxwaG90by1wYWdlfHx8fGVufDB8fHw%3D&ixlib=rb-1.2.1&auto=format&fit=crop&w=512&q=80',
       },
       {
         title: 'IMG_4985.HEIC',
         size: '3.9 MB',
         source:
             'https://images.unsplash.com/photo-1582053433976-25c00369fc93?ixid=MXwxMjA3fDB8MHxwaG90by1wYWdlfHx8fGVufDB8fHw%3D&ixlib=rb-1.2.1&auto=format&fit=crop&w=512&q=80',
       }
     ])
Having opened the client part of the application in the preview environment, we will see all the images, the data about which have been placed in the database. It looks like the function is working well. Now let’s merge the pull request into the master branch:

After it, the preview environment is automatically cleared:

Well done. With Qovery preview environments, we developed a new feature completely isolated from the production environment, tested this feature in a real environment deployed in the cloud without spending a second preparing the environment for tests.
Conclusion
We went through the process of complex application development with frontend, backend and database; included the preview environment feature to develop new features faster. We also learned about the benefits of preview environments and how to use and integrate them into your development workflow.
Qovery on github…
You can continue your study of Fullstack development and deployment of applications in our courses.

Find out the details stock.
Other professions and courses
Data Science and Machine Learning
Python, web development
Mobile development
Java and C #
From the basics to the depth
As well as