Preparing a Windows VM image
In this article, I’ll walk you through creating a Windows Server VM image, deploying it, and creating a test environment to work with Windows Server.
I often create a Windows VM to test various technologies. Over time, I partially automated this process and I want to tell about it. This article may be of interest to novice Windows administrators. The following topics will be covered:
- Installing and basic configuration of Hyper-V on Windows 10
- Creating a virtual machine image
- Create a virtual machine from a differencing disk image
For the test environment, I am using a home computer with the following characteristics:
- Intel Core i5-3570K
- 32 GB RAM
- SSD 128GB – System
- SSD 512GB – Hyper-V
- 2x1Gbps NIC
- Microsoft Windows 10 Enterprise
When several virtual machines are running at the same time, a large load is placed on disks. Therefore, I recommend stirring virtual machine disks to SSDs. Having a productive disk system will primarily affect the responsiveness of the virtual machine. The link contains the complete requirements for
installing Hyper-V on Windows 10
… Note that you will not be able to install Hyper-V on Windows 10 Home. A processor with support for virtualization is also required.
Installing and basic configuration of Hyper-V on Windows 10
Obfuscate the PowerShell console as administrator. In the future, all PowerShell commands must be executed in the console with administrator rights.
Run the following command.
Enable-WindowsOptionalFeature -Online -FeatureName Microsoft-Hyper-V -All
Reboot your computer.
To access the virtual machine to the network, you need to create a Hyper-V switch and connect the virtual machine adapter to it. PowerShell code:
– displays a list of network adapters in the system
– renames adapters for convenience
– creates a Hyper-V virtual switch
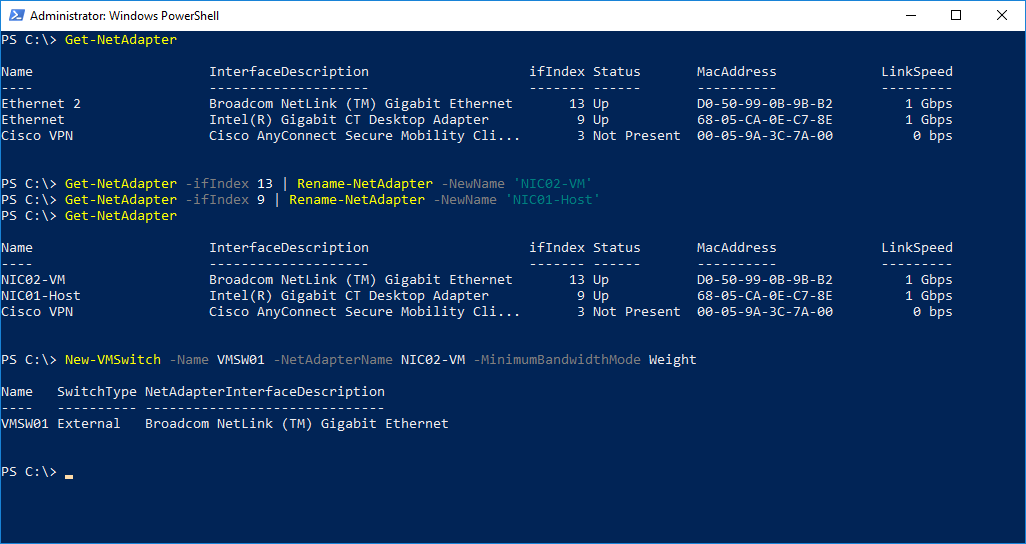
The code is for example. And I think it’s better to type the code yourself once. Which will help you remember it faster.
If you only have one network adapter use the following command to create a virtual switch
New-VMSwitch -Name VMSW01 -NetAdapterName 'Ethernet' -MinimumBandwidthMode Weight -AllowManagementOS $true
– AllowManagementOS $ true – will automatically create a virtual network adapter for the host and connect it to the new switch. When created, the configuration parameters of the physical adapter to which the virtual switch is connected will be migrated to the virtual host adapter.
We will also configure the location of configuration files and hard drives for new virtual machines on our hypervisor. The example specifies the path “F: Hyper-V “.
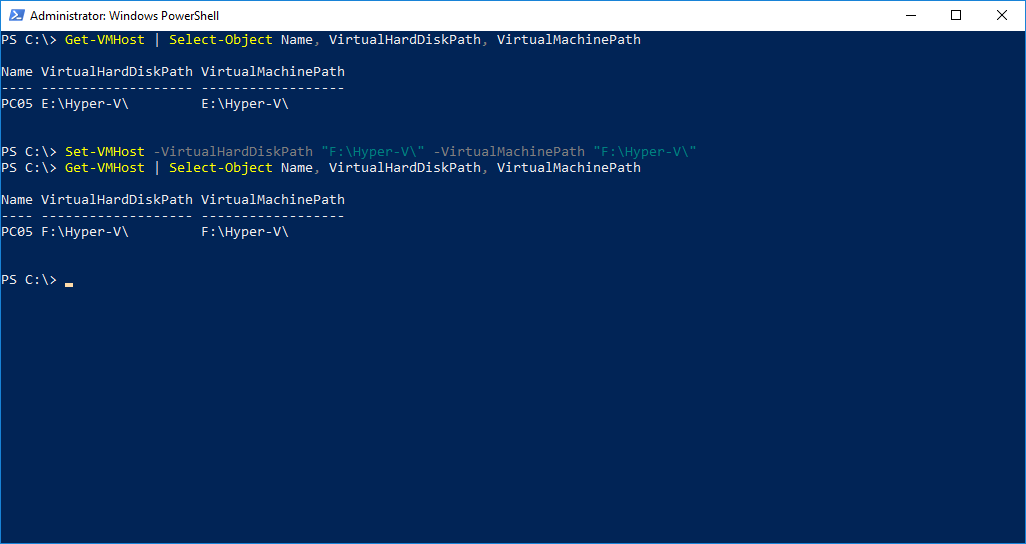
This completes the basic configuration of Hyper-V and you can start creating virtual machines.
Creating a virtual machine image
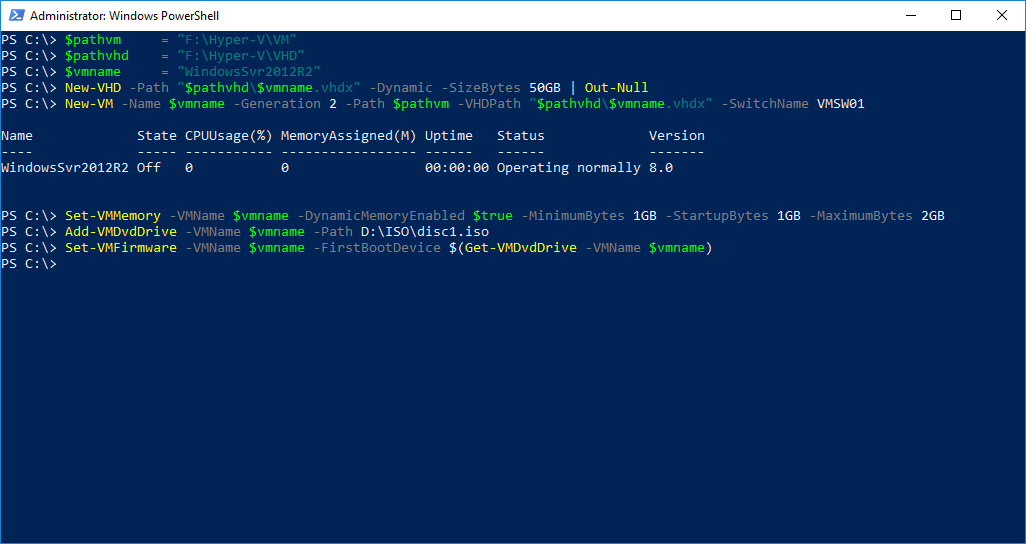
First, let’s create a WindowsSvr2012R2 virtual machine.
– $ pathvm directory for storing VM configuration
– $ pathvhd directory for storing the virtual hard disk
– $ vmname virtual machine name
– New-VHD create a new virtual hard disk
– New-VM create a new virtual machine
– Set-VMMemory set memory parameters
– Add-VMDvdDrive connect the ISO image to the virtual machine (connect the installation image of the OS you need)
– Set-VMFirmware select the mounted image as the first boot device
Now we start the virtual machine WindowsSvr2012R2
Start-VM WindowsSvr2012R2
Now you need to prepare the image. To do this, you need to do:
– Install OS
– Install OS updates
– Install the necessary programs and utilities
You are now ready to prepare the image for deployment. At the command prompt of the virtual machine, you must run the Sysprep command. It will prepare the image for further deployment.
c:windowssystem32Sysprep /generalize /oobe /mode:vm /shutdown
After Sysprep finishes working, the virtual machine will shut down and we will have a ready vhdx file for further deployment. If you now turn on the vm, it will boot during the OOBE phase of the Windows installation process. And after accepting the license agreement and configuring regional settings, it will be ready to go.
Create a virtual machine from a differencing disk image
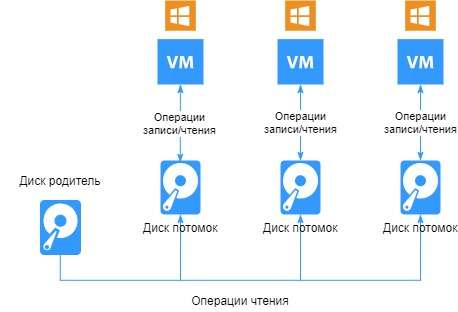
You can use a delta virtual disk to conserve disk space when creating a new virtual machine. When creating a differencing disk, you must define the parent disk. The parent’s disk data will be available on the differencing disk, but any changes made to the differencing disk will be saved in a separate file. Thus, having prepared the disk with the OS image and using it as a parent disk, we can quickly deploy new virtual machines.
Important about working with the differencing disk:
– the size of the differencing disk cannot exceed the size of the parent’s disk
– it is important to keep the parent disk unchanged, changing it will break all the difference disks for which he was a parent
– using Hyper-V Manager, you can merge the child disk and the parent disk. In this case, you can choose whether to create a new disk containing data from the parent and child. Or, the child’s disk data will be migrated to the parent’s disk.
– a child disk can act as a parent for a new delta disk
– I recommend using VMs with differential disks only for testing purposes
You can use the following code to create a virtual machine with a differencing disk.
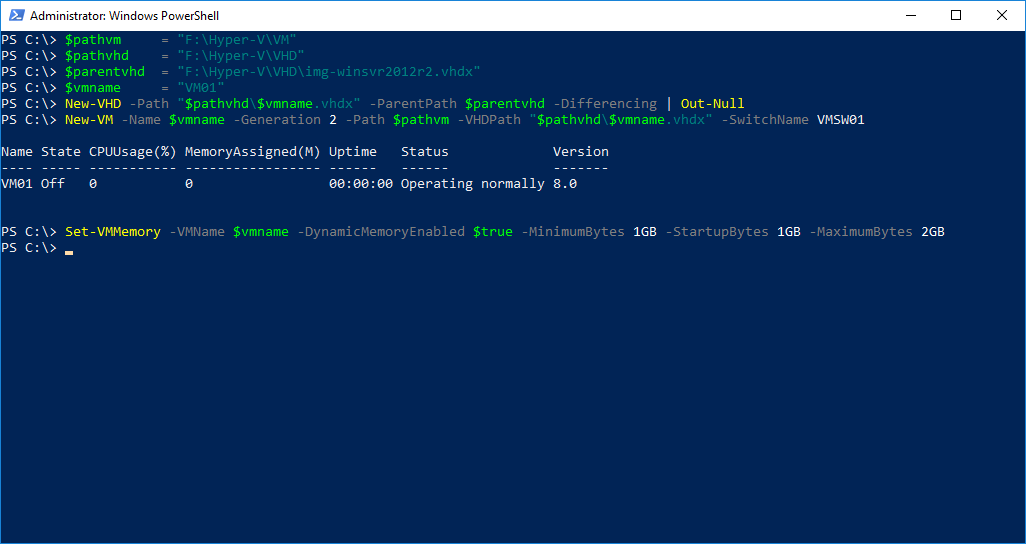
– $ pathvm directory for storing VM configuration
– $ pathvhd directory for storing the virtual hard disk
– $ parentvhd set the parent disk
– $ vmname virtual machine name
– New-VHD create a differencing disk
– New-VM create a new virtual machine and mount the differencing disk
– Set-VMMemory set memory parameters
In this way, you can quickly deploy a test environment with identical virtual machines.