Physics in Python with
Physics. Someone loves her, some do not, but it is definitely an integral part of our existence. In this article, we will look at how to create physics simulations ourselves using only 2 Python libraries.
By the end of the article, we will make an interactive simulation of the interaction of bodies and understand the basics of the library. Pymunk.
My terminology:
Section – a piece of code that I mark with a comment to describe it in the article
(Not used as a term, but it’s easier for me to explain to you)
Let’s get ready to get started
And so, let’s create a new Python file in an IDE that is convenient for you

Now we need to install Pymunk and Pygame… And also set them up for collaboration.
Don’t forget to install them in the project console via the command pip install
Here is the code:
#импорт модулей
import pygame as pg
import pymunk.pygame_util
PyGame coordinate system is different from PyMunk coordinate system, we need to fit them to the same coordinate system


Let’s add code to “import modules” to fix this
pymunk.pygame_util.positive_y_is_up = FalseHooray, we adjusted the coordinate system and now our libraries can work with each other.
Rendering in Pygame
To visualize our simulation, we will use a simple code.
Let’s set the screen resolution and the number of FPS.
#Настройки PyGame
RES = WIDTH, HEIGHT = 900, 720
FPS = 60

pg.init()
surface = pg.display.set_mode(RES)
clock = pg.time.Clock()
draw_options = pymunk.pygame_util.DrawOptions(surface)
WIDTH and HEIGHT are Pygame window resolution options.
FPS is the number of frames rendered per second (60 is considered the standard)
Now let’s create a render class. It will always be at the very end of the code.
while True:
    surface.fill(pg.Color('black'))

    for i in pg.event.get():
        if i.type == pg.QUIT:
            exit()
    pg.display.flip()
    clock.tick(FPS)
The code looks like this at the moment:
#имопрт модулей
import pygame as pg
import pymunk.pygame_util
pymunk.pygame_util.positive_y_is_up = False
#Настройки PyGame
RES = WIDTH, HEIGHT = 900, 720
FPS = 60
pg.init()
surface = pg.display.set_mode(RES)
clock = pg.time.Clock()
draw_options = pymunk.pygame_util.DrawOptions(surface)
#Отрисовка PyGame
while True:
surface.fill(pg.Color('black'))
for i in pg.event.get():
if i.type == pg.QUIT:
exit()
pg.display.flip()
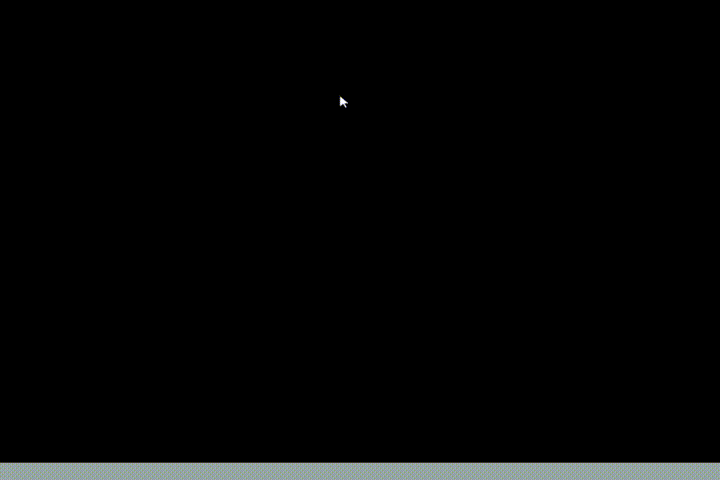
clock.tick(FPS)Finally we can see what comes out.

Our window is ready to create a simulation.
Create Space
But first, let’s understand the basic concepts of the PyMunk library.
First we need to create space
Space is the basic unit of PyMunk modeling. You add solids, shapes, and joints to it, and then move them forward together in time.
Create a new comment “PyMunk Variables” which will be after our section “PyGame Settings” and create space there
#переменные Pymunk
space = pymunk.Space()
There is space, it’s time to create gravity.
space.gravity = 0, 8000Our PyMunk Variables section now looks like this:
#настройки Pymunk
space = pymunk.Space()
space.gravity = 0, 8000
After adding the required variables, it is important to do the following:
Let’s add a couple of lines to render to draw our bodies created in PyMunk:
#Отрисовка
while True:
    surface.fill(pg.Color('black'))

    for i in pg.event.get():
        if i.type == pg.QUIT:
            exit()
#Мы добавили вот эти 2 строки:
    space.step(1 / FPS)
    space.debug_draw(draw_options)

    pg.display.flip()
    clock.tick(FPS)
The code looks like this at the moment:
#импорт модулей:
import pygame as pg
from random import randrange
import pymunk.pygame_util
pymunk.pygame_util.positive_y_is_up = False

#параметры PyGame
RES = WIDTH, HEIGHT = 900, 720
FPS = 60

pg.init()
surface = pg.display.set_mode(RES)
clock = pg.time.Clock()
draw_options = pymunk.pygame_util.DrawOptions(surface)

#настройки Pymunk
space = pymunk.Space()
space.gravity = 0, 8000

#Отрисовка
while True:
    surface.fill(pg.Color('black'))

    for i in pg.event.get():
        if i.type == pg.QUIT:
            exit()

    space.step(1 / FPS)
    space.debug_draw(draw_options)

    pg.display.flip()
    clock.tick(FPS)
Create physical bodies
V PyMunk there are 3 types of physical objects: Dynamic, Static and Kinematic
Dynamic (Dynamic) – Objects react to collisions, they are affected by forces and gravity, they have a finite mass.
Dynamic bodies interact with all types of bodies.Kinematic (Kinematic) – These are objects that are managed from your code, not inside a physics engine. They are not affected by gravity. Good examples of kinematic bodies: flying platforms in games
Static (Static) – Bodies that never move, but can interact with other bodies.
Walls and floors in games are a good example.
Let’s create a Static Platform:
We write the following code after the “Pymunk settings” section
#платформа
segment_shape = pymunk.Segment(space.static_body, (1, HEIGHT), (WIDTH, HEIGHT), 26)
space.add(segment_shape)
segment_shape.elasticity = 0.4
segment_shape.friction = 1.0
space.add (object names separated by commas) – adds objects to space
segment_shape.elasticity – Coefficient of elasticity
segment_shape.friction – Coefficient of friction

This gray stripe is our first physical object, it turned out to be easy to do this.
Let’s consider it as a simulation floor.
Interactive squares and their interaction
You have reached the key section of the article, congratulations!
Now we will figure out how to create dynamic bodies and how to make the right interaction for them.
Idea:
By clicking on the screen, the program will spawn squares that yield to the laws of physics.
Let’s get down to implementation:
#квадратики
def create_square(space, pos):
    square_mass, square_size = 1, (60, 60)
    square_moment = pymunk.moment_for_box(square_mass, square_size)
    square_body = pymunk.Body(square_mass, square_moment)
square_mass
- масса квадрата (в наше случае равняется одному)square_size
- размер квадрата. Передаётся в формате (width, height)square_moment = pymunk.moment_for_box –
автоматически рассчитываем момент инерции для полого круга зная массу и размерquare_body = pymunk.Body –
экземпляр тела
Time for the first feature: Let’s make the squares appear in the place where the cursor is
def create_square(space, pos):
    square_mass, square_size = 1, (60, 60)
    square_moment = pymunk.moment_for_box(square_mass, square_size)
    square_body = pymunk.Body(square_mass, square_moment)
    # появление на позиции курсора
    square_body.position = pos
square_body.position
- позиция тела
def create_square(space, pos):
    square_mass, square_size = 1, (60, 60)
    square_moment = pymunk.moment_for_box(square_mass, square_size)
    square_body = pymunk.Body(square_mass, square_moment)
    square_body.position = pos
    square_shape = pymunk.Poly.create_box(square_body, square_size)
    square_shape.elasticity = 0.8
    square_shape.friction = 1.0
Feature number two: the color of the cubes will be random.
You can do it like this:
square_shape.color = [randrange(256) for i in range(4)]Finally, we add the function, in the end it looks like this:
def create_square(space, pos):
    square_mass, square_size = 1, (60, 60)
    square_moment = pymunk.moment_for_box(square_mass, square_size)
    square_body = pymunk.Body(square_mass, square_moment)
    square_body.position = pos
    square_shape = pymunk.Poly.create_box(square_body, square_size)
    square_shape.elasticity = 0.8
    square_shape.friction = 1.0
    square_shape.color = [randrange(256) for i in range(4)]
    space.add(square_body, square_shape)
remind that space.add adds body to space
We are on the home stretch! All that’s left is to update the rendering.
# спавн кубиков
        if i.type == pg.MOUSEBUTTONDOWN:
            if i.button == 1:
                create_square(space, i.pos)
                print(i.pos)
As a result, rendering looks like this:
#Отрисовка
while True:
    surface.fill(pg.Color('black'))

    for i in pg.event.get():
        if i.type == pg.QUIT:
            exit()
        # спавн мячиков
        if i.type == pg.MOUSEBUTTONDOWN:
            if i.button == 1:
                create_square(space, i.pos)
                print(i.pos)

    space.step(1 / FPS)
    space.debug_draw(draw_options)

    pg.display.flip()
    clock.tick(FPS)

print('end')
Checking
I think it turned out great 🙂

All source code:
#импорт модулей:
import pygame as pg
from random import randrange
import pymunk.pygame_util
pymunk.pygame_util.positive_y_is_up = False

#параметры PyGame
RES = WIDTH, HEIGHT = 900, 720
FPS = 60

pg.init()
surface = pg.display.set_mode(RES)
clock = pg.time.Clock()
draw_options = pymunk.pygame_util.DrawOptions(surface)

#настройки Pymunk
space = pymunk.Space()
space.gravity = 0, 8000

#платформа
segment_shape = pymunk.Segment(space.static_body, (2, HEIGHT), (WIDTH, HEIGHT), 26)
space.add(segment_shape)
segment_shape.elasticity = 0.8
segment_shape.friction = 1.0


#квадратики
body = pymunk.Body()
def create_square(space, pos):
    square_mass, square_size = 1, (60, 60)
    square_moment = pymunk.moment_for_box(square_mass, square_size)
    square_body = pymunk.Body(square_mass, square_moment)
    square_body.position = pos
    square_shape = pymunk.Poly.create_box(square_body, square_size)
    square_shape.elasticity = 0.4
    square_shape.friction = 1.0
    square_shape.color = [randrange(256) for i in range(4)]
    space.add(square_body, square_shape)


#Отрисовка
while True:
    surface.fill(pg.Color('black'))

    for i in pg.event.get():
        if i.type == pg.QUIT:
            exit()
        # спавн кубиков
        if i.type == pg.MOUSEBUTTONDOWN:
            if i.button == 1:
                create_square(space, i.pos)
                print(i.pos)

    space.step(1 / FPS)
    space.debug_draw(draw_options)

    pg.display.flip()
    clock.tick(FPS)

print('end')
Outcome
We have created a small program in PyGame and PyMunk with physics simulation.
Then you can study the documentation, articles and videos from youtube yourself.
But I’m not going to end up with one article on this topic either.
Before communication)
Материалы: Standalone Coder, форумы, официальная документация.