One-to-one relationship: linking a user model to a custom profile model in Django
Pfft … Databases again?
There are three main relationships in a relational database:
- One-to-one relationship;
- One-to-many relationship;
- Many-to-many relationship.
In this article, we will deal with the first of these, the one-to-one relationship.
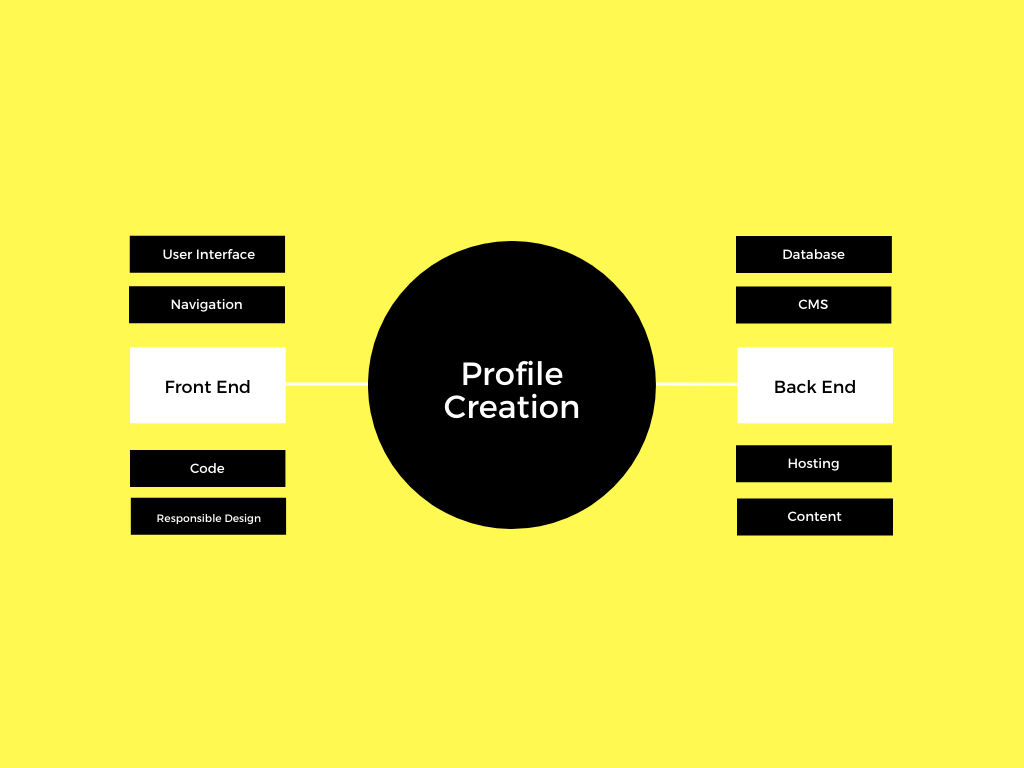
Usually Django already has a user model that comes with the framework. It comes with its own fields, methods, attributes, etc. The downside to this user model is that it doesn’t allow you to add custom fields apart from the defaults already provided in Django. This can be a serious problem as a developer may need to completely configure a user / client profile from a group of authenticated users. For example, a blog site might need an author profile, which will include a user’s photo, contact address, hobby, niche, etc. And the user model that comes with Django doesn’t allow for this.
To solve this problem, the developers create a custom profile model and connect it to the default user model in Django using a one-to-one relationship. It so happens that the user is guaranteed to be connected to one profile and vice versa. In addition, this mechanic allows for better control over the customization of the profile model.
Now I will show you how you can do this in Django.
1. Use the default user model in Django
In the application where you want to create a profile, create a new file forms.py… AT forms.py import the following modules:
from django.contrib.auth.forms import UserCreationForm
from django.contrib.auth.models import User
Create a class that will inherit from UserCreationForm… Inside this class, create another meta-class that will have two variables: model and fields… In a variable model your user model will be stored, and the variable fields – form fields to be created.
class createUserForm(UserCreationForm):
    class meta:
        model = User
        fields = ['username', 'password1', 'password2']
The code above will create a form with fields for username, password, and password confirmation.
2. Create your custom user profile model.
In file models.py import the default user model.
from django.contrib.auth.models import UserThe next step is to create your own profile model, as well as create a user field with a one-to-one relationship with the default user model in Django.
class Profile(models.Model):
    user = models.OneToOneField(User, on_delete=models.CASCADE, null=True,)
    name = models.CharField(max_length=200, null=True)
    email = models.CharField(max_length=200, null=True)
    address = models.CharField(max_length=200, null=True)

    def __str__(self):
        return self.name
3. Create a shape for your profile model.
Open the file form.py and import your profile model from models.py, also add a few other imports that will come in handy when creating your profile shape.
from django import forms
from django.utils.translation import ugettext_lazy as _
from .models import Profile
Then create a class that will inherit from forms.ModelForm… In this class, create another meta-class containing two variables: model and fields… Variable model contains the profile model, and fields – form fields to be created.
class profileForm(forms.ModelForm):
    class Meta:
        model = Profile
        fields = ['name', 'email', 'address']
#The labels attribute is optional. It is used to define the labels of the form fields created
        labels = {
                "name": _("Name     "),
                "email": _("Email Address"),
                "address": _("Street Address"),
                }
Now that the forms are ready, we will define the logic views.py before rendering it to our templates.
4. Write the logic in views.py…
To work with forms created in forms.py you need to import them into our views.py, and add a few more modules that will come in handy for creating logic.
from django.shortcuts import render, redirect
from django.contrib.auth import authenticate, login,
from django.contrib import messages
from .models import Profile
from .forms import createUserForm, profileForm
Now let’s create a registration page. Let’s just call it registerPage… Let’s create an empty context dictionary and return the render.
def registerPage(request):
    context = {}
    return render(request, 'app_name/register.html', context)
Let’s assign values from the form to variables by calling the POST method. Then we will pass the variables to the context dictionary.
def registerPage(request):
    if request.method == 'POST':
        form = createUserForm(request.POST)
        profile_form = profileForm(request.POST)

    context = {'form': form, 'profile_form': profile_form}
    return render(request, 'app_name/register.html', context)
Then we will validate both forms and save them afterwards.
def registerPage(request):
    if request.method == 'POST':
        form = createUserForm(request.POST)
        profile_form = profileForm(request.POST)

        if form.is_valid() and profile_form.is_valid():
            user = form.save()

            #we don't save the profile_form here because we have to first get the value of profile_form, assign the user to the OneToOneField created in models before we now save the profile_form.

            profile = profile_form.save(commit=False)
            profile.user = user

            profile.save()

    context = {'form': form, 'profile_form': profile_form}
    return render(request, 'app_name/register.html', context)
If the form values are validated and saved, we will display a success message and redirect the user to the login page.
def registerPage(request):
    if request.method == 'POST':
        form = createUserForm(request.POST)
        profile_form = profileForm(request.POST)

        if form.is_valid() and profile_form.is_valid():
            user = form.save()

            #we don't save the profile_form here because we have to first get the value of profile_form, assign the user to the OneToOneField created in models before we now save the profile_form.

            profile = profile_form.save(commit=False)
            profile.user = user

            profile.save()

            messages.success(request,  'Your account has been successfully created')

            return redirect('login')

    context = {'form': form, 'profile_form': profile_form}
    return render(request, 'app_name/register.html', context)
5. Render the template
In file register.html create a form tag using the POST method and action with an empty string value. In the form tag, put csrf_token in django template format and then we will dynamically render the forms (user and profile form). Also, let’s not forget about the submit button.
<form method="POST" action="">
                {% csrf_token %}
                    <h3>Register Profile</h3>

                    <div class="form-field">
                        {{profile_form.name.label_tag}}
                        {{profile_form.name}}
                    </div>
                    <div class="form-field">
                        {{form.username.errors}}
                        {{form.username.label_tag}}
                        {{form.username}}
                    </div>
                    <div class="form-field">
                        {{profile_form.email.label_tag}}
                        {{profile_form.email}}
                    </div>
                    <div class="form-field">
                        {{profile_form.address.label_tag}}
                        {{profile_form.address}}
                    </div>
                    <div class="form-field">
                        {{form.password1.errors}}
                        {{form.password1.label_tag}}
                        {{form.password1}}
                    </div>
                    <div class="form-field">
                        {{form.password2.errors}}
                        {{form.password2.label_tag}}
                        {{form.password2}}
                    </div>

                <hr>
                <input id="form-button" class="btn btn-success btn-block" type="submit" value="Create Profile">
                <br>
                    {{form.non_field_errors}}
                <p>Already have an account? <a href="{% url 'login' %}">Login</a></p>
            </form>
Since after filling out the form, checking it and saving it, we redirect to the login page, a message about the success of the operation will be displayed on the login page at the bottom right before the inscription “Don’t have an account? Register “…
 <form method="POST" action="">
                   ...
                 <hr>
                <input id="form-button" class="btn btn-success btn-block" type="submit" value="Login">

                {% for message in messages %}
                <p>{{message}}</p>
                {% endfor %}
                <p>Don't have an account? <a href="{% url 'store:register' %}">Register</a></p>
            </form>
This is how you create a profile model for your site that is linked to your user model in a one-to-one relationship.