One day in the life of DevOps

On the eve of the launch of the DevOps Practices and Tools course, we held another open lesson. The webinar turned out to be very informative. In fact, it was one and a half hour non-stop practice:
- examined 4 main tools of a modern DevOps engineer, each of which implements basic practices: infrastructure as code, CI / CD, feedback;
- learned not to break history in Git and work well in a team;
- They discussed how Ansible differs from other systems, and why we study it on the course;
- looked at Docker and explained why containers and microservices are more likely to defeat monolithic architectures.
Workspace:
- Ubuntu 18.04;
- Python 3
- All necessary software was installed during the webinar.
Lecturer – Lev Nikolaev, DevOps-engineer and trainer in the company "Express 42". The lesson was held in the "Demo" mode.
Demo 1
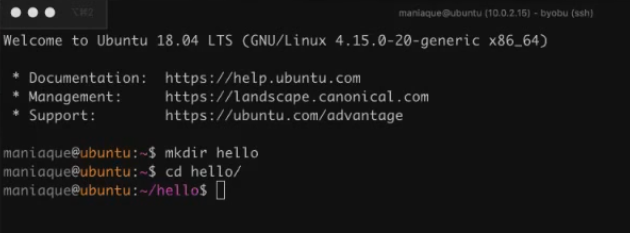
Let's start by launching the virtual machine, because we will do all the work there. And right away we’ll make a directory called “Hello”, where we will develop our application:
Then create a file called app.pywhere we insert the following code:
#! / usr / bin / env python3

import datetime

def do_magic ():
  now = datetime.datetime.now ()
  return "Hello! {0}". format (now)

if __name__ == "__main__":
  print (do_magic ())
As you can see, there is nothing complicated in the code. But if we include the file as a module from another application, it will not do anything, but will only do it if we run it directly as an application, for which the following construction is responsible:

And, accordingly, in the function itself do_magic () a very simple thing happens: we get into a variable now time value now and display it on the screen with text "Hello!".
Stylish, fashionable, youthful, simple – this is the so-called Stateless-application, which basically does not need anything to work, for example, a database. At the same time, our application, consisting of 10 magic lines of code, is ready to receive a service upon receipt of a request.
The next important feature – we want our application worked through web. But let's imagine that our code is very complicated, and we want to be able to check it somehow before laying out. To do this, we mark the app.py file as executable and immediately check in the console that everything works:

We also need a tool that will allow us to control the development of the application, for example, changes in versions, etc. The well-known Git version control system, which is installed by a simple command, will come in handy here:
sudo apt install gitOf course, you will need to create a Git repository in our directory, which we do and then execute ls -la:

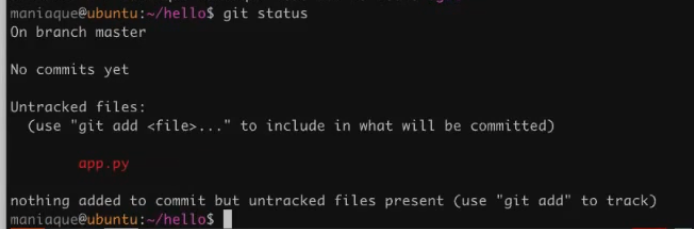
Having completed the team git status, we’ll see that there are no commits yet, and the file that contains our code is completely foreign to the geet, because it is in the category Untracked:
Of course, this should be corrected, but before that we will do another important thing – explain the gita who we are. Why is it important? The fact is that when you save some version of the code, you must write who made the commit, what is his name, and what is his email address. Without these settings, the git simply will not let us commit.
Two simple commands will help us:

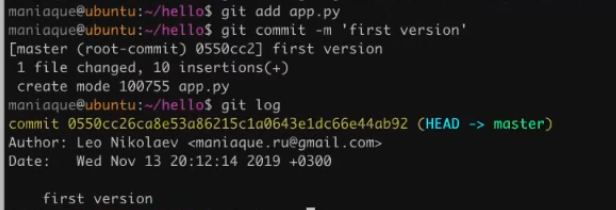
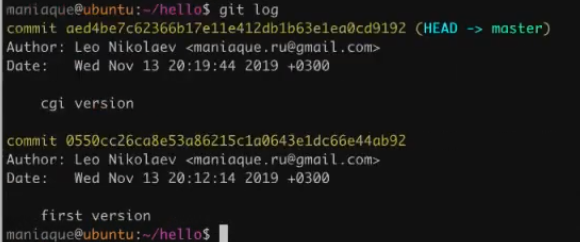
Now add our file, saying that this is the first version of the application. And after the successful operation of the commit, we will immediately see the history of the team git log:
If we want to see a more detailed history of changes, to the team git log add parameter –P:
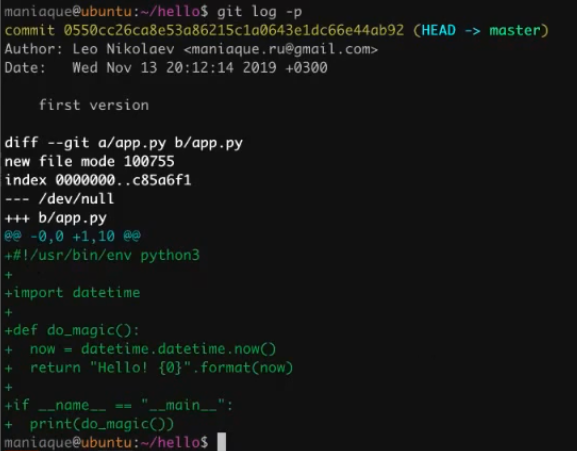
As you can see, now each commit will be attached diff those changes that occurred, that is, we will see which lines are added and which are removed. This is very convenient if you are working with code.
Demo 2
Now imagine what is required of us that the application opened and worked in the browser. This can be done by the mega-ancient method.
First, install Apache:
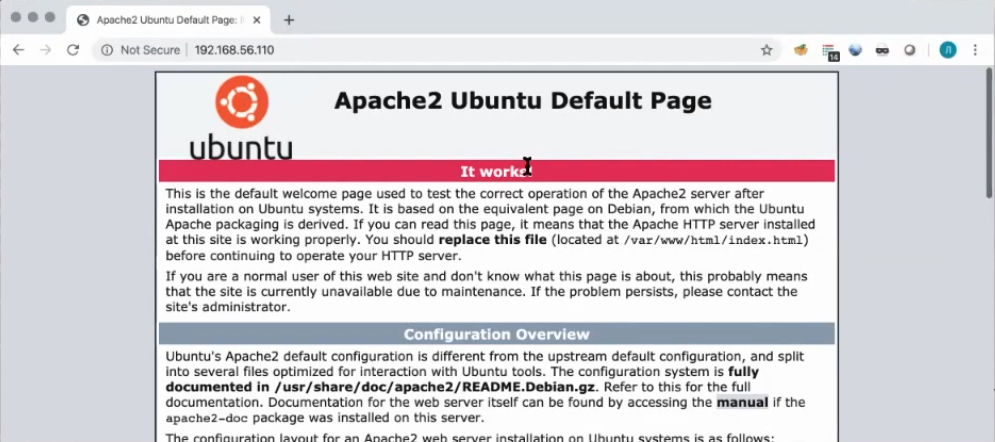
sudo apt install apache2After checking the browser, we see that Apache is installed:
Apache expects it to dump the files it will have into a specific directory. It can be seen, but there is nothing there yet:

Let's go to the directory now / var / www / html and we’ll do a very simple thing: move the directory of the old html to html2. And then we’ll do another tricky thing: we’ll direct the html directory to the home directory where we have the application:
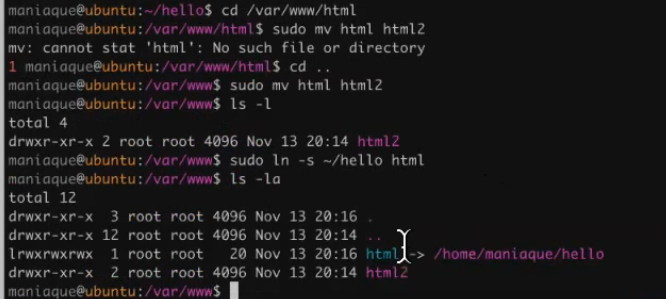
What happened in the end? We created a shortcut, but this shortcut is html and, as they say, the squad will not notice the loss of a fighter. Now, when we access the web server, Apache will run into our directory, where the application lies. But just like that, he won’t launch the application.
So, you need to continue to configure. First, enable the Apache module responsible for running external scripts:

But we won’t start yet, because we still need to add the ability to override Apache settings by creating files in our project directory. To do this, let's fix the default Apache site:

And add a very simple construction here: let's say that in the directory / var / www / html you can redefine anything you like by adding just 3 lines of code:

Now you can restart Apache, go to your project directory and make a special file .htaccess, which allows you to override settings on the fly:

Here are the settings:

Deciphering the lines:
- If you see a file with the extension
.py, that iscgi-script, and it must be executed. - We allow the execution of scripts in the desired directory.
- Unless you say otherwise, you must select a file as an index
app.py.
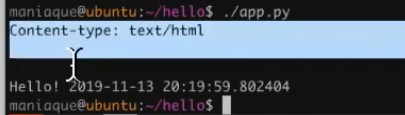
As you can see, the settings are simple. But if we try to update the browser, we will see Internal Server Error. In fact, the reason is that our script displays the time and the message “Hello!”, But this is not quite what Apache expects from it. The problem is solved by adding one simple line to the code:
#! / usr / bin / env python3

import datetime

def do_magic ():
  now = datetime.datetime.now ()
  return "Hello! {0}". format (now)

if __name__ == "__main__":
    print ("Content-type: text / html  n  n")
  print (do_magic ())
This line (print ("Content-type: text / html n n")) we say that before you display magic, you need to write Content-type: text / html n nso that Apache understands better.
Voila! We went from a simple regular application to a simple web application in about 20 minutes:

Now we fix this version, adding only app.py:

After looking at the log, we will see that we already have two versions, and the second version is modified for CGI execution.
Everything is great, but I want versatility. So when we launch the application with the command ./app.py, we did not get the text Content-type: text / html:
To do this, edit our code, modifying it:
#! / usr / bin / env python3

import datetime
import os

def do_magic ():
  now = datetime.datetime.now ()
  return "Hello! {0}". format (now)

if __name__ == "__main__":
  if 'REQUEST_URI' in os.environ:
    print ("Content-type: text / html  n  n")
  print (do_magic ())
Now, if the call is through Apache, the line print ("Content-type: text / html n n") is added, and if the call is made just like that, then it is removed (not shown).
Next, check the status and add the file to the project .htaccessbecause it is part of our code. And we commit:

Everything turned out very well, so it's time to mark what happened as a certain version, adding tag:
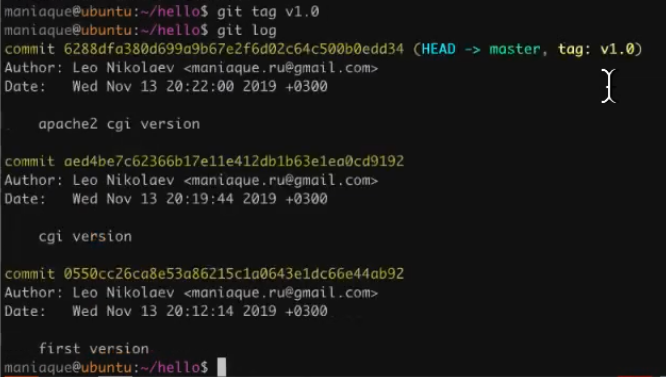
What does the tag give? For example, the ability to return (roll back) to the desired version of the code.
Brief conclusion from this demo:
- GIT helps us navigate code versions and understand what is going on;
- we can mark some commits especially (tags).
In fact, everything is just beginning … First, they will tell you that CGI is not cool, because you create your own separate process for each request. Secondly, for Python it is stylish, fashionable and youthful to use WSGI (whiskey). Thirdly, as a software implementation we can use uWSGI. So, we move on.
Demo 3
So, we want to continue to work with the code and make changes to it, but we don’t want our colleagues to see this, and that it somehow interferes with them. Therefore, we use a feature called gita called branch. It allows you to create a branch (a copy of the repository with all its code), where we will further add our commits. And when we consider that the development is completed, it will be possible to pour changes into the main repository.
To create a copy of the repository, execute a simple command:

For compatibility with the uWSGI standard, make changes to the code:
#! / usr / bin / env python3

import datetime
import os

def do_magic ():
  now = datetime.datetime.now ()
  return "Hello! {0}". format (now)

def application (env, start_response):
  start_response ('200 OK', [('Content-Type','text/html')])
  return [do_magic().encode()]

if __name__ == "__main__":
  if 'REQUEST_URI' in os.environ:
    print ("Content-type: text / html  n  n")
  print (do_magic ())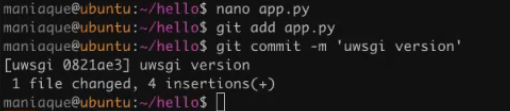
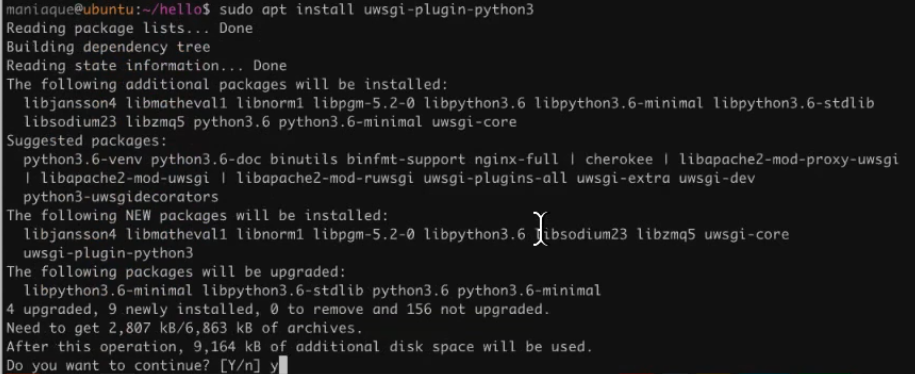
Now you need to install what is needed for this version to work, because uWSGI is a special server:
To run our file, we perform the following remarkable construction:

In it we ask:
- start the uWSGI daemon;
- load the plugin for Python 3;
- start the web server on the port: 9090;
- use the app.py file as the starting file.
Hooray, everything works:

Further, we understand that it is rather tedious for us to remember the settings with which we need to start the uWSGI server. Therefore, we will use the ability of uWSGI to drag data from a file. Create a file dev.ini, putting in it all the necessary parameters:
[uwsgi]

plugin = python3
http-socket =: 9090
wsgi-file = app.py
And now everything starts with a simple command uwsgi dev.ini.
Having looked at the status of the working directory, we add files app.py and dev.ini, make a commit, after which we can mergeby pulling your changes to the main branch.

We will see that our changes are perfectly integrated on top of what happened.
What did we see in this demo:
- git allows us to branch – to create full copies for editing;
- and then they can be injected into the main branch master;
- while we are editing in a branch, we are not bothering anyone.
While we work exclusively locally, however this does not mean that others cannot make commits right there.
Demo 4
So, we now use the built-in uWSGI server, but this is not very cool, because it is not very productive. In general, it would be nice to use nginx, because it is fashionable. In addition, the boss is in negotiations, so in the near future the project will have to be rolled out, and the air smells like a quick deploy.
Let's start by turning off Apache2 and installing nginx.

Now let's create a simple configuration file that will allow nginx to accept incoming connections and forward them to uWSGI, that is, we will get a more or less modern web stack. But first, delete the default nginx configuration files, i.e., we need to put ours there. We also create the configuration file of our server and restart nginx:

Here are the contents of our configuration file:
server {
  listen 80;
  root / var / www / html;

  location / {
    include / etc / nginx / uwsgi_params;
    uwsgi_pass 127.0.0.1:9000;
    uwsgi_param Host $ host;
    uwsgi_param X-Real-IP $ remote_addr;
    uwsgi_param X-Forwarded-For $ proxy_add_x_forwarded_for;
    uwsgi_param X-Forwarded-Proto $ http_x_forwarded_proto;
  }
}
In fact, the configuration is very simple: we ask the server to listen on port 80, use root as the directory / var / www / html, and when accessing the root directory, forward traffic to the address 127.0.0.1:9000. And not just forward, but to do it in the format uwsgiwhere the demon will be waiting for him uwsgi and give it the result of their work, as a result of which users will be able to see our wonderful application. And that way with nginx and uwsgi we will work in production.
Now you can go to our directory and copy the settings created at the development stage to the sales settings.

And we edit the settings, changing one line:
[uwsgi]

plugin = python3
socket = 127.0.0.1: 9000
wsgi-file = app.py
That is, instead of an HTTP server, we ask you to open a socket ready for communication via the protocol uwsgiwhere can go nginx.
Next, go to our directory and run uwsgi with sales settings:

After that, we make sure that everything works and is ready for deployment:

What are results of Demo 4:
- we gradually began to prepare for the product;
- usually a technology stack consists of many components, where everyone does their job;
-
nginxhandles a lot of requests and does it well; -
uWSGIknows how to behave as it should in the right amount of resources; - we got the first artifact – config
nginx(in fact, not the first, but the first, which is not ours).
Demo 5
Before we had time to finish another cup of coffee, the chef came running and said that it was time to do a deploy. This means that we have to write not just code, but infrastructure code, that is, the code that our application can roll out.
It’s not with your own hands to do this, because the client has 5 thousand servers, and they are located in different data centers and scattered around the world, and we need to deploy our application there. And we understand that we need to somehow move to the storage of infrastructure code. In this case, we make an engineering decision to store the infrastructure code in the same directory as our application code. This, by the way, one of the devops practices. When we are talking about deployment, we mean that deployment should be automated, automation means writing infrastructure code, and we can store infrastructure code both with the application and separately. Since the application is simple, we decide to store everything together.
What do we do next? We go to our directory and create 5 directories in one motion, and they are different:
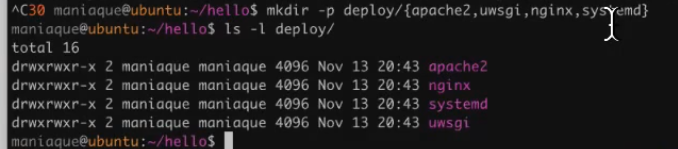
Why do we need this? The fact is that our code can be launched using Apache, using nginx, uWSGI, and systemd will be needed, so you need to put it all together beautifully and efficiently. What we do:

As you can see, the repository has become beautiful: application app.py remained in place, everything else went to the directory deploy. Now we can add the deploy directory to the tracking and commit immediately with all the changed files, saying that we are ready for the deployment:

Well, it's time to share the code with the outside world. So, we need to prepare the opportunity to lay out this code somewhere. In our case, you can use your account on the github by creating a public repository named “Hello”. To work with github, we perform the necessary settings. Since everything is configured using SSH keys, you do not need to enter any logins and passwords.
Throw changes to github: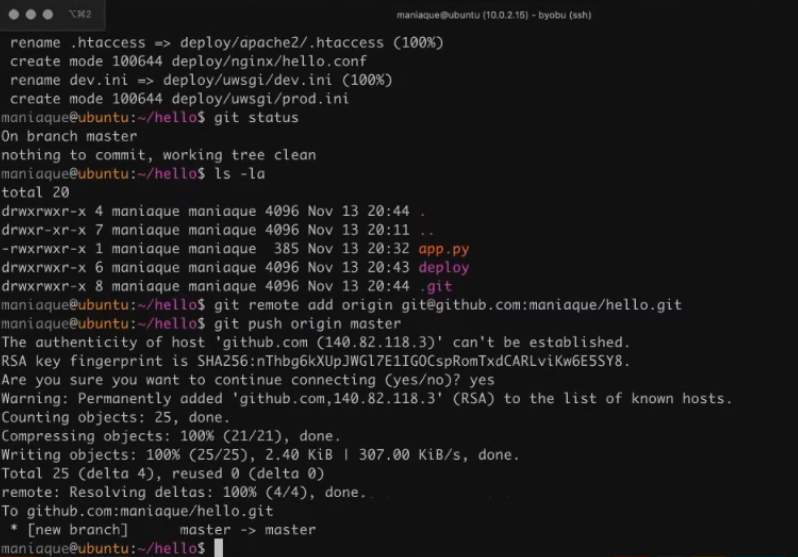
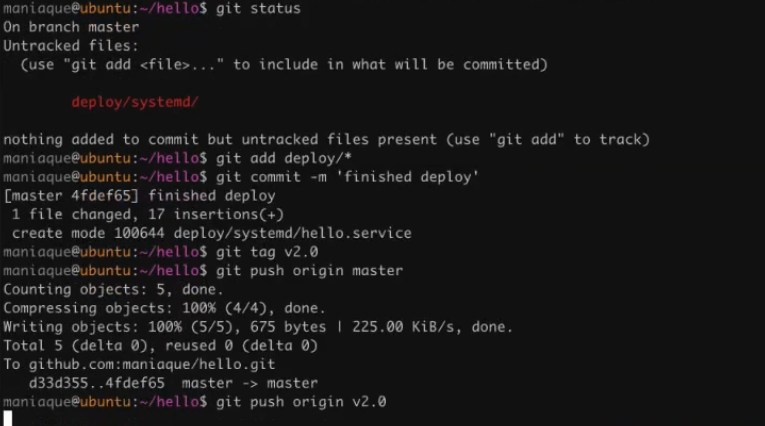
Everything seems to be cool, only tags in our remote repository will not be enough. Why, because we did them? The fact is that tags are not automatically transferred to the remote repository, so we will pass the tag manually:

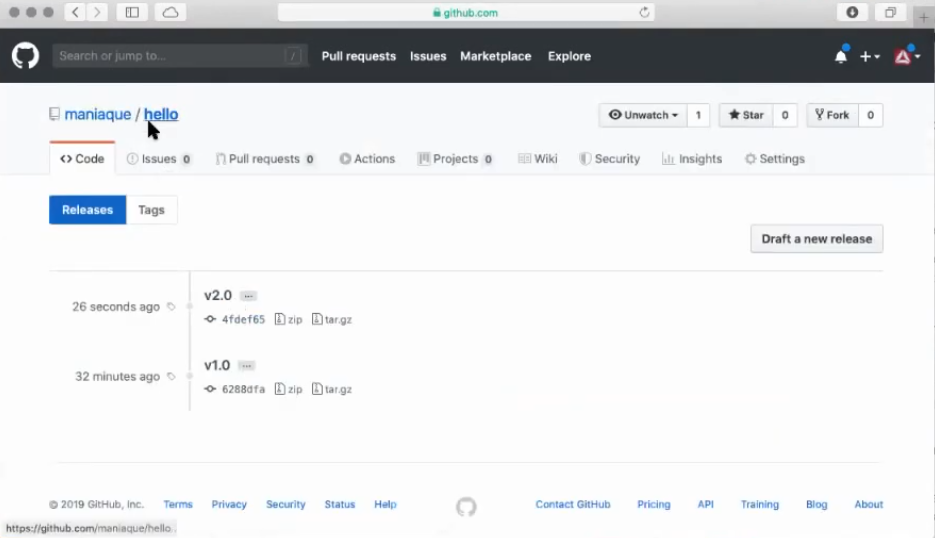
Now our version will appear in the releases section and will be a certain version of the application that can be downloaded in the archive:

We have one more task: to make our uWSGI daemon start automatically, while we don’t want to use any external tools. To solve this problem, create a unit file for systemd:

With the following contents:
[Unit]

Description = Hello app
Requires = network.target
After = network.target

[Service]
TimeoutStartSec = 0
RestartSec = 10
Restart = always
WorkingDirectory = / opt / hello
KillSignal = SIGQUIT
Type = notify
NotifyAccess = all
ExecStart = / usr / bin / uwsgi deploy / uwsgi / prod.ini

[Install]
WantedBy = multi-user.target
As you can see, the code is quite simple, but there are interesting points
.
Save the file and ask systemd re-read the changes from the disk so that he sees a new service. But before you do this, you need to go to the directory opt, become a superuser and say that we want to clone the repository:

Now we can safely start, and the console will not swear:

After checking, make sure that everything works beautifully, looks after everything systemdand everything is wonderful.
In principle, we built some kind of configuration that we would like to see in the deployment. Now we return to the home directory, copy our script and put it in the folder deploy:

And now, in principle, we are ready to deploy to any server. So, you can commit and create a new release 2.0:
Well, let's stop our text translation on this. However, you can continue to browse, as the day of the devops engineer has not yet ended and there is still ahead:
- Demo 6 – use Ansible to automate deployment;
- Demo 7 and Demo 8 – practice Docker and simplify the launch of the container using docker-compose;
- Demo 9 – welcome to Kubernetes!
And keep a link to the github project.