Mikrotik CHR hosted by vpsserver.com
We register on the hosting and create a new server.
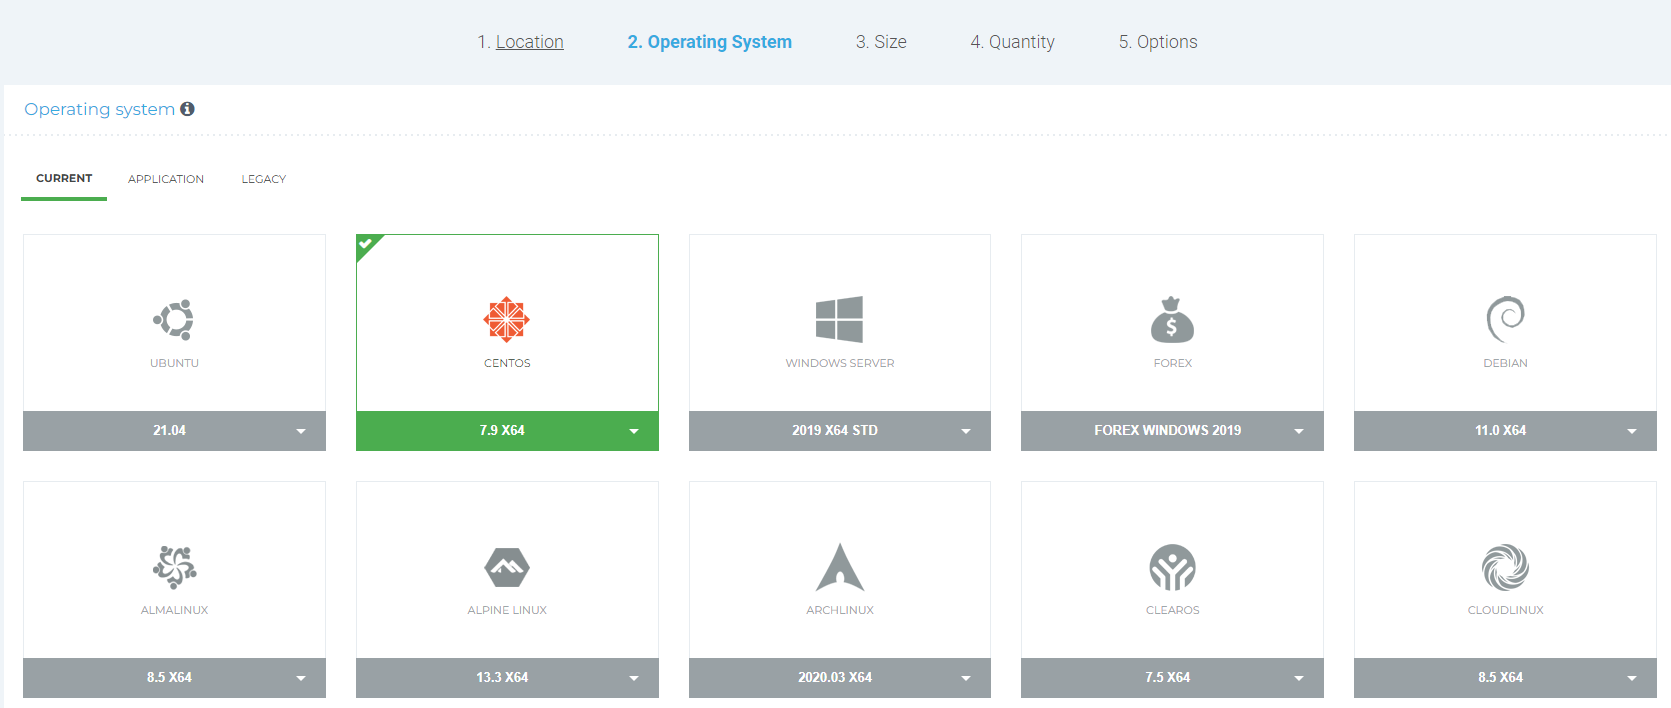
In the second step, select the type of operating system. We need CentOS.
At step 3, we select the minimum configuration. We don’t need a lot of resources for it.
No additional options are required to be connected. In general, even a periodic backup does not make sense, because. it is possible to make a backup in manual mode, frequent changes in server configurations do not threaten us, and Mikrotik itself has an excellent sandbox function – safe mode is turned on and even if something has been messed up, it will return everything as it was if something does not go according to plan .
And now we have a VPS running with a standard minimal OS.

We launch PuTTYconnect to our server using the login and password that we set in the web interface.

Then the instruction itself begins, what to do with the server.
We install everything you need. Since CentOS is one of the lightest and, as a result, empty Linux distributions, the necessary packages must be manually installed. Everywhere added a key
-ybecause lazy ass and I’m too lazy to agree every time – it allows you to answer all questions when you set “yes”.
You will most likely need to add a package repository.
cd /etc/yum.repos.d/
sed -i 's/mirrorlist/#mirrorlist/g' /etc/yum.repos.d/CentOS-*
sed -i 's|#baseurl=http://mirror.centos.org|eurl=http://vault.centos.org|g' /etc/yum.repos.d/CentOS-*
Install the nano text editor.
yum install nano -y
We install an analogue of Norton Commander (yes, yes, here the pissing rags that I spoke about earlier will fly at me from Linuxoids, but it’s really convenient to check whether everything went well through it).
yum install mc -y
Install archiver.
yum install unzip -y
We update everything we can
yum update -y
yum upgrade -y
Through the web interface, restart the server in recovery mode. It is necessary!!! If this is not done, then our server will turn into a pumpkin and in the end we will be blocked. The CPU will run at 146%. You will have to write to technical support to unblock and run the rebuild and then start all over again, because. The OS will be damaged.

We find out and write down the initial network settings of our server (we are interested in the network interface (most likely it will be eth0), network mask (most likely 255.255.255.0), gateway address (most likely the same as the server address only with zero at the end).
ifconfig
ip route
Connect to the server again via PuTTY and mount the tmp partition
mount -t tmpfs tmpfs /tmp/
On the Mikrotik website, select the required distribution kit in RAW format and copy the link to it for later download. At the time of writing, the stable version is 7.3.1.

In the command line, go to the mounted directory and upload the archive there:
cd /tmp
wget https://download.mikrotik.com/routeros/7.1.3/chr-7.1.3.img.zip
Then unzip
unzip chr-7.1.3.img.zip
You need to define a disk name.
fdisk -l
In our case, this is the /dev/vda drive.
We deploy the image to disk.
dd if=chr-7.1.3.img of=/dev/vda bs=4M oflag=sync
We check that we now have two disks (vda1 and vda2)
fdisk -l | grep da
Run Midnight Commander (oldfags wipe away tears of nostalgia for Norton Commander).
mc
Mounting the deployed image
mount /dev/vda1 /media/vda1
Go to the / media / vda1 folder and create the boot folder and inside the grub2 folder. The result should be the following folder structure:
/media/vda1/boot/grub2/
Inside the resulting folder, launch the nano text editor (there is a command line in the bottom line of Midnight Commander):
nano
Copy the following three lines into the opened text file:
setparams 'Grub 2'
set root=(hd0,msdos1)
chainloader +1

Press Ctrl + X, agree that the file will be written (Y + Enter) and give the file a name grub2.cfg

A file with the grub2.cfg bootloader configuration should appear in the folder
Exit all folders in Midnight Commander to the root directory and then exit Midnight Commander.
We write all the data from memory and unmount the image
sync
umount /dev/vda1
(optional) Check that the disk is unmounted. Run Midnight Commander, go to /media/vda1 folder. It must be empty.
Close Midnight Commander and reboot the server via the command line:
echo 1 > /proc/sys/kernel/sysrq
echo b > /proc/sysrq-trigger
After executing the second command, the connection will be terminated.
In the web interface of the hoster, we restart the server already in normal mode (because after restarting it will start again in recovery mode):

We are waiting for the server to finish rebooting (instead of the Pending status, the Running status should appear).

In the same place in the web interface, open the console and assign a password.

It remains to register the network settings for the subsequent connection via winbox. In the command line after authorization, we write (yes, it seemed to be some kind of curve and I didn’t succeed in copy-pasting – I’ll probably have to write with pens):
/ip address add address=YOUR.IP.ADD.RESS/MASK
We received this data in paragraph 3.
/ip route add gateway=YOUR.GATE.WAY.IP
It is worth noting that most likely, since Mikrotik completely rewrites the section, accordingly, the gateway address will most likely change to a standard Mikrotik. That is, instead of zero, there will be a unit at the end of the gateway address.
You can check on the same command line whether the route forwarding was registered with the command ip route
If everything is configured correctly, then by sending, for example, ping 8.8.8.8 we will see that the packets are being sent. If they are lost, then something is configured incorrectly.
Everything, you can connect via winbox (link for download).
(not necessary, but highly recommended) Since almost all Mikrotik setup is done through winbox, for security reasons it is better to disable everything superfluous.

I don’t see the point in describing the rest of the setting, because. opportunities and, accordingly, tasks, for which you need to configure Mikrotik CHR, a huge number. In addition, I myself will soon have to understand the functionality.
This article was written only because I myself spent a lot of time (mostly due to my inexperience) and so that others could get past all the rakes that I ran races for a week.
Additional disclaimer:
I wrote this article “on fresh tracks”, but I’m not ready to go through all the steps again to write it. Therefore, somewhere there may be inaccuracies (but in theory there should not be). If anything – write in the comments questions where the “gags” happened. I will try to remember and suggest.
Good luck to all.