Manage Synology Surveillance Station with Telegram, Python and Docker
Overview of Synology
Synology is a manufacturer of network storage systems for businesses and home users. Products from Synology are software and hardware systems. There are a lot of reviews on their devices for home use on the Internet. They are often recommended for photographers, video editors, and anyone else who needs to store and access data 24/7.
Hardware and software systems consist of the following elements: network storage, for example, models such as: DS220+, DS720+, DS920+, etc. and software: DSM operating system (currently version 7.1) and various modules included in the package, such as Photos, Contacts, Download Station, Docker, Surveillance Station and others. Some of the modules have mobile applications and they can be used from an iOS or Android device.
Photos – the module allows you to upload photos from your phone / tablet / computer, view them, share them with Synology users and give direct links on the Internet with the appropriate NAS settings.
Contacts – the application allows you to store contacts from different devices. On iOS, contacts are synchronized through the built-in tools of the mobile OS. On Android, you need the paid DAVx5 app to sync your contacts.
Download Station is a program designed for downloading torrents.
Docker – According to Synology’s knowledge base, it is a virtualized environment for building and running applications in an isolated container.
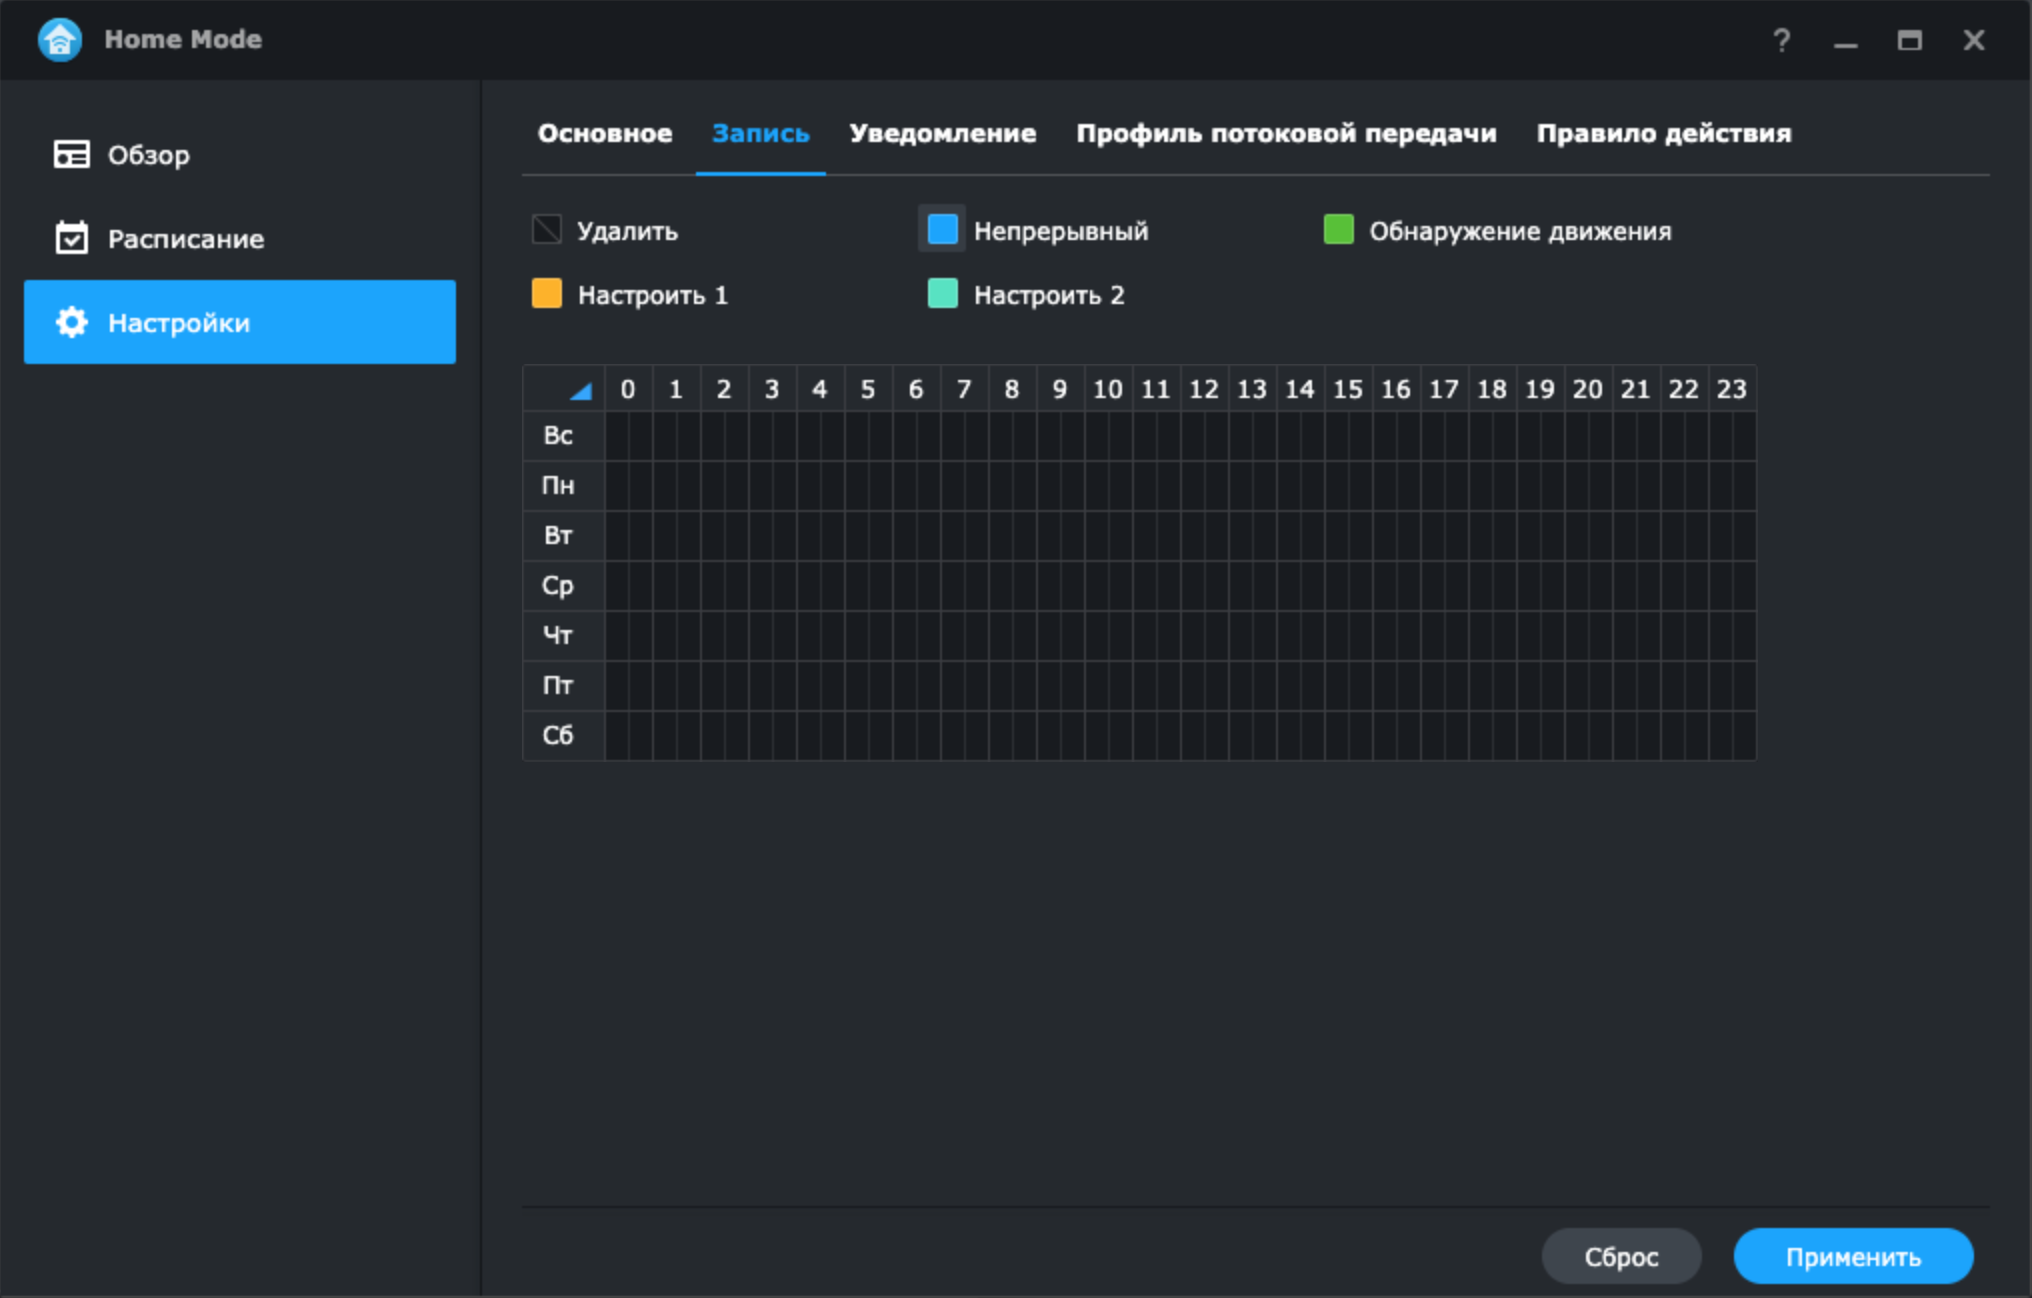
Surveillance Station (hereinafter – Video surveillance station) – the module allows you to configure video surveillance through various cameras. The official website provides a complete list of supported CCTV cameras. For example, the DS920+ comes with a license to connect two cameras, if you need to connect more than two, then you should buy additional licenses for each additional camera. There are three ways to control the Station: through the application for PC and Mac, through the browser and through the DSCam mobile application. The PC application has the ability to set up a scheduled recording of the video camera. For example, it is possible to set motion recording to trigger 24 hours 7 days a week for motion detection.
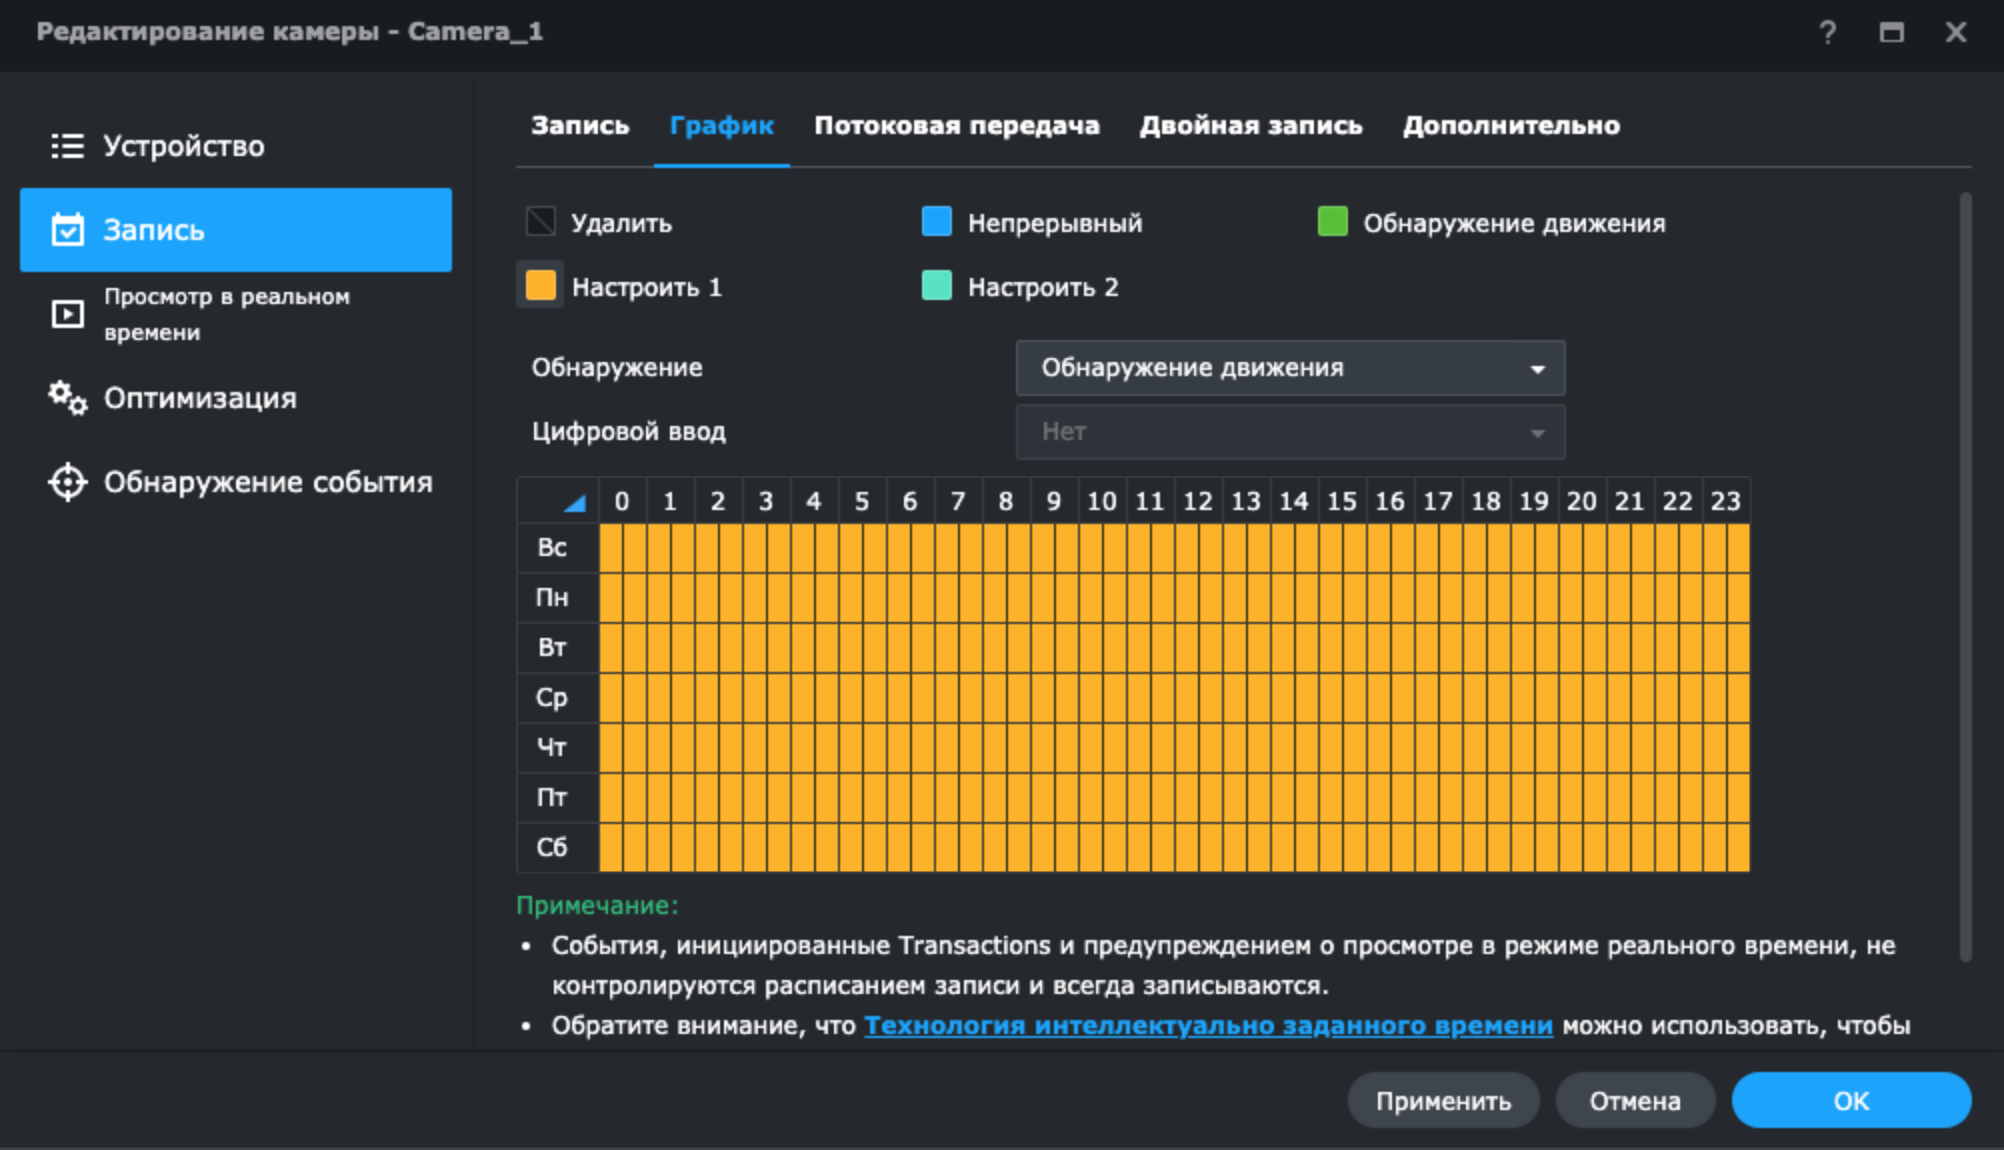
After this setting, the camera will record video when motion is detected and send notifications through the mobile app.
The application for PC and DSCam has the ability to turn the Home mode on and off. For example, by enabling the mode, the recording schedule for motion detection is turned off and notifications are stopped in the mobile application. Thus, through the Home mode mode, the security mode at the Video Surveillance Station is switched on and off.
Solving the problem of managing a Video Surveillance Station located inside a local network without Internet access via Telegram
However, the use of the mobile application becomes more complicated when the NAS is located within the home network without direct access to the Internet. Under this condition, to enable/disable the Home mode, you must connect to your home network via VPN, which complicates the management of the Surveillance Station. Also, to view the video stream from the video surveillance camera when the motion sensor is triggered, you must first connect to the VPN network, and then open DSCam to view the video stream in real time.
To manage the Station without connecting to a VPN network, it is possible to use the Python language, Telegram bot, Docker and WebAPI of the Station. This will allow you to find out the current state of the security mode, turn it on and off through Home mode. Receive photos from a surveillance camera on request from Telegram.
The article will not cover the process of creating a Telegram bot through Bot_Father, since there is a lot of this information on the Web.
According to the documentation for the WebAPI Station, there are the main request parameters “api”, “_sid”, “method”, “version”, all other parameters are clarifying for each type of request.
Authorization for different purposes occurs on different ports. To switch the Home mode, authorization is carried out at the address of the Video Surveillance Station http://192.168.1.3:9900/webapi/auth.cgi. An example of a request for authorization in a video surveillance station can be:
requests.get( 'http://192.168.1.3:9900/webapi/auth.cgi',
             params={'api': 'SYNO.API.Auth', 'method': 'login',
                     'version': '7', 'account': 'Test',
                     'passwd': 'RL2wXbx9', 'session': 'SurveillanceStation',
                     'format': 'cookie12'})
The answer will be:
{'data': {'account': 'Test',
          'device_id': 'qLDB5jfX7sxfdqws5MzCABW52jFKpxXiAbFE7QVzrdECrIvPDqR412355',
          'ik_message': '', 'is_portal_port': False,
          'sid': 'YxJx0PM0BGVlSgbgOfaN1zxmgXmxDaTD6WE1PYl47qohuGFobsLl7Eh0Y_s6MGBfW12356',
          'synotoken': '--------'}, 'success': True}
To authorize subsequent requests, information from the “sid” field is required via the json() method[‘data’][‘sid’]
To receive a photo from a video surveillance camera, authorization occurs at the address of the Network Storage http://192.168.1.3:5000/webapi/entry.cgi with the transfer of basic and auxiliary parameters similarly to the Video Surveillance Station. To create a photo, you should determine the ID of the video surveillance camera; for this, you should use the List method, through the following request
requests.get('http://192.168.1.3:5000/webapi/entry.cgi',
             params={'api': 'SYNO.SurveillanceStation.Camera',
                     '_sid': 'ответ поля sid в запросе на авторизацию',
                     'version': '9', 'method': 'List' })
The response will include the id of all video surveillance cameras with binding to IP addresses. In this example, only one camera with ip-address 192.168.5.120, id 7 is used.
{'data': {'cameras': [{'DINum': 0, 'DONum': 0, 'audioCodec': 0,
                       'channel': '1', 'connectionOverSSL': False,
                       'dsId': 0, 'enableLowProfile': True,
                       'enableRecordingKeepDays': True,
                       'enableRecordingKeepSize': False,
                       'enableSRTP': False, 'fov': '',
                       'highProfileStreamNo': 1,
                       'id': 7,
                       'idOnRecServer': 0,
                       'ip': '192.168.5.120',
                       'lowProfileStreamNo': 1, 'mediumProfileStreamNo': 1,
                       'model': 'Generic_HIKVISION', 'newName': 'Camera_1',
                       'port': 80, 'postRecordTime': 5, 'preRecordTime': 5,
                       'recordTime': 30, 'recordingKeepDays': 30,
                       'recordingKeepSize': '10', 'status': 1,
                       'stream1': {'bitrateCtrl': 2,
                                   'constantBitrate': '3000', 'fps': 25, 'quality': '5', 'resolution': '2688x1520'},
                       'tvStandard': 0, 'vendor': 'HIKVISION', 'videoCodec': 6, 'videoMode': ''}]},
 'success': True}
Here is the code of the configuration file and the Telegram bot file.
Configuration file code conf.py
user_id = [1234567, 2134567, 31234567]
token = 'Токен бота'
Telegram bot file code bot_2.py
import conf
import telebot
import requests
import time
import os

token = conf.token
bot = telebot.TeleBot(token)

def auth(chatid):
    for i in conf.user_id:
        if i == chatid:
            return True
    return False


def get_snapshot():
    take_snapshot = requests.get(
        'http://192.168.1.3:5000/webapi/entry.cgi',
        params={'api': 'SYNO.SurveillanceStation.SnapShot', '_sid': auth_syn,
                'version': '1', 'method': 'TakeSnapshot', 'camId': '7',
                'dsId': '0', 'blSave': 'true'
                })
    time.sleep(1)
    return (url_photo + '/' + sorted(os.listdir(url_photo))[-1])

auth_syn = requests.get(
    'http://192.168.1.3:5000/webapi/entry.cgi',
    params={'api': 'SYNO.API.Auth',
            'version': '7', 'method': 'login', 'account': 'test', 'passwd': 'RL2wXbx9'
            }).json()['data']['sid']
auth_surv = requests.get(
    'http://192.168.1.3:9900/webapi/auth.cgi',
    params={'api': 'SYNO.API.Auth',
            'method': 'login', 'version': '7', 'account': 'Test', 'passwd': 'RL2wXbx9',
            'session': 'SurveillanceStation', 'format': 'cookie12'
            }).json()['data']['sid']

url_surv = "http://192.168.1.3:9900/webapi/entry.cgi"

url_photo = '/camera'
mes_start = ('Основные команды: \n'
             '/sec - состояние охраны \n'
             '/sec_on - включить охрану \n'
             '/sec_off - выключить охрану \n'
             '/photo - сделать фото')

@bot.message_handler(commands=['start'])
def start(message):
    if auth(message.chat.id):
        bot.send_message(message.chat.id, mes_start)


@bot.message_handler(commands=['sec'])
def sec(message):
    if auth(message.chat.id):
        home_mode_info = requests.get(url_surv,
                                      params={'_sid': auth_surv, 'api': 'SYNO.SurveillanceStation.HomeMode',
                                              'version': '1', 'method': 'GetInfo'}).json()['data']['on']
        if home_mode_info:
            bot.send_message(message.chat.id, "Охрана выключена")
        else:
            bot.send_message(message.chat.id, "Охрана включена")


@bot.message_handler(commands=['sec_on'])
def sec_on(message):
    if auth(message.chat.id):
        home_mode_off = requests.get(url_surv,
                                     params={'_sid': auth_surv, 'api': 'SYNO.SurveillanceStation.HomeMode',
                                             'version': '1', 'method': 'Switch', 'on': 'false'}).json()['success']
        if home_mode_off:
            bot.send_message(message.chat.id, "Охрана гаража включена")
        else:
            bot.send_message(message.chat.id, "Ошибка постановки в охрану")


@bot.message_handler(commands=['sec_off'])
def sec_on(message):
    if auth(message.chat.id):
        home_mode_on = requests.get(url_surv,
                                    params={'_sid': auth_surv, 'api': 'SYNO.SurveillanceStation.HomeMode',
                                            'version': '1', 'method': 'Switch', 'on': 'true'}).json()['success']
        if home_mode_on:
            bot.send_message(message.chat.id, "Охрана гаража выключена")
        else:
            bot.send_message(message.chat.id, "Ошибка снятия гаража с охраны")


@bot.message_handler(commands=['photo'])
def photo(message):
    if auth(message.chat.id):
        bot.send_photo(message.chat.id, photo=open(get_snapshot(), 'rb'))


@bot.message_handler(content_types=['text'])
def other_mes(message):
    if auth(message.chat.id):
        bot.send_message(message.chat.id, mes_start)


bot.infinity_polling()
Let’s take a quick look at the main elements of the code.
In a separate conf.py file, we list the id of Telegram users who will be able to control the security mode, and also write the bot token.
In the def auth(chatid): function, the user from whom the message was received is identified.
In the def get_snapshot(): function, a photo from the surveillance camera is created, the result of the function is the path on the network storage to the last photo, which will later be sent to the telegram.
In the auth_syn and auth_surv variables, authorization is carried out on the Network Storage and Video Surveillance Station.
The home_mode_info variable defines the current state of the Home mode. If Home mode is enabled, then the telegram bot will send a response that the security is disabled, if Home Mode is disabled, then the security is enabled.
The home_mode_off and home_mode_on variables represent turning off and turning on the Home mode and, accordingly, the armed mode.
Running a Telegram bot in Docker
Let’s take a look at how a telegram bot is launched in Docker on Synology NAS.
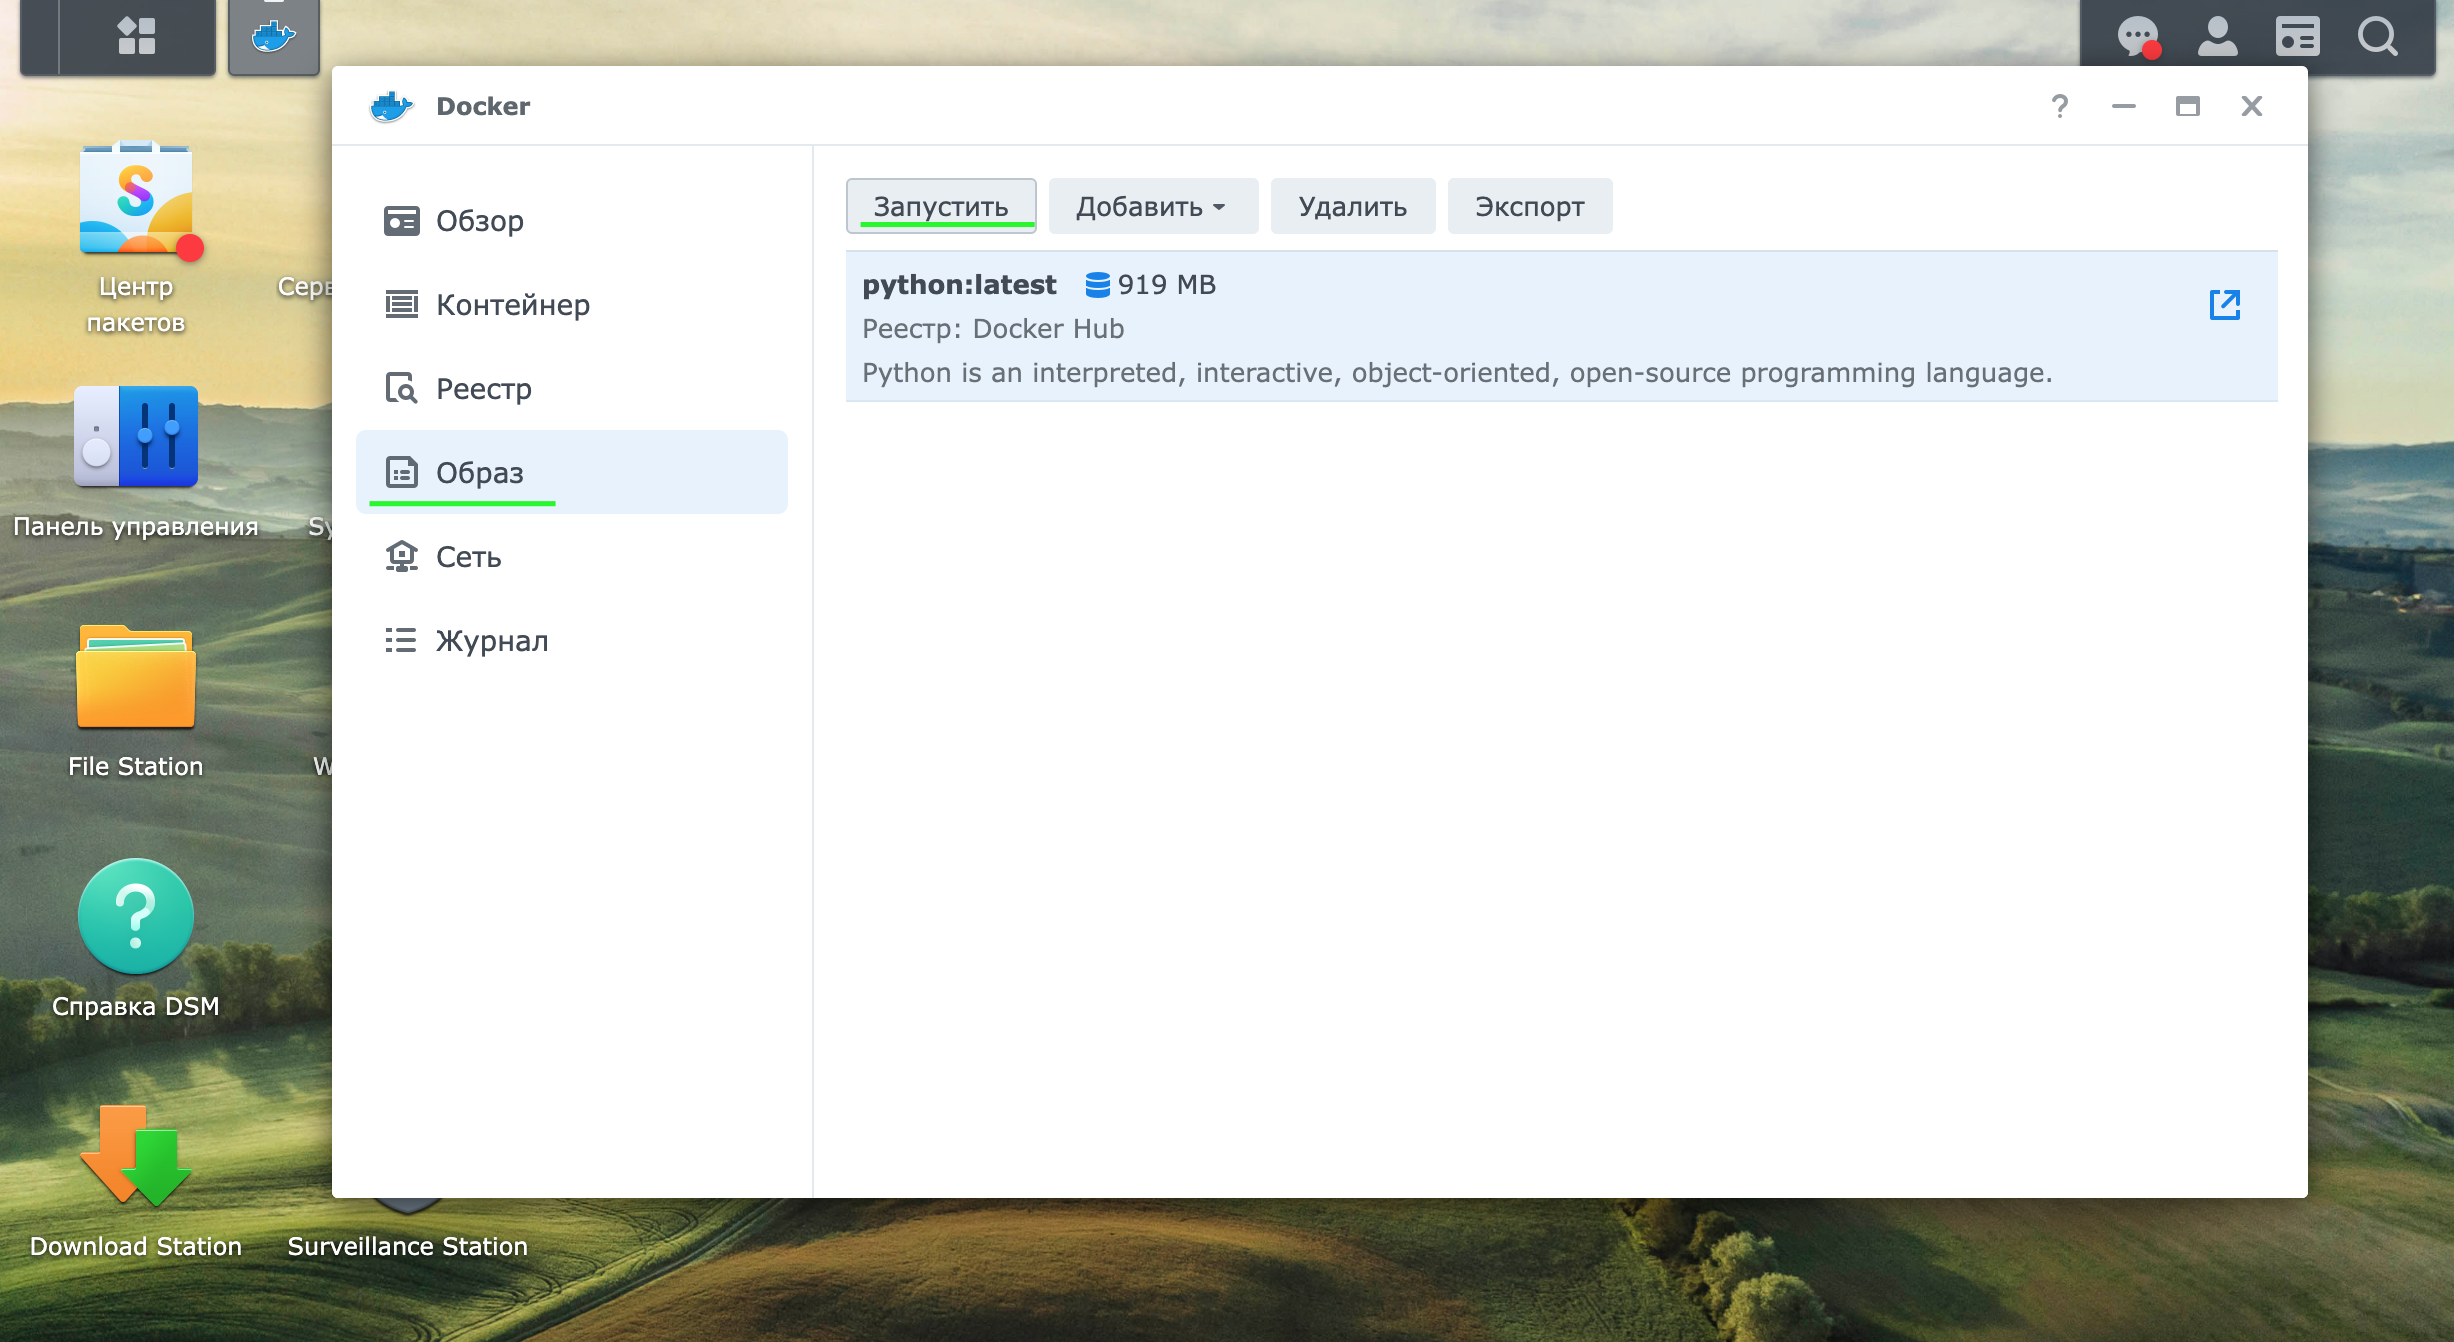
You need to install Docker as standard software
In the registry section, download the python container.

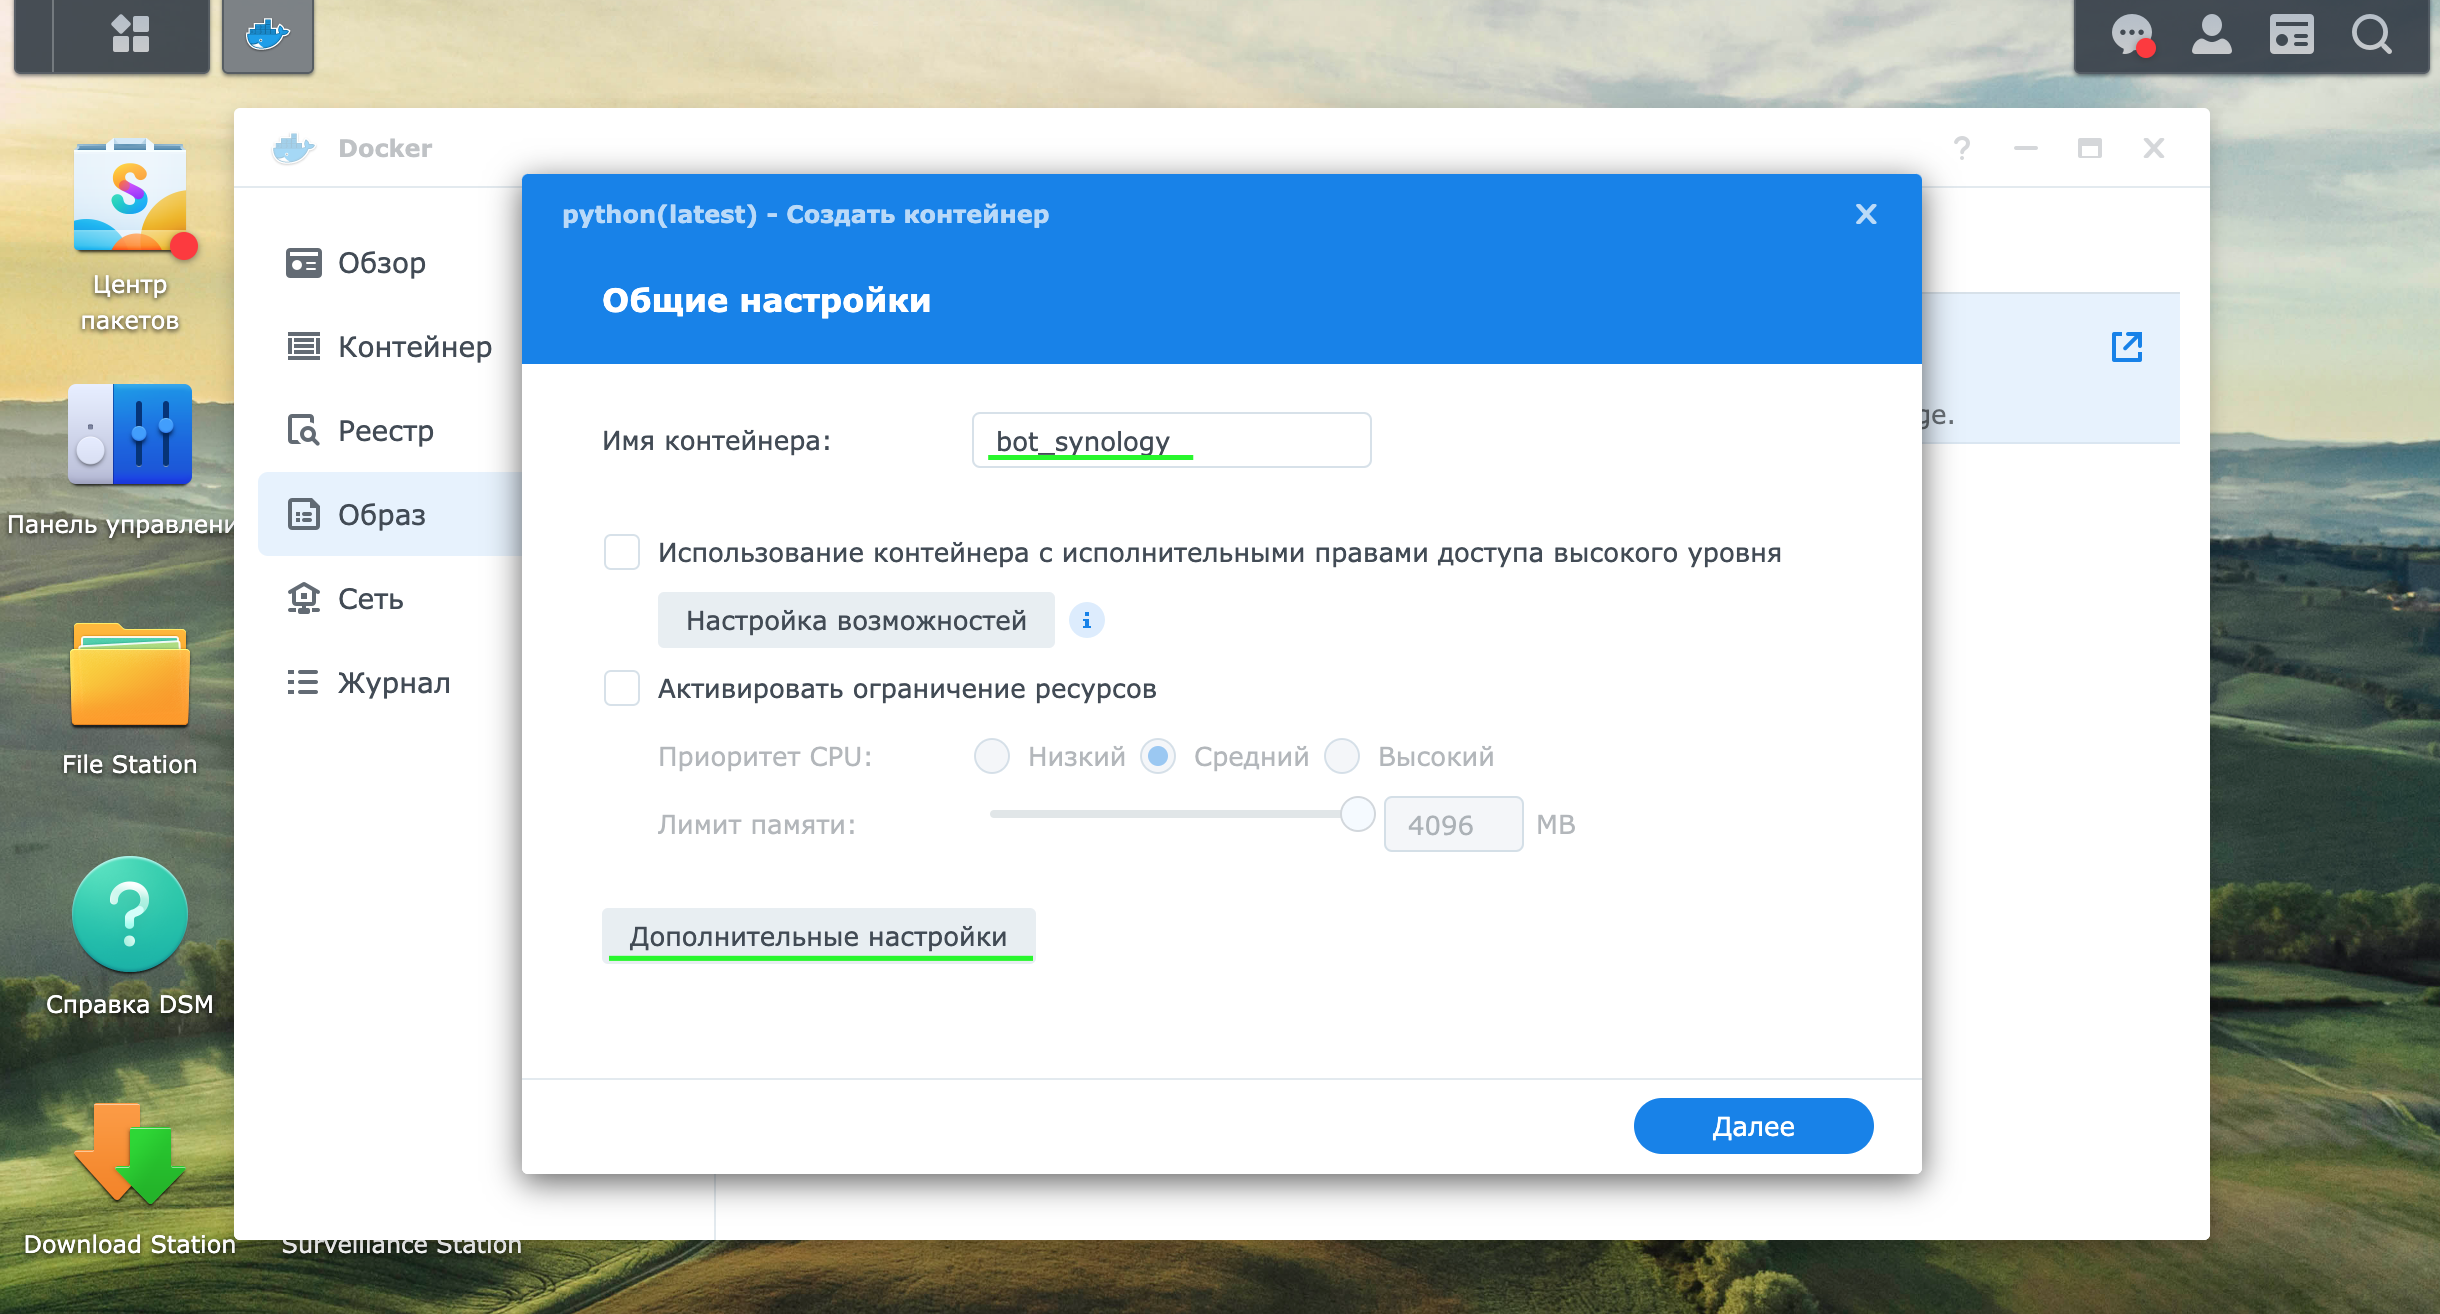
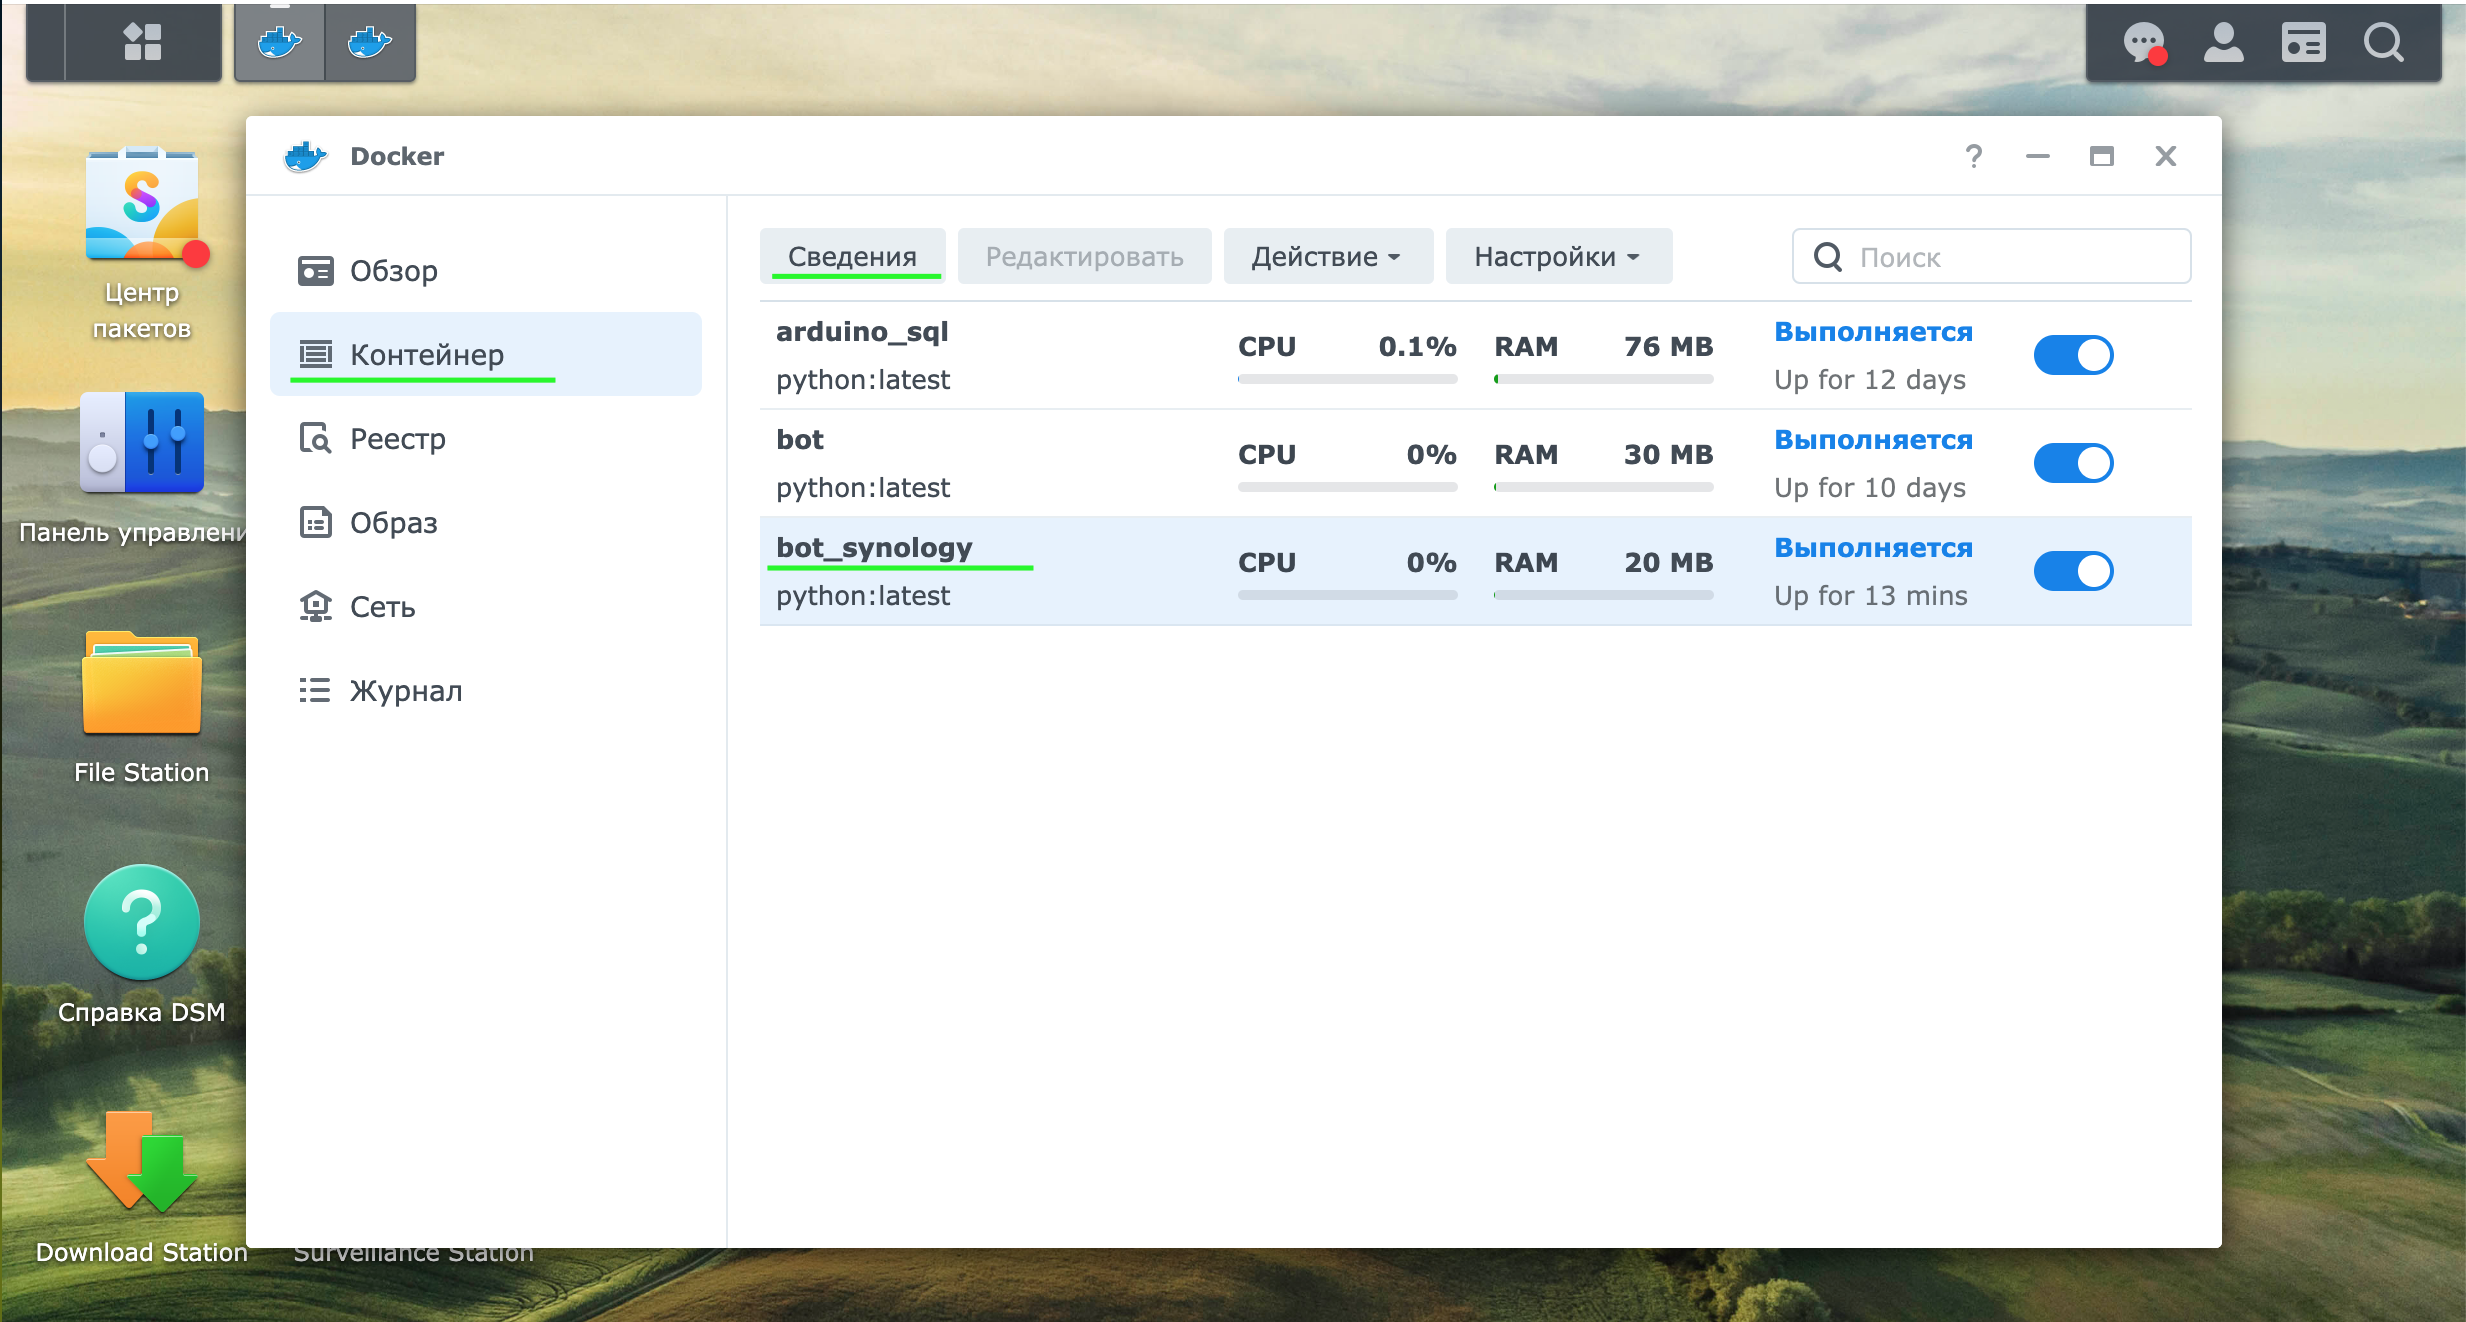
In the image section, start the process of creating a container (hereinafter – Container), in our example it will be called bot_synology.
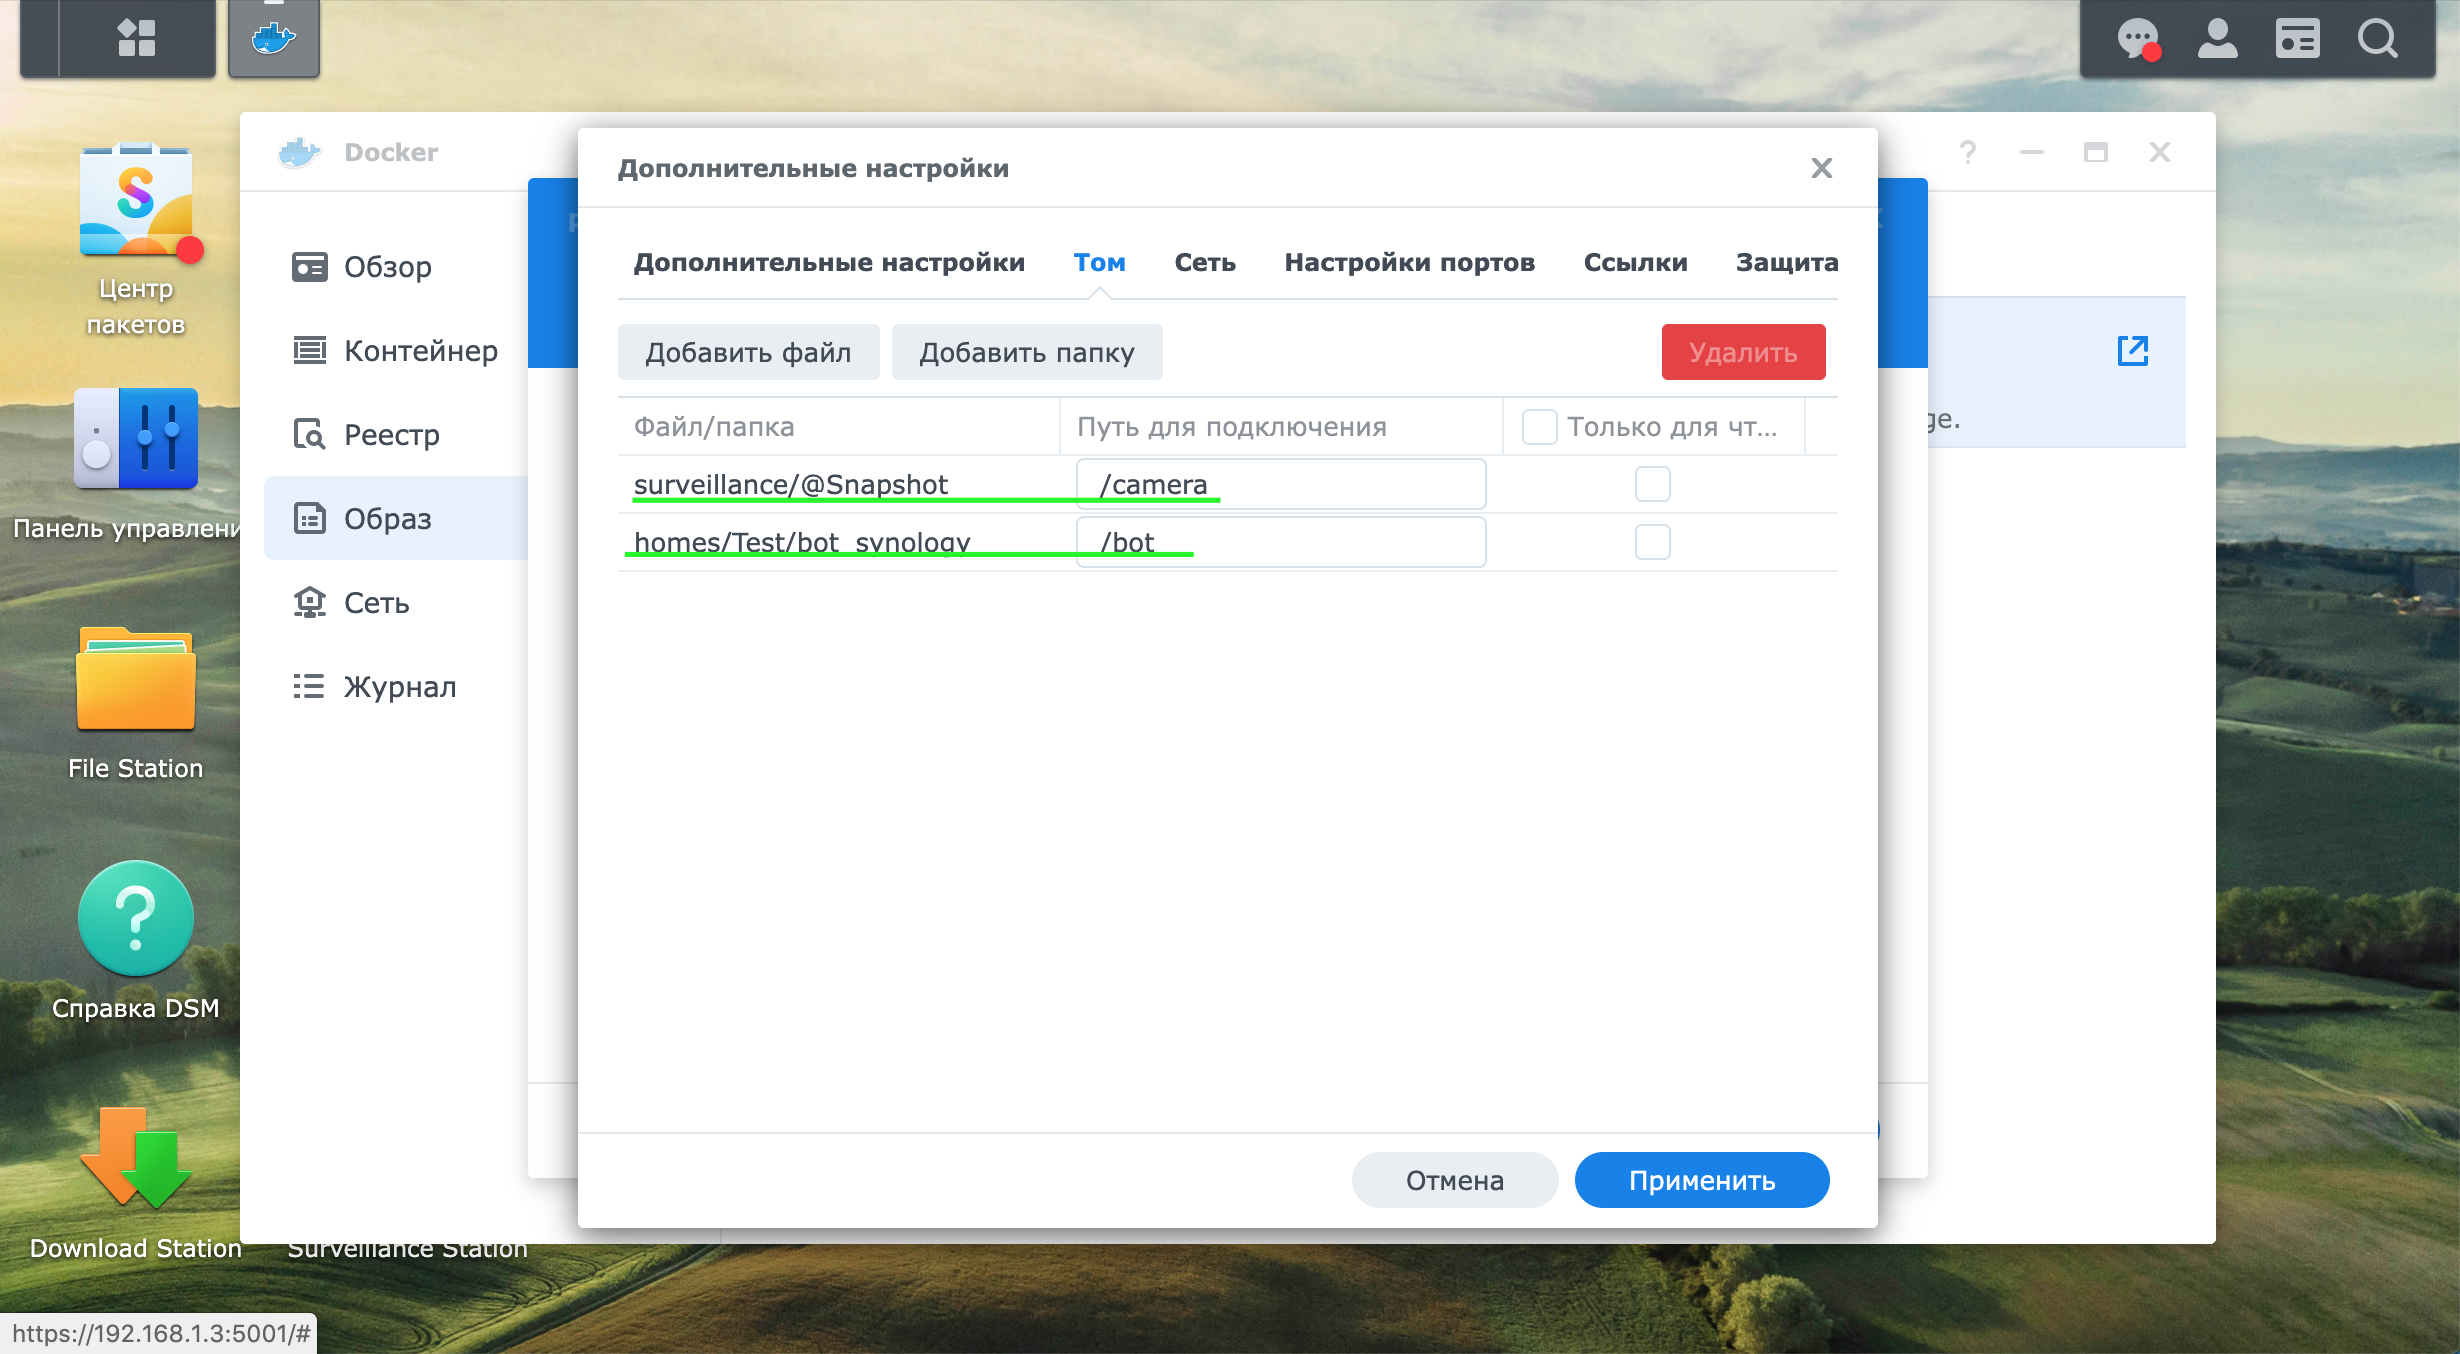
In the advanced settings section and in the volume subsection, specify the paths to the following folders:
1) folder with bot telegram files. The path on the NAS “/homes/Test/bot_synology” for the container will correspond to “/bot”.
2) a folder with photo files from the camera. The path on the NAS “/surveillance/@Snapshot” for the Container will correspond to “/camera”.
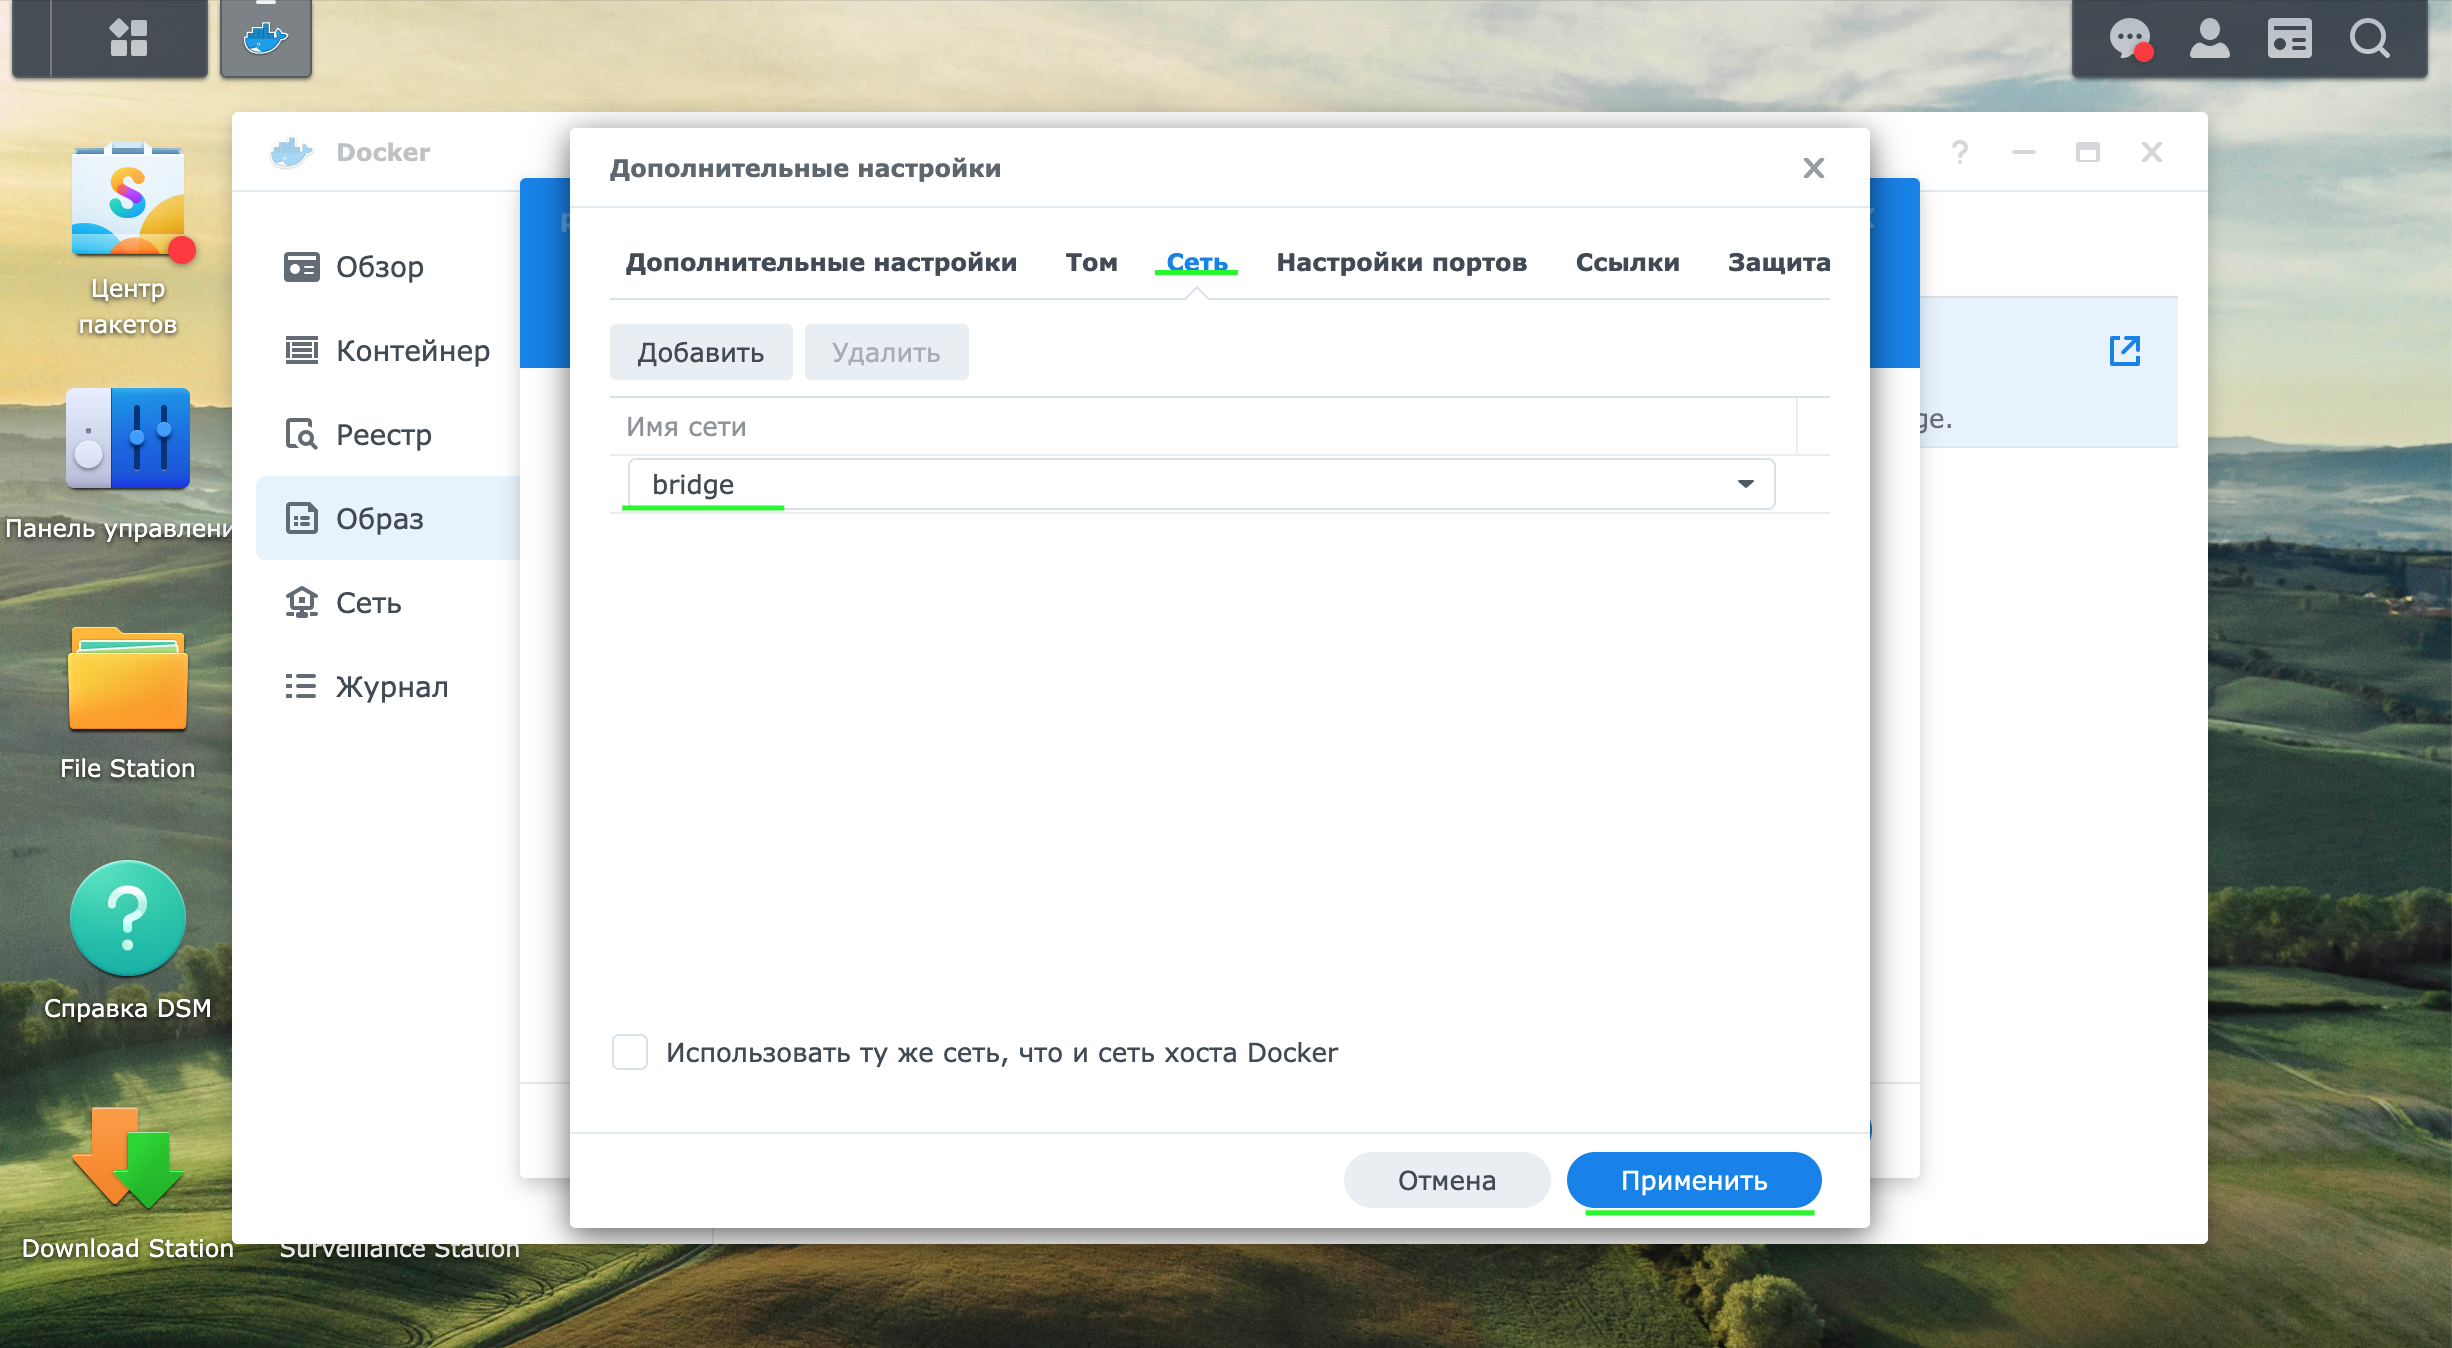
In the network section, leave the default settings (screenshot 7)
Next, create and run the container.
After creating the Container, you need to copy the bot files to the previously specified address: “/homes/Test/bot_synology” in any convenient way, for example, using the SMB protocol.
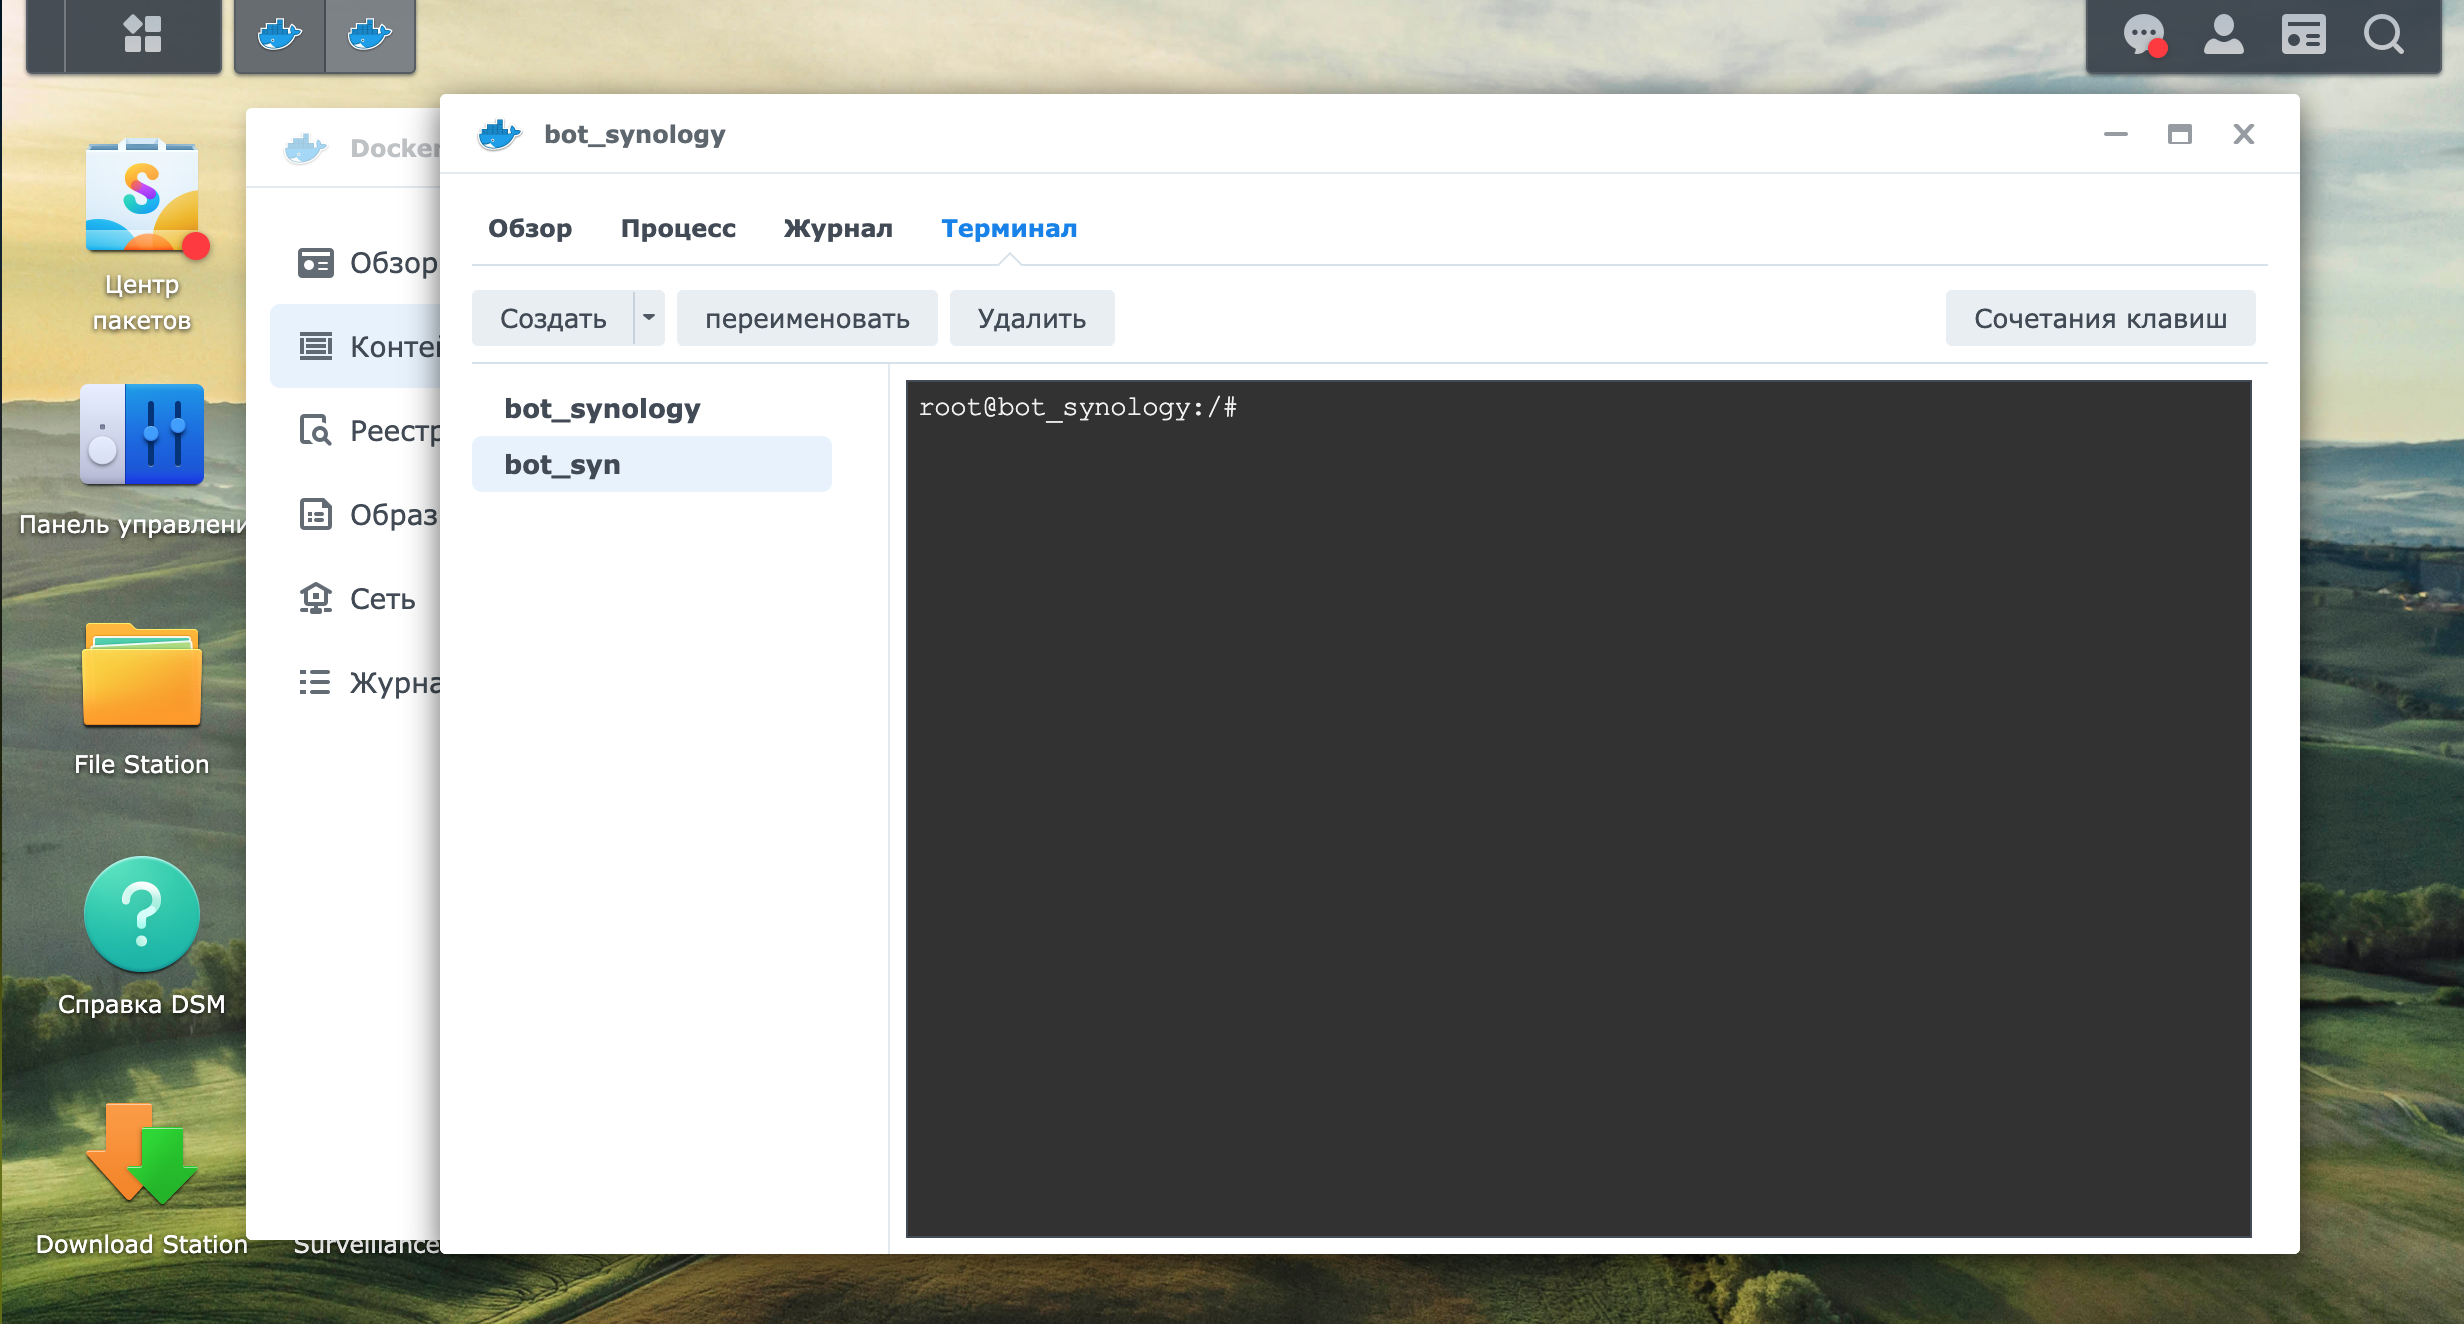
Let’s open the details about the Container and go to the Terminal section.
In the terminal section, let’s create another terminal, which will automatically be named bash. Through the Rename command, we will rename the bash terminal to bot_syn. where you can enter commands.
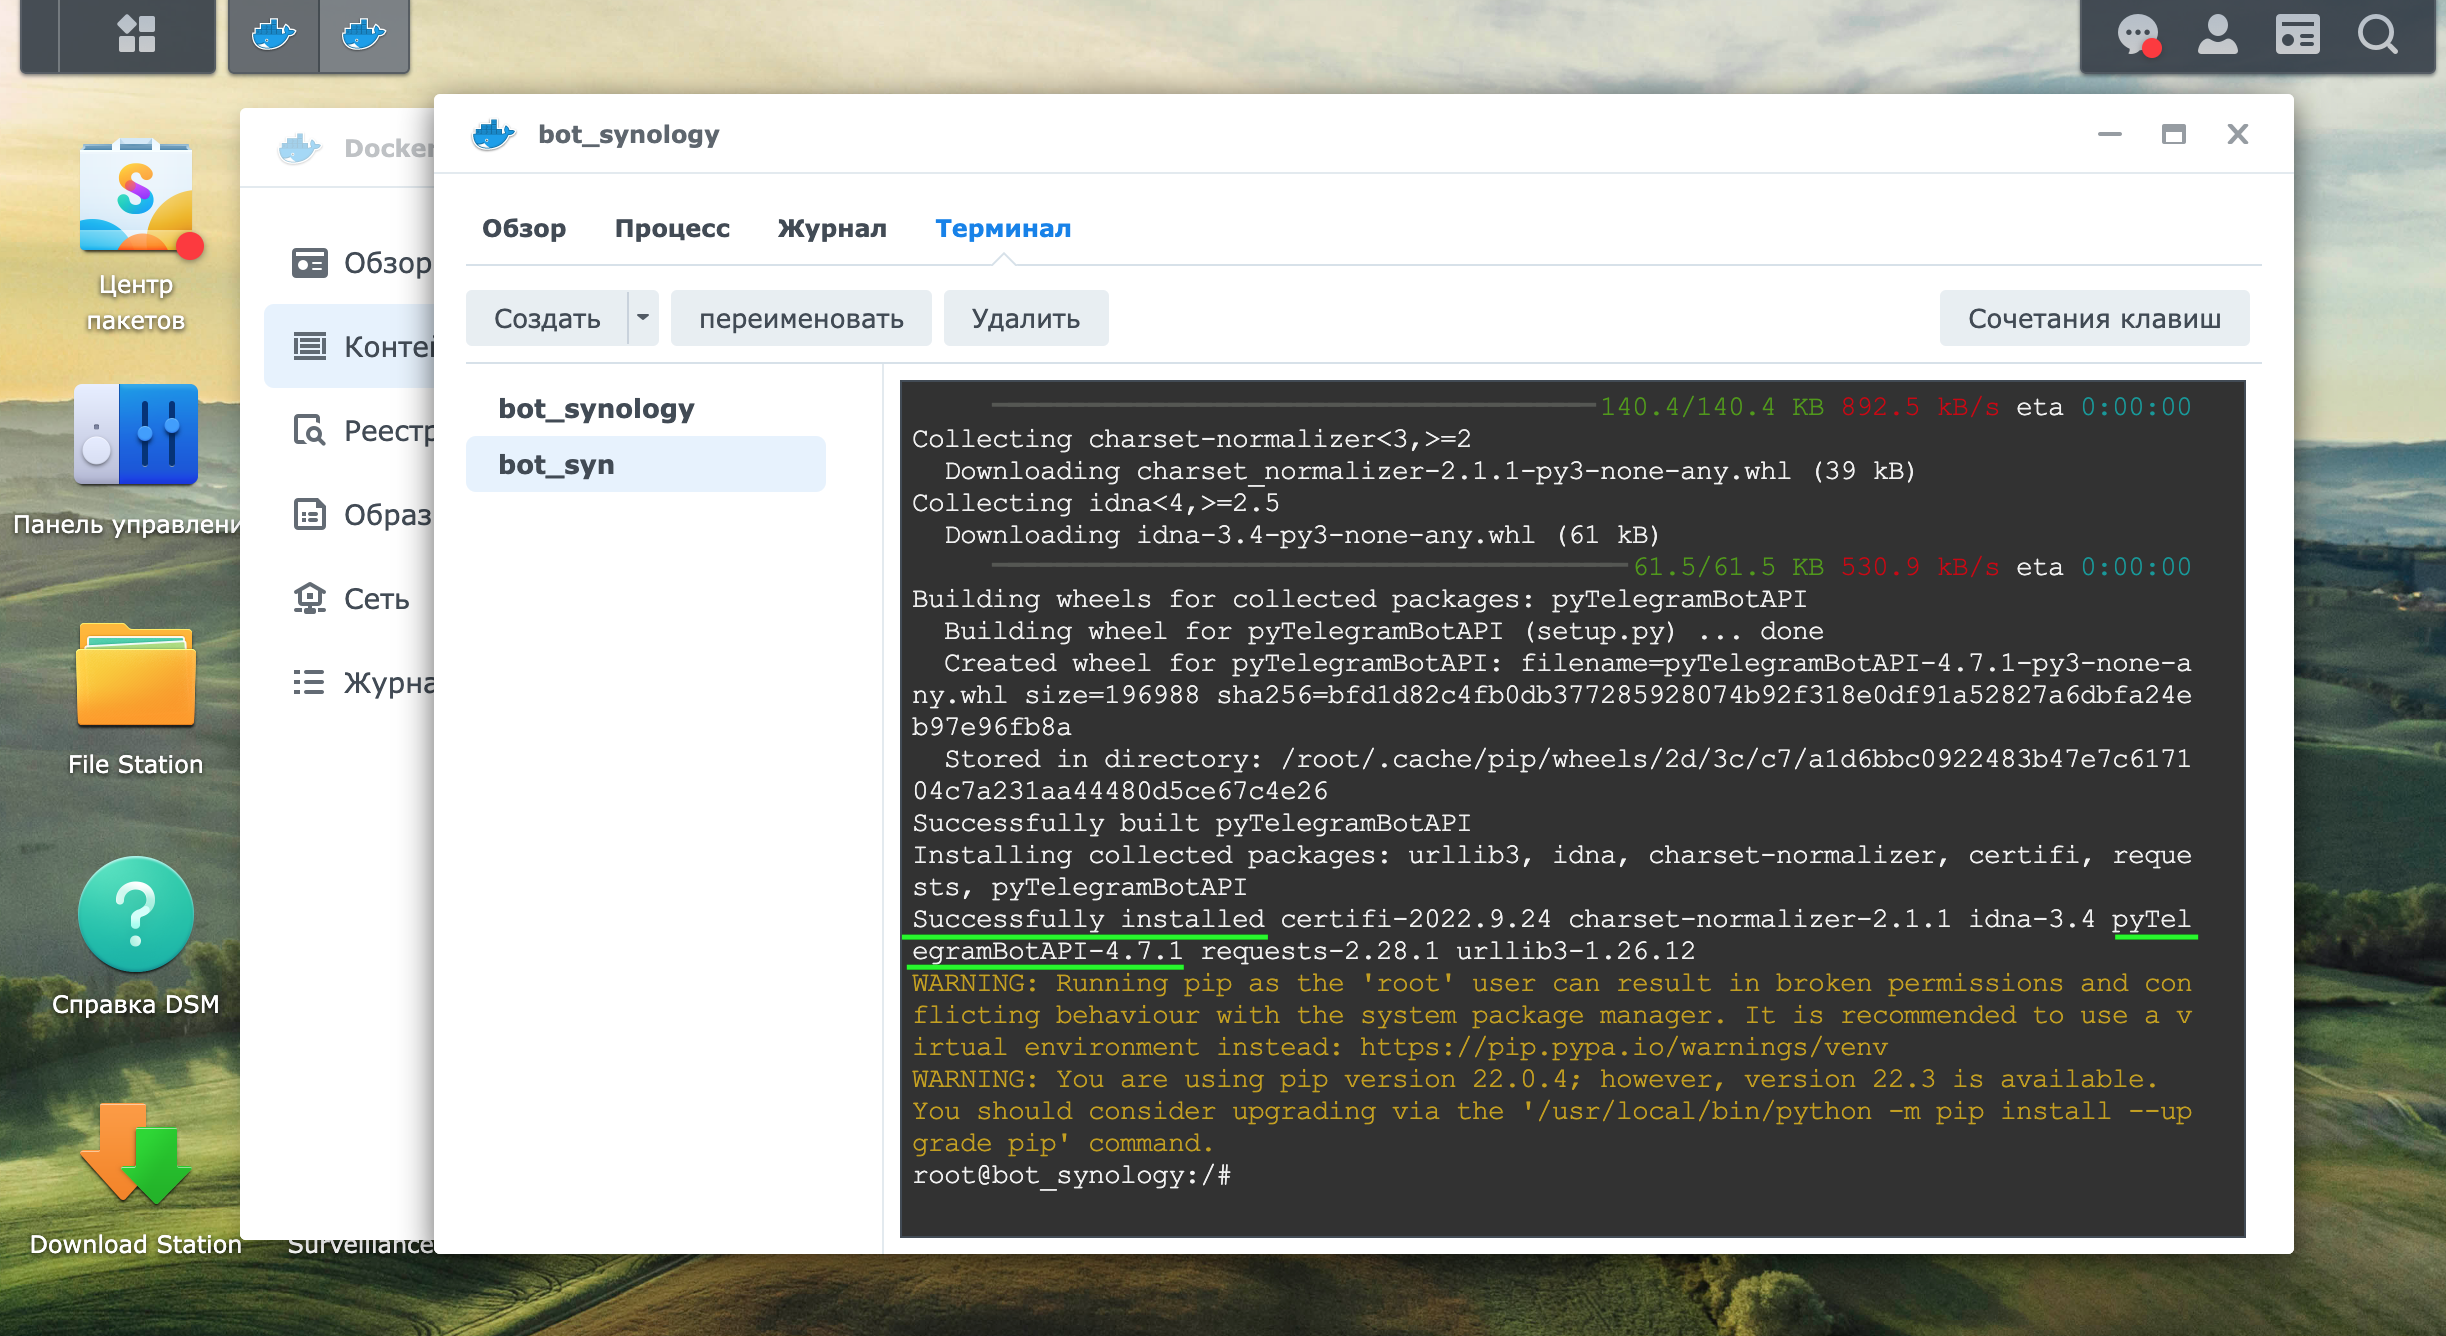
Install the pyTelegramBotAPI module in the Container using the “pip install pyTelergamBotAPI” command. The information shown in the screenshot below will be displayed on the successful execution of the command.
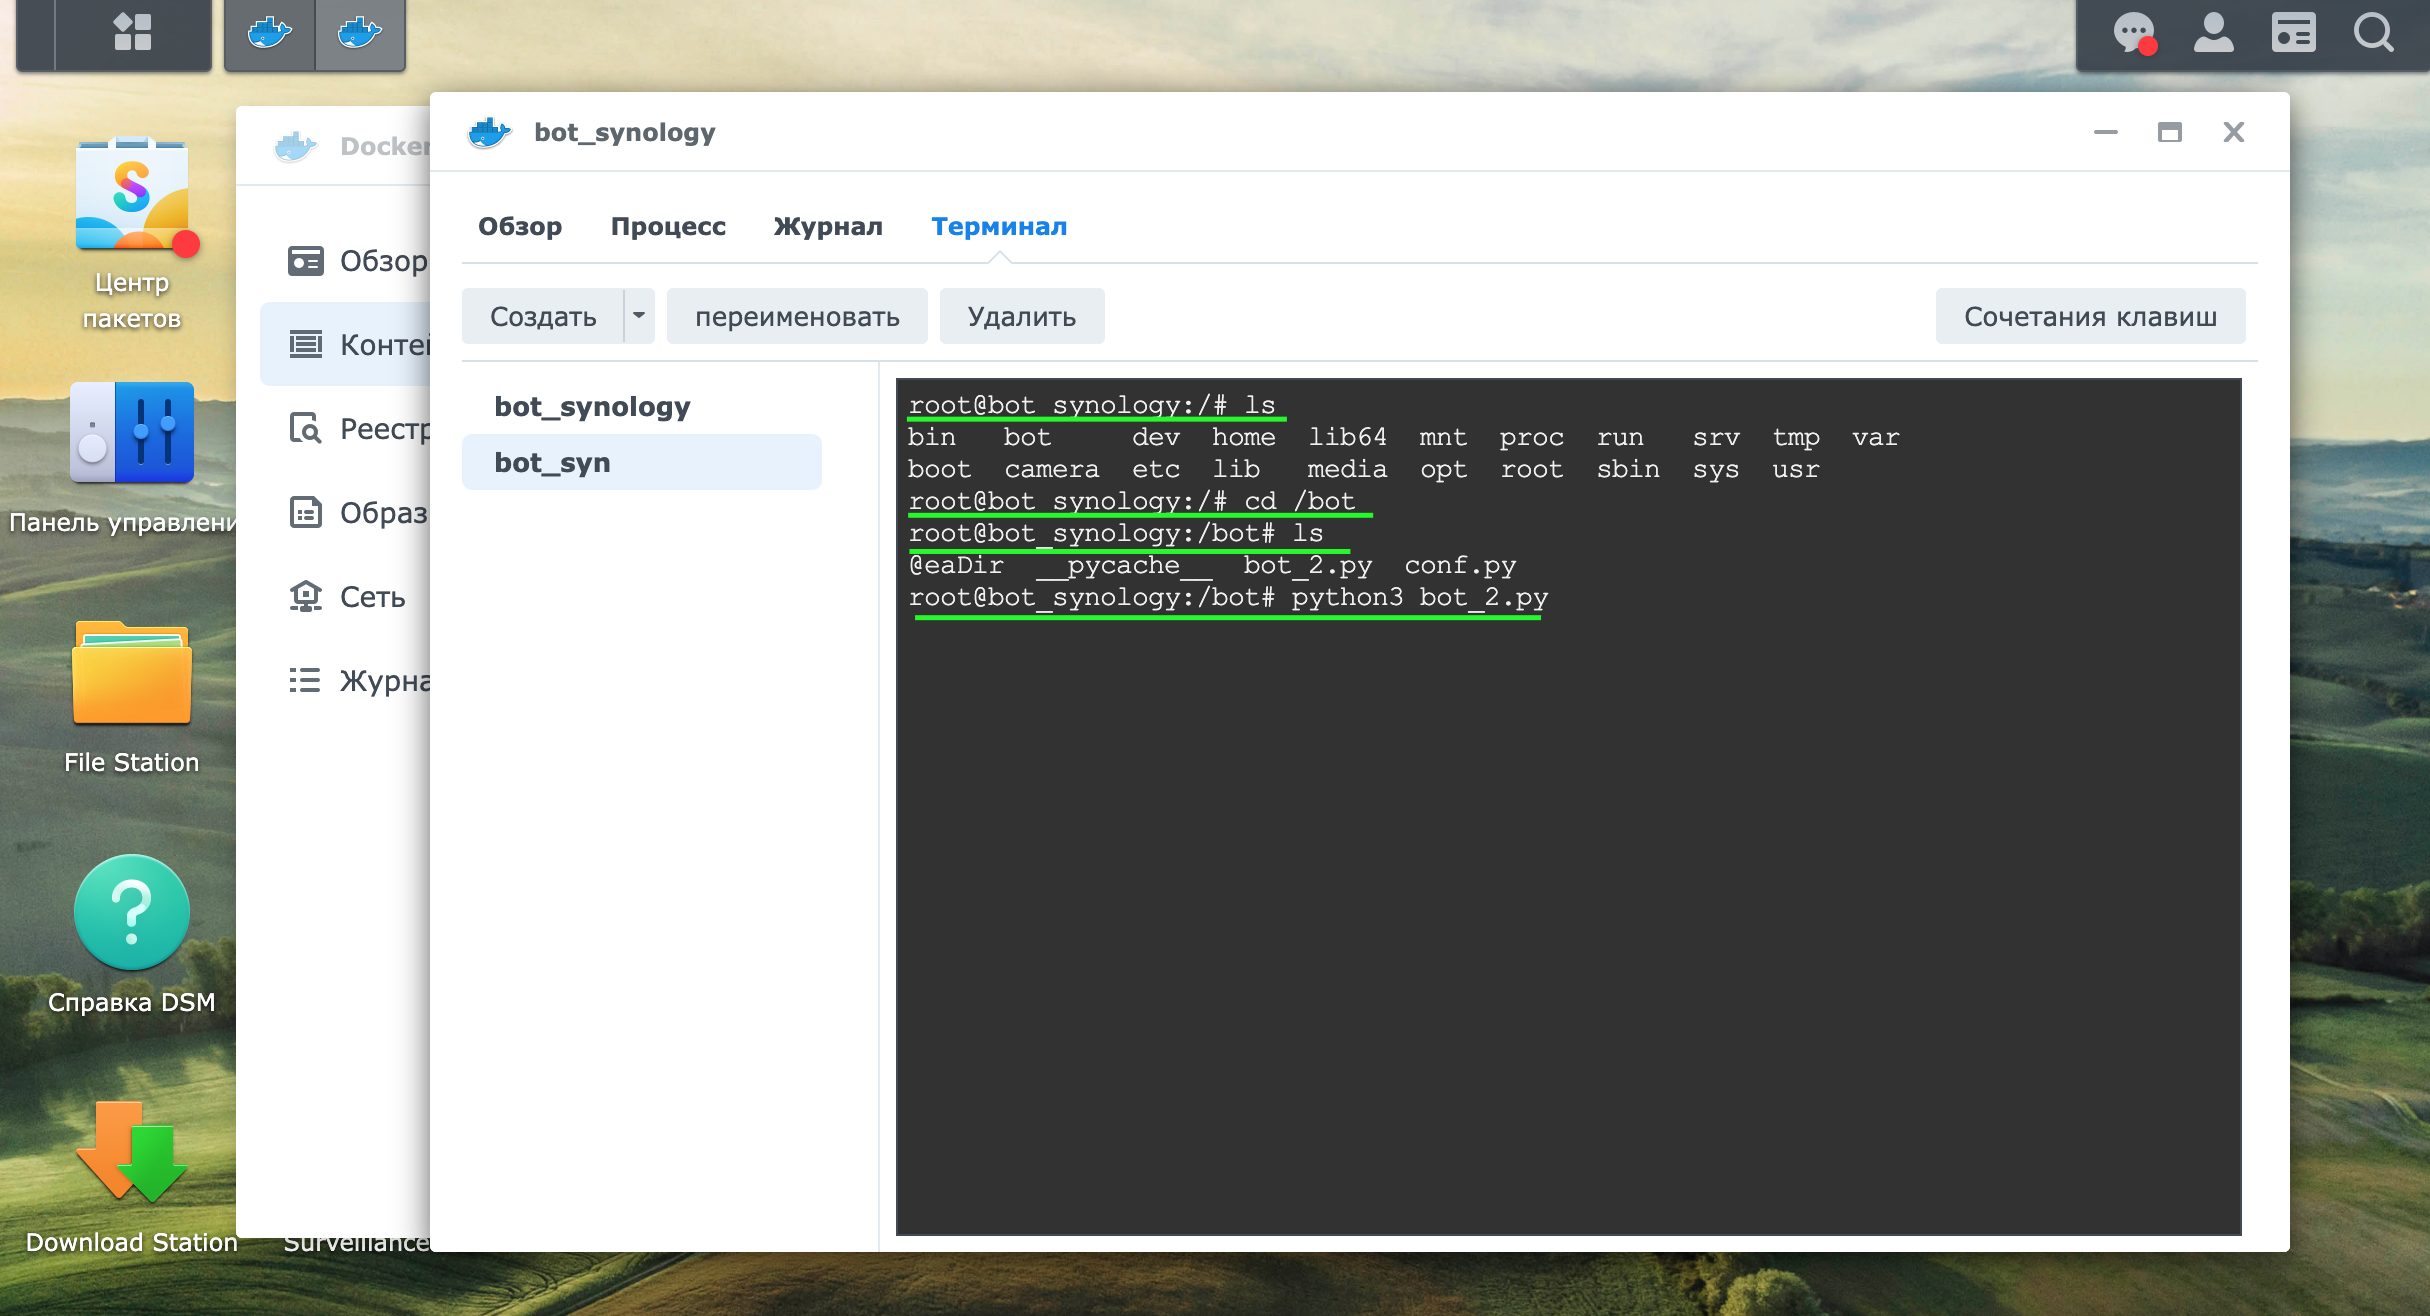
Let’s launch the telegram bot through the Container control panel. Let’s go to the Terminal section and use the ls command to see the folders, including the previously added bot and camera folders.
Using the command “cd / bot” go to the folder.
Let’s view the available files in the bot package using the ls command. The folder contains two files bot_2.py and conf.py that we created earlier.
Through the command “python3 bot_2.py” we will launch the telegram bot.
Consider the work of the bot.
Let’s send the /start command
Get an answer with the main bot commands
/sec command – displays the current security status
The /sec_on command – turns on the security mode
The /sec_off command – turns off the security mode
The /photo command takes a photo from the camera and sends it to the chat with the bot for quick viewing of information from the camera.
Summing up, we state that the task of managing a Video Surveillance Station located inside the network without connecting to it via VPN has been solved using a telegram bot. The disadvantage of this solution is that the change of the security mode occurs on all cameras, which will negatively affect the security function if the cameras are installed on different objects.
In future articles, it is possible to describe receiving notifications about a motion sensor triggering from a camera with sending photos via Telegram, as well as managing the security mode of each specific camera.