Learning to compile a C ++ program
One of the most difficult topics that I encountered when I started learning C ++, besides pointers and memory management, was how to successfully compile code using third-party libraries.
As a game developer, you often rely on libraries to implement various aspects of your game, such as rendering or physics, and successfully compiling an empty project with these libraries turned on can be surprisingly difficult.
At least I had difficulties with this, because I simply did not understand how C ++ programs are assembled and distributed over the Internet. I did not understand how my source code turned into an executable file or library, and did not understand how to compile platform-independent code.
In practice, this meant that I simply had no idea how to include the library in my code, or I was banging my head against the wall, trying to eliminate errors that occurred when trying to compile. In fact, this should not be the difficult part of creating your game.
This knowledge is not one that is usually included in training programs. The focus is on problem solving and C ++ syntax, and yet, if you want to do serious programming of C ++ games without writing from scratch, this knowledge is necessary.
Therefore, I decided to write a series of articles that discuss these issues that I discuss. The first article will be devoted to learning how to compile a program in C ++.
Three-step process
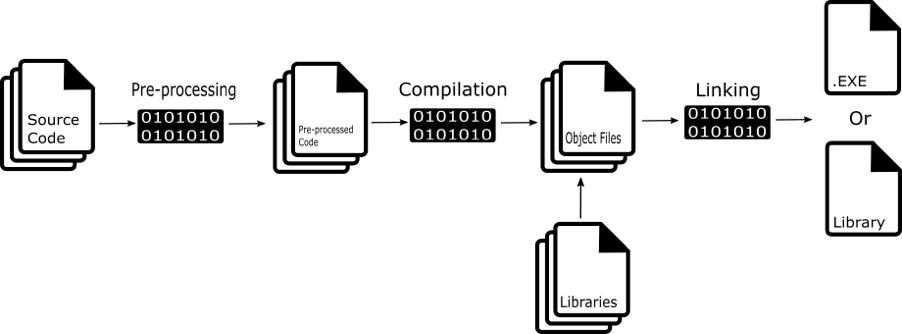
Compiling a C ++ program involves taking the source code we wrote (.cpp, .c, .h, .hpp files) and converting them into an executable file or library that can run on the specified platform.
This process can be divided into three main stages:
- Preprocessing
- Compilation
- Layout
Preprocessing
In C ++, there are preprocessor directives (identified by the prefix # in the code) that specify the transformations that must be performed in the source code before compiling it.
You can learn more about preprocessor directives. here. The first stage of compiling a C ++ program using a preprocessor involves performing these transformations.
What exactly the preprocessor does depends on the directive.
For example, we often break code into separate files to simplify the organization and reading. To associate code in one file with code from another, we use the directive #include.
When compiling our program in C ++, the preprocessor takes this #include and copies the code defined in the header to a file that includes it. This saves our time and eliminates the possibility of errors that could occur when manually copying code between files.
The include directive is just one example of predefined directives; you can see other examples in this article.
By the end of the preprocessing stage, all the preprocessor directives in your code will be processed by the compiler preprocessor, and the resulting code will be ready for compilation.
Compilation
Compilation is the next step in the process and is associated with the transformation of the source code that we write into something that a computer understands – machine code.
Compiling C ++ in itself is a two-step process. First, the compiler takes the source code and converts it to a language assembler. Assembler is a low-level programming language that is more similar to the machine instructions of the processor.
Secondly, the source code converted to assembly language is again converted to machine code using assembler. The result is a set of files stored in an intermediate file format known as object file.
Note: machine code consists of instructions written in binary format in terms of machine language, because this is the code that the processor actually understands.
The object file has an extension .obj or .o and is created for each source code file. The object file contains all the machine-level instructions for this file. It is referred to as an intermediate file, because only at the final stage, linking, does the actual executable file or library that we can use be created.
At the compilation stage, we will be warned of any errors in our code that lead to the fact that our code does not compile. All errors at this stage are caused by the fact that the compiler does not understand the code we wrote.
The code will not be recognizable by C ++ if we mix up our syntax somewhere. Typical examples of failed compilation lack a semicolon, the C ++ keyword is spelled incorrectly, or too many curly brackets are added at the end of the method.
If an error is detected, compilation stops completely. You cannot compile your C ++ code until all errors have been fixed.
Layout
The final step in the process is layout, which involves extracting our results from the previous step and linking all of this together to create the actual executable or library.
The first step in this step is to compile all the object files into an executable file or library. Once this step is successfully completed, the next step will be to link this executable file with any external libraries that we want to use in our program.
Note: a library is simply a reusable collection of functions, classes, and objects that have a general purpose, such as a math library.
Finally, the linker must resolve all the dependencies. This is the place where all layout errors occur.
Among the common errors are the inability to find the specified library or an attempt to link two files, which, for example, can have classes with the same name.
Assuming that there are no errors at this stage, the compiler will provide us with an executable file or library.
Assembly
I think it’s worth mentioning one more thing: in an IDE such as Visual studioThe described compilation steps are grouped into a process called assembly (build). A typical workflow when creating a program is assembly and then debugging.
The following happens: the assembly creates an executable file (by compiling and linking the code) or a list of errors, depending on how well we have managed to write the code since our last build. When we click Start debuggingVisual Studio will run the created executable file.
Compiling a simple C ++ program
Now we know the basic stages of compiling C ++ programs. I thought that we could finish this article by looking at a simple example that will help consolidate what we just learned.
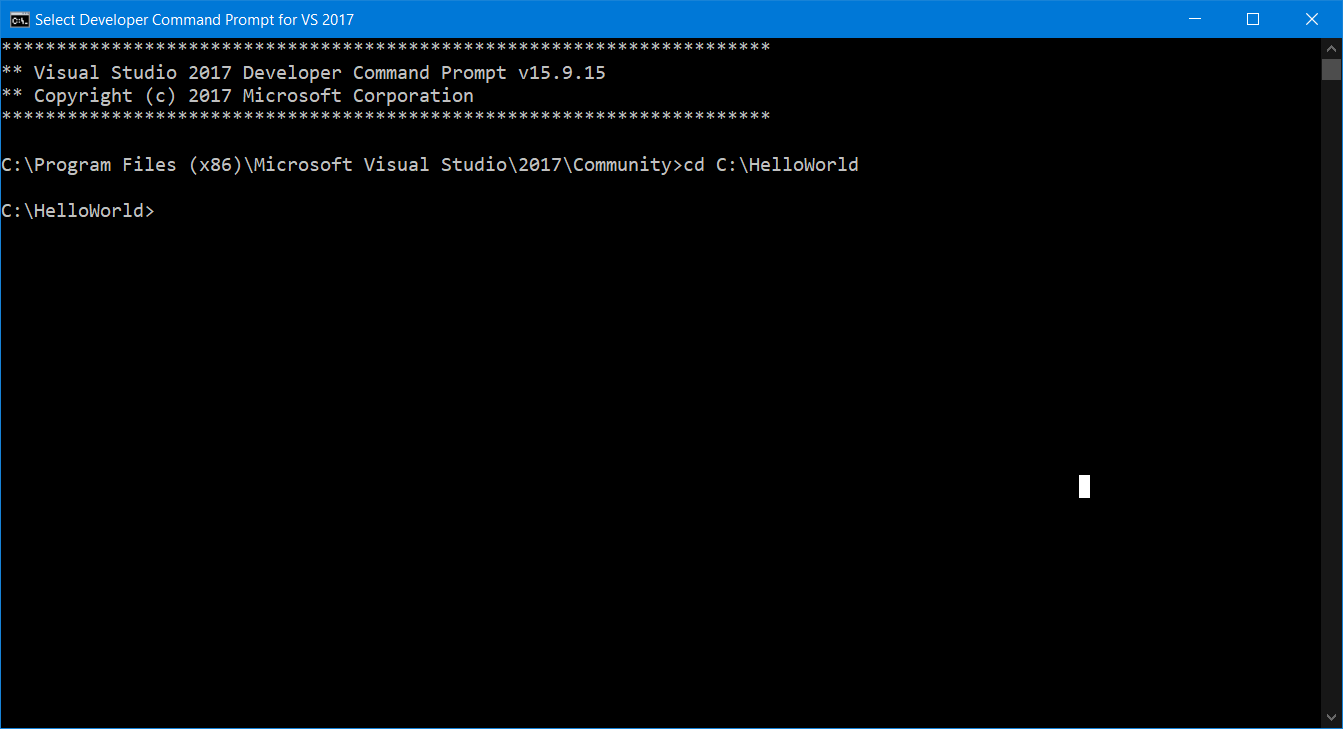
In this example, I plan to use a toolbox Mscv and compile it from the developer’s command line.
This is not a guide to configure and use the MSCV toolkit from the command line, so if you’re interested, you can find more information here.
The steps we are about to complete are:
- Create a folder for our C ++ program.
- Let’s go to this folder.
- Let’s create our C ++ program in the editor (I used Visual Studio Code).
- Compile our source code into object files.
- We compose our object files to create an executable file.
Create a place to store our C ++ program

All we do in this step is use the Windows command md to create a directory at the specified path with a name HelloWorld. We could just create a folder from Explorer, but it’s not so cool.
Go to the folder
All we do in this step is to move to our folder using the command cdfollowed by the path we want to go on. In our case, this is the folder that we created in the previous step.
We do this to make our lives easier.
If we do not go to the folder for each file that we want to compile, we need to specify the full path, but if we are in the corresponding folder, then we only need to specify the file name.
Writing C ++ Code
class HelloWorld
{
public:
void PrintHelloWorld();
};
#include "HelloWorld.h"
#include
using namespace std;
void HelloWorld::PrintHelloWorld()
{
std::cout << "Hello World";
}
#include "HelloWorld.h"
int main()
{
HelloWorld hello;
hello.PrintHelloWorld();
return 0;
}
The above code is a very simple program containing three files: main.cpp, HelloWorld.h, and HelloWorld.cpp.
Our header file HelloWorld defines a single function PrintHelloWorld(), the implementation of this function is defined in HelloWorld.cpp, and the actual creation of the object HelloWorld and its function call is executed from main.cpp.
Note. These files are saved in the folder that we created earlier.
Program compilation
To compile and compose our program, we simply use the command clfollowed by all files .cppwhich we want to compile. If we want to compile without linking, we need to use the command cl /c.
Note: we do not include the file .h into compilation because its contents are automatically included in main.cpp and HelloWorld.cpp preprocessor thanks to preprocessor directive #include.


The image above shows the object files for our two source files. .cpp. Also note that we do not have an executable file because we did not run the linker.
Layout
At this final stage, we need to compose our object files to get the final executable.
To do this, we use the LINK command, followed by the generated object files.


Now all we need to do is double-click on helloworld.exeto run our program.
It is worth noting that, given that our program outputs to the console just before calling return from main, the console may not appear, or it will be displayed for a very short time.
A common solution to ensure that the console remains open is to request user input at the end of the program using cin.
This is a very primitive example, but I hope it helps to understand how a C ++ program compiles.
There are many more things that we did not consider, for example, how to build external libraries, how our code can be compiled on several platforms, and how best to deal with compiling large C ++ programs.
There is also a much better way to compile and link programs than entering each file on the command line, and no, this is not just starting a build in your IDE.
Summary
Compiling a C ++ program is a three-step process: preprocessing, compilation, and linking.
The preprocessor handles preprocessor directives, such as #includecompilation converts the source code files to machine code stored in object files, and the linking links to object files and external libraries to create an executable or library file.
References
- en.wikipedia.org/wiki/C%2B%2B
- stackoverflow.com/questions/6264249/how-does-the-compilation-linking-process-work
- faculty.cs.niu.edu/~mcmahon/CS241/Notes/compile.html
- www.learncpp.com/cpp-tutorial/introduction-to-the-compiler-linker-and-libraries
Take the test and learn more about the course.