how we rebuilt the constructor from scratch
Hi! My name is Anastasia. I am a senior product designer for internal services at Ozon Tech. To quickly resolve Ozon customers' issues, we use chatbots and constantly improve them. Such bots are built into the customer chat, the chat with sellers, the Ozon Travel chat, and others.
In this article, I will tell you how my team and I redesigned the constructor, expanded its user base, what problems we encountered, and how we solved them under limited time conditions.

My colleague Dmitry Vasiliev wrote more about why Ozon needs a chatbot in his article “Love, People, and Robots: How to Create a Chatbot You Won't Be Ashamed of”.
Why did you decide to redo everything?
Previously, only specially trained employees — scriptwriters — could work in the constructor. They knew the JSON structure and could correctly call skills, but there were only 5-7 of them. The fact is that onboarding new employees was difficult and took a lot of time. First, it was necessary to find a person with technical skills, and then train him. Therefore, creating a new bot took at least a week.

Over time, the number of bots grew, and it was already difficult and expensive to support them. Therefore, we decided to develop a no-code solution that allows:
create bots with almost no involvement of programmers;
scale across the entire company;
launch new bots within one day.
About MVP design and development
We split the task into several stages to bring the project launch closer. The first step was to test the solution on one bot. The second step was to add missing functionality, integration with other services, and transfer the remaining bots.
When designing, we took into account the requirements of business customers, the experience and wishes of users of the old platform, as well as the best solutions of popular similar services. As a result, we assembled an MVP on the components of the OZI design system and after a year of work launched it under the name Bots Factory.
OZI is a design system that is used to build more than 500 products, services, admin panels and mobile applications. My colleague Viktor Teplov told more about design systems in Ozon in the article “The Hitchhiker's Guide to a Design System: A Contents Guide“.
Getting to know the constructor
Let's take a closer look at the constructor and see what it is. First, we get to the main page with a list of all bots, and then we move on to a specific one.
Each bot consists of a main scenario and additional ones. There can be a lot of them, which allows you to flexibly customize interaction with users. To find the desired scenario, you can use the search by name or content, as well as sorting by creation date.
The page contains full information about the bot, including its system name, integration, unique ID, and version history, which allows tracking changes in scenarios. In addition, users can publish the bot, test it, copy it, change the name, export it, or delete it.

Having selected a bot, we select a scenario and move on to the editor. The editor is a place where you can assemble a scenario from blocks. And blocks are the steps of the scenario, connected to each other by links.
Let's first look at the editor. It is built on the canvas functionality. When designing it, some features were borrowed from Miro and Figma, which allowed to reduce the onboarding time for new users. Here are some of them:
Selection. You can select blocks by clicking on them with your mouse. To select multiple blocks, hold down the Shift key (⇧ on Mac) while clicking. To select all blocks on the canvas, use the keyboard shortcut Ctrl (Cmd on Mac) + A.
Moving. To move a selected block, hold down the left mouse button and drag it to the desired location. To move several blocks, first select them and then drag them all together.
Copy and paste. You can copy blocks using the shortcut Ctrl (Cmd on Mac) + C, and paste them using Ctrl (Cmd on Mac) + V.
Removal. To delete selected blocks, use the Delete key (Backspace on Mac).
Undo and redo actions. You can undo your last action with Ctrl (Cmd on Mac) + Z, and redo it with Ctrl (Cmd on Mac) + Shift + Z.

Now let's take a closer look at the available block types, each of which performs its own functions:
The “Start” block is present in all scenarios and is the entry point.
Another type is “Content”. With its help, we can assemble a message that we will send to the user. It can contain text, an image, a document, and buttons.

The Conditions block defines which transitions will be performed depending on the values of the variables used in the scenario. For example, if we want to understand whether the customer is contacting us for a regular order, Global or Fresh.
The Actions block is used to call skills and work with variables. With the help of skills, the bot receives information about clients and their orders, and also performs certain actions, such as canceling an order or changing the delivery date.
And the last type has a self-explanatory name – “Subscript”. It acts as a portal to another script. For example, if the expression #message.ButtonID == 8then the bot will go into the “Ozon Fresh Cancellation” scenario, and if #message.ButtonID == 9then in the scenario – “Cancellation of OzonBox post office”.

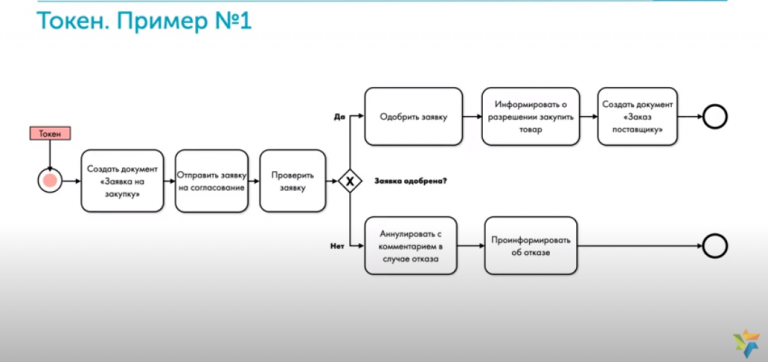
To better understand how it all works, let's look at a simple example from life: a user was unable to pay for an order and goes to the support chat. A bot automatically responds. The user then selects the order that interests him.

The bot goes through several scenarios and at the “Terms” stage finds out what order the question is about. Then it gets data on it, checks the status, and also the presence of payment from other services. After that, the bot stops at the “Content” block and answers the client.

Now that you understand how our builder works, I want to talk about the problem we encountered in the Conditions block after running the first stage.
Expression Builder
Let me remind you that after migrating one bot, we needed to migrate the rest. This required adding new expressions. Expressions are special constructions that define the bot's behavior in response to certain incoming messages or user actions.
In the first version we added both simple A == Bas well as part of the functional fn(A). And to add others (for example, fn(A) == B, A == fn(B), fn(A, B) == C), it was necessary to rebuild the entire expression constructor.
Expressions are part of the condition. There may be several conditions, and in this case they are checked sequentially until one of them is triggered. And expressions are compared with each other using the functions “and” and “or”.

Let's look at the process of creating expressions in the first version. To add a simple expression, first select the variable whose value you want to check.

Then we select the operator:
Equal ==
Not equal !=
More >
Less <
Greater than or equal to >=
Less than or equal to <=
There is an occurrence of the string fn(A)
No occurrence of string !fn(A)
Now – the data type of the second argument and its value. The following types are available: number, string, button, or the contents of another variable.
An argument in an expression is a value or variable that is passed to a function or operation to perform a calculation. In the context of mathematical and logical expressions, arguments can be numbers, variables, or other expressions.
For example, in a mathematical function
( f(x) = x^2 )the argument is( x ). When you substitute a value for( x )For example( 3 )you get( f(3) = 3^2 = 9 ).

In the second version, we changed the behavior of the constructor to allow more flexible control. Now, when creating an expression, we first specify its type: simple “(x)” or functional “fn” If a simple expression is selected, then we fill in the variable and complete the right side of the expression.

If functional is selected, then first select the function. Then the system will automatically complete the left part of the expression. All that remains is to fill it in and complete the right part.

If the function is Boolean, the constructor will build the entire expression, and all that remains is to fill in the missing information.

In functional expressions, the function can be located on the left or right side. However, we decided not to overload the designer and users with unnecessary logic, so we limited it to using it only on the left. We also fixed the width of all fields, but the width for values is larger, since they can be quite long.

Working with the find_regexp and find_substring functions turned out to be the most difficult among the functional expressions. To create an expression with them, you first had to select a variable, and then an operation – “there is an occurrence of the string” or “there is no occurrence of the string”. Then you had to fill in the value and duplicate this construction as many times as there were values to add (20-30 times).

We have fixed this and now you just need to select the desired function, variable and enter all the values in one field.

Status model
Since we wanted to launch faster, we considered some of the initial decisions to be less than optimal, especially regarding the status model.
The status model was inconvenient and contained many “extra” stages that performed formal functions and did not bring significant benefits. For example, when a user makes changes to a script and wants to publish them, he first needs to save them, prepare them for assembly, perform the assembly, test them, and only then proceed to the publishing stage.
In addition, the status model did not allow multiple users to work on the same scenario at the same time. This became a problem when there was an urgent need to make changes to a scenario that another user was already working on. In such situations, it was necessary to turn to the developers for help.
We decided not to reinvent the wheel, but to partially borrow the logic of working with branches from Git. Now each bot is considered a master branch, and its scripts are always in the “Published” status. To make changes to the bot logic, you need to allocate a branch. Branches completely clone the master, and their number can be unlimited.

On the branch page, you can add a new script or edit existing ones. Edited scripts will be marked and moved to the top of the list in the “Draft” status.

After making the changes, we can move on to the testing stage, and then to publishing. If during this time no one has made changes to the same blocks in the master as we have, then the merge will go smoothly. In addition, it is necessary to add a comment so that other users can understand what exactly was changed.

Let's consider another situation. While we were working in our branch, our colleagues made changes to the master. In this case, the system will notify us about it. Now we need to update our branch by pulling changes from the master.

If our colleagues made changes to the same blocks in the master as we did, then conflicts will arise. The mechanics of their resolution are the same as in Git. In fact, conflicts are rare, since users usually do not work on the same scenarios at the same time. But if this does happen, the system will warn us at the publishing stage. A modal window will appear, and after clicking the “Resolve” button, we will get to the conflict resolution page.

On this page we can see in which scenarios the problems occurred. If the conflicts do not require deep study, then we can resolve them all at once, choosing either our changes or from the master. After that, we can continue the publishing process.

If the conflicts are complex, you can go to the necessary blocks and study them. On the conflict page, we see a split panel: on the left side, the content of the block from our branch, and on the right side, from the master. Here we also have a choice of what to apply: our changes or from the master. However, it may turn out that neither of the changes can be applied “as is”. In this case, we can go to the designer by clicking on the “Edit” link and make the necessary changes manually.

It should be noted that in the first version we will not highlight the differences in the visual representation. However, this is possible in JSON mode for users who are familiar with it.
We also borrowed the ability to roll back changes to any version from standard Git features.
Results
Bots Factory at Ozon has been around for a little over a year, and during that time the number of users has increased from less than 10 to more than 100. Now, in addition to the team of scriptwriters, various departments and areas of the company work with their bots: operators, lawyers, HR and others.
At the moment, we already have 3 bots (2 internal and 1 external) created by the business in just a few days. In addition, the speed of scenario development has increased significantly: previously, it took about 2 hours to change a simple consulting scenario, and now this task can be completed in less than 5 minutes.
We have many plans for further scaling. For example, we plan to add the ability to further train recognition models without the participation of developers and create our own LLM agentstrained on our knowledge bases.