How to track network connection status in Swift? Hello, native implementation, bye, Reachability

Consider a native solution to monitor network connection on iOS with Swift 5 and use Network Link Conditioner.
Note
If you find the article interesting, then in this channel I write about iOS development.
Most of the implementations you can find for monitoring the network connection of your iOS device are based on using third party dependencies such as Reachability, NetworkReachabilityManager in Alamofireor utilities that periodically send HTTP requests to determine the status of a network connection.
Instead, I’d like to present an alternative approach that uses the native framework introduced in iOS 12.
For this implementation, we only need a framework Network. Although you usually use it when you need direct access to protocols like TLS, TCP and UDPwe won’t do anything too complicated here.
Initial Implementation
Let’s start building our utility NetworkMonitor:
import Network

final class NetworkMonitor {
  static let shared = NetworkMonitor()
  private let monitor: NWPathMonitor

  private init() {
      monitor = NWPathMonitor()
  }

}
Here NWPathMonitor is an observer that will monitor the state of the network connection and respond to changes that may occur.
Next, we’ll create a few properties to hold the current state of the network connection:
final class NetworkMonitor {
  static let shared = NetworkMonitor()
  private let monitor: NWPathMonitor

  private(set) var isConnected = false

  /// Следующее свойство нужно для проверки, что сетевое соединение
  /// будет дорогим в плане потребления трафика
  ///
  /// Сотовые интерфейсы считаются дорогими. WiFi точки доступа
  /// от других девайсов также могут быть дорогими. Другие интерфейсы
  /// могут оказаться дорогими в будущем
  private(set) var isExpensive = false

  /// curentConnectionType указывает на тип текущего соединения
  /// в сети, к которой мы подключены
  ///
  /// Возможные состояния могут быть `other`, `wifi`, `cellular`,
  /// `wiredEthernet`, or `loopback`
  private(set) var currentConnectionType: NWInterface.InterfaceType?

  private init() {
      monitor = NWPathMonitor()
  }

}
Since these properties can only be read-only, it is used
private(set).
We clearly don’t want this lengthy task to run on our application’s main thread, so let’s create a new DispatchQueue to manage this task:
private let queue = DispatchQueue(label: "NetworkConnectivityMonitor")The network framework defines an enum NWInterface.InterfaceTypewhich contains all types of media that our device can support (WiFi, cellular, wired ethernet, etc.).
Because this enum is declared in ObjCwe don’t have access to the property allCases, as, for example, is the case with enums in Swift. So let’s add protocol compliance CaseIterable and implement allCases. As a result of this extra step, the rest of our implementation will be much simpler and much more readable.
extension NWInterface.InterfaceType: CaseIterable {
  public static var allCases: [NWInterface.InterfaceType] = [
  .other,
  .wifi,
  .cellular,
  .loopback,
  .wiredEthernet
  ]
}
The last step in our implementation is to create functions responsible for starting and stopping the monitoring process:
func startMonitoring() {
  monitor.pathUpdateHandler = { [weak self] path in
  self?.isConnected = path.status != .unsatisfied
  self?.isExpensive = path.isExpensive
  // Identifies the current connection type from the
  // list of potential network link types
  self?.currentConnectionType = NWInterface.InterfaceType.allCases.filter { path.usesInterfaceType($0) }.first
  }
	monitor.start(queue: queue)
}

func stopMonitoring() {
	monitor.cancel()
}
NetworkMonitor in action
Tracking can be started from anywhere in the code by simply calling NetworkMonitor.shared.startMonitoring()although in most cases you’ll want to initiate this process at AppDelegate. We can then use NetworkMonitor.shared.isConnected to check the status of our network connection in real time.
Here is our implementation so far:
import Network

extension NWInterface.InterfaceType: CaseIterable {
    public static var allCases: [NWInterface.InterfaceType] = [
        .other,
        .wifi,
        .cellular,
        .loopback,
        .wiredEthernet
    ]
}

final class NetworkMonitor {
    static let shared = NetworkMonitor()

    private let queue = DispatchQueue(label: "NetworkConnectivityMonitor")
    private let monitor: NWPathMonitor

	private(set) var isConnected = false
	private(set) var isExpensive = false
	private(set) var currentConnectionType: NWInterface.InterfaceType?

    private init() {
        monitor = NWPathMonitor()
    }

    func startMonitoring() {
        monitor.pathUpdateHandler = { [weak self] path in
            self?.isConnected = path.status != .unsatisfied
            self?.isExpensive = path.isExpensive
            self?.currentConnectionType = NWInterface.InterfaceType.allCases.filter { path.usesInterfaceType($0) }.first
        }
        monitor.start(queue: queue)
    }

    func stopMonitoring() {
        monitor.cancel()
    }
}
Add NotificationCenter Support
The behavior of modern iOS apps changes drastically when a device’s network connection is disconnected—some screens may notify you that the device has lost connection, the app’s caching behavior may change, or even some user scripts may break.
To support this type of behavior, we need to extend our implementation to send notifications throughout the application when the connection status changes.
import Foundation
import Network

extension Notification.Name {
    static let connectivityStatus = Notification.Name(rawValue: "connectivityStatusChanged")
}

extension NWInterface.InterfaceType: CaseIterable {
    public static var allCases: [NWInterface.InterfaceType] = [
        .other,
        .wifi,
        .cellular,
        .loopback,
        .wiredEthernet
    ]
}

final class NetworkMonitor {
    static let shared = NetworkMonitor()

    private let queue = DispatchQueue(label: "NetworkConnectivityMonitor")
    private let monitor: NWPathMonitor

    private(set) var isConnected = false
    private(set) var isExpensive = false
    private(set) var currentConnectionType: NWInterface.InterfaceType?

    private init() {
        monitor = NWPathMonitor()
    }

    func startMonitoring() {
        monitor.pathUpdateHandler = { [weak self] path in
            self?.isConnected = path.status != .unsatisfied
            self?.isExpensive = path.isExpensive
            self?.currentConnectionType = NWInterface.InterfaceType.allCases.filter { path.usesInterfaceType($0) }.first

            NotificationCenter.default.post(name: .connectivityStatus, object: nil)
        }
        monitor.start(queue: queue)
    }

    func stopMonitoring() {
        monitor.cancel()
    }
}

// ViewController.swift
class ViewController: UIViewController {

    override func viewDidLoad() {
        super.viewDidLoad()
        NotificationCenter.default.addObserver(self, selector: #selector(showOfflineDeviceUI(notification:)), name: NSNotification.Name.connectivityStatus, object: nil)
    }

    @objc func showOfflineDeviceUI(notification: Notification) {
        if NetworkMonitor.shared.isConnected {
            print("Connected")
        } else {
            print("Not connected")
        }
    }
}
All source code is located here.
Network Link Conditioner
Since we are talking about network technologies and debugging connection problems, it’s time to mention Network Link Conditioner.
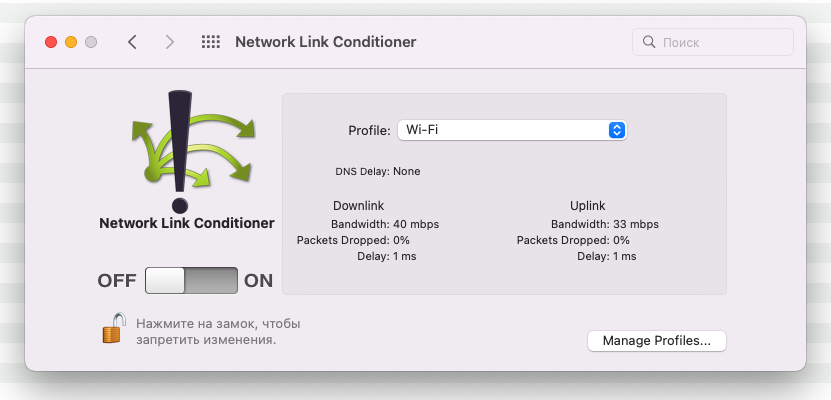
With this tool, you can simulate various network conditions on a computer and, accordingly, in an iOS simulator. With this tool, we can not only monitor extreme situations when we are completely online or offline, but also test the behavior of our application in various network conditions.
You can download it from the Apple Developers site or from this link.
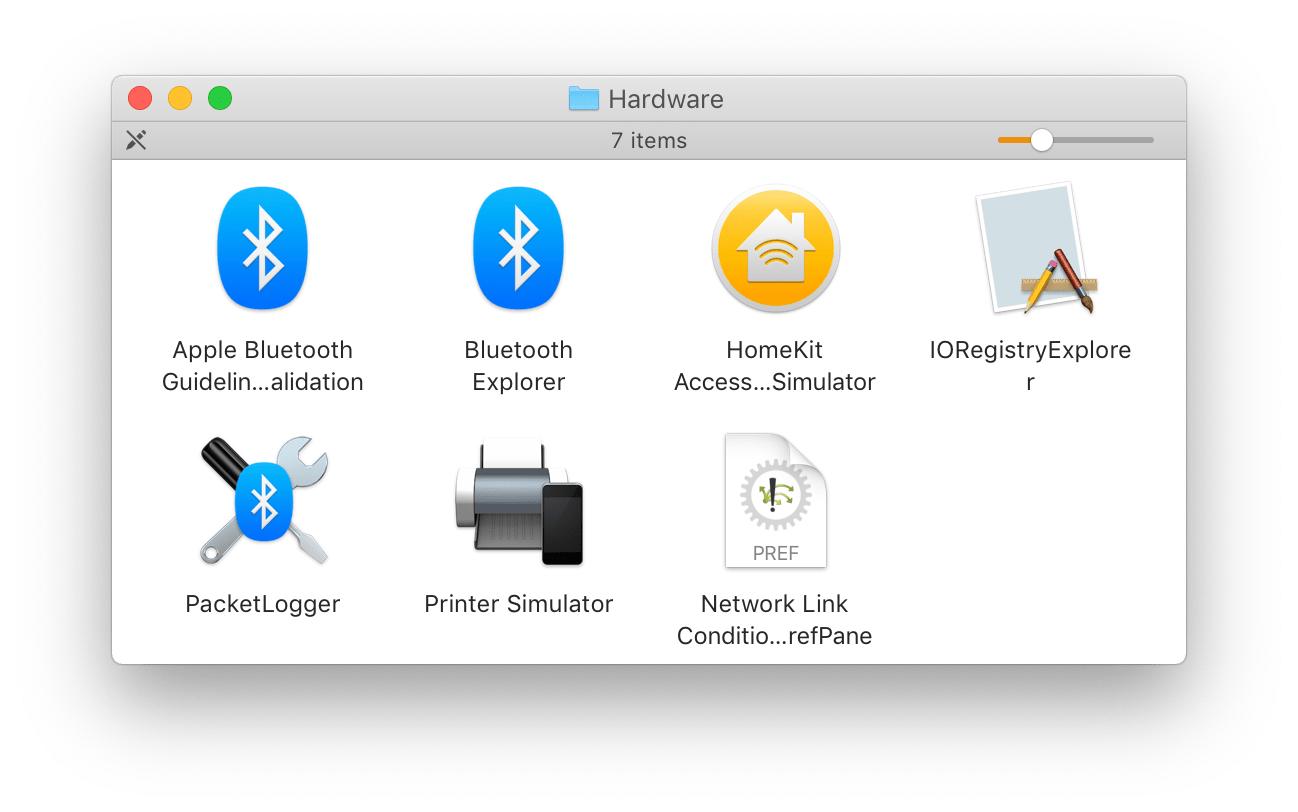
The utility itself will be located in the Hardware folder, just click on it to install it.

After that, you can configure the settings you need, just like on a real device here:

Useful Resources
Article with an example of an application for tracking a network connection.
Work example for Network Link Conditioner
Page with additional utilities from Apple.
More stories, implementation approaches, and tools for the iOS developer can be found at author’s channel about iOS development.


