How to create a telegram bot in C# quickly?

Good afternoon, dear friends!
In this article, we will look at a template for creating a telegram bot in C#. In connection with the latest TelegramBotAPI updates, most of the publications on this topic that were successful from my point of view are somewhat outdated. That is why I decided to write an article on this topic.
A little more
We will use libraries Telegram.Bot and Telegram.Bot.Extentions.Polling, we will receive updates periodically by polling the Telegram server for new updates. We won’t be using webhooks…Whoa, wait for me to throw rotten tomatoes at me, seasoned coders! Yes, the Webhook-based update method is better, but Polling is easier to implement because you don’t need to get an SSL certificate and the bot can be launched immediately after writing the code without additional troubles. This is where a beginner can get stuck. In addition, there are a number of nuances when using Webhooks on my server. If I have them, then you can have them too. Therefore, we use the method of periodically polling the Telegram server for new updates. Okay, dear reader, if you still disagree with me and want to get certified and work on Webhooks, you can read about getting a certificate in this article.
Existing schemes of telegram bot operation
I like the C# telegram bot scheme described in this article. I consider her a good example. Here is the code:
using Telegram.Bot;
using Telegram.Bot.Args;
using Telegram.Bot.Types;
using Telegram.Bot.Types.Enums;
class Program
{
	private static TelegramBotClient client;
	static void Main(string[] args)
	{
// token, который вернул BotFather
		client = new TelegramBotClient(token);
		client.OnMessage += BotOnMessageReceived;
		client.OnMessageEdited += BotOnMessageReceived;
		client.StartReceiving();
		Console.ReadLine();
		client.StopReceiving();
	}
private async void BotOnMessageReceived(object sender, MessageEventArgs messageEventArgs)
{
var message = messageEventArgs.Message;
if (message?.Type == MessageType.TextMessage)
{
await client.SendTextMessageAsync(message.Chat.Id, message.Text);
}
}
}
There is nothing superfluous. We create a TelegramBotClient object to interact with our bot using the library, assign it the token that BotFather gave us. Next, we create the OnMessage event, process it with the BotOnMessageReceived method, and launch the client.
However, with the release of newer versions of TelegramBotAPI, it turned out that such a scheme no longer works. Moreover, bots written on earlier versions of Telegram.Bot stop working after updating the library.
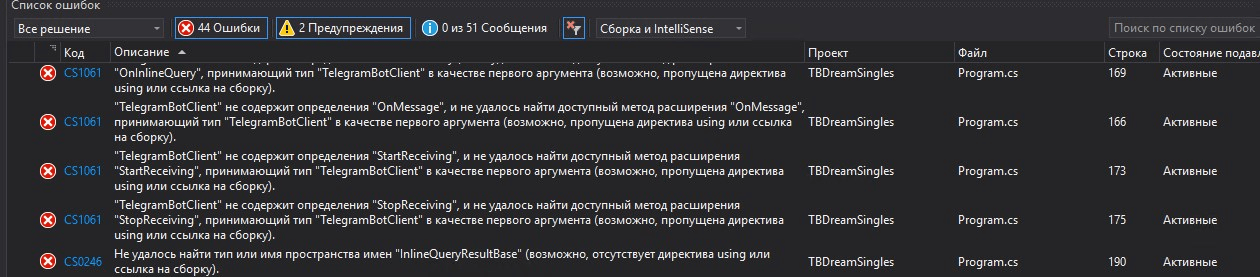
You need to use a different schema. Let’s try to figure this out.
Step-by-step instruction
So below I have sketched the following list of steps that will lead you to a working telegram bot.
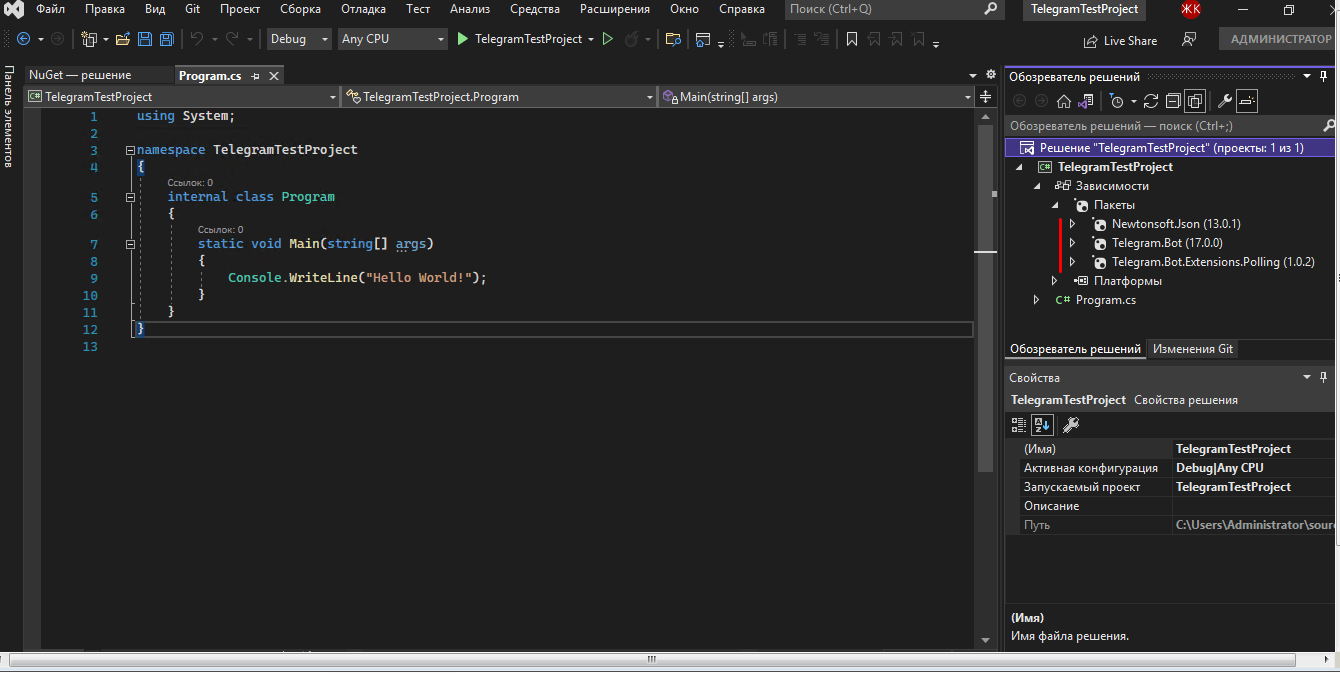
1. Launch Visual Studio Community, create a console application.
If you don’t have Visual Studio Community, you can install it using article or somewhat outdated video. In this case, it is advisable to choose the installation of Visual Studio Community 2022 as the most current version at the moment.


2. Add the Telegram.Bot, Telegram.Bot.Extentions.Polling and Netonsoft.Json libraries to the console application


When finished, you should have the names of the packages that we have installed installed and displayed.
Netonsoft.Json applicable to our workpiece is needed so that we can display a message from the user on the console.
3. Create a telegram bot in BotFather. Copy its api key to work.
We find BotFather in telegram, send it /newbot, the name and login of the bot

BotFather must provide us with an API key, which we must insert into the skeleton code in the next step in the line
static ITelegramBotClient bot = new TelegramBotClient(“TOKEN”);
4. Insert the following skeleton code into the Program.cs file:
using System;
using System.Threading;
using System.Threading.Tasks;
using Telegram.Bot;
using Telegram.Bot.Extensions.Polling;
using Telegram.Bot.Types;
using Telegram.Bot.Exceptions;

namespace TelegramBotExperiments
{

    class Program
    {
        static ITelegramBotClient bot = new TelegramBotClient("TOKEN");
        public static async Task HandleUpdateAsync(ITelegramBotClient botClient, Update update, CancellationToken cancellationToken)
        {
            // Некоторые действия
            Console.WriteLine(Newtonsoft.Json.JsonConvert.SerializeObject(update));
            if(update.Type == Telegram.Bot.Types.Enums.UpdateType.Message)
            {
                var message = update.Message;
                if (message.Text.ToLower() == "/start")
                {
                    await botClient.SendTextMessageAsync(message.Chat, "Добро пожаловать на борт, добрый путник!");
                    return;
                }
                await botClient.SendTextMessageAsync(message.Chat, "Привет-привет!!");
            }
        }

        public static async Task HandleErrorAsync(ITelegramBotClient botClient, Exception exception, CancellationToken cancellationToken)
        {
            // Некоторые действия
            Console.WriteLine(Newtonsoft.Json.JsonConvert.SerializeObject(exception));
        }


        static void Main(string[] args)
        {
            Console.WriteLine("Запущен бот " + bot.GetMeAsync().Result.FirstName);

            var cts = new CancellationTokenSource();
            var cancellationToken = cts.Token;
            var receiverOptions = new ReceiverOptions
            {
                AllowedUpdates = { }, // receive all update types
            };
            bot.StartReceiving(
                HandleUpdateAsync,
                HandleErrorAsync,
                receiverOptions,
                cancellationToken
            );
            Console.ReadLine();
        }
    }
}
5. We edit the code to fit our needs and tasks.
The main task that the bot must perform is to respond to messages that the user sends to it. Of course, the developers of telegram have made it possible to track and respond to many other events.
I would also include pressing the inline keyboard button by the user as important, inline mode – when the user enters the bot’s login and search query into the text field and the bot provides a list of found objects for this query. It would also be interesting to consider the event of publishing a new post on the channel. Obtaining from the user his phone number, file or geolocation. But this is material for the following videos and articles. If you are interested in seeing this material on the YouTube channel or in the article, like, share the article with your friends. When you reach 200 likes and 20 comments, I will know that you like this topic and write a sequel.
So what can we do when a user sends a message to our bot?
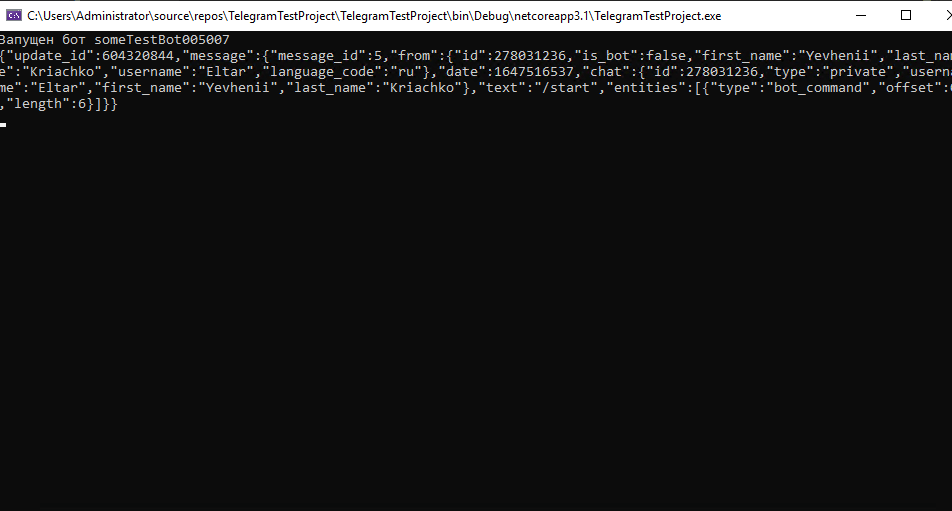
First, we can print it to the console. To do this, install the Newtonsoft library in Nuget and write it in the HandleUpdateAsync method.
Console.WriteLine(Newtonsoft.Json.JsonConvert.SerializeObject(update));Of course, we can check what he sent us. And if the text of the message is the one we are waiting for, perform certain actions. For example, if the user pressed the Start button and thereby sent the text “/start” to the bot, we can send him back “Welcome aboard, good traveler!”.
if (update.Type == Telegram.Bot.Types.Enums.UpdateType.Message)
	            {
	                var message = update.Message;
	                if (message.Text.ToLower() == "/start")
	                {
	                    await botClient.SendTextMessageAsync(message.Chat, "Добро пожаловать на борт, добрый путник!");
	                    return;
	                }
	                await botClient.SendTextMessageAsync(message.Chat, "Здоров, братан! И тебе не хворать!");
            }
if (update.Type == Telegram.Bot.Types.Enums.UpdateType.Message)
Here we check the update type. If a user has sent us a message, follow the steps below.
varmessage = update.message;
We create a new variable for convenience and write all the information about the incoming message into it.
if (message.Text.ToLower() == “/start”)
We check what text the user sent. If the text of the message in lower case (.ToLower()) is the word “/start”, then we write the message “Welcome aboard, good traveler!” to it. And we stop the execution of the method with the return command.
It is also advisable to record the data of this user in some database. For example MySQL, PostgreSQL or some other. Or just to a file. Write in the comments if you are interested.
And if the user sends another message to the bot, such as “Hello”, we can write to the bot, for example, “Hey, bro! And don’t get sick”
await botClient.SendTextMessageAsync(message.Chat, “Hey bro! Don’t get sick!”);
I think you understand the principle.
Full code below:
using System;
using System.Threading;
using System.Threading.Tasks;
using Telegram.Bot;
using Telegram.Bot.Extensions.Polling;
using Telegram.Bot.Types;
using Telegram.Bot.Exceptions;

namespace TelegramBotExperiments
{

    class Program
    {
        static ITelegramBotClient bot = new TelegramBotClient("TOKEN");
        public static async Task HandleUpdateAsync(ITelegramBotClient botClient, Update update, CancellationToken cancellationToken)
        {
            // Некоторые действия
            Console.WriteLine(Newtonsoft.Json.JsonConvert.SerializeObject(update));
            if(update.Type == Telegram.Bot.Types.Enums.UpdateType.Message)
            {
                var message = update.Message;
                if (message.Text.ToLower() == "/start")
                {
                    await botClient.SendTextMessageAsync(message.Chat, "Добро пожаловать на борт, добрый путник!");
                    return;
                }
                await botClient.SendTextMessageAsync(message.Chat, "Привет-привет!!");
            }
        }

        public static async Task HandleErrorAsync(ITelegramBotClient botClient, Exception exception, CancellationToken cancellationToken)
        {
            // Некоторые действия
            Console.WriteLine(Newtonsoft.Json.JsonConvert.SerializeObject(exception));
        }


        static void Main(string[] args)
        {
            Console.WriteLine("Запущен бот " + bot.GetMeAsync().Result.FirstName);

            var cts = new CancellationTokenSource();
            var cancellationToken = cts.Token;
            var receiverOptions = new ReceiverOptions
            {
                AllowedUpdates = { }, // receive all update types
            };
            bot.StartReceiving(
                HandleUpdateAsync,
                HandleErrorAsync,
                receiverOptions,
                cancellationToken
            );
            Console.ReadLine();
        }
    }
}
Do not forget to insert the API key from your bot into the code where TOKEN is written.
For convenience, I recorded a video.
Conclusion
So in this article, we created a telegram bot from scratch and tested it for performance. The created blank can be used in the future to create full-scale commercial projects.