How to create a real-time speech transcriber application using Python
Walkthrough using AssemblyAI and Streamlit

Teaching AI to speak in a whisper is not an easy task even today. But we will show how easy speech recognition and transcription has become, at least on the surface. Interesting? Then welcome under cat.
Material prepared for the start of the course on Fullstack Python Development.
Introduction
The real-time speech transcriber app automatically converts text to speech. This text is almost instantly displayed on the screen, and such applications can be used for a variety of purposes, including transcription of lectures, conferences and meetings. There are a number of advantages here:
You can immediately record ideas and conversations. This is a very useful feature for people who work in a fast paced environment and people with lots of ideas;
develop communication skills, because now you will see how you yourself speak and how others speak.
These apps can be used by people who are hearing impaired or who are learning English. The application transcribes the audio in real time, and the user sees the text on the screen in parallel with the pronunciation of the words. Natural language processing can be applied to text.
We’ll learn how to build a dynamic speech-to-text application, and we’ll do it using the AssemblyAI (backend) and Streamlit (client) APIs.
Here is the video version of the article:
Application Overview
The application will need the following Python libraries:
streamlit – we will use the web framework to host all the input and output widgets;
websocket – allows the application to interact with the AssemblyAI API;
asyncio – allows you to perform all kinds of speech input and output asynchronously;
base64 – encodes and decodes the audio signal before sending it to the AssemblyAI API;
json – reads speech output generated via the AssemblyAI API (for example, transcribed text);
pyaudio – handles speech input through the PortAudio library;
os and pathlib are used to navigate through various project folders and work with files.
Setting up the working environment
To recreate the dynamic speech transcription application on your computer, we will create a conda environment called transcription:
conda create -n transcription python=3.9You may be prompted to install Python library dependencies. If so, press the Y key to confirm the action and continue.

After creating the conda environment, you can activate it like this:
conda activate transcriptionYou need to do this every time at the beginning of writing code, and when you finish working with the code, you need to exit the environment:
conda deactivateDownloading the GitHub repository
Download the entire repository of the dynamic speech transcriber application from GitHub:
git clone https://github.com/dataprofessor/realtime-transcriptionGo to the realtime-transcription folder:
cd realtime-transcriptionYou can install the required libraries that the application uses:
pip install -r requirements.txtGetting a key from the AssemblyAI API
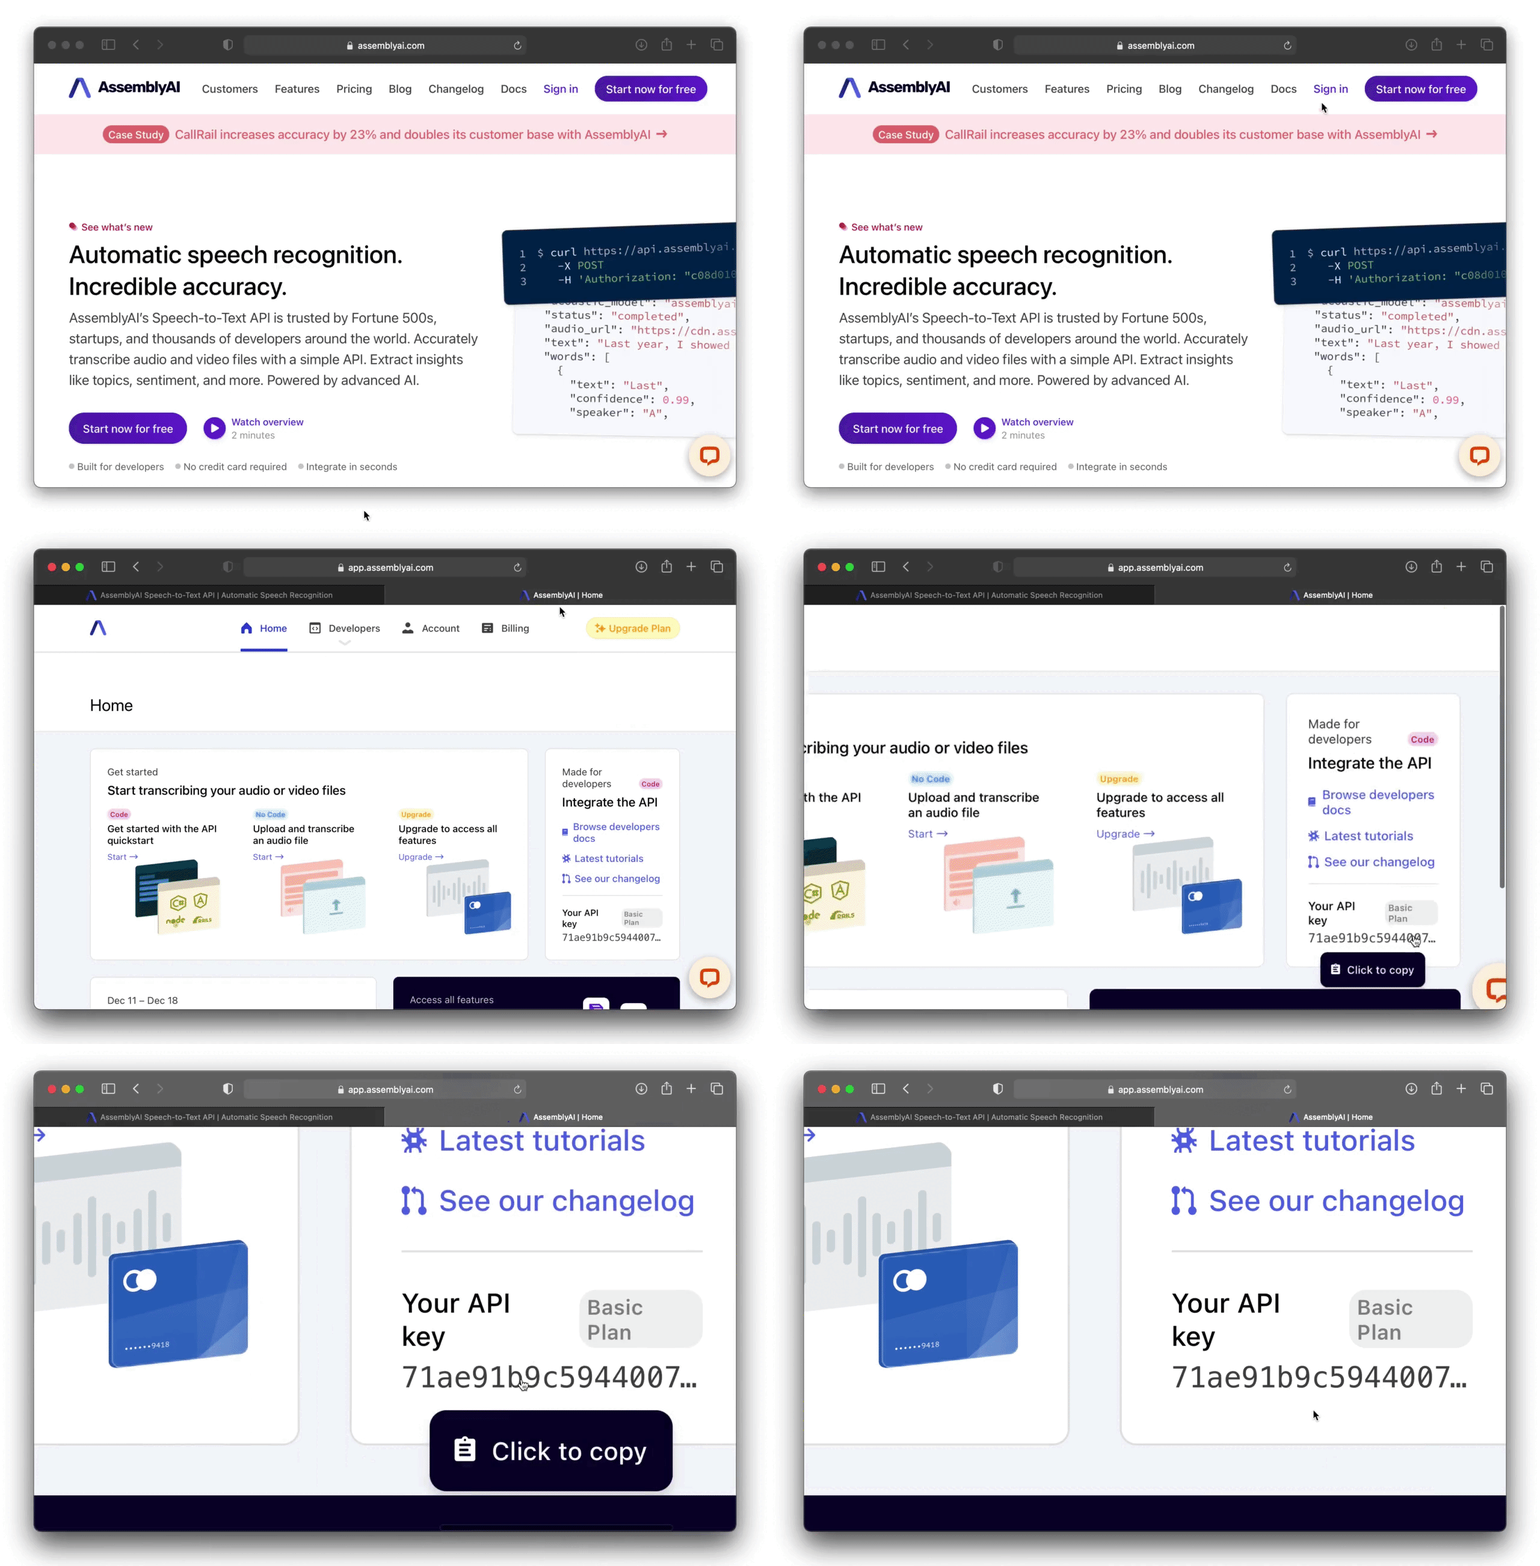
Accessing the API in AssemblyAI is extremely easy. To start register on AssemblyAI, it’s free. Sign in to your account. In the panel on the right you will see the API key:

Now that you have copied the API key into memory, you need to add it to the secrets.toml file from the .streamlit folder. The file path looks like this: .streamlit/secrets.toml. Its content should be like this:
api_key = 'xxxxx'Replace xxxxx with your API key. We can get this key using the st.secrets line of code[‘api_key’].
Application launch
Before running the application, let’s look at the contents of the working directory (what is opened by the tree command in Bash):

The contents of the realtime-transcription folder
Now we are ready to run our application:
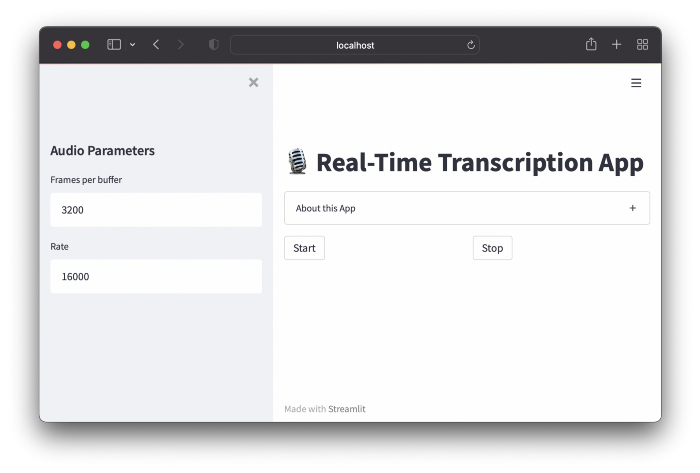
streamlit run streamlit_app.pyThis code will open the application in a new browser window:

Let’s see how the application works:

Code Explanation
The basic application code is explained below.
Lines 1–8 – Import required web application libraries.
Lines 10-13 — the initial state of the application session.
Lines 15-22 – input for accepting user input of audio parameters is represented by the text_input widget.
Lines 24-31 – to open the audio data stream through pyaudio, the audio input parameters from the code block above are used.
Lines 33-46 – define 3 user-defined functions (for example, start_listening, stop_listening and download_transcription) that will be called in the code (see below).
Line 49 – Displays the name of the application through the string st.title.
Lines 51–62 – displays information about the application (About section) using the st.expander string.
Lines 64–67 – create 2 columns with the line st.columns to accommodate the Start and Stop buttons. That is, they use start_listening and stop_listening through the button widget’s on_click parameter.
Lines 69–139 – processing of speech input and output is performed here: the audio signal is transmitted to the AssemblyAI API, where the decrypted text is issued in JSON format. This part has been modified and adapted from a block of code written Misroy Turp and Georgios Mirianthus.
Lines 141–144 – display a download transcript button, and then delete the file.
All code
import streamlit as st
import websockets
import asyncio
import base64
import json
import pyaudio
import os
from pathlib import Path

# Состояние сессии
if 'text' not in st.session_state:
	st.session_state['text'] = 'Listening...'
	st.session_state['run'] = False

# Параметры аудио
st.sidebar.header('Audio Parameters')

FRAMES_PER_BUFFER = int(st.sidebar.text_input('Frames per buffer', 3200))
FORMAT = pyaudio.paInt16
CHANNELS = 1
RATE = int(st.sidebar.text_input('Rate', 16000))
p = pyaudio.PyAudio()

# Открываем аудиопоток с указанными выше параметрами
stream = p.open(
   format=FORMAT,
   channels=CHANNELS,
   rate=RATE,
   input=True,
   frames_per_buffer=FRAMES_PER_BUFFER
)

# Запуск и остановка прослушивания
def start_listening():
	st.session_state['run'] = True

def download_transcription():
	read_txt = open('transcription.txt', 'r')
	st.download_button(
		label="Download transcription",
		data=read_txt,
		file_name="transcription_output.txt",
		mime="text/plain")

def stop_listening():
	st.session_state['run'] = False

# Веб-интерфейс (фронтенд)
st.title('🎙️ Real-Time Transcription App')

with st.expander('About this App'):
	st.markdown('''
	This Streamlit app uses the AssemblyAI API to perform real-time transcription.

	Libraries used:
	- `streamlit` - web framework
	- `pyaudio` - a Python library providing bindings to [PortAudio](http://www.portaudio.com/) (cross-platform audio processing library)
	- `websockets` - allows interaction with the API
	- `asyncio` - allows concurrent input/output processing
	- `base64` - encode/decode audio data
	- `json` - allows reading of AssemblyAI audio output in JSON format
	''')

col1, col2 = st.columns(2)

col1.button('Start', on_click=start_listening)
col2.button('Stop', on_click=stop_listening)

# Отправляем аудио (ввод)
async def send_receive():
	URL = f"wss://api.assemblyai.com/v2/realtime/ws?sample_rate={RATE}"

	print(f'Connecting websocket to url ${URL}')

	async with websockets.connect(
		URL,
		extra_headers=(("Authorization", st.secrets['api_key']),),
		ping_interval=5,
		ping_timeout=20
	) as _ws:

		r = await asyncio.sleep(0.1)
		print("Receiving messages ...")

		session_begins = await _ws.recv()
		print(session_begins)
		print("Sending messages ...")


		async def send():
			while st.session_state['run']:
				try:
					data = stream.read(FRAMES_PER_BUFFER)
					data = base64.b64encode(data).decode("utf-8")
					json_data = json.dumps({"audio_data":str(data)})
					r = await _ws.send(json_data)

				except websockets.exceptions.ConnectionClosedError as e:
					print(e)
					assert e.code == 4008
					break

				except Exception as e:
					print(e)
					assert False, "Not a websocket 4008 error"

				r = await asyncio.sleep(0.01)

    # Принимаем транскрипцию (вывод)
		async def receive():
			while st.session_state['run']:
				try:
					result_str = await _ws.recv()
					result = json.loads(result_str)['text']

					if json.loads(result_str)['message_type']=='FinalTranscript':
						print(result)
						st.session_state['text'] = result
						st.write(st.session_state['text'])

						transcription_txt = open('transcription.txt', 'a')
						transcription_txt.write(st.session_state['text'])
						transcription_txt.write(' ')
						transcription_txt.close()


				except websockets.exceptions.ConnectionClosedError as e:
					print(e)
					assert e.code == 4008
					break

				except Exception as e:
					print(e)
					assert False, "Not a websocket 4008 error"

		send_result, receive_result = await asyncio.gather(send(), receive())


asyncio.run(send_receive())

if Path('transcription.txt').is_file():
	st.markdown('### Download')
	download_transcription()
	os.remove('transcription.txt')

# Ссылки (этот код — адаптация кода по ссылкам ниже)
# 1. https://github.com/misraturp/Real-time-transcription-from-microphone
# 2. https://medium.com/towards-data-science/real-time-speech-recognition-python-assemblyai-13d35eeed226
Conclusion
Congratulations, you have created a dynamic speech conversion application in Python using the AssemblyAI API. As already mentioned, such applications have several use cases (dictation of an article / essay or letter, development of communication skills, speech transformation for people with a hearing impairment, etc.).
You can act as the author, that is, adapt the code again, already for the Russian voice APIs. And we will help you upgrade your skills or master a profession that is relevant at any time from the very beginning:
Choose another in-demand profession.


