Getting Started with Unity with OpenXR
Hello! Today we will create a Unity VR project that works according to the OpenXR standard.
Time goes by, technology does not stand still, and there are more and more ways to develop your VR project. OpenXR allows you to take full control of your VR project and painlessly transfer your game to virtual reality.

What is OpenXR?
OpenXR is an augmented and virtual reality access standard developed by the Khronos Group and introduced in 2019. In essence, thanks to the OpenXR standard, you can completely control everything related to VR in your Unity project: the position of the head, hands, work with controllers, etc. OpenXR replaced VRTK, SteamVR and a specially designed SDK for each individual platform (HTC Vive, WMR, Oculus), and combined work with all platforms under one API.
Preparing a Unity project
To work with OpenXR in Unity, oddly enough, we need a Unity project. Let’s create it. I will be using Unity 2021.3.8f1.

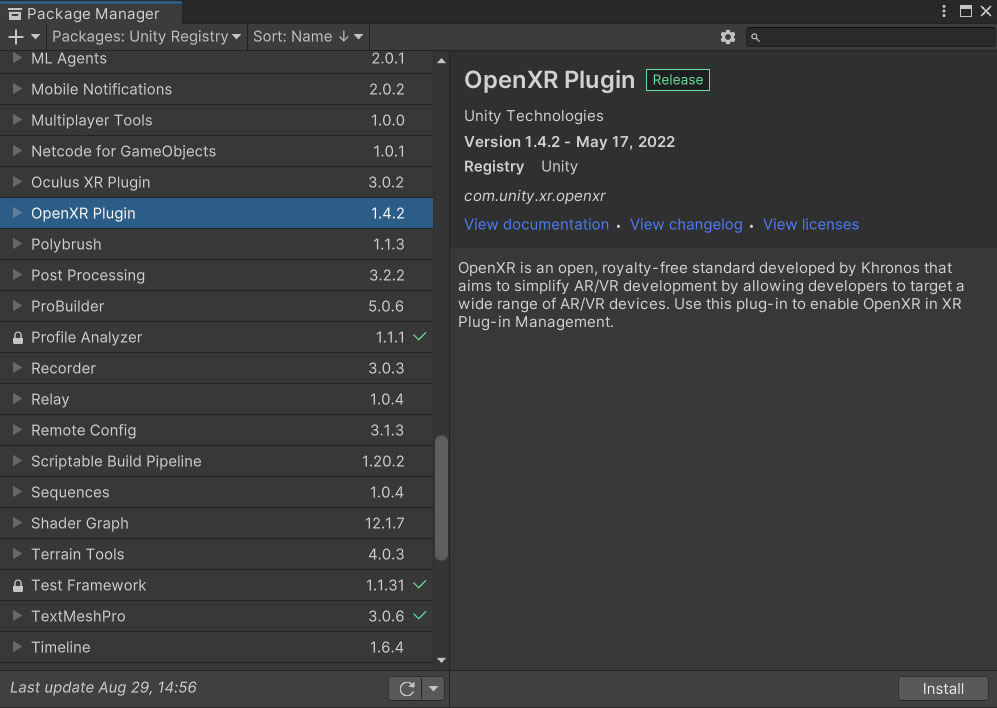
In the opened Unity project, the first thing we need to do is install the OpenXR Plugin through the Unity Package Manager. Open Package Manager via Window/Package Manager, switch to Unity Registry, look for OpenXR Plugin in the list of packages and install it.

When Unity reboots, we move on to the next step – enabling and configuring OpenXR. To do this, we open Project Settings (Edit / Project Settings …) and in the window that opens, go down to the “XR Plug-in Management” tab. On this tab, we find the Plug-in Providers group and check the box next to OpenXR in it.
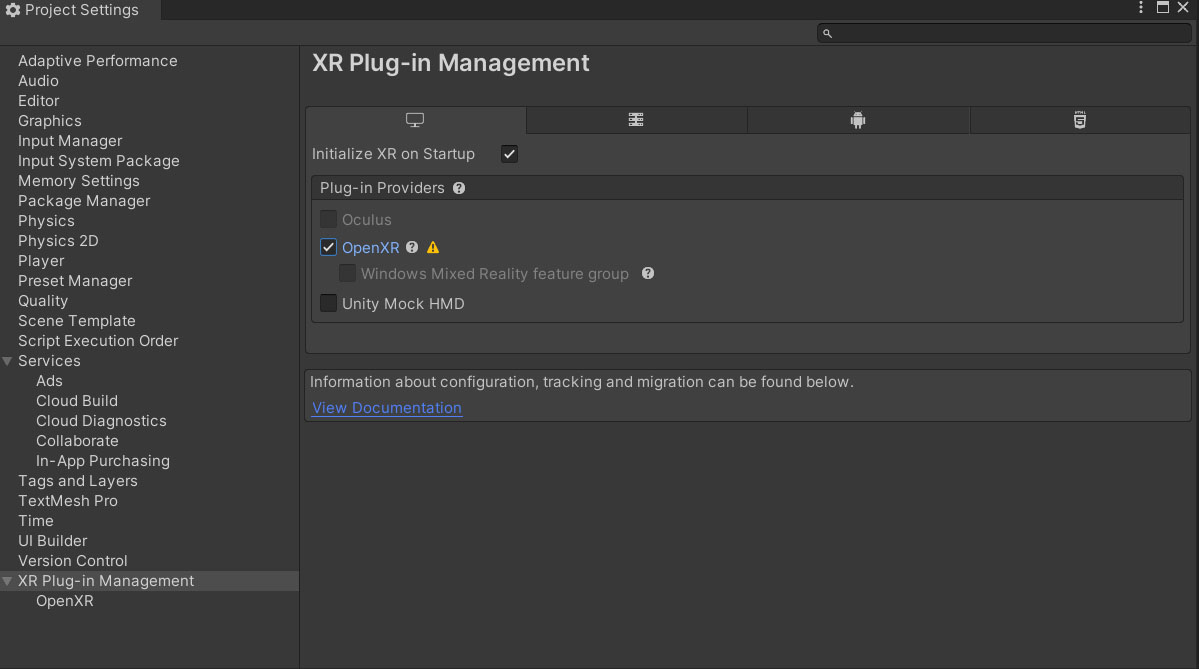
After turning on OpenXR, we will see that a warning sign has appeared to the right of the inscription “OpenXR”. This is a notice about incorrect project setup for OpenXR. Click on the warning icon and the Open XR Project Validation window opens. This window will list the existing problems with setting up the project (on mobile platforms, for example, the impossibility of the OpenXR Plugin to work without using IL2CPP will be indicated here). In our case, only the fact that we have not specified any interaction profile is indicated. Click on the Edit button to the right of the existing problem and go to the OpenXR settings window.

In the OpenXR configuration window, select an interaction profile in the Interaction Profiles group. For me, this is the Oculus Touch Controller Profile. for work, I will use an Oculus Touch 2 connected to a computer via an Oculus Link cable. You also need to select Oculus in the Play Mode OpenXR Runtime field or leave System Default if Oculus is already set in your program as Default XR Play Mode.

The final step is to transform the Main Camera into a VR Rig. It is very easy to do this, because. a corresponding item appeared in the context menu for working with the scene. Right-click on the Main Camera in the Hierarchy window and select XR/Convert Main Camera to XR Rig. Voila! Instead of a camera, a full-fledged VR player appeared on the stage – however, without hands, but we will add them later.

Now let’s check that OpenXR is configured and working properly. Let’s add a plane for the test and place it and the player’s Rig at zero coordinates. After all, you can click on the Play button and make sure that we can turn our heads on our stage. For owners of Oculus Quest 2, you will additionally need to make sure that the headset is connected in Link mode.
Adding hands
In the resulting scene, we can turn our heads, but this is obviously not enough. Let’s try to connect hand tracking and attach some logic to the buttons.
On the stage, we will create two empty objects in the XR Rig object with the names “Left Hand” and “Right Hand”. In order for Unity to automatically recognize them as hand objects, you need to add the TrackedPoseDriver component to them, in which you put Device as Generic XR Controller, and put Left Controller and Right Controller in Pose Source, respectively.
Next, let’s add a small visual to see our handles: in each hand object, add child Capsule with sizes (0.1, 0.1, 0.1). Now we run the scene and see that in addition to rotating our heads, we can move our arms.

Working with controllers
Working with controllers in OpenXR occurs through the InputDevice structure, but getting it is not as easy as it seems. Let’s write a simple script that assigns the left and right controllers to the corresponding fields.
To correctly process the available InputDevices, we need to get a list of connected devices at the start (the UnityEndinge.XR.InputDevices.GetDevices method) and subscribe to the device connection event (InputDevices.deviceConnected event). We must run all received InputDevice through the InitController method, which will determine whether the given InputDevice is a controller and, if so, which one – left or right.
using System.Collections.Generic;
using UnityEngine;
using UnityEngine.XR;

public class TinyInputDeviceManager : MonoBehaviour
{
    public InputDevice LeftController;
    public InputDevice RightController;

    private void Awake()
    {
        var listDevices = new List<InputDevice>();
        InputDevices.GetDevices(listDevices);

        foreach (var inputDevice in listDevices)
        {
            InitController(inputDevice);
        }

        InputDevices.deviceConnected += InitController;
    }

    private void OnDestroy()
    {
        InputDevices.deviceConnected -= InitController;
    }

    private void InitController(InputDevice inputDevice)
    {
        if (!inputDevice.characteristics.HasFlag(InputDeviceCharacteristics.Controller))
        {
            return;
        }

        if (inputDevice.characteristics.HasFlag(InputDeviceCharacteristics.Left))
        {
            LeftController = inputDevice;
        }
        else
        {
            RightController = inputDevice;
        }
    }
}
A slightly more extended version of InputDeviceManager can be viewed on my gist.github.com.
With the script above, we can easily access the left and right controllers from our code.
Let’s now write the primitive logic for interacting with the controller buttons. I propose to create a HandCapsule script that will change the color of our capsules depending on the degree of pressing the trigger and the grip of the controller corresponding to the capsule.
To get any of the controller values, you need to refer to the controller’s InputDevice (for this, in fact, we remembered above which controller is left and which is right) and call its TryGetFeatureValue method. The returned bool-value means whether it was possible to get the value from the InputDevice, the first parameter determines what we want to take, and the second out-parameter determines the output value of the desired one.
Let’s write a script that changes the material.color of the capsule, depending on the degree of pressing on the trigger and on the controller’s grip.
using UnityEngine;
using UnityEngine.XR;

public class HandCapsule : MonoBehaviour
{
    public bool IsLeftHand;

    public InputDeviceManager InputDeviceManager;

    private Renderer _renderer;

    private void Awake()
    {
        _renderer = GetComponentInChildren<Renderer>();
    }

    private void Reset()
    {
        InputDeviceManager = FindObjectOfType<InputDeviceManager>();
    }

    private void Update()
    {
        var inputDevice = IsLeftHand ? InputDeviceManager.LeftController : InputDeviceManager.RightController;

        inputDevice.TryGetFeatureValue(CommonUsages.trigger, out var triggerValue);
        inputDevice.TryGetFeatureValue(CommonUsages.grip, out var gripValue);

        _renderer.material.color = new Color(triggerValue, gripValue, 1f);
    }
}
Next, we hang all the scripts we have written on objects: we hang InputControllerManager (or TinyInputControllerManager) on XR Rig, and HandCapsule on capsules in our hands. We set the value of IsLeftHand to true in the capsule, which lies in the Left Hand object.
We launch, press triggers or grip and watch our capsules in our hands shimmer with all the colors of the rainbow.

Thanks to TryGetFeatureValue, any button, stick, touchpad, etc. can be accessed. on your controllers and, in principle, on the helmet. Accordingly, you just need to implement the logic of interaction with Inputs in your game, whether it be a teleport to deflect the stick forward, locomotion to the same stick, grab an object on the grip, or call the menu on the button of the same name.
I don’t know what to add, because the basic functionality of OpenXR is described and further work lies with you and your imagination. You can get acquainted with the standard OpenXR examples that are in UPM in the package itself, there are useful features, for example, the use of Haptics.
But that’s all. Good luck in your endeavors with Unity in conjunction with OpenXR!
I also want to invite everyone to a free lesson: “Metaverse = XR + AI + Blockchain + Crypto + Web3”. Within the framework of which we will get acquainted with the technologies that make up the metaverse, and we will understand at what point the future has already arrived.