File system BtrFS. How to Recover Data from BtrFS RAID
Usually, mdadm and lvm are used to create a RAID array in Linux, you can see more about these systems in one of our video tutorials.
In addition to these tools, which are described in the video, there is also built-in RAID support in the Btrfs file system. It dispenses with its own means for building and working with disk arrays, then let’s take a closer look at all its capabilities.
Btrfs file system
Btrfs is a new Copy on Write file system with built-in RAID support. The essence of this great feature is that you do not overwrite old data when you copy it. This is a huge plus, it greatly simplifies the recovery of deleted files after failures. Since any failure or error in the rewriting process will not affect the previous state of the files in any way.
FS keeps metadata separate from file system data, and you can use different RAID levels for this information at the same time, this is its main advantage. Also the goal of this journaling system is to provide more efficient storage management and increased data integrity security in Linux OS.
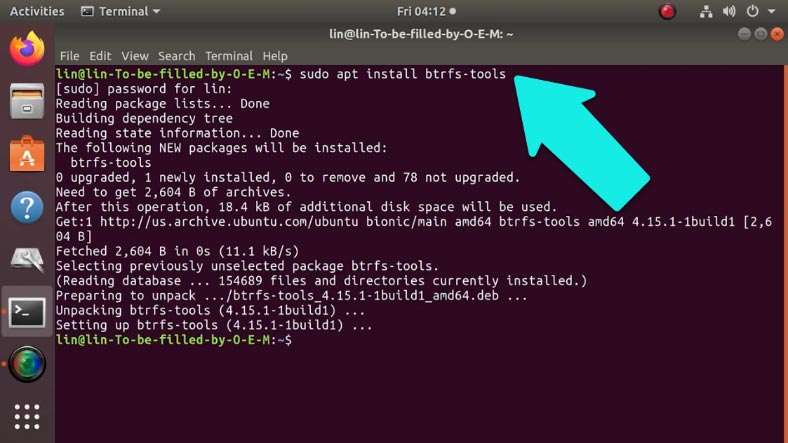
Before starting to use btrfs, we need to install the necessary FS management tools by running the following command:
sudo apt install btrfs-tools
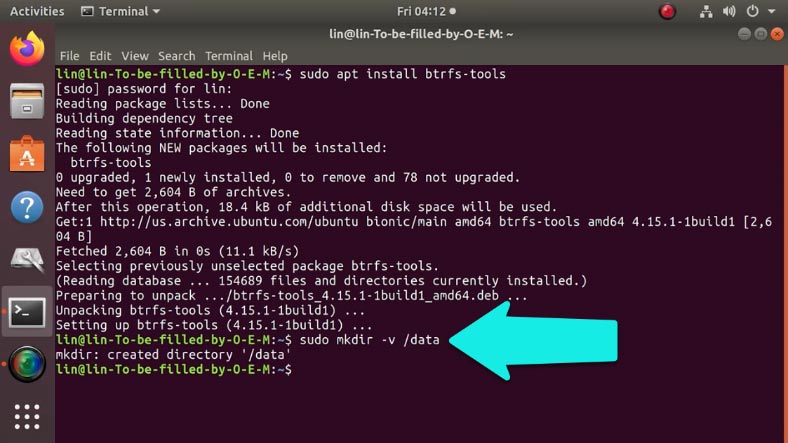
Create a mount point
And before assembling the RAID, you need to create a mount point directory.
Create a directory:
Sudo mkdir –v /data
Where “data” is its name.
Now let’s start creating the array.
How to create a RAID5
When creating an array, it is not necessary to necessarily partition the media into partitions, the FS does not require this. Combine drives into an array, you can either whole or separate partitions, even combine media with existing partitions. As an example, I’ll show you how to create a RAID5 from five drives.
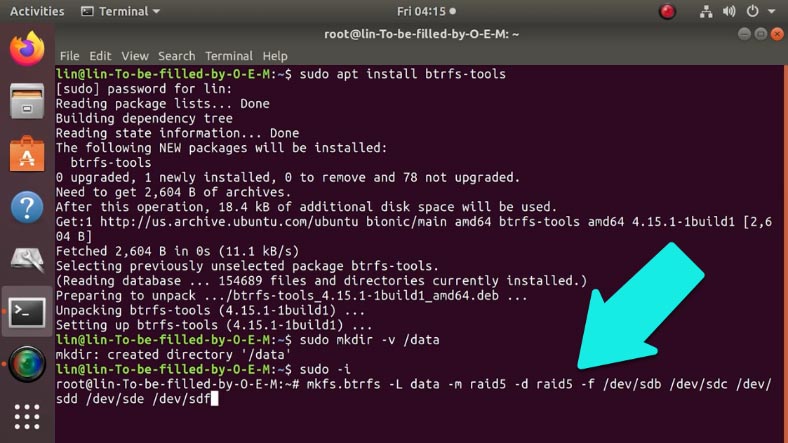
In order not to constantly enter the root password, run the command sudo -i, after which all commands will be executed from the administrator.

To build an array, enter the following command in the terminal:
sudo mkfs.btrfs -L data -m raid5 -d raid5 -f /dev/sdb /dev/sdc /dev/sdd /dev/sde /dev/sdf
where: L is the label or name of the filesystem,
Parameter:
- d – set the RAID5 type for data.
- m – set the type of RAID5 for metadata.
- f – serves to force the creation of btrfs, even if any of the drives is formatted in another file system.
Now, you can mount using any of the drives that are included.
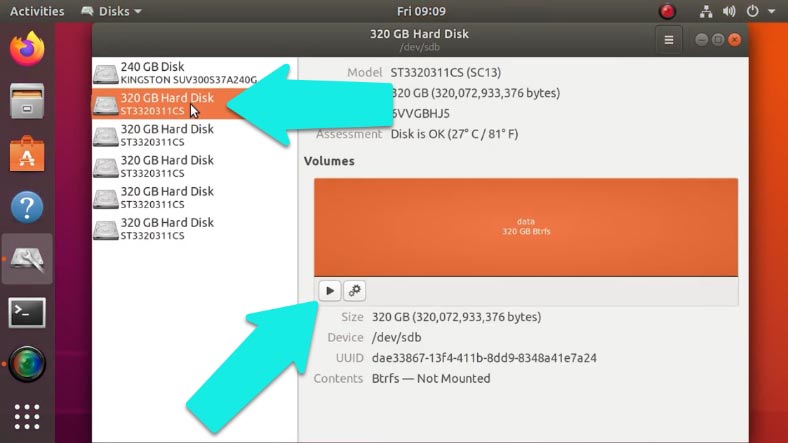
How to mount a RAID disk
I used 5 drives to create the RAID: sdb, sdc, sdd, sde and sdf… So I can mount the FS data in the data directory using the sdb drive. We open disk management and mount our media, after which it will become available.
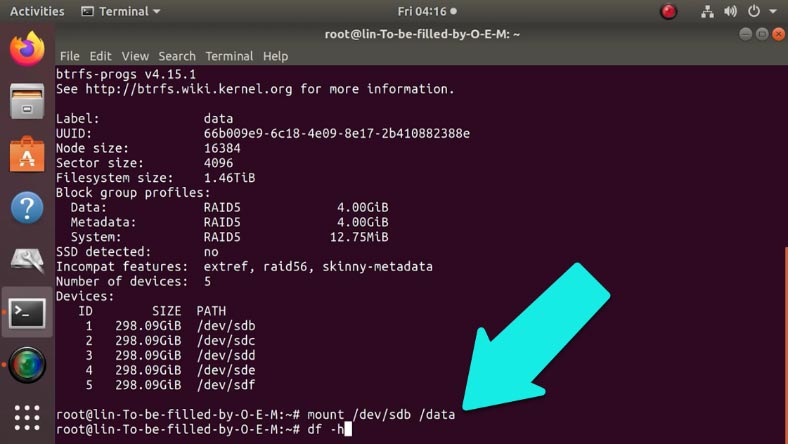
Alternatively, you can mount the disk through the terminal.
sudo mount /dev/sdb1 /data
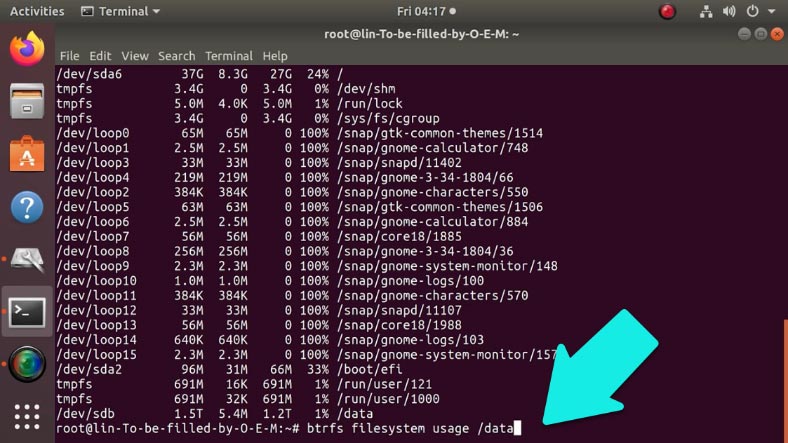
To check enter sudo df -h
As you can see, our array is mounted in the directory / data
And to view information about the occupied and free space of the array, enter:
sudo btrfs filesystem usage /data
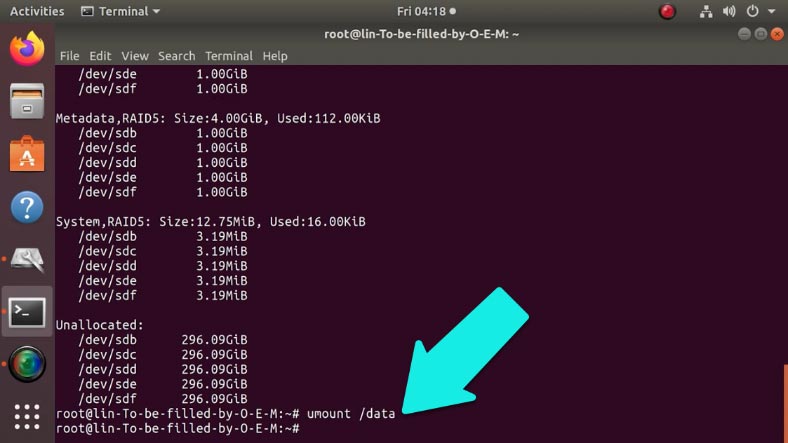
And to unmount the array, just enter:
sudo umount /data
How to replace or add a drive
To replace the drive, you need to enter btrfs replace in the terminal. It starts asynchronously, that is, it is executed gradually:
- start – to start,
- cancel – to stop,
- status – and to view the status.
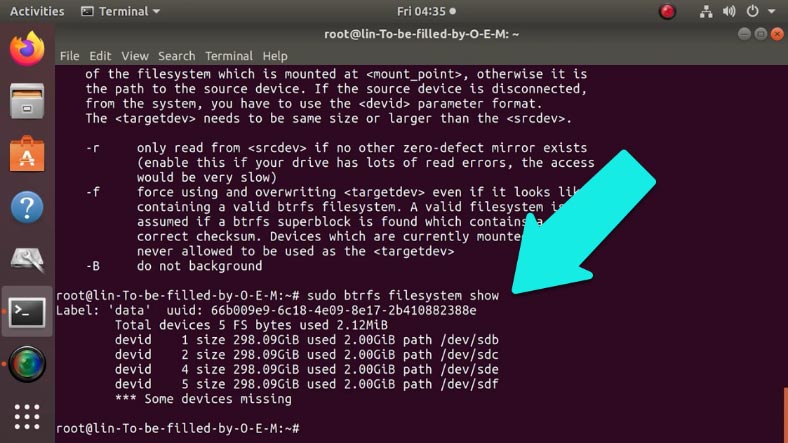
First, you need to determine the number of the damaged drive:
sudo btrfs filesystem show
Then replace it with a new one:
btrfs replace start <удаляемое устройство или его ID> <добавляемое устройство> <путь, куда смонтирована btrfs>
In my case, enter:
btrfs replace start 3 /dev/sdg
Where: 3 Is the number of the missing disk, and sdg – the code of the new drive.

How to recover a damaged volume
To restore a Btrfs array, you need to use the built-in mount option – recovery:
sudo mount -o recovery /dev/sdb /mnt
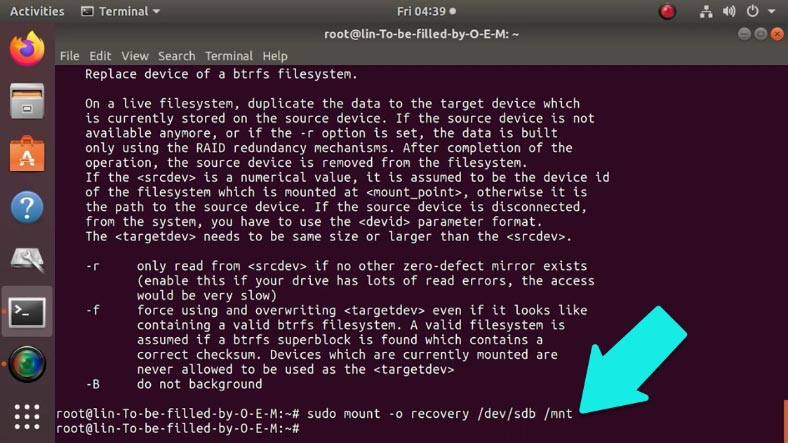
Next, the recovery process will begin.
Recovering data from btrfs RAID5
Even the most reliable and fault-tolerant system can fail. System failure, failure of the drive, hardware, damage to metadata, accidental deletion, incorrect configuration can all lead to RAID breakdown and loss of important data. If you encounter this use the program Hetman RAID Recovery… It is able to recover any information from non-working arrays or media that were included in the array. The utility will recreate the destroyed RAID, step by step reading all the known information, then you can copy all the data found.
Connect the media to a Windows PC, use a virtual machine, or install it on a second system.
The program will automatically scan the disk space and display all possible information about the array.

As you can see, in our case with btrfs RAID, the program does not collect media into an array, this is due to the specifics of its construction, while all information is stored in accordance with the RAID type.
To start the recovery process, open the disk manager, right-click on any of the disks of which the array consisted and run the “Quick Scan”.
When scanning any of the disks, the result will be identical, since they are all part of the same array.
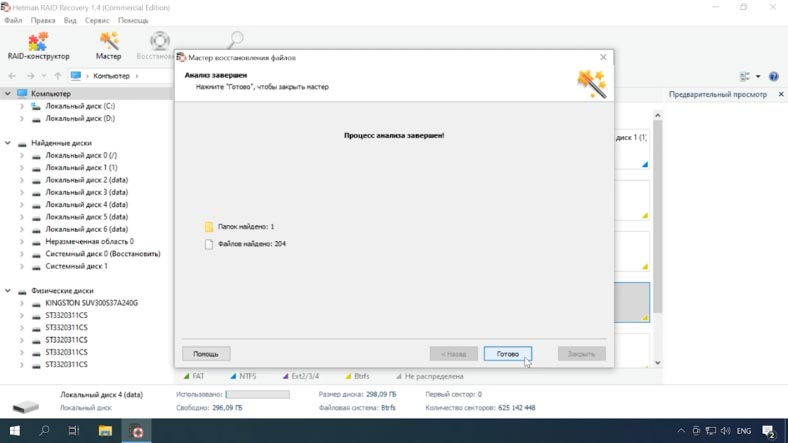
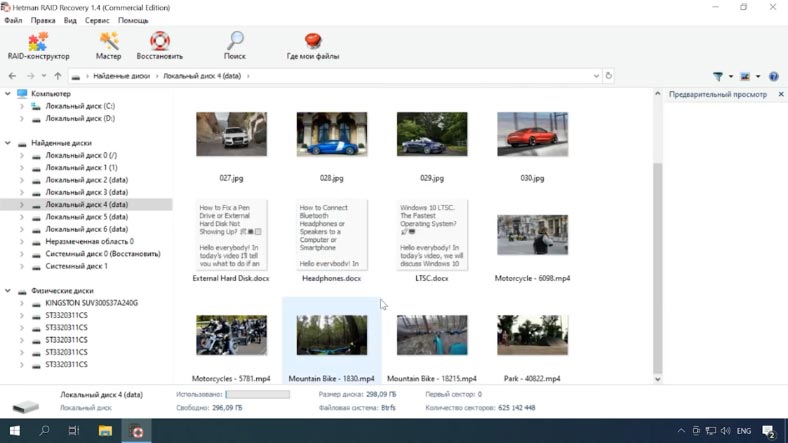
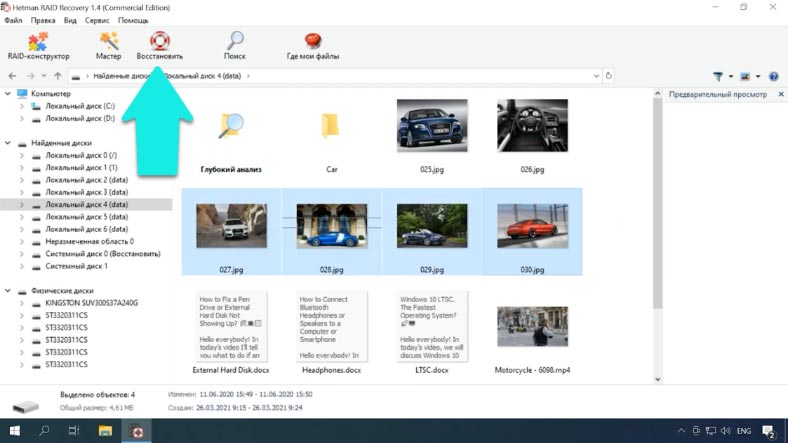
Upon completion of the analysis, the program will display the found files, here they can be previewed, with the help of which it is easier to find the desired images or videos.
Select the files you want to return and click “Restore”, specify the path where to save them and “Restore” again. Upon completion, all files will be in the specified folder.
If, as a result of a quick scan, the program could not find the necessary files, perform the “Full Analysis”. This type of analysis will take longer, but at the same time it will find all the information that remains on the disk, even the one that was deleted from the disk long ago.

Since this is the fifth RAID, all information remains intact in the absence of one drive, but if 2 disks are out of order, some of the information will be damaged.

Features of the btrfs filesystem
Btrfs supports data compression. That is, all available information on the media will be automatically compressed. And when accessing data, each specific file will be automatically unpacked.
This feature can significantly save storage space, as well as the time spent looking for third-party data compression software. FS supports 3 main file compression methods – zlib, lzo and zstd. Their main difference lies in the degree as well as the speed of compression.
Our program supports recovery of compressed files using any of these three methods. In the program interface, compressed volumes and files are displayed as follows, as you can see they are highlighted in a different color.

Another major advantage is the creation of subvolums. In simple words, on one drive, you can create, for example, 3 different disks (subvolums). These subvolumes are able to expand on their own using the free space of another volume. This ability, if necessary, allows you to expand one disk at the expense of another without compression and data transfer. These subvolumes are displayed in the program as follows, these are disks inside the main drive.
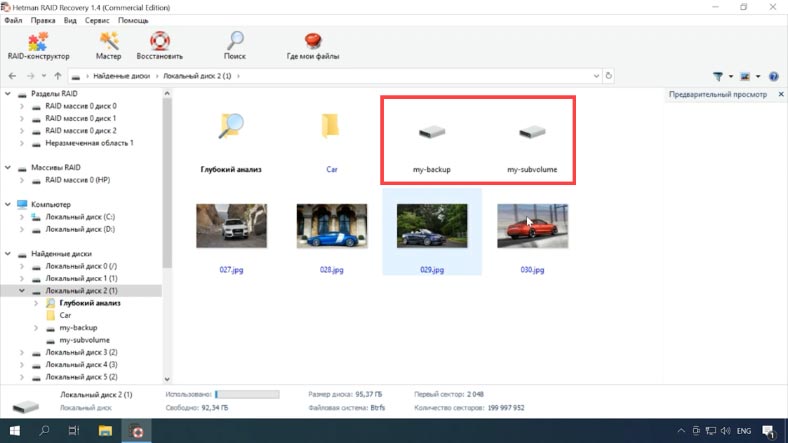
In the same way, the program displays folders with snap-shot…
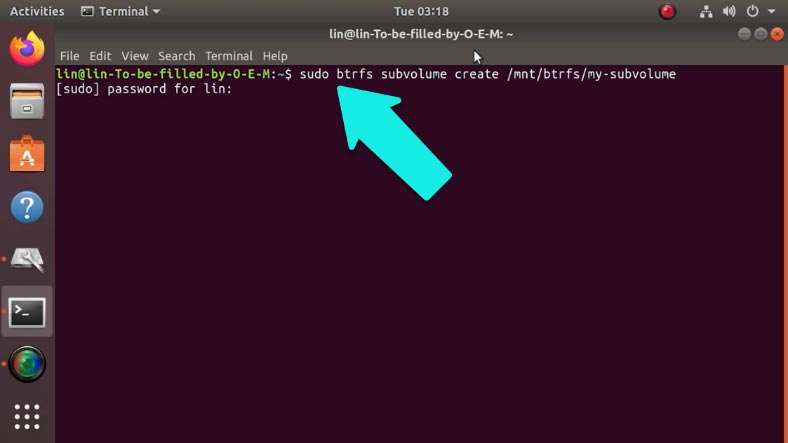
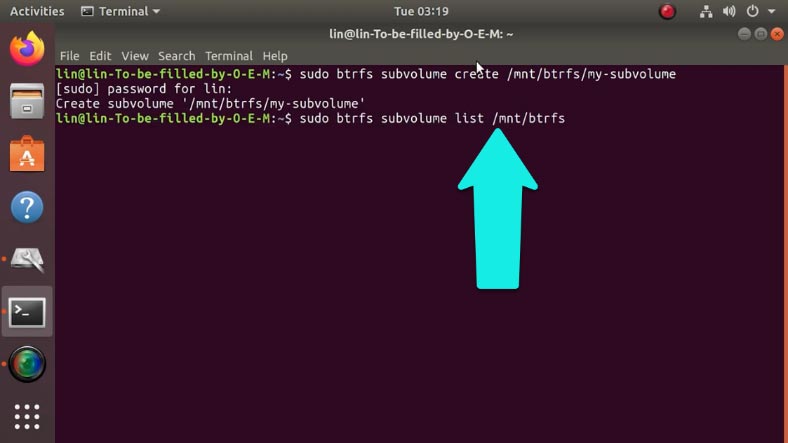
To create subvolumes use the command:
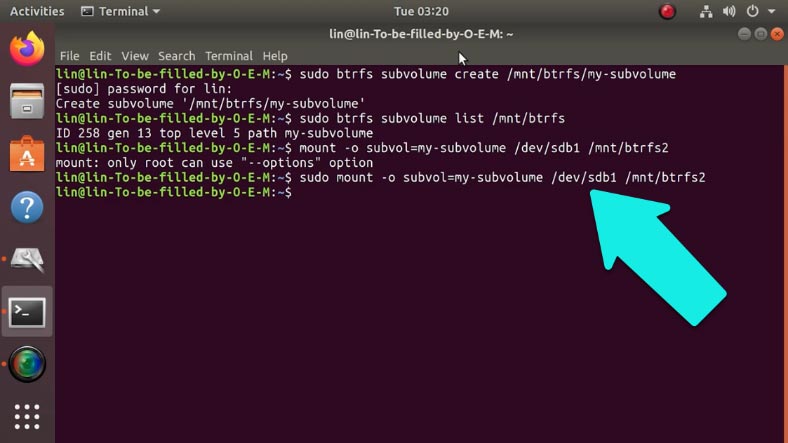
btrfs subvolume create /mnt/btrfs/my-subvolume
And to view the list of subvolumes on this drive, run:
btrfs subvolume list /mnt/btrfs
To mount a subvolume:
mount -o subvol=my-subvolume /dev/sdd2 /mnt/btrfs2
where sdb1 is the drive code.
Conclusion
There are a small number of data recovery tools that can read btrfs RAID. When choosing, it should be borne in mind that in the process of work, information can be overwritten, pay attention to the presence of the function of creating an image of an array and scanning from an image. However, the best solution to protect yourself from the loss of important data is to back it up on a regular basis.
For the full version of the article with all additional video tutorials, see source… If you still have questions, ask them in the comments. And also visit our Youtube channel, there are more than 400 training videos collected there.